How Often Should You Water a Lantana?

How Often Should You Water a Lantana?

Lantana, a vibrant flowering plant known for its clusters of bright blooms and tolerance to heat, is a favorite among gardeners seeking color with minimal care. Native to tropical and subtropical regions of the Americas and Africa, Lantana (Lantana camara) thrives in sunny environments and can flourish in both containers and ground beds.

One of the most common questions about lantana care is:

How often should you water a lantana?

The answer isn’t always straightforward, as it depends on various factors such as climate, soil type, age of the plant, and whether it’s potted or in the ground. In this article, we’ll provide a complete, detailed guide on how to properly water your lantana, how to recognize signs of under- or overwatering, and tips to ensure a healthy, thriving plant.


Understanding Lantana’s Water Needs

Lantana is considered a drought-tolerant plant, especially once established. Unlike thirsty annuals or tropical flowers, lantana has low to moderate water requirements, and in many cases, it actually prefers dry conditions over constantly moist soil.

Key Traits:

  • Deep root system (especially in older plants)
  • Thick leaves that resist wilting
  • Tolerance to heat, sun, and even salt (ideal for coastal gardens)

These characteristics mean that overwatering is more dangerous than underwatering for lantana. Knowing how and when to water is essential to prevent root rot and encourage blooming.


How Often to Water a Lantana: The Short Answer

Growth Stage / SettingWatering Frequency
Newly planted in groundEvery 2–3 days for first 2–3 weeks
Established in groundOnce every 7–10 days (more in extreme heat)
Container-grown lantanaEvery 3–5 days; check for dryness
Dormant season (fall/winter)Reduce to once every 2–3 weeks or less

Tip: Always check soil moisture before watering. Lantana prefers soil to dry out slightly between waterings.


Factors Affecting Watering Frequency

1. Plant Age and Establishment

  • Newly planted lantanas need more frequent watering to help roots develop.
  • Established lantanas (planted 1+ year ago) are very drought-tolerant and require minimal watering unless it’s very hot or dry.

2. Container vs. Ground Planting

  • Container-grown lantana dries out faster due to limited soil and drainage.
  • In-ground plants retain moisture longer, especially with mulch and proper soil prep.

3. Soil Type

  • Sandy soil drains quickly and may require more frequent watering.
  • Clay soil holds water longer and needs less frequent watering.
  • Well-drained loamy soil is ideal for lantana.

4. Climate and Weather

  • In hot, dry, or windy climates, increase watering frequency.
  • During rainy or humid seasons, reduce watering to avoid soggy roots.

How to Water Lantana Properly

Proper technique is just as important as frequency.

Best Practices:

  1. Water at the base, not on the leaves, to prevent fungal issues.
  2. Water deeply, allowing water to soak 6–8 inches into the soil.
  3. Use a soaker hose or slow drip method to encourage deep root growth.
  4. Allow the top 1–2 inches of soil to dry out between waterings.

Avoid light, frequent watering that only wets the surface. Deep watering encourages stronger, deeper roots, making your lantana more resilient.


Signs of Overwatering and Underwatering

Overwatering Symptoms:

  • Yellowing leaves
  • Wilting despite moist soil
  • Mushy stems
  • Root rot
  • Fungal diseases

Underwatering Symptoms:

  • Dry, brittle leaves
  • Curling or browning leaf edges
  • Wilting with dry soil
  • Fewer or smaller flowers

Solution: Always check soil moisture with your finger before watering. If it’s dry 1–2 inches below the surface, it’s time to water.


Watering Lantana in Different Seasons

Spring

  • Moderate watering (every 5–7 days)
  • Resume regular watering as plant comes out of dormancy

Summer

  • Water more frequently (every 3–5 days) in extreme heat
  • Use mulch to retain soil moisture

Fall

  • Gradually reduce watering as temperatures drop
  • Let the soil dry more between waterings

Winter

  • Minimal to no watering if plant goes dormant
  • Only water during prolonged dry spells if soil is completely dry

Note: In zones where lantana is grown as an annual or goes dormant, reduce watering significantly in fall and winter.


Watering Lantana Indoors or in Containers

Container plants dry out faster due to wind, sun exposure, and limited soil volume.

Tips for Potted Lantana:

  • Check soil daily during summer.
  • Water when the top 1 inch feels dry.
  • Ensure pot has drainage holes to prevent waterlogging.
  • Use a well-draining potting mix (cactus or succulent soil is ideal).
  • Elevate pot slightly to encourage drainage and airflow.

Using Mulch to Help With Watering

Applying 2–3 inches of organic mulch (like bark, straw, or shredded leaves) around your lantana can:

  • Retain soil moisture
  • Regulate soil temperature
  • Suppress weeds
  • Reduce watering needs by up to 50%

Keep mulch a few inches away from the base of the plant to prevent stem rot.


Special Watering Tips for Lantana Varieties

Some lantana varieties are more tolerant of drought or humidity.

  • ‘Miss Huff’: One of the most cold-hardy and drought-tolerant lantanas.
  • Trailing lantana (Lantana montevidensis): Ideal for hanging baskets; water more often in hot weather.
  • Hybrid lantanas: May require slightly more water depending on bloom density and size.

Always monitor how specific varieties respond in your unique growing conditions.


Common Watering Mistakes to Avoid

  1. Watering on a schedule regardless of weather
    → Instead, water based on soil moisture and weather conditions.
  2. Using shallow watering methods
    → Deep watering promotes strong root growth.
  3. Letting potted lantana sit in standing water
    → Always use pots with proper drainage.
  4. Watering in the heat of the day
    → Water in the early morning or late afternoon to reduce evaporation.
Conclusion

So, how often should you water a lantana?

The answer depends on your plant’s age, environment, and how it’s grown—but the golden rule is: less is more. Lantana thrives when the soil is allowed to dry out between waterings. Overwatering can quickly lead to root rot and disease, while underwatering is usually less harmful thanks to its drought tolerance.

With the right watering habits, your lantana will reward you with long-lasting blooms, vibrant colors, and healthy growth throughout the growing season. Whether in containers, garden beds, or hanging baskets, consistent and mindful watering is the key to helping your lantana thrive.

8 Stunning Border Flower Bed Ideas to Enhance Your Garden's Look

8 Stunning Border Flower Bed Ideas to Enhance Your Garden’s Look

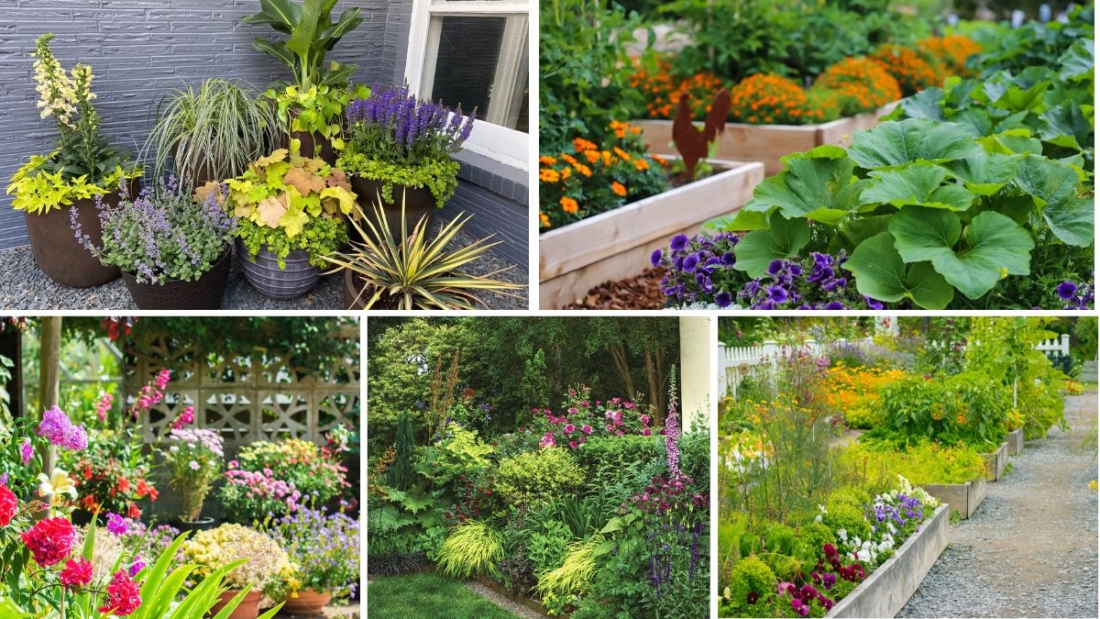
A well-designed garden border can transform an ordinary yard into an extraordinary outdoor space. Whether you prefer colorful blooms, low-maintenance perennials, or striking contrasts, border flower beds serve as the finishing touch that pulls your entire garden together. These flower bed designs not only define your garden layout but also add texture, color, and seasonal charm to your landscape. Below are eight stunning border flower bed ideas that will enhance your garden’s aesthetic appeal and make your outdoor space truly unforgettable.


1. Classic English Cottage Border

Bring timeless romance to your garden with a classic English cottage-style border. This design blends a charming mix of roses, foxgloves, delphiniums, lavender, and peonies, creating a natural yet lush look. The goal is to layer tall plants at the back and smaller ones in front for a full, overflowing effect. Pair these blooms with winding brick or gravel paths to complete the storybook atmosphere. This border works beautifully in both formal and informal gardens, offering an inviting and nostalgic charm.


2. Monochromatic Modern Edge

For a contemporary and sophisticated vibe, try a monochromatic border flower bed. Stick to a single color palette—such as purples, whites, or deep reds—to create visual unity. Plants like alliums, tulips, salvia, or black mondo grass add depth and interest within your chosen hue. Clean lines, repetition, and symmetry are key. This style is perfect for modern homes and urban gardens, where minimalism and bold statements go hand in hand. A matching mulch or stone border elevates the sleek look.


3. Pollinator Paradise Border

Create a vibrant and purposeful border with a pollinator-friendly flower bed. Use a variety of nectar-rich flowers like echinacea, bee balm, black-eyed Susans, lavender, and yarrow. These not only bring bursts of color but also attract bees, butterflies, and hummingbirds, enhancing biodiversity in your garden. Arrange in layers with staggered bloom times to ensure continuous flowering. Add native grasses or herbs like mint or oregano along the edge for texture. This type of border is beautiful, lively, and ecologically responsible.


4. Curved Border with Mixed Heights

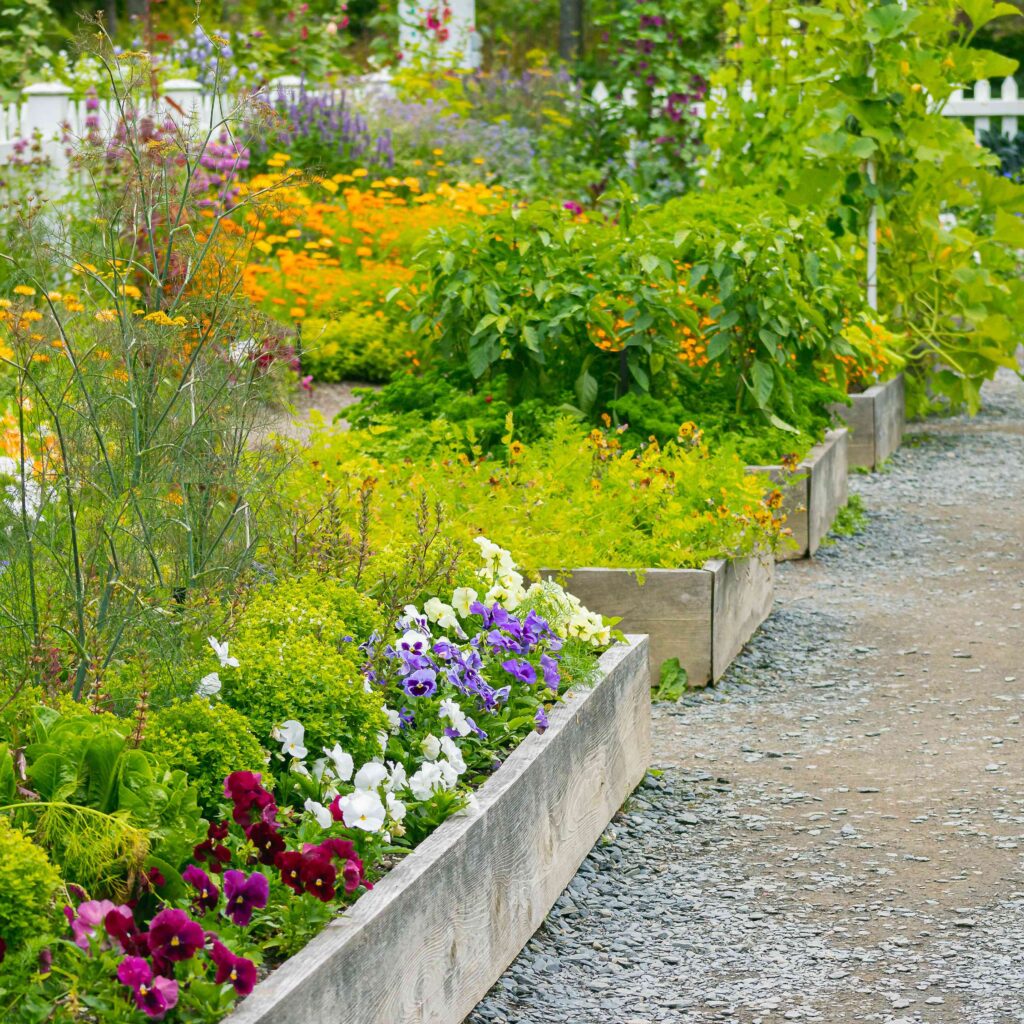
Break away from traditional straight edges with a curved border design. This layout adds natural flow and visual interest, especially in larger gardens. Combine plants of varying heights—like sedum, daylilies, ornamental grasses, phlox, and cone flowers—to add rhythm and balance. Taller plants should anchor the back of the curve, with cascading varieties spilling over the front. Curved borders are dynamic and lend a sense of movement, making them perfect along walkways, patios, or the base of trees.


5. Evergreen and Seasonal Mix Border

For a garden that looks beautiful year-round, go for a mix of evergreens and seasonal flowering plants. Use evergreens like boxwood, dwarf spruce, or holly as the structural backdrop. Then, intersperse with colorful annuals and perennials like tulips in spring, zinnias in summer, and chrysanthemums in fall. This approach offers constant greenery with rotating seasonal bursts of color. It’s especially effective along property lines, fences, or in front of porches, providing continual curb appeal no matter the month.


6. Rock-Edged Wildflower Border

Rustic and low-maintenance, a rock-edged wildflower border blends natural stones with a variety of meadow-like blooms. Think coreopsis, cosmos, poppies, goldenrod, and daisies, randomly sown or loosely planted to mimic nature. Use irregular rocks or fieldstones to define the edge, giving it a rugged yet charming appeal. This idea works well on sloped ground, sunny backyards, or around vegetable gardens. It encourages wildlife, reduces mowing areas, and brings a casual, countryside feel to your landscape.


7. Symmetrical Formal Border

Ideal for stately homes and formal landscapes, the symmetrical border flower bed emphasizes balance and order. Plant pairs of boxwoods, hydrangeas, roses, or lilies on either side of a path, bench, or garden feature. Use clipped hedges or brick edging to maintain clear lines. The plant selection should include repeats at regular intervals to create cohesion. Although more structured than other styles, this border type delivers timeless elegance and grandeur that’s hard to ignore.


8. Tropical Border with Bold Foliage

Make a bold statement with a tropical-themed border flower bed full of color and texture. Choose plants with large, dramatic foliage like cannas, elephant ears, coleus, bird of paradise, and caladiums. Mix in vibrant flowers such as hibiscus or bromeliads for added flair. Tropical borders do best in warm climates or as seasonal displays in cooler zones. Use natural stone or bamboo edging to complete the exotic feel. This lively design instantly transforms your yard into a lush getaway.


Conclusion

Border flower beds are more than just finishing touches—they’re an opportunity to infuse personality, structure, and visual drama into your garden. Whether you love the softness of a cottage garden or the boldness of tropical plants, there’s a border bed design here to suit every style and skill level. Experiment with textures, colors, and forms, and remember: a well-planned border adds charm not just to your garden—but to your entire home.

How to Grow a Dragon Fruit Plant at Home: A Complete Beginner’s Guide

How to Grow a Dragon Fruit Plant at Home: A Complete Beginner’s Guide

Exotic, eye-catching, and delicious—dragon fruit, also known as pitaya, has become a superstar in the world of tropical fruits. Its vibrant pink or yellow skin, unique scaly appearance, and sweet, speckled pulp make it a favorite among gardeners, health enthusiasts, and home growers alike. Native to Central America and belonging to the cactus family, this fruit is as functional as it is fascinating. The best part? You can successfully grow it right at home, even as a beginner!

This comprehensive guide will walk you through every step of growing dragon fruit at home, from seed or cutting to flowering and fruiting. Whether you live in a tropical climate or plan to grow it in containers indoors, this article has everything you need to cultivate your own dragon fruit oasis.


What Is Dragon Fruit?

Dragon fruit comes from the Hylocereus genus—a climbing cactus plant that produces large, stunning flowers and vibrant fruits. There are several varieties, including:

  • Hylocereus undatus – White flesh with pink skin (most common)
  • Hylocereus costaricensis – Red flesh with pink skin
  • Hylocereus megalanthus – White flesh with yellow skin

Rich in vitamin C, fiber, antioxidants, and low in calories, dragon fruit is both nutritious and visually striking, making it a rewarding plant to grow.


Step 1: Choose the Right Propagation Method

You can grow dragon fruit in two main ways:

1. From Seeds

  • Suitable for patient growers
  • Takes 3–5 years to bear fruit
  • Great for experimenting with new varieties

2. From Cuttings (Recommended)

  • Faster and more reliable
  • Fruits in 1–2 years
  • Ensures quality and true-to-type fruit

Tip: For beginners, cuttings are the easiest and most efficient way to grow dragon fruit.


Step 2: Selecting and Preparing the Cutting

Get a healthy cutting from an existing dragon fruit plant:

  • Choose a 12–15 inch long cutting from a mature, disease-free plant.
  • Let the cutting dry and callous for 3–5 days in a shady area to prevent rot when planted.

Optional: Dip the cut end in rooting hormone to promote faster root development.


Step 3: Choosing the Right Pot or Garden Spot

Dragon fruit needs room to grow, climb, and spread.

If Growing in a Pot:

  • Choose a large, deep container (minimum 15 gallons) with drainage holes.
  • Use a cactus or succulent potting mix or a well-draining homemade mix (sand + compost + perlite).
  • Provide a sturdy support like a trellis, tomato cage, or wooden post. Dragon fruit vines can grow 10–20 feet long!

If Growing in the Ground:

  • Pick a sunny location with 6–8 hours of direct sunlight.
  • Ensure the soil is well-draining, slightly acidic to neutral (pH 6–7).
  • Space multiple plants at least 3–5 feet apart.

Step 4: Planting the Cutting

Steps to Plant a Dragon Fruit Cutting:

  1. Fill your pot or planting hole with well-draining soil.
  2. Insert the calloused end of the cutting 2–3 inches into the soil.
  3. Firm the soil around the base.
  4. Lightly water to moisten the soil.

Important: Keep the soil moist (not soggy) until roots develop—typically within 2–4 weeks.


Step 5: Provide Proper Support

As a climbing cactus, dragon fruit needs structural support.

Support Options:

  • Wooden or concrete post with a circular frame on top
  • Vertical trellis or wire frame
  • Tomato cage for container plants

Tie the main stem gently to the support using soft ties or garden tape. As the plant grows, continue training it upward for optimal light exposure and airflow.


Step 6: Watering and Light Requirements

Watering Tips:

  • Dragon fruit is a cactus, but it loves consistent moisture (not waterlogging).
  • Water when the top 1–2 inches of soil are dry.
  • In hot climates, water 1–2 times per week.
  • Reduce watering in cooler months.

Sunlight Needs:

  • Needs at least 6 hours of full sunlight daily.
  • In very hot climates, provide afternoon shade to prevent leaf scorching.
  • Indoor growers should place the plant near a bright, south-facing window or use grow lights.

Step 7: Fertilizing for Healthy Growth

Dragon fruit plants are heavy feeders during their growing season.
Fertilizer Schedule:

  • Apply a balanced fertilizer (10-10-10) every month during spring and summer.
  • Use organic compost or worm castings to improve soil health.
  • Switch to a phosphorus-rich fertilizer before blooming to encourage flower and fruit development.

Stop fertilizing during dormancy (late fall to winter).


Step 8: Flowering and Pollination

Dragon fruit plants produce large, fragrant white flowers that bloom at night and last only until early morning.

Pollination Tips:

  • Some varieties are self-pollinating, while others require cross-pollination.
  • If growing indoors or with only one plant, use a small paintbrush or cotton swab to transfer pollen manually from stamen to stigma.
  • Bees and moths are natural pollinators outdoors.

Pollination is essential for fruit development, so be proactive if you’re not relying on nature!


Step 9: Harvesting Dragon Fruit

Dragon fruit typically ripens 30–50 days after flowering.

How to Know It’s Ready:

  • Skin turns bright pink or yellow (depending on variety).
  • Fruit feels slightly soft to the touch.
  • Wings or flaps on the fruit begin to wither or dry out.

Use a sharp knife or pruners to cut the fruit from the vine. Enjoy fresh, in smoothies, or as a show-stopping dessert topping!


Step 10: Pruning and Maintenance

Proper care ensures healthier plants and better yields.

Pruning Tips:

  • Trim excessive stems or overcrowded branches.
  • Remove any damaged or diseased growth.
  • Focus energy on fewer stems for stronger, fruit-bearing branches.

Pests and Diseases to Watch For:

  • Aphids, mealybugs, and ants
  • Fungal infections from overwatering
  • Snails or slugs in humid regions

Use neem oil or insecticidal soap for pests, and always maintain good air circulation to prevent disease.


When Will Dragon Fruit Plants Start Fruiting?

  • Seed-grown plants: May take 5–7 years to fruit.
  • Cutting-grown plants: Usually produce fruit in 1–2 years.

With proper care, a mature dragon fruit plant can produce several rounds of fruit each year, especially in warm climates.


Benefits of Growing Dragon Fruit at Home

  • Health boost: Rich in antioxidants, fiber, and vitamins.
  • Eco-friendly: Reduces reliance on imported produce.
  • Decorative: Stunning flowers and sculptural growth habit.
  • Educational: Great way to learn about tropical plants and pollination.

Plus, it’s a conversation piece—not everyone can say they grow dragon fruit in their backyard or balcony!


Conclusion

Growing a dragon fruit plant at home may seem exotic, but it’s completely doable—even for beginners. With the right cutting, container, soil, sunlight, and care, you can enjoy watching your cactus vine evolve into a flowering, fruiting wonder.

While it requires patience, especially in the early stages, the process is rewarding and filled with excitement. Few things match the joy of harvesting your first dragon fruit—grown entirely by your hands. So go ahead, grab that cutting, set up your pot, and let nature do the rest. Your dragon fruit journey starts now!

How to Plant an Aloe Vera Plant: A Beginner’s Easy-to-Follow Guide

How to Plant an Aloe Vera Plant: A Beginner’s Easy-to-Follow Guide

Aloe vera is one of the most beloved succulent plants worldwide. Known for its soothing gel, healing properties, and striking green appearance, aloe vera is not just a pretty face—it’s a practical, medicinal, and low-maintenance addition to any home or garden. Whether you’re looking to grow aloe for its health benefits, to beautify your space, or simply to start a journey into gardening, planting aloe vera is the perfect starting point for beginners.

This comprehensive guide will walk you through everything you need to know—from selecting the right plant to planting, caring for, and maintaining your aloe vera for long-term success. Let’s dig in!


Why Choose Aloe Vera?

Aloe vera is perfect for beginners for several reasons:

  • Low Maintenance: Thrives on neglect and requires minimal watering.
  • Drought-Tolerant: Stores water in its thick, fleshy leaves.
  • Medicinal Uses: The gel can soothe burns, cuts, insect bites, and more.
  • Air-Purifying: Known to improve indoor air quality.
  • Versatile: Can be grown indoors or outdoors in the right climate.

Step 1: Choosing the Right Aloe Vera Plant

If you’re starting from scratch, you have two main options:

1. Buy a Healthy Aloe Vera Plant

Purchase a mature aloe vera plant from a nursery or garden center. Look for:

  • Firm, green leaves
  • No visible signs of disease (brown spots, wilting, mold)
  • A strong root base

2. Use Aloe Vera Pups

If you already have an aloe plant or know someone who does, you can propagate it using pups—small baby plants that grow at the base of the mother plant. These can be separated and replanted.


Step 2: Selecting the Right Pot

Material

  • Terracotta or clay pots are best because they’re breathable and help the soil dry out faster.
  • Avoid plastic pots unless they have excellent drainage.

Drainage

  • The pot must have drainage holes to prevent water from pooling and causing root rot.

Size

  • Choose a pot that is about 2 inches wider than the root ball of your plant.
  • Don’t oversize it—aloe prefers snug roots.

Step 3: Choosing the Right Soil

Aloe vera needs well-draining soil to thrive. Avoid regular potting mix which holds too much moisture.

Best Soil Options:

  • Cactus or succulent mix (available in stores)
  • Or DIY mix:
    • 2 parts potting soil
    • 1 part sand or perlite
    • 1 part pumice or crushed granite

This type of soil mimics aloe’s natural desert environment and prevents overwatering issues.


Step 4: How to Plant Aloe Vera

Materials Needed:

  • Aloe vera plant or pup
  • Pot with drainage holes
  • Cactus or succulent soil
  • Gloves (optional, for handling)
  • Small gardening trowel

Instructions:

For Aloe Vera Pups:

  1. Remove the pup from the mother plant using a clean knife or gently twist it off.
  2. Ensure the pup has some roots attached.
  3. Let the pup sit out in the open for 1–2 days so the cut end can callous over. This helps prevent rot.

Planting Steps:

  1. Fill the pot about ¾ full with your well-draining soil mix.
  2. Place the aloe plant or pup in the center of the pot.
  3. Add more soil around the roots, pressing gently to stabilize the plant.
  4. Ensure the base of the leaves sits just above the soil line—never bury the leaves.
  5. Do not water immediately. Wait 5–7 days before the first watering to allow roots to settle and avoid rot.

Step 5: Choosing the Right Location

Aloe vera loves bright, indirect sunlight. It can tolerate direct sunlight, but too much can scorch the leaves, especially when newly planted.

Ideal Locations:

  • Indoors: Near a south- or west-facing window
  • Outdoors: In partial sun or light shade
  • Climate: Aloe vera is best suited for USDA zones 9–11. In cooler areas, keep it as a houseplant.

Step 6: Watering Your Aloe Vera

Aloe is a succulent, so it doesn’t need much water.

Watering Guidelines:

  • Water only when the top 2–3 inches of soil are completely dry.
  • In spring and summer (growing season), water every 2–3 weeks.
  • In fall and winter, reduce to every 4–5 weeks.
  • Always water deeply, allowing excess water to drain out.

Important: Overwatering is the most common reason aloe plants die. If in doubt, skip watering!


Step 7: Fertilizing Aloe Vera

Fertilizing isn’t required often, but occasional feeding helps boost growth.

When to Fertilize:

  • Once in spring and once in mid-summer is sufficient.

Best Fertilizer:

  • Use a balanced, water-soluble fertilizer diluted to half strength.
  • Alternatively, use a cactus or succulent fertilizer once or twice a year.

Step 8: Aloe Vera Plant Maintenance

1. Pruning

  • Remove dried or damaged leaves by cutting them at the base.
  • Do not trim healthy green leaves unless harvesting gel.

2. Repotting

  • Repot every 2–3 years or when the plant outgrows its pot.
  • Refresh with new soil and choose a slightly larger pot.

3. Propagation

  • As your plant matures, it will produce more pups.
  • These can be separated and replanted, following the same process.

Step 9: Harvesting Aloe Vera Gel

Once your aloe plant is mature, you can harvest the gel:

How to Harvest:

  1. Select a mature outer leaf (thick and healthy).
  2. Cut at the base with a clean knife.
  3. Let the yellow sap (aloin) drain off—this can be irritating to the skin.
  4. Slice the leaf open and scoop out the clear inner gel.
  5. Use fresh gel immediately or store in the refrigerator for up to a week.

Note: Use only Aloe barbadensis miller, the true aloe vera species, for consumption or skin use.


Common Aloe Vera Problems and Solutions

ProblemCauseSolution
Yellow or mushy leavesOverwateringAllow soil to dry completely; repot if needed
Brown leaf tipsToo much direct sunlight or dry airMove to indirect light; mist lightly
Drooping leavesUnderwatering or rootboundWater deeply; check if repotting is needed
No pups formingYoung plant or low lightBe patient and ensure 6+ hours of light

Conclusion

Planting aloe vera is a rewarding, easy-to-follow journey perfect for beginners. With minimal tools and care, you can grow a resilient, healing plant that adds beauty and purpose to your home or garden. By choosing the right pot, soil, location, and watering method, your aloe will not only survive—it will thrive.

Whether you’re interested in home remedies, interior greenery, or sustainable living, an aloe vera plant is the perfect green companion. Follow this guide, give your plant some sunshine and love, and soon you’ll have a thriving aloe vera ready to offer its soothing gel and vibrant charm.

How to Grow a Cherry Tree from a Pit: A Complete Step-by-Step Guide

How to Grow a Cherry Tree from a Pit: A Complete Step-by-Step Guide

Imagine plucking a juicy, ripe cherry from a tree you grew yourself—from nothing more than a simple pit. It sounds like a dream, but it’s entirely possible. Growing a cherry tree from a pit is not only a satisfying gardening project but also a remarkable lesson in patience, nature, and sustainability. Though it takes time and care, the rewards—a blossoming tree and potentially a harvest of fresh cherries—are well worth the effort.

This complete step-by-step guide will walk you through everything you need to know: from choosing the right cherry variety and preparing the pit to planting, growing, and nurturing your tree. Whether you’re a beginner gardener or an experienced horticulturist, this guide will help you grow a cherry tree successfully from a seed.


Understanding Cherry Trees: Before You Begin

There are two main types of cherry trees:

  1. Sweet Cherries (Prunus avium) – Ideal for fresh eating. Varieties include Bing, Rainier, and Stella.
  2. Sour or Tart Cherries (Prunus cerasus) – Often used for baking and preserves. Montmorency is the most popular variety.

While sweet cherries require cross-pollination and more space, tart cherries are self-pollinating and better suited to small gardens and cooler climates. Growing from a pit may not produce the exact fruit of the parent tree, especially if the original cherry came from a hybrid. However, the resulting tree can still be beautiful, healthy, and potentially fruitful with care.


Step-by-Step Guide to Growing a Cherry Tree from a Pit

Step 1: Choose the Right Cherry Pits

Start with organic, non-GMO cherries from a local farmer’s market or organic grocery store. Avoid store-bought cherries treated with chemicals, which may inhibit germination.

  • Choose ripe and unblemished cherries.
  • You can try both sweet and tart varieties, but tart cherries have a higher germination success rate.

Tip: Try to source local cherries that grow well in your climate. This increases your chances of growing a tree that thrives.


Step 2: Clean and Prepare the Pits

After enjoying your cherries, it’s time to clean the pits:

  1. Rinse the pits in water and remove any fruit residue.
  2. Soak the pits in warm water for a few minutes to loosen any remaining pulp.
  3. Scrub them gently with a toothbrush.
  4. Lay the pits on a paper towel to air-dry for 3–5 days.

Once dry, store them in an airtight container if you’re not planting immediately.


Step 3: Cold Stratification (Mimicking Winter)

Cherry seeds need cold stratification—a period of cold to break dormancy and encourage sprouting. Here’s how to do it:

  1. Wrap the clean, dry cherry pits in a damp paper towel.
  2. Place them inside a resealable plastic bag.
  3. Label the bag with the date and type of cherry.
  4. Store the bag in the refrigerator (not freezer) at about 4°C (39°F) for 10–12 weeks.

Check periodically to ensure the towel stays moist, but not soggy or moldy. After several weeks, some pits may begin to sprout inside the bag.


Step 4: Planting the Sprouted Pits

Once your cherry pits have sprouted:

Materials Needed:

  • Small pots with drainage holes
  • Well-draining potting mix (a mix of peat, sand, and perlite is ideal)
  • Spray bottle or watering can

Instructions:

  1. Fill pots with moist potting mix.
  2. Plant each sprouted pit about 1–2 inches deep, root-side down.
  3. Place the pots in a sunny indoor window or under grow lights.
  4. Keep the soil consistently moist but not wet.
  5. Once the seedlings grow 2–4 inches tall with several leaves, they are ready to transplant.

Step 5: Transplanting to the Outdoors

Once the danger of frost has passed and your seedlings are 6–12 inches tall, it’s time to transplant outdoors.

Site Selection:

  • Full sun (6–8 hours daily)
  • Well-draining soil
  • Protected from strong winds
  • Adequate space (sweet cherries: 20–30 ft; sour cherries: 15–20 ft)

Steps:

  1. Dig a hole twice the width of the root ball.
  2. Mix in organic compost if soil is poor.
  3. Gently remove the seedling from the pot and place in the hole.
  4. Fill in with soil and water deeply.
  5. Apply mulch around the base (2–3 inches thick) but keep it away from the trunk.

Caring for Your Young Cherry Tree

Growing a tree from a pit takes patience. Here’s how to care for your cherry tree through the years:

Watering

  • Water deeply once or twice a week during the first growing season.
  • Reduce watering once the tree is established.

Fertilizing

  • In the second year, apply a balanced fertilizer (10-10-10) in early spring.
  • Avoid over-fertilizing, as this can harm young roots.

Pruning

  • Begin pruning in the second or third year.
  • Remove dead or diseased branches.
  • Shape the tree to encourage an open center and good air circulation.

Pest & Disease Management

  • Watch for aphids, cherry fruit flies, and fungal diseases.
  • Use organic pest control methods or neem oil when needed.
  • Keep the area around the tree clean to avoid disease.

When Will Your Cherry Tree Bear Fruit?

Growing a cherry tree from a pit is not a fast process:

  • Sour cherries: May fruit in 3–5 years
  • Sweet cherries: May take 5–7 years or more

Keep in mind that pit-grown trees may produce fruit different from the parent due to genetic variation. Some may produce sour or small fruit, while others might bear no fruit at all. However, even non-fruiting trees are still beautiful additions to any landscape.


Tips for Success

  • Grow multiple pits to improve your chances of germination and fruit-bearing.
  • Label your cherry varieties if experimenting with different types.
  • Patience is key—fruiting takes several years but is highly rewarding.
  • If your climate is not ideal, grow your cherry tree in a large container and overwinter indoors.

Conclusion

Growing a cherry tree from a pit is a rewarding journey that combines gardening, science, and a little bit of magic. With the right steps—cleaning, stratifying, sprouting, planting, and nurturing—you can transform a discarded cherry pit into a flourishing tree.

While growing from seed may take longer than planting a nursery sapling, it offers an unmatched sense of achievement. Plus, there’s always the exciting possibility that your pit-grown tree may produce a new variety of cherry, uniquely yours.

So the next time you enjoy a sweet cherry, don’t toss the pit—plant it, and watch it grow into a beautiful legacy of patience and nature.

Which Country Is the Largest Papaya Exporter in the World?

Which Country Is the Largest Papaya Exporter in the World?

Papaya (Carica papaya) is a tropical fruit that is not only delicious but also incredibly nutritious. Known for its juicy orange flesh and sweet, musky flavor, papaya is rich in vitamin C, vitamin A, antioxidants, and digestive enzymes like papain. It’s no surprise that papaya is widely consumed in fresh, dried, and processed forms around the world. While many countries cultivate papaya, only a few dominate the global export market, making it a significant crop in terms of both agriculture and international trade.

In this article, we explore which country holds the title of the largest papaya exporter in the world, and why. We’ll examine global production trends, export statistics, key trade partners, and the factors contributing to this country’s success in the papaya trade. This comprehensive analysis will give a full understanding of the international papaya industry, especially for academic and research purposes.


Global Papaya Production: An Overview

Papaya is primarily grown in tropical and subtropical regions. The plant thrives in warm climates with plenty of sunshine and well-drained soil. The top producers of papaya globally include:

  • India (largest producer)
  • Indonesia
  • Nigeria
  • Philippines
  • Brazil
  • Mexico

While India leads in papaya production by volume, its exports are relatively limited due to high domestic consumption. On the other hand, Mexico is the clear leader when it comes to papaya exports, supplying a major portion of the global market.


Mexico: The World’s Largest Papaya Exporter

Export Volume and Share

According to the Food and Agriculture Organization (FAO) and international trade databases, Mexico is the largest exporter of papayas in the world, accounting for approximately 35–40% of global papaya exports. In recent years, Mexico has exported more than 160,000 metric tons of papayas annually, earning hundreds of millions of dollars in revenue.

The majority of these exports go to:

  • United States
  • Canada
  • European Union countries
  • Japan

Why Mexico Dominates the Export Market

Several factors contribute to Mexico’s leadership in papaya exports:

1. Geographic Proximity to Major Markets

Mexico shares a long border with the United States, the largest consumer of fresh papayas globally. This proximity allows for fast, cost-effective transportation, especially for a fruit as perishable as papaya. Most shipments reach the U.S. within 2–3 days, ensuring freshness and quality.

2. Favorable Climate and Soil

Mexico’s tropical and subtropical climate, especially in southern states like Oaxaca, Chiapas, Veracruz, and Colima, offers optimal growing conditions for papayas. Consistent temperatures and well-drained volcanic soils make it possible to harvest papayas year-round.

3. Infrastructure and Farming Practices

Mexican farmers and agribusinesses use modern irrigation systems, integrated pest management, and improved post-harvest handling techniques. This has significantly increased the yield and export quality of papayas.

4. Government and Industry Support

The Mexican government, through agencies like SAGARPA (Secretariat of Agriculture), provides training, certifications, and export support to papaya producers. Additionally, organizations like ProMéxico promote Mexican agricultural exports abroad.


Key Papaya Exporting Regions in Mexico

The main papaya-producing and exporting states in Mexico include:

  • Colima – One of the leading exporters with ideal climate conditions and advanced farming methods.
  • Veracruz – Known for high-quality papayas with excellent flavor.
  • Chiapas – A major production hub with strong transportation links.
  • Oaxaca and Campeche – Growing rapidly due to favorable investment and infrastructure development.

Popular Papaya Varieties Grown in Mexico

Mexico primarily exports the following papaya varieties:

1. Maradol

This is the most widely exported variety. It has large, oval-shaped fruits with orange-red flesh and sweet taste. Maradol is favored for its long shelf life and firmness, making it ideal for export.

2. Tainung

Originating from Taiwan, this variety is becoming increasingly popular due to its smaller size, high sugar content, and smooth skin.

3. Red Lady

A hybrid papaya with excellent disease resistance, early fruiting, and bright red flesh. It’s gaining popularity among organic farmers and small-scale exporters.


Top Importers of Mexican Papayas

1. United States

The U.S. imports more than 80% of its fresh papayas from Mexico, making it the most important trade partner. Cities like Los Angeles, Houston, and Miami are major distribution centers for imported papayas.

2. Canada

Canadian demand for fresh tropical fruit continues to rise, and Mexico benefits due to trade agreements and reliable logistics.

3. Europe and Asia

Though smaller markets than North America, countries like Germany, the Netherlands, and Japan import growing quantities of Mexican papayas, particularly in the offseason.


Challenges Facing Mexican Papaya Exporters

Despite its success, Mexico’s papaya industry faces several challenges:

1. Disease and Pest Issues

Papayas are vulnerable to Papaya ringspot virus (PRSV), anthracnose, and various fungal infections. These can reduce yields and affect export quality.

2. Labor Shortages

Agricultural labor availability has declined, especially during peak seasons. Harvesting and packing are labor-intensive processes requiring skilled workers.

3. Competition from Other Countries

Countries like Brazil, Guatemala, and the Philippines are expanding their papaya export industries, potentially threatening Mexico’s dominance.

4. Sustainability Concerns

Intensive papaya farming can lead to soil degradation and water resource strain. Sustainable farming practices are now essential to maintaining long-term viability.


Other Major Papaya Exporters

While Mexico leads, several other countries also contribute significantly to the global export market.

1. Brazil

Brazil is a major papaya producer and exporter, particularly to Europe. It produces varieties like Golden and Formosa, known for their sweetness and small size.

2. India

India is the largest producer of papaya in the world, but most of it is consumed domestically. Export volumes remain relatively low.

3. Philippines

The Philippines exports papayas primarily to Japan, Korea, and Hong Kong, and is expanding its market in Asia.

4. Guatemala

Guatemala exports smaller volumes to the U.S. and has become a competitive regional supplier due to proximity and low labor costs.


Economic Importance of Papaya Exports

Papaya exports provide significant benefits to Mexico’s economy:

  • Job creation in rural communities
  • Income for smallholder farmers and cooperatives
  • Foreign exchange earnings
  • Agricultural innovation and rural development

In regions like Colima and Chiapas, papaya cultivation is a key driver of economic growth and community stability.


Conclusion

To answer the thesis question clearly:

Mexico is the largest papaya exporter in the world.

Through its ideal climate, strong trade ties (especially with the U.S.), advanced farming techniques, and government support, Mexico dominates the international papaya market. While other countries like Brazil and the Philippines contribute to global exports, none match Mexico in volume, consistency, and quality.

As global demand for healthy tropical fruits continues to rise, Mexico is well-positioned to maintain and expand its leadership—so long as it continues to innovate, combat plant diseases, and adopt sustainable practices. The success of Mexico’s papaya industry is a compelling case study in how agriculture, trade policy, and geography intersect to shape global food markets.

How Often Should You Water an Aloe Plant?

How Often Should You Water an Aloe Plant?

Aloe vera is one of the most popular houseplants worldwide, loved for its low maintenance, striking appearance, and medicinal benefits. With its fleshy, spiky green leaves and soothing gel, aloe plants are not just decorative—they also serve as a natural remedy for burns, cuts, and skin irritation. But while aloe is famous for its resilience and ability to thrive in dry conditions, knowing how often to water an aloe plant is crucial to its health and longevity.

Many plant lovers assume aloe requires little to no water, while others may unknowingly overwater it, leading to root rot. In this comprehensive guide, we’ll explore how to properly water aloe plants, taking into account seasonal changes, potting conditions, soil type, and plant size. Whether you’re a novice or an experienced gardener, understanding these watering principles will help your aloe thrive for years to come.


Understanding Aloe’s Natural Habitat

To properly care for any plant, it’s important to understand where it comes from. Aloe vera is a succulent that hails from the dry, arid regions of the Arabian Peninsula, North Africa, and other parts of the Middle East. In the wild, aloe grows in rocky, sandy soils with minimal rainfall and high temperatures.

This natural background means:

  • Aloe plants are highly drought-tolerant.
  • Their thick leaves are designed to store water.
  • They’re more prone to damage from overwatering than from underwatering.

How Often Should You Water an Aloe Plant?

The general rule is:

Water your aloe plant every 2–3 weeks in the growing season (spring and summer), and every 4–6 weeks during dormancy (fall and winter).

However, this is a guideline, not a fixed rule, and watering frequency can vary based on several factors.


Factors That Affect Aloe Watering Needs

1. Season and Growth Cycle

  • Spring and Summer: Aloe grows actively in warmer months and uses more water. Water every 10–14 days if the soil dries out faster.
  • Fall and Winter: Aloe slows its growth and needs less moisture. Reduce watering to once every 3–4 weeks.

2. Pot and Drainage

  • Always plant aloe in a pot with drainage holes.
  • If your pot retains water, the soil will stay wet for too long, increasing the risk of root rot.
  • Clay pots are better than plastic because they allow water to evaporate more quickly.

3. Soil Type

Aloe vera thrives in well-draining, sandy or cactus mix soil. Avoid heavy garden soil or moisture-retentive mixes.

Use:

  • Commercial cactus/succulent potting mix, or
  • A DIY mix: 1 part potting soil + 1 part sand or perlite + 1 part pumice or gravel

The faster the soil drains, the more frequently you may need to water.

4. Light Exposure

Plants in bright, indirect sunlight or full sun may need water more frequently than those in shaded or indoor spots.

  • More light = faster evaporation = slightly more frequent watering
  • Indoor aloe in low light dries out more slowly

5. Size of Plant and Pot

  • A large aloe in a small pot may dry out quickly.
  • A small aloe in a large pot may hold too much moisture.

Adjust your watering schedule accordingly based on pot size and plant maturity.


How to Know When Your Aloe Needs Water

Instead of relying only on a calendar, observe your plant and the soil. These are the signs to check before watering:

1. Soil Dryness Test

Insert your finger 2 inches into the soil. If it feels dry at that depth, it’s time to water.

2. Wrinkled or Curling Leaves

A slightly underwatered aloe shows wrinkled, curling, or shriveled leaves. This is a sign it needs water soon.

3. Limp or Bending Leaves

Healthy aloe leaves stand firm and upright. Limp, soft leaves may indicate dehydration—or overwatering.

4. Pale or Yellowing Leaves

If leaves turn yellow, mushy, or start browning at the base, it’s likely a sign of overwatering or root rot.

5. Weight of the Pot

Lift the pot—dry soil is noticeably lighter. This trick is especially helpful for smaller potted plants.


How to Water an Aloe Plant Properly

Step-by-Step Watering Instructions:

  1. Check the Soil: Make sure the top 2–3 inches are completely dry.
  2. Water Deeply: Water until it flows out of the drainage holes.
  3. Drain Excess Water: Never let the pot sit in a saucer of standing water.
  4. Let the Soil Dry Out: Wait for the soil to dry completely before watering again.

Pro Tip: It’s better to underwater than overwater aloe. A thirsty plant can recover quickly—roots rotting in wet soil may not.


Common Aloe Watering Mistakes

1. Overwatering

This is the #1 killer of aloe plants. Roots become waterlogged, oxygen is cut off, and rot sets in quickly. Symptoms include:

  • Mushy or translucent leaves
  • Foul smell from soil
  • Sudden leaf collapse

2. Watering on a Schedule Without Checking Soil

Always check the soil’s moisture level before watering. Weather and indoor conditions change frequently.

3. Using Pots Without Drainage

Without a drainage hole, even one overwatering incident can be fatal. Always use a well-draining pot.

4. Splashing Water on Leaves Frequently

Although occasional misting won’t harm aloe, frequent wetting of leaves can lead to fungal problems or rot, especially in humid environments.


Watering Aloe Indoors vs Outdoors

Indoors:

  • Less sunlight and airflow means slower drying.
  • Water less frequently — usually every 3–4 weeks.
  • Use bright, indirect light to mimic its native environment.

Outdoors:

  • Hotter temperatures and wind dry out the soil faster.
  • Water every 7–14 days, especially in summer.
  • Protect from heavy rain or move pots under cover.

Bonus: Aloe Watering Tips for Specific Scenarios

Repotting Aloe

After repotting, wait 5–7 days before watering to allow roots to settle and avoid shock.

Propagated Offsets (Pups)

Let offsets dry for 1–2 days before planting. Then water lightly and wait until new growth appears to resume normal watering.

Dormant Aloe in Winter

Water very sparingly — once every 4–6 weeks — and only if the soil is bone dry.


Conclusion

Watering an aloe plant may seem simple, but it’s all about balance and observation. These hardy succulents have evolved to survive harsh, dry conditions and are far more tolerant of drought than excess water. The key is to water deeply but infrequently, allowing the soil to fully dry out between sessions.

To recap:

  • Every 2–3 weeks in summer, every 4–6 weeks in winter
  • Use well-draining soil and pots with drainage holes
  • Always check the soil before watering
  • Adjust based on climate, light, and plant size

By understanding your aloe plant’s natural needs and signs, you can grow a healthy, vibrant aloe that not only enhances your space but also provides fresh, medicinal gel right at home.

9 Stunning Mailbox Flower Bed Ideas to Beautify Your Entrance

9 Stunning Mailbox Flower Bed Ideas to Beautify Your Entrance

Your mailbox is often the first thing people notice as they approach your home — so why not turn it into a beautiful focal point? A well-designed mailbox flower bed can dramatically enhance your curb appeal, add vibrant color, and create a warm, welcoming entrance to your property. Whether you prefer a tidy look or a wild cottage-garden vibe, there are countless ways to transform the area around your mailbox using plants, flowers, stones, and creative arrangements. Below are 9 stunning flower bed ideas that can bring charm and beauty to your mailbox area.


1. Cottage-Style Mailbox Garden

Embrace the relaxed elegance of a cottage garden around your mailbox with a mix of perennials and flowering herbs like lavender, salvia, and black-eyed Susans. Include taller plants in the back and trailing ones like creeping Jenny or sweet alyssum up front for a soft, romantic flow. This design not only offers year-round interest but also attracts bees and butterflies, making your mailbox both a visual and ecological delight.


2. Circular Stone-Edged Flower Bed

Surround your mailbox with a circular stone border and fill the center with seasonal blooms like tulips in spring, marigolds in summer, and chrysanthemums in autumn. The stone edging adds structure and definition while keeping mulch and soil neatly contained. This timeless design works beautifully with both modern and traditional homes and requires low maintenance throughout the year.


3. Butterfly and Pollinator Garden

Create a mini haven for pollinators by planting milkweed, echinacea, bee balm, and zinnias around your mailbox. These plants attract butterflies, bees, and hummingbirds, turning your mailbox into a lively, colorful ecosystem. Use native flowers when possible to ensure success and resilience. Add a small sign or butterfly stake for an educational and decorative touch.


4. Mailbox with Raised Planter Box

Attach or build a raised wooden or metal planter box around the base of your mailbox post. Fill it with cascading petunias, calibrachoas, or ivy geraniums for a vibrant, overflowing look. This setup keeps plants elevated and makes weeding and watering easier. Plus, you can switch out the flowers seasonally for an ever-changing floral display.


5. Drought-Tolerant Mailbox Bed

If you live in a hot, dry climate or want a low-maintenance option, go for a drought-tolerant flower bed. Use ornamental grasses, sedum, coreopsis, lavender, and succulents like hens and chicks. Add pea gravel or small rocks for a natural desert aesthetic. This design not only conserves water but also offers a modern, clean look that stays beautiful with minimal effort.


6. Monochromatic Color Theme

For a bold, cohesive appearance, choose a monochromatic color palette such as all shades of purple or red. Combine plants like purple coneflowers, salvia, and verbena to create depth and variation within a single color scheme. Use dark mulch or coordinating stones to enhance the overall effect. This idea is especially effective in creating a high-end, intentional look for your front entrance.


7. Tropical-Inspired Mailbox Garden

Bring island vibes to your mailbox with a tropical-themed flower bed. Use vibrant, broad-leafed plants like canna lilies, elephant ears, coleus, and hibiscus. Add coconut mulch and a tiki-style sign or flamingo statue for fun. These heat-loving plants create an exotic look and work best in warm climates or summer displays in containers.


8. Seasonal Swaps with Annuals

Design a flexible flower bed that lets you rotate seasonal annuals. For spring, plant tulips and daffodils; in summer, switch to petunias, marigolds, or sunpatiens; and in fall, go for mums and ornamental cabbage. You can even add mini evergreens or string lights for winter charm. This approach keeps your mailbox area fresh and exciting year-round.


9. Rustic Country Mailbox Bed

Capture a farmhouse vibe with a rustic-themed flower bed using sunflowers, daisies, and ornamental grasses. Incorporate natural elements like a weathered wooden sign, an old milk can, or a small wagon wheel. Mulch with straw or bark, and use reclaimed wood or rocks as edging. This design radiates warmth and a nostalgic charm that suits rural or cottage-style homes.


Conclusion

Transforming your mailbox into a floral showpiece is a simple yet impactful way to enhance your home’s curb appeal. Whether you prefer classic elegance, modern minimalism, or a wild natural look, these 9 stunning mailbox flower bed ideas can elevate your entrance and give visitors (and mail carriers!) a beautiful first impression. Choose a design that complements your style and climate — and watch your front yard bloom with personality.

How to Plant Ginger Root for Vibrant Flavors: A Complete Growing Guide

How to Plant Ginger Root for Vibrant Flavors: A Complete Growing Guide

Ginger (Zingiber officinale) is one of the world’s most popular and versatile culinary and medicinal plants. Known for its bold, zesty flavor and aromatic warmth, ginger has been prized for centuries in various cuisines and traditional healing systems like Ayurveda, Traditional Chinese Medicine (TCM), and folk medicine. While commonly available in supermarkets, growing your own ginger at home ensures a steady supply of fresh, flavorful, and chemical-free rhizomes that are superior in taste and potency compared to store-bought versions.

Despite its exotic origins in Southeast Asia, ginger is remarkably easy to cultivate, even for novice gardeners. This article offers a comprehensive, step-by-step guide on how to plant ginger root for vibrant flavors, covering everything from choosing the right rhizome to harvesting and storage tips.


Why Grow Your Own Ginger?

Before diving into the planting process, it’s worth understanding why homegrown ginger is so rewarding:

  • Enhanced Flavor: Freshly harvested ginger is more aromatic, juicy, and pungent than store-bought options.
  • Chemical-Free: You control the soil, water, and fertilizers, avoiding harmful pesticides.
  • Easy to Grow: Ginger thrives in containers, raised beds, or directly in the ground with minimal care.
  • Year-Round Supply: In suitable climates or with indoor growing, you can harvest ginger as needed.
  • Health Benefits: Packed with antioxidants, anti-inflammatory compounds, and digestive aids.

Understanding Ginger: The Basics

Ginger is a tropical perennial plant grown primarily for its underground stem, called a rhizome, which is the edible part. It has:

  • Long, slender green stalks.
  • Narrow, lance-shaped leaves.
  • Underground rhizomes that spread horizontally.

Ginger prefers warm, humid conditions and grows best in rich, loose, well-drained soils with partial shade.


When to Plant Ginger

The ideal time to plant ginger depends on your region:

  • In tropical and subtropical climates: Plant ginger at the beginning of the rainy season or when daytime temperatures consistently remain above 20°C (68°F).
  • In temperate climates: Plant indoors in late winter or early spring, then transplant outdoors after the last frost.

How to Choose the Best Ginger Root for Planting

Not all ginger roots (rhizomes) are suitable for planting. Follow these guidelines to select the right one:

  • Look for Fresh, Plump Rhizomes: Choose firm, juicy pieces free from shriveling or mold.
  • Select Rhizomes with ‘Eyes’ or Growth Buds: These are small, yellowish-green tips that resemble potato sprouts.
  • Avoid Waxed Roots: Supermarket ginger is often coated with wax to extend shelf life, which can inhibit sprouting. Buy from a nursery or organic produce market if possible.

How to Prepare Ginger for Planting

1. Cut the Rhizome

  • If your ginger piece is large, cut it into 1-2 inch sections, ensuring each piece has at least one or two healthy eyes.
  • Allow the cut pieces to air-dry for 24-48 hours. This forms a callus over the cut surfaces, reducing the risk of rot.

Best Soil for Growing Ginger

Ginger thrives in loose, well-draining, and fertile soil rich in organic matter.

Soil Requirements:

  • pH between 5.5 and 6.5 (slightly acidic)
  • High organic content — mix in compost, aged manure, or coconut coir
  • Excellent drainage to prevent waterlogging and rhizome rot

If planting in containers, use a quality potting mix blended with compost and sand or perlite for added drainage.


How to Plant Ginger Root: Step-by-Step

1. Choose a Planting Site or Container

  • Select a partially shaded area protected from strong winds.
  • If using containers, opt for wide, shallow pots as ginger rhizomes spread horizontally.

2. Prepare the Soil

Loosen the soil to a depth of 8-10 inches and mix in organic compost.

3. Plant the Rhizomes

  • Plant each piece 2-4 inches deep, with the growth buds facing upward.
  • Space multiple rhizomes 8-12 inches apart.

4. Water Gently

Water the soil thoroughly after planting, ensuring it’s moist but not soggy.


Caring for Your Ginger Plant

Watering

  • Keep the soil consistently moist, but avoid waterlogging.
  • Water more frequently in hot, dry weather.
  • Reduce watering slightly as the plant matures and approaches harvest time.

Mulching

Apply a 2-3 inch layer of organic mulch (straw, leaves, or grass clippings) to retain moisture, suppress weeds, and keep the soil temperature stable.

Fertilizing

  • Feed ginger with a balanced organic fertilizer or compost tea every 3-4 weeks.
  • Avoid excessive nitrogen, which promotes foliage growth at the expense of rhizomes.

Pest and Disease Management

  • Ginger is relatively pest-resistant but watch for root-knot nematodes, fungal rot, and aphids.
  • Ensure proper drainage and avoid overhead watering to minimize fungal issues.

How Long Does Ginger Take to Grow?

Ginger takes about 8 to 10 months to fully mature. However, you can start harvesting small, tender pieces (called young or baby ginger) after about 4-6 months.


When and How to Harvest Ginger

1. Early Harvest

For mild, tender ginger with thin skin, carefully dig around the plant after 4-6 months.

2. Full Harvest

When the leaves turn yellow and begin to die back (around 8-10 months), it signals that the rhizomes are fully mature.

Harvest Method:

  • Gently dig up the rhizomes using a garden fork or your hands.
  • Shake off excess soil.
  • Rinse and dry the harvested ginger in a shaded, airy place.

Post-Harvest Storage

  • Store fresh ginger in a cool, dry place.
  • Refrigerate in perforated bags for up to 3-4 weeks.
  • Freeze for long-term storage.
  • Dehydrate or pickle extra harvest for year-round use.

Tips for More Vibrant, Flavorful Ginger

  • Grow in rich, compost-amended soil for superior taste.
  • Use organic fertilizer to avoid chemical residues.
  • Harvest young ginger for a milder, aromatic flavor or let it mature for a more intense, spicy bite.
  • Keep the plant consistently moist during the active growing season.

Conclusion

Growing ginger at home is both rewarding and surprisingly easy, offering you a steady supply of fresh, flavorful rhizomes that elevate your culinary creations and herbal remedies. By choosing healthy, sprouting rhizomes, planting them in well-drained, fertile soil, and providing consistent care, you’ll enjoy a thriving ginger harvest within months.

Whether you prefer the delicate, tender zing of young ginger or the bold, spicy heat of mature roots, cultivating your own ginger ensures you always have access to nature’s most aromatic and medicinal spice. With its low maintenance needs and adaptability to pots, beds, and indoor spaces, ginger is a perfect addition to any kitchen garden or balcony planter.

Which Country Is the Largest Bitter Melon Producer in the World?

Which Country Is the Largest Bitter Melon Producer in the World?

Bitter melon (Momordica charantia), also known as bitter gourd, karela, or balsam pear, is a tropical and subtropical vine belonging to the Cucurbitaceae family, which also includes cucumbers, pumpkins, and melons. Widely appreciated for its distinctive bitter flavor and medicinal properties, bitter melon is cultivated in many parts of the world and holds significant cultural, culinary, and health importance, particularly in Asian and African countries.

The demand for bitter melon has steadily grown due to its reputed health benefits — notably for managing blood sugar levels, improving digestion, and boosting immunity. While several nations cultivate this unique vegetable, one country stands out as the largest producer globally. In this comprehensive article, we’ll explore bitter melon’s origins, global production landscape, and highlight the leading producer, examining why this country dominates the market and how bitter melon plays an important role in its agriculture and food culture.


Understanding Bitter Melon: A Global Crop

Bitter melon thrives in warm, humid climates and requires well-drained, fertile soils with plenty of sunlight. It is typically grown as an annual crop and harvested while the fruits are still green and immature — before their bitterness becomes too intense.

There are various cultivars of bitter melon globally, which vary in:

  • Shape: long and slender to short and round
  • Skin texture: smooth, warty, or deeply ridged
  • Bitterness level

The vegetable is especially popular in:

  • South Asia (India, Pakistan, Bangladesh)
  • Southeast Asia (Thailand, Vietnam, the Philippines, Indonesia)
  • China
  • Africa
  • Caribbean nations

Beyond culinary uses, bitter melon is highly valued in traditional medicine systems such as Ayurveda, Traditional Chinese Medicine (TCM), and folk medicine for its potential to treat various ailments.


Global Bitter Melon Production Overview

Bitter melon cultivation has expanded worldwide due to its rising popularity among health-conscious consumers. Countries with tropical and subtropical climates typically cultivate it, and key global producers include:

  • India
  • China
  • Bangladesh
  • Pakistan
  • Philippines
  • Vietnam
  • Thailand

Among these, India is the undisputed leader in bitter melon production.


India: The Largest Bitter Melon Producer in the World

Why India Leads Bitter Melon Production

India is the world’s largest producer of bitter melon, both in terms of land under cultivation and total production volume. The country’s dominance in this crop is attributed to several critical factors:

  • Favorable Climate: India’s tropical and subtropical regions provide ideal growing conditions, with ample sunshine, moderate rainfall, and warm temperatures.
  • Rich Agricultural Heritage: Bitter melon has been cultivated in India for centuries and remains a staple ingredient in traditional Indian cuisine and Ayurvedic medicine.
  • Wide Regional Cultivation: Bitter melon is grown extensively across various states, including Uttar Pradesh, Bihar, Madhya Pradesh, Maharashtra, Karnataka, Andhra Pradesh, Telangana, and Tamil Nadu.
  • High Domestic Demand: Bitter melon is a popular vegetable in Indian households, especially for its purported health benefits. It’s prepared in curries, stir-fries, and even juices.
  • Commercial Export: India exports bitter melon to the Middle East, Europe, Canada, the United States, and Australia, catering to the diaspora and global health markets.

Production Volume

According to the latest data from the Food and Agriculture Organization (FAO) and India’s National Horticulture Board (NHB):

  • India produces approximately 750,000 to 800,000 metric tons of bitter melon annually.
  • This accounts for over 50% of the world’s total bitter melon production.

The sheer size of India’s production capacity far surpasses other nations, maintaining its global leadership position.


Key Bitter Melon Producing Regions in India

India’s diverse agricultural landscape enables year-round bitter melon cultivation in different states:

  • Uttar Pradesh: Largest producing state, contributing significantly to national output.
  • Bihar and Madhya Pradesh: Notable for large-scale commercial farms.
  • Karnataka and Maharashtra: Key suppliers for both domestic consumption and exports.
  • Andhra Pradesh and Telangana: Important regions with organized horticultural markets.

Each region benefits from favorable soil and climate conditions and well-established distribution channels.


Other Major Bitter Melon Producers Globally

While India dominates, several other countries make notable contributions to global bitter melon production:

China

China is the second-largest producer of bitter melon, cultivating a wide range of varieties. Bitter melon is a popular ingredient in Chinese cuisine and traditional medicine, used to reduce heat, improve digestion, and balance blood sugar. It’s especially common in southern provinces like Guangdong, Guangxi, and Hainan.

Bangladesh

Bitter melon ranks among the most widely grown vegetables in Bangladesh, where it’s cultivated on both small family plots and commercial farms. The vegetable is a staple in local diets and folk medicine.

Pakistan

Pakistan produces considerable quantities of bitter melon, mainly for domestic consumption. It is grown throughout the country, particularly in Punjab and Sindh provinces.

Philippines, Vietnam, and Thailand

These Southeast Asian countries are notable producers and consumers of bitter melon. In these regions, bitter melon is used in stews, soups, and stuffed preparations.


Global Trade and Market Trends

Export Markets

While much of the bitter melon produced in countries like India, China, and Bangladesh is consumed domestically, there’s growing international demand, especially in:

  • Middle Eastern countries
  • United States
  • Canada
  • Australia
  • United Kingdom

The increasing global interest in plant-based diets, diabetes management, and functional foods has expanded export opportunities for producers like India and China.

Rising Popularity

Bitter melon’s antioxidant and antidiabetic properties have made it popular in health food markets. It’s now sold not only as fresh produce but also in the form of:

  • Dried slices
  • Powders
  • Capsules and supplements
  • Herbal teas
  • Bitter melon juices and extracts

Challenges in Bitter Melon Production

Despite its demand, growers face several challenges:

  • Climate Sensitivity: Bitter melon is vulnerable to excessive rain, high humidity, and frost.
  • Pest and Disease Pressure: Common issues include fruit flies, downy mildew, and powdery mildew.
  • Post-Harvest Losses: The vegetable is highly perishable, requiring careful handling, storage, and transport.

Addressing these challenges through improved cultivation practices, pest management, and cold-chain logistics is crucial for expanding bitter melon markets globally.


Conclusion

To directly answer the thesis question: India is the largest bitter melon producer in the world, contributing over half of the global production. India’s ideal climatic conditions, extensive cultivation areas, strong domestic demand, and growing export potential have positioned it at the forefront of bitter melon farming worldwide.

While China, Bangladesh, and Pakistan also play significant roles in global production, none match India’s scale, diversity of growing regions, or integration into both local cuisine and traditional medicine. As global health trends continue to favor functional, nutrient-dense foods, India’s leadership in bitter melon cultivation appears likely to strengthen, benefiting farmers, traders, and health-conscious consumers alike.