
Garlic is one of the easiest and most rewarding crops you can grow at home. Not only does it add rich, savory flavor to countless dishes, but it’s also packed with health benefits — from boosting your immune system to lowering blood pressure. If you’ve ever wondered how to plant garlic cloves for strong, flavorful bulbs, you’re in the right place. This comprehensive guide will walk you through everything you need to know, from choosing the right garlic variety to harvesting those plump, aromatic heads.

Why Grow Your Own Garlic?
Before we dive into planting, let’s talk about why growing garlic is a fantastic idea for any gardener:
- Incredible Flavor: Freshly harvested homegrown garlic is more potent and aromatic than store-bought varieties.
- Health Benefits: Rich in antioxidants, vitamins, and minerals, garlic supports heart health, immunity, and even has natural anti-inflammatory properties.
- Low Maintenance: Garlic requires minimal attention once planted.
- Pest-Repellent: Its strong scent naturally deters common garden pests.
Choosing the Right Garlic Variety
Garlic comes in two primary types, and selecting the right one for your climate ensures a successful harvest:
Hardneck Garlic (Allium sativum var. ophioscorodon)
- Thrives in colder climates
- Produces a flowering stalk called a scape
- Stronger, richer flavor
- Shorter shelf life (5-6 months)
- Popular varieties: ‘Music,’ ‘Chesnok Red,’ ‘German Extra Hardy’
Softneck Garlic (Allium sativum var. sativum)
- Prefers milder, warmer climates
- No scape production
- Milder flavor
- Longer shelf life (up to 9-12 months)
- Great for braiding
- Popular varieties: ‘Silverskin,’ ‘California Early,’ ‘Inchelium Red’
Pro Tip: Purchase garlic bulbs from a reputable garden center or online supplier rather than grocery store garlic, which may be chemically treated to prevent sprouting.
When to Plant Garlic
Garlic is best planted in the fall, typically 4-6 weeks before the ground freezes. This allows roots to establish before winter, resulting in larger bulbs by summer.
- Cold climates (Zones 3–7): Plant in mid-September to late October.
- Mild climates (Zones 8–10): Plant in late October to November.
In warmer regions, garlic can also be planted in early spring, though the bulbs may be smaller.


How to Prepare the Soil
Garlic thrives in loose, well-draining, fertile soil with a pH between 6.0 and 7.0. Follow these steps to prep your garlic bed:
- Choose a Sunny Spot: Garlic needs at least 6-8 hours of sunlight daily.
- Loosen the Soil: Work the soil to a depth of 8-12 inches to encourage deep root growth.
- Add Organic Matter: Mix in compost or well-aged manure to enrich the soil.
- Test and Adjust pH: If your soil is too acidic, add a sprinkle of garden lime.
- Ensure Good Drainage: Avoid soggy spots, which can lead to rot.
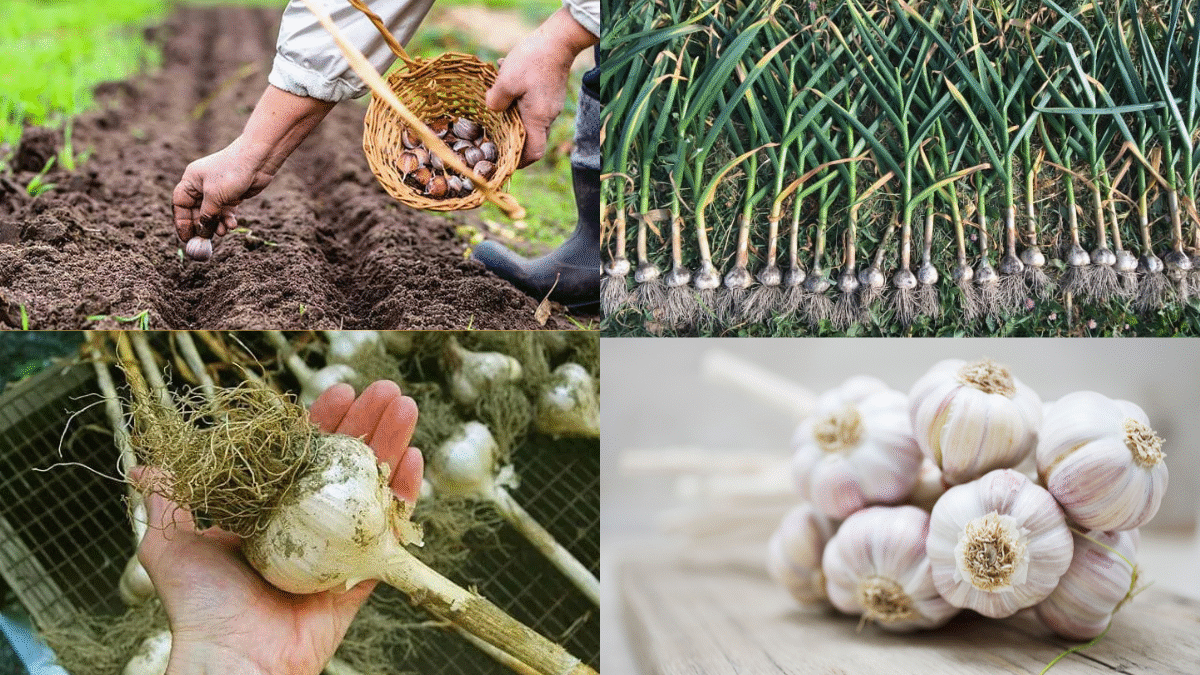
How to Plant Garlic Cloves Step by Step
Once your soil is ready, it’s time to plant!
What You’ll Need:
- Garlic bulbs (separate into cloves)
- Trowel
- Compost or organic fertilizer
- Mulch (straw, leaves, or grass clippings)
Instructions:
Step 1: Break the Bulbs
- Gently separate each garlic bulb into individual cloves.
- Leave the papery skin on each clove intact.
Step 2: Plant the Cloves
- Plant cloves pointy end up, flat root side down.
- Space cloves 4-6 inches apart in rows 12-18 inches apart.
- Plant each clove 2-3 inches deep.
Step 3: Add Fertilizer
- Mix a balanced organic fertilizer (like 5-5-5) into the soil as you plant to give cloves a head start.
Step 4: Water Thoroughly

- Water the bed well after planting to help settle the soil and initiate root growth.
Step 5: Apply Mulch
- Cover the planting bed with 3-4 inches of mulch to insulate the soil, retain moisture, and suppress weeds.
How to Care for Garlic as It Grows
Watering
- Water garlic deeply once a week, providing about 1 inch of water.
- Avoid overwatering, especially in late spring, as excess moisture can cause rot.
Mulching
- Keep a consistent layer of mulch to maintain soil moisture and temperature.
- In spring, you can reduce mulch slightly to let the soil warm up faster.
Fertilizing
- In early spring, side-dress with a nitrogen-rich fertilizer like blood meal or fish emulsion.
- Stop fertilizing once bulbs start to swell in late spring (when the lower leaves begin to yellow).
Remove Flower Stalks (Hardneck Garlic)
- If you’re growing hardneck varieties, snip off the curly scapes as they appear.
- This encourages the plant to focus energy on bulb development.
- Bonus: Scapes are edible and delicious sautéed or made into pesto!
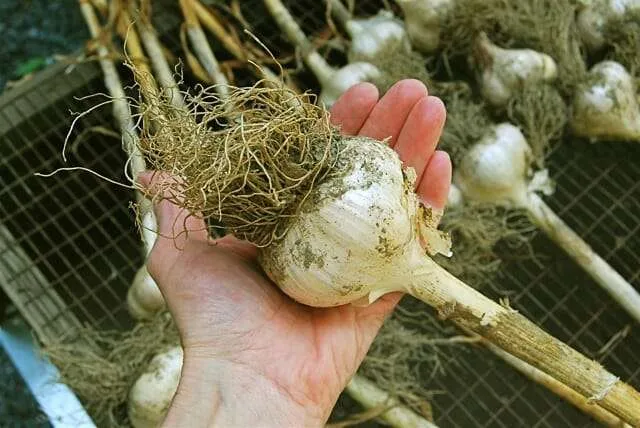
When and How to Harvest Garlic
Garlic is typically ready to harvest in mid-to-late summer, about 7-9 months after planting.
Signs It’s Ready:
- Lower leaves turn brown while upper leaves remain green.
- Typically when half to two-thirds of the leaves have died back.
How to Harvest:
- Use a garden fork or spade to gently lift bulbs from the soil.
- Avoid pulling them by the stems as this can damage the bulbs.
- Shake off excess soil, but don’t wash them.
Curing and Storing Garlic
Curing is essential for preserving garlic and enhancing its flavor.
How to Cure:
- Hang or spread bulbs in a well-ventilated, dry, shaded area.
- Leave them for 2-3 weeks until the outer skins are papery and roots are dry.
Storing Garlic:
- Trim off roots and cut stems 1 inch above the bulb (for softneck, you can braid them).
- Store in a cool, dry, dark place with good air circulation.
- Properly cured and stored garlic can last:
- 5–6 months for hardneck varieties
- 9–12 months for softneck varieties

Common Garlic Growing Problems (and How to Fix Them)
Overwatering
- Leads to rot. Ensure soil drains well and avoid soggy conditions.
Pests
- Aphids and onion maggots can be an issue. Use row covers or insecticidal soap as needed.
Disease
- White rot and rust can affect garlic. Practice crop rotation and avoid planting garlic in the same spot for at least 3 years.
Final Thoughts
Growing your own garlic is incredibly satisfying — not to mention practical and delicious. By planting quality cloves in well-prepared soil, giving them the right care, and knowing when to harvest and cure them, you’ll enjoy an abundant supply of strong, flavorful bulbs perfect for cooking and preserving.
Pro Tip: Save a few of your largest, healthiest bulbs to plant next season, improving your crop year after year.
Now that you know how to plant garlic cloves for a thriving, flavorful harvest, it’s time to get your hands dirty and start growing!
Leave A Comment