There’s something truly satisfying about taking a simple kitchen leftover — like an avocado pit — and turning it into a beautiful, living tree. Growing an avocado tree from a pit isn’t just a fun science experiment for kids and adults alike, it’s also a wonderful way to add lush greenery to your home or garden.
While it takes patience (and your tree may not bear fruit for several years, if at all), the joy of watching your plant sprout and thrive is reward enough. In this detailed guide, we’ll walk you through how to grow an avocado pit into a tree, from start to finish, with easy-to-follow steps, tips, and care advice.
Why Grow an Avocado Tree from a Pit?
Growing an avocado tree from a pit offers several unique benefits:
- It’s free and eco-friendly.
- An educational, family-friendly project.
- A great way to repurpose kitchen waste.
- Adds a beautiful tropical touch to your home or garden.
Even if your homegrown avocado tree never produces fruit, it’ll still be a striking ornamental plant you can proudly say you grew yourself.
What You’ll Need
Before you start, gather these simple supplies:
- 1 ripe avocado pit
- 3-4 toothpicks
- A glass or jar
- Water
- A sunny windowsill or bright spot
- Potting soil (for later stages)
- A planting pot with drainage holes
How to Grow an Avocado Pit into a Tree
Here’s a complete, step-by-step breakdown of the process:
Step 1: Remove and Clean the Pit
After enjoying your avocado, carefully remove the pit. Be gentle to avoid damaging it.
- Rinse the pit under lukewarm water.
- Remove any remaining fruit residue.
- Pat the pit dry with a paper towel.
Pro Tip: Avoid removing the brown skin on the pit — it protects the seed and aids germination.

Step 2: Determine the Top and Bottom
To successfully sprout, it’s important to position the pit correctly:
- The top (pointy end) is where the stem will emerge.
- The bottom (flat, slightly wider end) is where roots will grow.
Make sure you remember which side is which for the next step.
Step 3: Insert Toothpicks
To suspend the pit in water, insert 3 or 4 toothpicks around the pit’s equator, evenly spaced.
- Angle the toothpicks slightly downward.
- Be gentle to avoid cracking the pit.
These toothpicks will hold the pit so its bottom half sits submerged in water, while the top half stays dry.
Step 4: Place in Water
Place the pit, pointy side up, in a glass of water.
- Ensure the bottom half is submerged in water.
- Set the glass in a warm, bright spot out of direct sunlight.
- Change the water every 2-3 days to prevent bacteria and mold.
Ideal temperature:
65°F to 80°F (18°C to 27°C)
Step 5: Wait for the Pit to Sprout
Patience is key — it can take 2 to 8 weeks (sometimes longer) for the pit to sprout.
What you’ll notice:

- The pit will dry and crack open.
- A root will grow from the bottom.
- A small sprout will emerge from the top.
Once the stem reaches 6-8 inches tall, you’re ready for the next step.
Step 6: Trim the Stem
When the stem reaches about 6-8 inches, trim it down to 3 inches.
This encourages stronger, bushier growth.
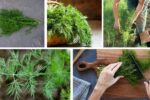
Step 7: Transplant Into Soil
When the roots are thick and the stem has new leaves, it’s time to plant your avocado in soil.
How to Transplant:
- Choose a 10-12 inch diameter pot with good drainage.
- Use a light, well-draining potting mix (a mix for citrus or cactus works well).
- Plant the pit so the top half remains exposed above the soil.
- Water thoroughly and place in a sunny location.
Ongoing Avocado Tree Care
Your young avocado tree will need consistent care to thrive.
Light
Avocado trees love bright, indirect sunlight.
A south-facing window is ideal for indoor plants.
Watering
- Keep the soil consistently moist, but not waterlogged.
- Allow the top inch of soil to dry between waterings.
Tip: Droopy leaves may mean overwatering or underwatering — check the soil moisture to be sure.
Humidity
Avocado trees prefer moderate humidity.
If indoor air is dry, mist the leaves or use a humidity tray.
Fertilizing
Feed your plant with a balanced, water-soluble fertilizer every 4-6 weeks during spring and summer.
Pruning for Shape and Health
Regular pruning encourages a fuller, bushier tree.
- Pinch off new growth at the tips to encourage side shoots.
- Remove dead, weak, or crowded branches as the tree matures.
When Will It Bear Fruit?

Here’s the truth:
An avocado tree grown from a pit can take 5 to 13 years (or more) to produce fruit — and indoor-grown trees often don’t fruit at all. Also, seed-grown trees may not yield fruit identical to the original avocado.
For reliable fruiting, most commercial avocado trees are grafted onto rootstock. Still, many home gardeners grow them from pits for the beauty of the tree itself.
Common Avocado Pit Growing Problems
| Problem | Likely Cause | Solution |
|---|---|---|
| No sprouting after 8 weeks | Old pit, too cold, wrong placement | Try a fresh pit and ensure bright, warm conditions |
| Moldy or foul-smelling water | Stagnant water | Change water every 2-3 days, clean the container |
| Droopy leaves | Overwatering or underwatering | Check soil moisture and adjust watering routine |
| Yellowing leaves | Poor drainage or over-fertilizing | Ensure well-draining soil and feed lightly |
Final Thoughts
Growing an avocado tree from a pit is a fun, simple, and rewarding DIY project that requires minimal supplies but offers plenty of satisfaction. Whether or not your tree eventually bears fruit, you’ll have a beautiful houseplant with lush, glossy leaves to enjoy for years.
With the right care — including consistent watering, good sunlight, and occasional pruning — your avocado seedling can become a lovely, leafy tree that adds a fresh, natural vibe to any space.
So, the next time you slice into a ripe avocado, save the pit and start your own avocado-growing journey. You’ll be amazed at how a little patience can turn kitchen scraps into living greenery.
Leave A Comment