How to Repot a Snake Plant Without Damaging Roots

How to Repot a Snake Plant Without Damaging Roots

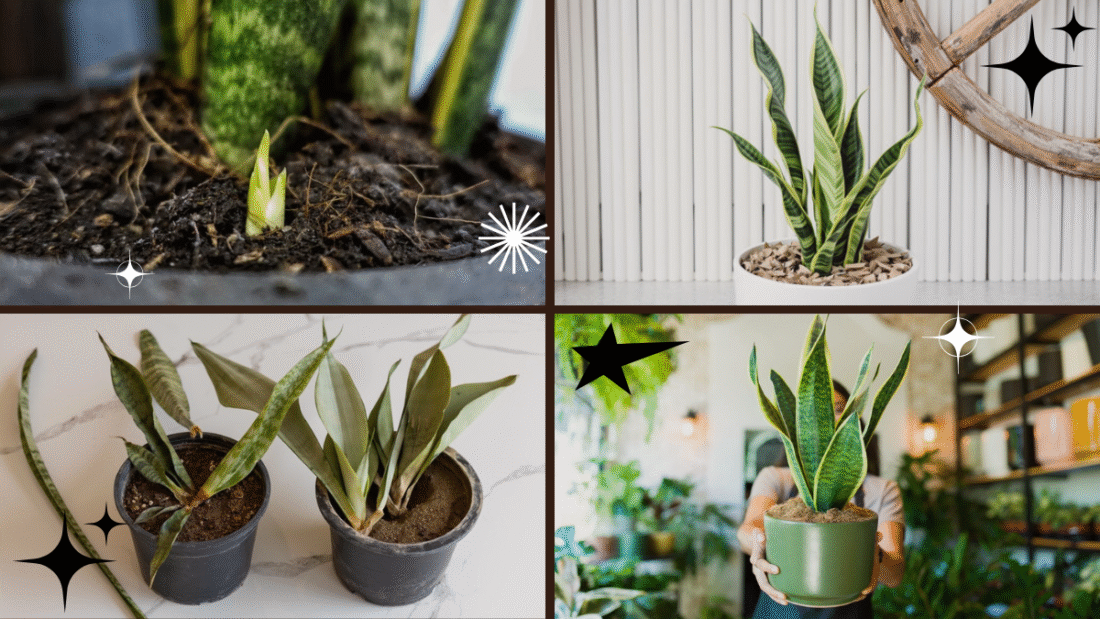
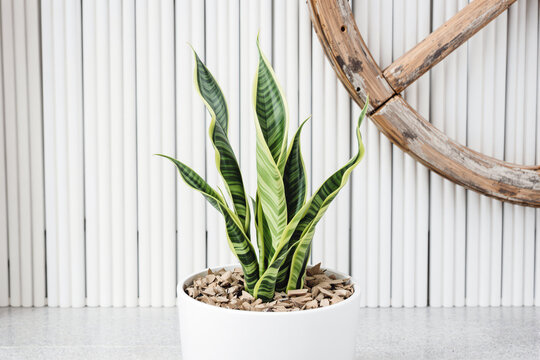
Snake plants (Sansevieria), also known as mother-in-law’s tongue, are some of the most popular houseplants worldwide. Their upright, sword-shaped leaves and striking variegation make them a beautiful addition to any indoor space. Beyond their beauty, snake plants are incredibly hardy and low-maintenance, perfect for both novice and experienced plant lovers.

However, like all plants, snake plants eventually outgrow their pots. Repotting is necessary to give them room to grow and to refresh their soil. But snake plants have delicate, fleshy root systems that can be easily damaged during repotting. Damaged roots can cause stress, slow growth, or even kill your plant.

In this article, you’ll learn step-by-step how to repot your snake plant safely and efficiently, avoiding any harm to the roots and ensuring your plant thrives in its new home.


Why and When to Repot Your Snake Plant

Before we dive into the process, it’s important to understand why and when you should repot your snake plant.

Why Repot?

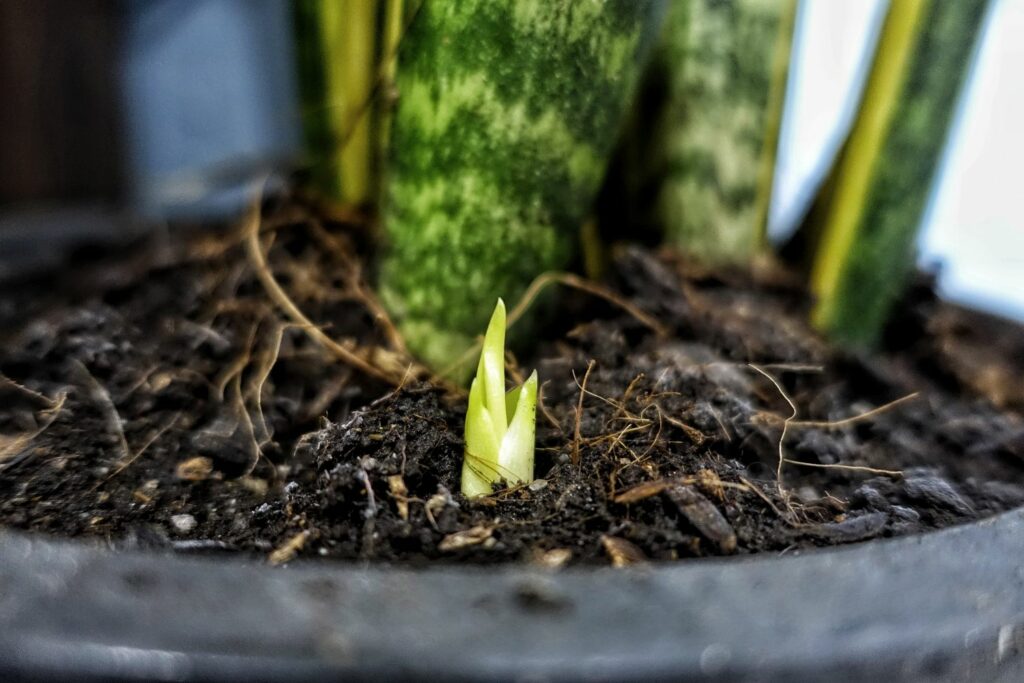
  • Root Bound: Snake plants develop dense root systems that can outgrow their pots, causing roots to circle tightly and eventually strangle the plant.
  • Soil Degradation: Over time, potting soil loses nutrients, becomes compacted, and poorly drains water.
  • Size Upgrade: Your snake plant might simply need a larger pot to continue growing healthily.

When to Repot?

  • Typically every 2-3 years.
  • When roots poke out of drainage holes.
  • When the plant looks top-heavy or soil dries out too fast.
  • Best done in spring or early summer during the plant’s active growing season.

Tools and Materials You’ll Need

To repot your snake plant properly, gather the following:

  • New pot (1-2 inches larger in diameter than current pot)
  • Well-draining potting mix (cactus or succulent mix recommended)
  • Clean gardening gloves
  • Small hand trowel or spoon
  • Scissors or pruning shears (sterilized)
  • Newspaper or plastic sheet (to catch soil mess)
  • Water spray bottle (optional)

Step 1: Choose the Right Pot and Soil

Choosing the proper pot and soil is the foundation of a successful repot.

  • Pot: Select a pot with drainage holes to prevent waterlogging. Snake plants dislike sitting in soggy soil, which causes root rot.
  • Size: Avoid pots that are too big; snake plants prefer snug conditions. Moving up just one or two pot sizes is ideal.
  • Soil: Use a well-draining soil mix designed for succulents or cacti. You can make your own mix by combining standard potting soil with sand or perlite to increase drainage.

Step 2: Prepare Your Work Area

Repotting can get messy, so prepare your workspace by spreading newspaper or a plastic sheet. Wear gloves to protect your hands, especially if your plant has any sharp edges.


Step 3: Remove the Snake Plant from Its Current Pot

  • Gently turn the pot on its side and carefully slide the plant out.
  • If stuck, tap the pot’s sides or squeeze plastic pots gently.
  • Avoid pulling the plant by its leaves to prevent breakage.

Step 4: Inspect and Clean the Roots

Once out, inspect the root system carefully.

  • Remove old soil gently by shaking or lightly brushing the roots.
  • Trim any dead, black, mushy, or rotten roots with sterilized scissors.
  • Avoid disturbing the healthy roots too much to prevent shock.

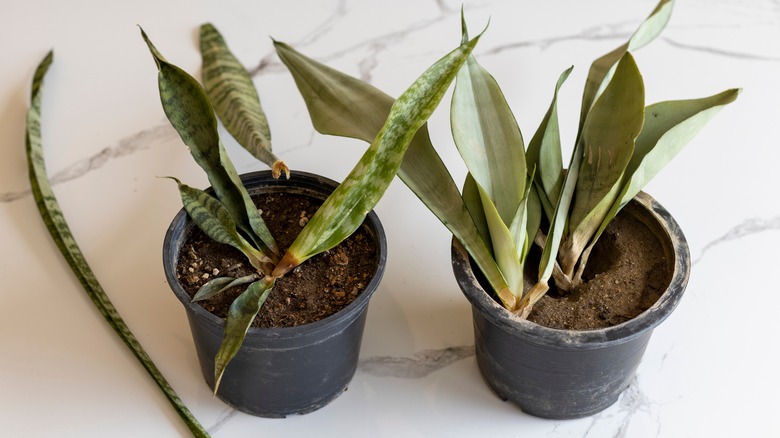
Step 5: Loosen the Root Ball (If Root Bound)

Snake plants often get root bound, meaning the roots form a tight mass.

  • Gently tease apart the roots with your fingers to encourage outward growth.
  • If the roots are extremely tangled, trim a few outer roots to stimulate new growth.

Step 6: Add Soil to the New Pot

  • Place a small layer of fresh potting mix at the bottom of the new pot.
  • Make a small mound in the center to spread the roots over.

Step 7: Position the Plant and Fill the Pot

  • Place your snake plant on top of the soil mound, spreading roots evenly.
  • Fill in around the roots with potting mix, pressing gently to eliminate air pockets.
  • Leave about an inch of space from the rim for watering.

Step 8: Water the Plant Sparingly

Snake plants prefer dry conditions and are susceptible to root rot.

  • Water lightly right after repotting to settle the soil.
  • Allow the soil to dry completely before watering again (typically 2-3 weeks).
  • Avoid overwatering especially in the first few weeks.

Step 9: Provide Proper Post-Repot Care

Your snake plant will be adjusting to its new home and needs some care:

  • Light: Place it in indirect, bright light but avoid direct harsh sunlight initially.
  • Temperature: Keep it in a warm environment between 60-85°F (15-29°C).
  • Humidity: Average household humidity is fine.
  • Avoid Fertilizer: Do not fertilize for at least 4-6 weeks after repotting to reduce stress.

Common Mistakes to Avoid When Repotting Snake Plants

1. Using Too Large a Pot

Big pots retain too much moisture, increasing root rot risk.

2. Overwatering After Repotting

Freshly disturbed roots are vulnerable; overwatering can drown them.

3. Disturbing Roots Excessively

Minimize root disturbance to prevent transplant shock.

4. Planting Too Deep

Ensure the base of the leaves sits just above the soil line.


Signs Your Snake Plant Needs Repotting

  • Roots visibly growing out of drainage holes.
  • Soil dries out unusually quickly.
  • Plant appears crowded or unstable.
  • Leaves are smaller or growth has slowed.

Additional Tips for Healthy Snake Plants

  • Snake plants thrive on neglect—less is more with water.
  • Clean leaves occasionally to remove dust and improve photosynthesis.
  • Rotate plants every few weeks for even growth.
  • Use sharp, sterilized tools to prevent disease.

FAQs About Repotting Snake Plants

Q: How often should I repot my snake plant?
A: Every 2-3 years or when root bound.

Q: Can I repot during winter?
A: It’s best to repot during the growing season (spring/summer) for faster recovery.

Q: Should I trim the leaves while repotting?
A: Only remove damaged or dead leaves to keep the plant healthy.

Q: What if my snake plant is root bound but healthy?
A: You can carefully loosen roots and repot or divide the plant if desired.


Conclusion

Repotting your snake plant doesn’t have to be stressful or damaging to its roots. By following these careful, detailed steps—choosing the right pot and soil, gently handling the roots, and providing post-repot care—you can ensure your snake plant continues to grow strong and healthy for years to come.

Snake plants are incredibly resilient, and a little bit of careful attention during repotting will reward you with a lush, vibrant houseplant that purifies your air and beautifies your home.

Happy gardening!

How to Raise Lavender Plants in Any Climate

How to Raise Lavender Plants in Any Climate

Lavender, with its silvery-green foliage and fragrant purple blooms, is one of the most beloved herbs worldwide. Known for its calming scent, beautiful flowers, and versatility in culinary and medicinal uses, lavender is a favorite among gardeners and plant lovers alike. However, many hesitate to grow lavender because of concerns about their local climate — whether it’s too hot, too cold, too humid, or too dry.

The good news is that with the right knowledge and techniques, you can successfully raise lavender plants in any climate. This guide will walk you through all the essential steps and tips to grow thriving lavender no matter where you live.


Why Grow Lavender?

Before diving into the how-to, let’s appreciate why lavender is worth growing:

  • Aromatic beauty: Lavender’s scent calms the mind and can freshen up your home naturally.
  • Pollinator magnet: Bees and butterflies love lavender, making it great for garden biodiversity.
  • Versatile use: Lavender is perfect for cooking, herbal remedies, and DIY beauty products.
  • Low maintenance: Once established, lavender plants require minimal care, especially if suited to your climate.

Understanding Lavender Varieties and Climate Tolerance

To raise lavender successfully, you need to choose the right variety for your climate. Here are the main types of lavender:

  • English Lavender (Lavandula angustifolia): Hardy, best for cooler climates, withstands cold winters.
  • French Lavender (Lavandula dentata): Thrives in warm, dry climates, less cold tolerant.
  • Spanish Lavender (Lavandula stoechas): Prefers Mediterranean climates, can tolerate some humidity.
  • Lavandin (Lavandula x intermedia): A hybrid, vigorous grower, adaptable to a range of climates.

Choosing the variety that matches your climate conditions is the first step toward success.


1. Preparing the Right Soil

Lavender loves well-draining soil and dislikes waterlogged roots.

  • Ideal soil: Sandy or gritty loam with a neutral to slightly alkaline pH (6.5 to 7.5).
  • Amend heavy clay soils: Add coarse sand or organic matter such as compost to improve drainage.
  • Raised beds or containers: Great options for improving drainage and controlling soil quality, especially in humid or rainy climates.

2. Location and Sunlight

Lavender is a sun lover and needs full sunlight for at least 6-8 hours daily.

  • Choose a sunny, sheltered spot protected from harsh afternoon winds.
  • In extremely hot climates, afternoon partial shade can help prevent leaf scorch.
  • In colder regions, a south-facing wall or raised bed can provide extra warmth.

3. Watering Lavender Naturally and Efficiently

Lavender is drought tolerant and prefers to dry out between waterings.

  • Water newly planted lavender regularly until established (about 6-8 weeks).
  • After establishment, water deeply but infrequently — about once every 1-2 weeks.
  • Avoid overwatering and soggy soil, which leads to root rot.
  • In humid climates, reduce watering frequency and ensure good air circulation around plants.

4. Temperature and Climate Adaptations

Growing Lavender in Hot, Dry Climates

  • Use mulch like gravel or small rocks to retain soil moisture and keep roots cool.
  • Provide afternoon shade or plant where they receive morning sun.
  • Water in the early morning to reduce evaporation.

Growing Lavender in Cold, Frosty Climates

  • Choose hardy varieties like English lavender.
  • Use raised beds to improve drainage and reduce frost risk.
  • Mulch heavily with straw or leaves before winter to protect roots.
  • Consider growing lavender in pots to move indoors during extreme cold.

Growing Lavender in Humid or Rainy Climates

  • Plant lavender on slopes or raised areas to prevent waterlogging.
  • Space plants to ensure good airflow and reduce fungal diseases.
  • Prune regularly to open up the plant and allow drying.

5. Fertilizing Lavender Naturally

Lavender is a light feeder and doesn’t require heavy fertilization.

  • Use well-composted organic matter mixed into the soil before planting.
  • Apply a light feeding of balanced organic fertilizer or compost tea in early spring.
  • Avoid high-nitrogen fertilizers that encourage excessive foliage over flowers.

6. Pruning for Health and Flowering

Pruning is crucial for healthy, bushy lavender plants and prolonged flowering.

  • Prune back after the first bloom to encourage a second bloom and prevent legginess.
  • In late summer or early fall, trim about one-third of the plant but avoid cutting into old woody stems.
  • Regular pruning also helps prevent disease by improving airflow.

7. Propagating Lavender Easily

Propagation lets you multiply your plants without buying new ones.

  • Cuttings: Take 3-4 inch softwood cuttings in spring, dip in rooting hormone, and plant in sandy soil.
  • Layering: Bend a low stem to the ground and cover with soil until roots form.
  • Seeds: More challenging and slower but possible; start indoors in spring.

8. Dealing with Pests and Diseases Naturally

Lavender is generally pest-resistant, but issues can arise in some climates.

  • Fungal diseases such as root rot and leaf spot occur in wet, humid conditions — ensure proper drainage.
  • Aphids and spittlebugs can appear but can be controlled with insecticidal soap or neem oil.
  • Prevent problems by maintaining good airflow, proper watering, and regular pruning.

9. Harvesting and Using Lavender

Knowing when and how to harvest lavender ensures the best fragrance and longevity.

  • Harvest when buds have formed but before full bloom for the strongest scent.
  • Cut stems early in the morning after dew evaporates.
  • Hang bundles upside down in a dark, dry, well-ventilated place to dry.
  • Use dried lavender in sachets, teas, cooking, or essential oil making.

Tips for Growing Lavender in Containers

  • Use pots with excellent drainage holes.
  • Choose a light, sandy potting mix.
  • Move containers indoors or to a sheltered area during extreme weather.
  • Regularly check soil moisture and adjust watering accordingly.

Common Problems and How to Solve Them

ProblemCauseSolution
Yellowing leavesOverwatering or poor drainageReduce watering, improve drainage
No bloomsToo much nitrogen, lack of sunUse balanced fertilizer, ensure full sun exposure
Woody stemsLack of pruningPrune regularly to encourage fresh growth
Fungal diseasesHumidity, wet soilImprove airflow, avoid overhead watering

Final Thoughts: Growing Lavender Successfully Anywhere

Raising lavender plants in any climate is very achievable when you tailor your approach to local conditions. By selecting the right variety, providing proper soil and sunlight, watering thoughtfully, and using natural fertilizing and pruning methods, you can enjoy beautiful, fragrant lavender all year round.

Lavender not only enhances your garden’s beauty but also fills your home with soothing aromas, supports pollinators, and offers many practical uses. Whether you live in a hot desert, humid tropics, chilly north, or temperate zone, lavender can thrive with a little patience and care.

How to Prune Lavender Plants to Keep Them Healthy: A Complete Gardener’s Guide

How to Prune Lavender Plants to Keep Them Healthy: A Complete Gardener’s Guide

Lavender is one of the most beloved plants in the garden world — known for its soothing fragrance, striking purple blooms, and ability to attract pollinators like bees and butterflies. Native to the Mediterranean, this hardy, drought-tolerant shrub is surprisingly easy to care for, provided you understand one crucial maintenance task: pruning.

While lavender is often considered a “plant it and forget it” type, regular pruning is essential to keep it looking tidy, vigorous, and blooming at its best year after year. Without pruning, lavender can become leggy, woody, and prone to splitting, ultimately shortening its lifespan.

In this comprehensive, step-by-step guide, we’ll show you exactly how to prune lavender plants to keep them healthy, encourage lush growth, and prolong their beautiful life in your garden.


Why Pruning Lavender Is So Important

Pruning lavender isn’t just a cosmetic practice — it directly impacts the plant’s health and longevity. Let’s break down the key reasons:

Encourages Bushier Growth

Without regular pruning, lavender stems grow long and spindly. Cutting them back encourages new shoots to sprout from the base, keeping the plant compact and dense.

Prevents Woody Centers

Unpruned lavender often develops a woody center, which weakens the plant and leads to an untidy, uneven appearance. Pruning reduces this tendency.

Boosts Flower Production

Pruned plants produce more flowers, as energy is directed toward new, productive growth rather than maintaining old, woody stems.

Extends Plant Lifespan

By removing old growth, pruning stimulates rejuvenation and can dramatically increase the lifespan of your lavender plant — often adding several healthy years.


When Should You Prune Lavender?

Timing is everything when it comes to pruning lavender. The best times are:

After the First Bloom (Mid to Late Summer)

Lightly prune to shape the plant and remove spent flower spikes. This helps tidy the plant and may encourage a second, smaller bloom.

End of the Growing Season (Early Fall or Early Spring)

Perform a more substantial pruning once flowering has finished for the season. This will prepare the plant for winter and promote robust growth come spring.

Important Note:
Avoid heavy pruning in late fall in colder regions, as new growth may not have time to harden before frost.


Types of Lavender and Their Pruning Needs

Different types of lavender may require slightly different pruning approaches. The most common varieties include:

  • English Lavender (Lavandula angustifolia) — Cold hardy and perfect for garden borders; responds well to both light and hard pruning.
  • French Lavender (Lavandula dentata) — Less cold-hardy, prefers milder winters, and benefits from lighter, more frequent trims.
  • Spanish Lavender (Lavandula stoechas) — Distinctive “rabbit ear” flowers, requires lighter pruning, particularly in cooler climates.

For all types, the general pruning techniques are similar, with adjustments in severity depending on variety and climate.


Tools You’ll Need

Before you begin, gather these essential pruning tools:

  • Sharp hand pruners or garden shears
  • Gloves (lavender can be tough and slightly resinous)
  • A clean cloth or disinfectant (to sanitize blades between plants)

Keeping your tools sharp and clean is important to make clean cuts and reduce the risk of spreading disease.


How to Prune Lavender: Step-by-Step

Let’s walk through the pruning process for healthy, flourishing lavender plants.


Step 1: Deadhead Spent Blooms

As the first flowering season winds down, use sharp snips to cut off spent flower spikes just above the foliage. This improves the plant’s appearance and may trigger a light rebloom.

Pro Tip:
Cut flower spikes with about 1–2 inches of stem attached if you’d like to dry them for sachets or decorations.


Step 2: Light Summer Shaping

After deadheading, gently shape the plant by snipping off any stray or overly long stems to maintain a rounded, mound-like form.

Avoid cutting into the old, woody base at this stage — stick to the soft green growth.


Step 3: Hard Prune at Season’s End

In early fall or early spring (depending on your climate), give your lavender a more substantial pruning:

  1. Reduce overall size by about one-third to one-half.
  2. Cut just above a set of new green leaf growth.
    Avoid cutting into bare, woody stems — lavender struggles to regenerate from old wood.

If the plant has become very woody in the center, prune conservatively and aim to gradually rejuvenate it over multiple seasons.


Step 4: Remove Dead or Diseased Stems

While pruning, inspect the plant for any dead, damaged, or diseased stems and remove them cleanly at the base.

This improves airflow and reduces the risk of fungal diseases like root rot and botrytis.


What to Avoid When Pruning Lavender

Even though lavender is forgiving, a few mistakes can set your plant back. Here’s what to steer clear of:

  • Never cut into old wood unless absolutely necessary.
    Lavender rarely grows back from bare stems.
  • Avoid pruning too late in the fall.
    New growth won’t have time to harden before winter, increasing the risk of frost damage.
  • Don’t skip annual pruning.
    An unpruned lavender plant quickly turns woody, sparse, and unproductive.

Can You Rejuvenate an Old, Woody Lavender Plant?

If your lavender plant has been neglected and become woody and sparse, it may be possible to rejuvenate it gradually:

  1. In early spring, prune back the outer growth by one-third, being careful not to cut into old wood.
  2. Lightly fertilize with a balanced, slow-release fertilizer.
  3. Keep it consistently watered (but not soggy) through the growing season.
  4. Continue gentle, gradual pruning over the next 1–2 years to encourage new shoots.

In severe cases, it might be best to start fresh with a new plant.


Bonus: Harvesting and Drying Lavender While Pruning

When pruning flower spikes, why not make use of those fragrant stems? Here’s how:

  1. Harvest in the morning after dew has dried but before the heat of the day.
  2. Bundle stems together and secure with a rubber band.
  3. Hang upside down in a dark, dry, well-ventilated room.
  4. After 2–4 weeks, your lavender will be dry and ready for crafts, teas, or sachets.

Conclusion

Pruning is one of the most important — yet often overlooked — aspects of lavender care. By learning how to properly prune lavender plants, you’ll not only keep your garden looking neat and beautiful but also promote vigorous, healthy growth and abundant blooms.

Remember to deadhead regularly, shape your plants in summer, and give them a hard prune at season’s end while avoiding cuts into old wood. With these simple yet essential techniques, your lavender will thrive for years, rewarding you with clouds of purple flowers and that irresistible, calming scent.

How to Prune a Tomato Plant for Better Growth: A Complete Gardener’s Guide

How to Prune a Tomato Plant for Better Growth: A Complete Gardener’s Guide

Tomatoes are among the most popular and rewarding plants to grow in home gardens. Whether you’re after juicy slicing tomatoes, tangy cherry varieties, or meaty paste types, a bit of care and attention can dramatically improve your harvest. One of the most effective ways to boost your tomato yield and plant health is through proper pruning.

Many beginner gardeners wonder if pruning is truly necessary — and the answer is a confident yes for certain types of tomato plants. Done correctly, pruning not only improves airflow and reduces disease but also encourages stronger, more productive plants.

In this comprehensive guide, we’ll cover everything you need to know about how to prune a tomato plant for better growth — including why it matters, when to do it, what tools you’ll need, and a step-by-step method you can follow today.


Why Should You Prune Tomato Plants?

Pruning is the process of selectively removing certain parts of a plant — typically stems, leaves, and suckers — to direct energy toward fruit production rather than excessive foliage growth. Let’s explore the key benefits of pruning tomato plants:

Better Air Circulation

Dense foliage traps moisture, creating the perfect environment for fungal diseases like blight and powdery mildew. Pruning improves airflow and reduces disease risk.

Higher-Quality Fruits

Pruning directs the plant’s resources to fewer, more robust fruits rather than lots of smaller, less flavorful tomatoes.

Faster Ripening

With less foliage shading the plant, sunlight reaches the fruits more directly, helping them ripen evenly and quickly.

Easier Maintenance and Harvesting

A pruned plant is tidier, making it easier to water, check for pests, and pick ripe tomatoes.


Determinate vs. Indeterminate Tomatoes: Know the Difference

Before you start pruning, it’s crucial to understand what type of tomato plant you’re working with, as pruning practices differ.

Determinate (Bush) Tomatoes:

  • Grow to a fixed height (about 3-4 feet).
  • Produce most of their fruit over a short period.
  • Minimal pruning is recommended — only remove dead or diseased leaves.

Indeterminate (Vining) Tomatoes:

  • Keep growing and producing fruit throughout the season.
  • Can reach 6-10 feet tall or more.
  • Benefit greatly from regular pruning.

This article focuses primarily on pruning indeterminate tomatoes, but we’ll mention light maintenance tips for determinate varieties too.


When Should You Prune Tomato Plants?

The best time to start pruning is when your tomato plant reaches 12-18 inches tall and begins producing side shoots or “suckers.”

Ideal pruning time:

  • In the early morning on a dry, sunny day.
    This reduces stress on the plant and minimizes disease risk, as cuts heal faster in dry conditions.

Continue pruning every 7-10 days throughout the growing season for indeterminate varieties.


What Tools Do You Need for Pruning?

Keeping your tools clean and sharp is essential to avoid spreading plant diseases.

Recommended tools:

  • Sharp garden shears or pruning scissors
  • Garden gloves
  • Rubbing alcohol or a disinfectant spray (to sanitize tools between plants)

For small suckers, you can also use your fingers to pinch them off cleanly.


How to Prune a Tomato Plant: Step-by-Step Guide

Let’s break down the pruning process into clear, manageable steps.


Step 1: Identify the Suckers

Suckers are small shoots that grow from the junction (called the leaf axil) between a branch and the main stem.

They typically appear as small, leafy growths and will eventually turn into full branches if left unchecked. On indeterminate tomatoes, these suckers can overrun the plant and sap energy away from fruit production.


Step 2: Remove Lower Leaves

Start by removing any leaves or branches below the first flower cluster. These lower leaves are more prone to soil splashing, pests, and fungal infections.

Use clean scissors or gently pinch them off.


Step 3: Pinch Off Small Suckers

Once your plant starts producing suckers (usually about 6-8 inches tall), pinch off the small ones with your fingers while they’re tender and easy to remove.

Important Tip:
Leave suckers above the topmost flower cluster if you want to continue extending the vine.


Step 4: Decide on a Pruning Style

You can choose one of several pruning strategies, depending on how much growth you want to allow:

  • Single-Stem Pruning:
    Keep one main stem and remove all suckers. This method is ideal for limited space and supports early fruiting.
  • Two-Stem Pruning:
    Allow the main stem and one additional sucker (usually the one just below the first flower cluster) to grow. Remove all other suckers.
  • Three-Stem Pruning:
    Allow the main stem and two strong suckers to grow. This method balances fruit production with plant vigor.

Step 5: Top the Plant (Optional)

Toward the end of the growing season, you can top indeterminate tomato plants by cutting off the growing tip of the main stem about 1-2 feet above the highest flower cluster.

This stops new growth, forcing the plant to direct its energy into ripening existing fruits.


Pruning Determinate Tomatoes

For determinate (bush) tomato varieties:

  • Only remove dead, yellowing, or diseased leaves.
  • Avoid removing suckers, as this can reduce your harvest.
  • A light trim to improve airflow is fine, but heavy pruning is unnecessary and often harmful.

Common Pruning Mistakes to Avoid

Even experienced gardeners can make mistakes when pruning tomatoes. Here’s what to watch out for:

  • Over-pruning:
    Removing too much foliage reduces photosynthesis and stresses the plant.
  • Pruning during wet weather:
    Moisture increases the risk of fungal infection at cut sites.
  • Using dirty tools:
    Always sanitize shears between plants to prevent disease spread.
  • Pruning determinate varieties excessively:
    This can dramatically reduce your harvest.

Frequently Asked Questions

Q: Can I prune tomato plants after they start flowering?
Yes — in fact, it’s common to continue pruning throughout the season. Focus on removing suckers and lower leaves while leaving flower clusters and fruit untouched.

Q: Should I prune the leaves around ripening tomatoes?
You can remove a few leaves shading the fruit to increase sun exposure for faster ripening, but avoid stripping too many, as leaves protect against sunscald.

Q: What if I forgot to prune my tomatoes early?
It’s never too late to start. Remove small suckers and damaged leaves anytime, but be cautious not to shock the plant by removing too much at once.


Conclusion

Pruning tomato plants isn’t just for appearance — it plays a vital role in promoting stronger growth, reducing disease, and producing larger, healthier fruit. While determinate (bush) tomatoes require minimal pruning, indeterminate (vining) varieties thrive with regular attention.

By following the simple, step-by-step guide we’ve outlined here, you’ll enjoy a tidier garden, a more productive harvest, and healthier tomato plants all season long.

So grab those garden shears, keep an eye out for those pesky suckers, and watch your tomato crop flourish like never before!

How to Protect Plants from Freezing Temperatures: A Complete Gardener’s Guide

How to Protect Plants from Freezing Temperatures: A Complete Gardener’s Guide

As the seasons shift and temperatures begin to drop, every gardener faces a common challenge — protecting plants from freezing temperatures. Frost can cause severe damage to plant cells, stunt growth, and even kill your favorite flowers, vegetables, and shrubs overnight. The good news? With some thoughtful planning and practical methods, you can safeguard your plants and help them survive the cold months.

In this comprehensive guide, we’ll explore the science behind frost damage, identify which plants are most vulnerable, and outline simple yet effective techniques to protect your garden from freezing temperatures. Whether you’re a backyard hobbyist or a seasoned green thumb, these tips will keep your plants thriving, even when winter strikes.


Why Do Freezing Temperatures Harm Plants?

Understanding how cold weather affects plants is the first step in protecting them effectively. When temperatures fall below 32°F (0°C), the water inside plant cells can freeze, forming ice crystals. These crystals puncture cell walls, leading to dehydration, blackened foliage, wilting, and death of plant tissues.

Frost damage typically happens during:

  • Clear nights when heat radiates away from the ground.
  • Calm conditions with no wind to mix the air.
  • Sudden temperature drops after mild weather.

Some plants naturally tolerate frost better than others, but many garden favorites like tomatoes, peppers, impatiens, and tropical plants need extra care when temperatures fall.


Which Plants Are Most Vulnerable to Frost?

Identifying which of your plants need protection is essential. Here’s a quick breakdown:

Highly Vulnerable:

  • Tropical plants (banana trees, hibiscus)
  • Tender annuals (marigolds, petunias, zinnias)
  • Warm-weather vegetables (tomatoes, peppers, cucumbers)
  • Houseplants placed outdoors

Moderately Vulnerable:

  • Young perennials and newly planted shrubs
  • Certain herbs (basil, cilantro)
  • Citrus trees in pots

Cold-Hardy:

  • Leafy greens (kale, spinach)
  • Root crops (carrots, turnips)
  • Many native and evergreen shrubs

How to Prepare Plants for Cold Weather

The best protection against frost damage begins before winter arrives. Here’s how to prepare your garden for freezing temperatures:

Know Your Frost Dates

Find out your region’s average first and last frost dates. This helps you plan when to start moving sensitive plants indoors or cover them up.

Harden Off Plants

Gradually expose tender plants to cooler outdoor temperatures over a week or two. This process, known as hardening off, helps build cold resistance.

Prune and Clean

Remove any dead, diseased, or weak growth in late fall. Damaged parts are more susceptible to frost and can sap the plant’s strength.

Mulch Generously

Apply a 2-4 inch layer of organic mulch (straw, shredded leaves, bark chips) around the base of plants. Mulch acts as insulation, stabilizing soil temperatures and protecting roots from freezing.


Practical Ways to Protect Plants from Freezing Temperatures

Let’s dive into proven, practical methods you can use to shield your plants from the cold.


Move Potted Plants Indoors

For houseplants, tender perennials, and tropicals in containers:

  • Bring them inside before the first frost.
  • Place them in bright, indirect light near windows.
  • Reduce watering, as plant growth slows in cooler conditions.

Use Garden Fabrics and Covers

Covering plants is one of the simplest, most effective frost protection techniques.

Options include:

  • Frost cloths
  • Old bed sheets
  • Lightweight blankets
  • Burlap

How to Use Them:

  • Drape covers over plants, making sure they reach the ground to trap warm air.
  • Avoid letting fabric touch leaves directly to prevent damage.
  • Secure covers with rocks or stakes.
  • Remove covers during the day when temperatures rise above freezing.

Build Cloche or Mini-Greenhouses

A cloche is a small, transparent cover that protects individual plants.

DIY Ideas:

  • Cut the bottom off a plastic soda bottle and place it over seedlings.
  • Use clear plastic storage containers or glass jars.
  • Build small hoop houses with PVC pipe and plastic sheeting for raised beds.

Water Before a Frost

Moist soil holds more heat than dry soil. Watering plants in the afternoon before an expected frost can help radiate heat overnight and slightly increase air temperature around the plant.


Add Heat Sources

In very cold conditions:

  • Use string lights (non-LED) for gentle warmth in greenhouses.
  • Place hot water bottles or jugs under covers overnight.
  • Install outdoor heaters for larger gardens.

Always prioritize safety when using electrical or heat sources outdoors.


Mulch Heavily

For in-ground perennials and shrubs:

  • Mound mulch around the base of the plant.
  • Use straw, bark chips, pine needles, or shredded leaves.
  • Keep mulch 1-2 inches away from the stem or trunk to prevent rot.

Move Sensitive Plants Together

Group pots and tender plants in a protected area, like against a south-facing wall or inside a covered patio. These spots retain more heat overnight.


Plant Strategically

When planning your garden, position frost-sensitive plants:

  • Near walls or fences (which reflect heat)
  • Under the canopy of larger trees (which provide insulation)
  • In raised beds (which drain cold air better than flat ground)

How to Revive Frost-Damaged Plants

If your plants suffer frost damage:

  • Don’t prune immediately. Wait until after the danger of frost has passed and new growth appears.
  • Remove dead or mushy foliage and stems.
  • Water and fertilize moderately to encourage recovery.
  • Protect surviving plants during future cold snaps.

Preventing Future Cold Damage

To reduce long-term frost risks:

  • Choose more cold-hardy plant varieties.
  • Install windbreaks (like fences or hedges) to buffer cold winds.
  • Invest in a cold frame or greenhouse for overwintering delicate plants.
  • Maintain healthy plants through the growing season; strong, well-fed plants resist cold damage better.

Conclusion

Protecting plants from freezing temperatures may seem daunting, but with a little preparation and the right techniques, you can keep your garden thriving even when the frost comes calling. From simple fabric covers to strategic planting and clever heat sources, there are many ways to shield your precious plants and give them a fighting chance against the cold.

As a gardener, being attentive to changing weather and having a few frost-protection tricks up your sleeve ensures your garden stays lush and lively year after year. And there’s nothing quite like the satisfaction of seeing your flowers bloom and your vegetables flourish in spring, knowing you helped them weather the winter chill.

How to Propagate Plants for Your Garden: A Complete, Easy-to-Follow Guide

How to Propagate Plants for Your Garden: A Complete, Easy-to-Follow Guide

There’s something truly magical about watching a tiny cutting transform into a thriving plant. Propagating plants is not just a cost-effective way to expand your garden; it’s also a deeply satisfying process that connects you with nature on a personal level. Whether you want to multiply your favorite flowers, grow new herbs, or create a backyard brimming with life, learning how to propagate plants is a skill every gardener should master.

In this comprehensive guide, we’ll explain how to propagate plants for your garden using various methods. You’ll learn what tools you need, when to propagate, the best techniques for different plant types, and practical aftercare tips to ensure success.


What Is Plant Propagation?

Plant propagation is the process of creating new plants from existing ones. It can be done naturally (through seeds and runners) or with a gardener’s help using cuttings, division, layering, and more. The main benefit? You can multiply plants without buying new ones — and often with faster results.


Why Should You Propagate Plants?

Here’s why propagation is worth adding to your gardening skills:

  • Save money on new plants
  • Preserve rare or heirloom varieties
  • Share plants with friends and family
  • Control your garden’s layout and variety
  • Increase your garden’s biodiversity

When Is the Best Time to Propagate Plants?

The ideal propagation time depends on the plant type and propagation method:

  • Spring to early summer is typically best for most plants, as they’re in active growth.
  • Late summer to early fall works well for hardwood cuttings and root division.
  • Always avoid propagating when a plant is stressed, dormant, or in full bloom.

Different Methods of Plant Propagation

Let’s break down the most popular propagation techniques and how to do them successfully:


1. Propagation by Seeds

Seed propagation is the most natural way to grow plants, though it can take longer than other methods.

How to Do It:

  • Collect seeds from healthy, mature plants.
  • Sow them in seed trays or pots filled with seed-starting mix.
  • Lightly cover with soil and mist with water.
  • Place in a warm, bright location.
  • Keep the soil consistently moist until germination.

Best for:
Vegetables, annual flowers, herbs, native plants.

Tip: Soak hard-coated seeds (like morning glories or nasturtiums) overnight before planting to improve germination.


2. Propagation by Cuttings

Cuttings propagation involves taking a part of a plant — usually a stem, leaf, or root — and encouraging it to grow roots.

Types of Cuttings:

  • Softwood cuttings: New, flexible growth (spring-early summer)
  • Semi-hardwood cuttings: Partially mature wood (summer-early fall)
  • Hardwood cuttings: Dormant, woody stems (fall-winter)

How to Do It:

  • Use clean, sharp scissors to cut a healthy, disease-free section of the plant.
  • Remove lower leaves, leaving 2-4 at the top.
  • Dip the cut end in rooting hormone (optional, but helpful).
  • Plant in a pot with well-draining soil or a mix of peat and perlite.
  • Mist and cover with a plastic bag to maintain humidity.
  • Place in bright, indirect light and keep soil moist.

Best for:
Herbs, houseplants, roses, hydrangeas, coleus, succulents.


3. Propagation by Division

Division involves splitting a mature plant into several parts, each with roots and shoots attached.

How to Do It:

  • Remove the plant from the ground or pot.
  • Gently shake off excess soil.
  • Use your hands, a sharp knife, or spade to separate clumps.
  • Replant divisions immediately in prepared soil or pots.
  • Water thoroughly.

Best for:
Perennials like hostas, daylilies, ferns, ornamental grasses.

Tip: Divide plants in early spring or after blooming in fall for best results.


4. Propagation by Layering

Layering encourages a plant stem to form roots while still attached to the parent plant.

How to Do It:

  • Select a flexible, healthy stem.
  • Bend it down to the soil surface.
  • Remove leaves from the section touching the soil.
  • Bury that part under a few inches of soil, securing with a stone or U-shaped pin.
  • Keep soil moist.
  • Once roots form, cut the new plant from the parent and transplant it.

Best for:
Strawberries, raspberries, trailing shrubs, climbing vines, philodendrons.


5. Propagation by Grafting

Grafting involves joining parts of two plants — a rootstock and a scion (shoot or bud) — so they grow as one.

How to Do It:

  • Choose compatible plants.
  • Cut both the scion and rootstock at matching angles.
  • Join their cut surfaces and secure with grafting tape.
  • Keep in a sheltered, humid location until the graft heals.

Best for:
Fruit trees, roses, ornamental trees.


Tools You’ll Need for Propagation

To make your propagation process smooth and successful, gather:

  • Sharp pruning shears or scissors
  • Clean, sterilized knife
  • Rooting hormone powder or gel
  • Potting mix or seed-starting soil
  • Seed trays, small pots, or containers
  • Plastic bags or propagation dome
  • Spray bottle
  • Labels or plant markers

Tip: Always clean your tools before and after use to prevent disease transfer.


Aftercare for Newly Propagated Plants

Once your new plants are in their growing medium, follow these care tips:

  • Light: Bright, indirect light is best for young cuttings and seedlings.
  • Water: Keep soil consistently moist but not soggy.
  • Humidity: Use plastic covers or mist regularly to maintain humidity.
  • Temperature: Maintain a warm, stable environment around 65-75°F (18-24°C).
  • Gradual Adjustment: Once established, gradually expose new plants to more light and outdoor conditions.

Common Propagation Mistakes and How to Avoid Them

  • Overwatering: Leads to rot. Keep soil slightly moist, not waterlogged.
  • Using unhealthy cuttings: Always pick disease-free, vigorous growth.
  • Skipping callus formation: Some cuttings (like succulents) need to callus over before planting.
  • Neglecting humidity: Dry air can cause cuttings to shrivel. Cover with plastic to trap moisture.
  • Insufficient light: New plants need plenty of indirect light for photosynthesis.

Conclusion

Propagating plants for your garden isn’t just a money-saving technique — it’s an enriching way to connect with your plants and extend the life of your garden favorites. Whether you choose seed sowing, taking cuttings, or dividing perennials, propagation gives you the power to fill your garden with new life, color, and creativity.

Start experimenting with one or two propagation methods, and soon you’ll have a flourishing garden filled with plants you nurtured yourself. Once you master the basics, you might even find yourself swapping cuttings with friends, passing down cherished plants, and enjoying a personal, thriving plant collection for years to come.

How to Propagate and Plant a Christmas Cactus: A Complete Step-by-Step Guide

How to Propagate and Plant a Christmas Cactus: A Complete Step-by-Step Guide

If you’re looking to grow a houseplant that not only brightens your home but also carries a beautiful family tradition, the Christmas Cactus is a wonderful choice. Known for its elegant, drooping stems and vibrant, tubular flowers that bloom around the holiday season, this charming succulent is easy to propagate, plant, and care for.

In this complete guide, we’ll explore everything you need to know about propagating and planting a Christmas Cactus successfully — from choosing healthy cuttings to the perfect potting mix, planting techniques, and aftercare. Whether you’re a beginner or a seasoned plant enthusiast, you’ll be able to expand your collection and keep your home blooming every festive season.


Why Grow a Christmas Cactus?

Unlike many desert cacti, the Christmas Cactus (Schlumbergera bridgesii) hails from Brazil’s tropical rainforests and grows in shaded, humid environments. It’s prized for:

  • Brilliant blooms in shades of pink, red, white, yellow, or purple
  • Low-maintenance nature — perfect for homes and offices
  • Easy propagation for gifting or expanding your indoor garden
  • Longevity — some family plants have been passed down for generations!

The Best Time to Propagate a Christmas Cactus

The ideal time to propagate is:

  • After the blooming season (typically late winter to early spring)
  • When the plant is actively growing and producing new stems
  • Avoid propagating while it’s in bloom, as this can stress the plant and reduce the chances of successful rooting.

How to Propagate a Christmas Cactus

You can propagate a Christmas Cactus through stem cuttings. It’s an easy and reliable method that usually yields high success rates.

What You’ll Need:

  • A healthy, mature Christmas Cactus
  • Clean, sharp scissors or pruning shears
  • Small pots or containers
  • Well-draining potting mix
  • Rooting hormone (optional, but helpful)
  • Spray bottle for misting

Step-by-Step Propagation Guide

Step 1: Choose a Healthy Stem

Look for a firm, vibrant green stem with 3-5 joined segments (leaf-like pads). Avoid stems that appear wilted, shriveled, or discolored.

Step 2: Make the Cut

Using sterilized scissors or pruning shears:

  • Cut the stem cleanly between segments, ideally at a joint.
  • Take several cuttings to increase your chances of success.

Step 3: Let the Cuttings Callus

Before planting, allow your cuttings to dry and callus over at the cut end for 24-48 hours in a cool, dry place. This step prevents rot once planted.

Step 4: (Optional) Dip in Rooting Hormone

For faster root development, you can dip the cut end of each cutting into a rooting hormone powder.


How to Plant Christmas Cactus Cuttings

Once your cuttings are callused, it’s time to plant them.

Step 1: Prepare the Pot and Soil

Choose small pots with drainage holes. Christmas Cactus prefers slightly acidic, well-draining soil. You can use:

  • A mix of 2 parts cactus or succulent soil and 1 part perlite or coarse sand
  • Or make your own with regular potting soil, perlite, and peat moss

Step 2: Plant the Cuttings

  • Insert each cutting about 1-2 inches deep into the soil, with at least one segment buried.
  • Firm the soil gently around the cutting to hold it upright.
  • Space cuttings an inch apart if planting several in one pot.

Step 3: Mist and Position

  • Lightly mist the soil with a spray bottle — avoid soaking.
  • Place the pot in a bright, indirect light location (avoid direct sunlight).
  • Maintain a temperature of around 65-75°F (18-24°C) for optimal rooting.

Caring for New Christmas Cactus Cuttings

Watering:

  • Mist lightly every 2-3 days, keeping the soil barely moist.
  • Avoid overwatering — too much moisture can cause cuttings to rot.

Rooting Time:

  • New roots typically form in 2-4 weeks.
  • You’ll know your cutting has rooted when you feel slight resistance if you gently tug it.

Transplanting:

  • Once your cuttings show new growth or roots fill the pot, transplant them into slightly larger containers filled with the same potting mix.

Long-Term Care for Christmas Cactus

Once established, Christmas Cactus is low-maintenance and long-living.

Light:

  • Prefers bright, indirect light
  • Avoid harsh, direct sunlight which can scorch leaves.

Water:

  • Water when the top inch of soil feels dry.
  • Water thoroughly, allowing excess water to drain.
  • Reduce watering frequency in fall and winter.

Humidity:

  • Christmas Cactus enjoys moderate to high humidity.
  • Mist regularly or use a humidity tray indoors, especially during dry months.

Fertilizing:

  • Feed with a balanced, water-soluble fertilizer every 4-6 weeks from spring through early fall.
  • Stop feeding in late fall before the plant’s blooming period.

Pruning:

  • After flowering, prune lightly to encourage branching and a fuller shape.
  • Use clean scissors to remove leggy or damaged stems.

How to Encourage Christmas Cactus Blooms

To enjoy vibrant blooms during the holidays:

1. Provide a Rest Period

  • In fall, reduce watering and keep the plant in a cool (50-60°F/10-15°C), dark location for 6 weeks.

2. Limit Light Exposure

  • For flower buds to form, the plant needs 12-14 hours of darkness daily for several weeks.

3. Resume Regular Care

  • Once buds form, move the plant back to its bright spot and resume regular watering.

Common Issues and How to Fix Them

Wilted Leaves:

  • Cause: Overwatering or underwatering
  • Fix: Adjust watering schedule and check drainage

No Blooms:

  • Cause: Too much light or warmth during the pre-bloom rest period
  • Fix: Move to a cooler, darker spot in fall

Rotting Stems:

  • Cause: Excess water or poor drainage
  • Fix: Remove affected parts and repot in fresh, dry soil

Fun Facts About Christmas Cactus

  • Despite its name, it’s not a desert cactus but an epiphytic cactus that grows on trees in rainforests.
  • Some Christmas Cactus plants can live for over 50 years, often passed down through families.
  • Its relative, the Easter Cactus, blooms in spring and has slightly different care needs.

Final Thoughts

Propagating and planting a Christmas Cactus is a rewarding, beginner-friendly project that allows you to multiply one of the most charming houseplants around. With just a little patience and care, your home can soon be filled with bright, holiday blooms and lush, trailing green stems.

Whether you’re propagating to gift to loved ones or expanding your indoor plant family, following these simple, detailed steps will help you grow healthy, happy Christmas Cactus plants that brighten your space year after year.

How to Plant and Grow Orchid Plants at Home

How to Plant and Grow Orchid Plants at Home

Orchids are one of the most beautiful and exotic houseplants you can grow at home. With their stunning blooms, intricate patterns, and long-lasting flowers, orchids can instantly add elegance and tranquility to any indoor space. While many people assume that orchids are delicate and difficult to care for, the truth is — with the right approach, growing orchids at home is surprisingly manageable and rewarding.

In this detailed guide, we’ll explore how to plant and grow orchid plants at home — from choosing the right type and planting it correctly to ongoing care and troubleshooting common issues.


Why Grow Orchids at Home?

Before we get into the how-to, let’s look at why orchids make such wonderful houseplants:

  • Visually stunning: Their unique shapes and vibrant colors brighten up any room.
  • Air-purifying: Like many houseplants, orchids improve indoor air quality by absorbing toxins.
  • Compact and space-saving: Perfect for small apartments, bedrooms, and office desks.
  • Long-lasting blooms: Many orchid varieties bloom for several weeks or even months.
  • Symbolic beauty: Orchids symbolize love, luxury, and strength.

Popular Orchid Varieties for Home Growing

Not all orchids are created equal — some are easier for beginners, while others need a bit more expertise. Here are a few beginner-friendly options to consider:

Phalaenopsis (Moth Orchid)

  • Most popular houseplant orchid.
  • Long-lasting blooms in a variety of colors.
  • Prefers indirect light and consistent humidity.

Dendrobium

  • Compact plants with abundant flowers.
  • Tolerates a range of conditions.
  • Blooms usually last up to six weeks.

Cattleya

  • Known for large, fragrant flowers.
  • Prefers bright, indirect light.
  • Requires a bit more attention to humidity and temperature.

Oncidium (Dancing Lady Orchid)

  • Distinctive flowers resembling dancing figures.
  • Loves bright, filtered light and regular watering.

Ideal Growing Conditions for Orchids

To successfully grow orchids at home, you need to replicate their natural tropical habitat as closely as possible.

Light:
Bright, indirect sunlight is best. Avoid placing orchids in direct sunlight, which can scorch the leaves. A north or east-facing window is ideal.

Temperature:

  • Day: 65–80°F (18–27°C)
  • Night: 55–65°F (13–18°C)

Humidity:
Orchids thrive in 50–70% humidity. Use a humidity tray, room humidifier, or regular misting to maintain these levels indoors.

Air Circulation:
Good airflow is essential to prevent disease. Place your orchid where it can receive fresh air without being exposed to cold drafts.


What You’ll Need to Grow Orchids at Home

  • Healthy orchid plant or seedling
  • Orchid pot (with drainage holes)
  • Orchid-specific growing medium (bark chips, sphagnum moss, or perlite mix)
  • Humidity tray (optional)
  • Watering can or spray bottle
  • Balanced orchid fertilizer (20-20-20 or similar)

How to Plant Orchids at Home: Step-by-Step Guide


Step 1: Choose the Right Pot and Growing Medium

Orchid pots typically have extra drainage holes to prevent root rot. Choose a pot that’s only slightly larger than the root ball.

Orchid growing medium is different from regular soil. It’s typically made of bark chips, sphagnum moss, coconut husk, or a mixture — providing good drainage and aeration.


Step 2: Prepare the Orchid Plant

If you’re transplanting an orchid:

  • Gently remove it from its existing pot.
  • Trim away any dead, mushy, or dry roots with sterilized scissors.
  • Rinse the healthy roots under lukewarm water.

Step 3: Plant the Orchid

  • Add a small layer of the orchid medium at the bottom of the pot.
  • Place the orchid inside, spreading its roots gently.
  • Fill around the roots with the medium, ensuring the plant is stable but not buried too deeply.
  • The base of the plant (called the crown) should sit just above the medium’s surface.

Step 4: Water the Orchid

After planting, water thoroughly until the medium is evenly moist. Let excess water drain out completely.


Step 5: Position in the Right Spot

Place your orchid near an east-facing window or in a bright, shaded spot. Avoid direct afternoon sun, which can damage the leaves.


How to Care for Orchids at Home

Growing orchids is mostly about consistency and observation. Here’s how to keep them healthy and blooming:

Watering:

  • Water once a week in winter, twice in summer.
  • Always check if the medium is dry before watering.
  • Use room-temperature, filtered water if possible.
  • Avoid letting water sit at the base, which can cause root rot.

Humidity:

  • Maintain 50–70% humidity using a tray filled with pebbles and water beneath the pot.
  • Mist the leaves lightly in the morning.

Fertilizing:

  • Use a balanced orchid fertilizer every 2–3 weeks during the growing season (spring and summer).
  • Reduce feeding in fall and winter.

Repotting:

  • Orchids need repotting every 1–2 years, preferably after flowering.
  • Use fresh medium to replace the old, decomposed one.

Common Orchid Growing Problems (and How to Fix Them)

ProblemCauseSolution
Yellowing leavesOverwatering, poor drainageReduce watering, improve drainage
Wrinkled leavesUnderwatering or root rotCheck roots and adjust watering
No bloomsInsufficient light or nutrientsMove to a brighter spot, fertilize
Moldy roots or mediumExcess moisture, poor airflowRemove affected parts, repot
Drooping flowersSudden temperature changeMaintain steady indoor temperatures

Tips for Encouraging More Blooms

  • Ensure enough bright, indirect light.
  • Keep night temperatures 10°F cooler than daytime.
  • Use a bloom booster fertilizer when buds start to form.
  • Cut the flower spike back to a node after blooms drop to encourage a second bloom cycle (for some types like Phalaenopsis).

Benefits of Having Orchids at Home

Beyond their beauty, orchids offer several lifestyle perks:

  • Improve indoor air quality.
  • Add color and vibrancy to any room.
  • Reduce stress and promote calmness.
  • Serve as a rewarding, low-maintenance hobby.
  • Make perfect, thoughtful gifts for special occasions.

Frequently Asked Questions

Q: How long do orchid flowers last?
A: Most orchid blooms last 6–10 weeks, depending on the variety and care.

Q: Do orchids like to be root-bound?
A: Yes — orchids prefer snug pots. Only repot when absolutely necessary.

Q: Can orchids grow in regular potting soil?
A: No — regular soil holds too much moisture and suffocates orchid roots. Always use a specialized orchid medium.

Q: How often should I water my orchid?
A: Typically once a week, but adjust based on temperature, humidity, and medium dryness.


Final Thoughts

Orchids may have a reputation for being finicky, but with the right setup and a little care, they’re one of the most rewarding houseplants to grow. By choosing beginner-friendly varieties, providing bright but indirect light, maintaining humidity, and sticking to a consistent watering schedule, you’ll enjoy vibrant, exotic blooms right in your living room.

Ready to add a touch of tropical elegance to your home? Start planting orchids today — and discover why these timeless beauties have enchanted plant lovers for centuries.

How to Plant Mushrooms at Home Easily

How to Plant Mushrooms at Home Easily

If you’ve ever marveled at the rich, earthy flavor of fresh mushrooms in your meals and thought about growing your own, you’re not alone. More and more home gardeners and food lovers are discovering the joy of cultivating mushrooms at home. Unlike typical plants, mushrooms are fungi — and they grow differently, in dark, damp, and nutrient-rich environments. The good news? With a few simple tools and a little patience, growing mushrooms at home is easier than you might think.

In this guide, we’ll walk you through how to plant mushrooms at home easily, covering everything from choosing your mushroom variety to harvesting your first batch.


Why Grow Mushrooms at Home?

Before diving into the how-to, let’s take a look at why growing mushrooms at home is such a rewarding activity:

  • Freshness and flavor: Homegrown mushrooms have richer flavor and texture than store-bought varieties.
  • Health benefits: Mushrooms are packed with vitamins, antioxidants, and immune-boosting properties.
  • Space-saving: They don’t require a garden — you can grow them indoors in a basement, kitchen, or closet.
  • Eco-friendly: Growing your own mushrooms reduces your carbon footprint and food waste.

Best Mushroom Varieties for Home Growing

Start with beginner-friendly varieties that thrive in controlled environments:

White Button Mushrooms (Agaricus bisporus)

  • Mild flavor
  • Ideal for beginners
  • Grows well in composted manure

Oyster Mushrooms (Pleurotus ostreatus)

  • Fast-growing and low-maintenance
  • Can be grown on straw, coffee grounds, or sawdust

Shiitake Mushrooms (Lentinula edodes)

  • Rich, earthy flavor
  • Best grown on hardwood logs or sawdust blocks

What You’ll Need to Grow Mushrooms at Home

Supplies:

  • Mushroom spores or spawn (available from garden centers or online)
  • Growing medium (straw, compost, sawdust, or coffee grounds, depending on variety)
  • Containers (trays, buckets, or grow bags)
  • Spray bottle or mister
  • Thermometer (optional but helpful)
  • Plastic sheeting or lids to maintain humidity

Best Growing Conditions for Mushrooms

Mushrooms prefer:

  • Low light or darkness
  • High humidity (80–95%)
  • Cool to moderate temperatures (55°F–70°F / 13°C–21°C depending on species)
  • Fresh, moist growing medium

A basement, dark closet, or shaded room corner works well for indoor mushroom growing.


Step-by-Step Guide to Plant Mushrooms at Home

Let’s get practical — here’s exactly how to do it:


Step 1: Choose Your Mushroom and Growing Medium

Decide which mushroom type suits your taste and growing setup:

  • White button mushrooms: Composted manure
  • Oyster mushrooms: Straw, coffee grounds, or sawdust
  • Shiitake mushrooms: Hardwood logs or sawdust blocks

Purchase spores or spawn matched to your chosen variety.


Step 2: Prepare the Growing Medium

For straw or sawdust:

  • Cut straw into small pieces.
  • Soak it in hot water (160°F / 71°C) for 1 hour to sterilize.
  • Drain and cool to room temperature.

For composted manure:

  • Moisten the compost until it feels like a damp sponge.

For logs:

  • Drill holes and soak the log in water for 24 hours.

Step 3: Inoculate the Medium with Mushroom Spawn

Mix the mushroom spawn into your prepared growing medium.

  • For containers: Spread a 2–3 inch (5–8 cm) layer of medium, sprinkle spawn evenly, and cover with more medium.
  • For logs: Insert spawn plugs into drilled holes and seal with wax.

Step 4: Create a Humid, Dark Environment

Cover containers loosely with plastic sheeting or lids to maintain humidity and darkness.

  • Mist the surface regularly to keep it damp but not waterlogged.
  • Maintain the ideal temperature based on your mushroom variety.

Step 5: Incubation Period

Allow the spawn to colonize the medium:

  • White button mushrooms: 2–3 weeks
  • Oyster mushrooms: 10–14 days
  • Shiitake mushrooms: 6–12 months on logs

During this time, keep the area dark and humid. You’ll notice white, thread-like growth called mycelium spreading through the medium.


Step 6: Trigger Fruiting (Mushroom Growth)

Once the medium is fully colonized:

  • Expose it to indirect light for a few hours daily.
  • Lower the temperature slightly.
  • Increase fresh air circulation.
  • Keep misting the surface to maintain humidity.

Small mushroom pins will appear within days to weeks.


Step 7: Harvest Your Mushrooms

When mushrooms reach mature size:

  • Gently twist and pull them from the medium.
  • Avoid cutting, as this may leave stubs that could rot.

Timing varies:

  • Oyster mushrooms: Ready in 5–7 days after pinning
  • White button mushrooms: 7–10 days
  • Shiitake mushrooms: A few weeks to months

How to Care for Growing Mushrooms

  • Mist regularly: Keep medium consistently damp but not soggy.
  • Control temperature: Maintain the optimal range for your species.
  • Limit light exposure: Most mushrooms prefer darkness for colonization and dim light for fruiting.
  • Watch for mold: Remove any green or black moldy patches promptly.

Common Mushroom Growing Problems and Solutions

ProblemCauseSolution
Medium too dryInsufficient mistingMist daily, cover with plastic sheet
Mold growthExcessive moisture, poor airflowRemove affected areas, improve air flow
No mushroom growthWrong temperature or spawn diedCheck environment, replace if needed
Mushrooms too smallLow humidity or nutrientsIncrease misting, refresh medium

Benefits of Growing Mushrooms at Home

  • Fresh, organic produce without chemicals
  • Sustainable recycling of kitchen scraps (like coffee grounds)
  • Saves money compared to grocery store prices
  • Year-round harvest in controlled conditions
  • Fun, educational hobby for families and kids

Frequently Asked Questions

Q: Can I grow mushrooms in my kitchen?
Yes — as long as you can maintain high humidity and avoid direct sunlight, a kitchen corner works well.

Q: How long does it take to grow mushrooms?
From inoculation to harvest, it takes about 3–4 weeks for oyster or button mushrooms and several months for shiitake.

Q: Are homegrown mushrooms safe to eat?
Absolutely — as long as you’re using spores from reliable suppliers and following clean growing practices.

Q: Can mushrooms grow in sunlight?
No — mushrooms thrive in low light or dark, humid environments.

Q: How many times can I harvest from one batch?
Most growing mediums produce 2–3 flushes (harvest cycles) before needing replacement.


Final Thoughts

Growing mushrooms at home is surprisingly easy, fun, and highly rewarding. Whether you’re a seasoned gardener or a curious beginner, mushrooms offer a unique way to produce fresh, healthy food in small spaces, all year round.

By selecting beginner-friendly varieties like oyster or white button mushrooms and following simple steps for moisture, temperature, and cleanliness, you’ll soon be enjoying your own homegrown fungi. It’s a fantastic hobby that nourishes both your kitchen and your connection to nature.

How to Plant and Maintain Moss in Your Garden

How to Plant and Maintain Moss in Your Garden

When you think of tranquil, enchanting gardens, one plant quietly working its magic is moss. Soft, velvety, and vibrantly green, moss transforms ordinary spaces into serene retreats. Whether you want to create a peaceful shade garden, a carpet-like ground cover, or a Japanese-inspired landscape, moss adds texture and a timeless natural beauty to any outdoor space.

Best of all — moss is hardy, low-maintenance, and eco-friendly. If you’ve been curious about incorporating moss into your garden, this guide will show you exactly how to plant and maintain moss for a lush, inviting landscape.


Why Choose Moss for Your Garden?

Moss offers both aesthetic and practical advantages:

  • Evergreen year-round: Stays green through all seasons.
  • Low maintenance: Requires no mowing, fertilizing, or chemical treatments.
  • Thrives in shade: Perfect for areas where grass struggles.
  • Prevents soil erosion: Ideal for slopes and damp areas.
  • Creates tranquil spaces: Common in Zen gardens and shaded retreats.

Moss is perfect for modern, rustic, or classic garden designs — from stepping stone pathways to shady nooks and decorative rock gardens.


Types of Moss for Gardens

There are several varieties to consider, depending on your landscape and climate:

Sheet Moss (Hypnum)

  • Forms soft, carpet-like layers.
  • Great for ground cover and shady areas.

Cushion Moss (Leucobryum glaucum)

  • Grows in mounded, pillow-like shapes.
  • Beautiful for rock gardens and accents.

Haircap Moss (Polytrichum)

  • Upright, spiky texture.
  • Ideal for woodland gardens and moist areas.

Fern Moss (Thuidium)

  • Feathery, fern-like appearance.
  • Spreads quickly and thrives in shade.

Where and When to Plant Moss

Moss thrives in moist, shaded areas, although some varieties tolerate sun if humidity remains high.

Best Time to Plant

  • Spring and fall are ideal, when temperatures are moderate and moisture is more consistent.
  • Avoid planting in the heat of summer or during droughts.

Ideal Planting Conditions

  • Shade or partial shade: Under trees, near walls, or alongside paths.
  • Moist, acidic soil: pH between 5.0 and 5.5 is best.
  • Compact soil: Moss prefers firm, clay-like or compacted soil without loose texture.

How to Plant Moss: Step-by-Step Guide

Whether you’re transplanting live moss or growing it from a slurry, these steps will ensure successful establishment.


Materials You’ll Need:

  • Moss sheets or clumps (purchased or foraged ethically)
  • Garden rake or hoe
  • Spray bottle or hose with mist setting
  • Water
  • Optional: Buttermilk or yogurt (for slurry method)

Planting Moss Sheets or Clumps

1. Prepare the Area

  • Remove leaves, weeds, grass, and debris.
  • Lightly rake or tamp down the soil for a firm, even surface.

2. Test Soil pH

  • Use a pH testing kit.
  • If necessary, acidify the soil using sulfur or organic compost.

3. Place the Moss

  • Press moss sheets or clumps firmly onto the soil.
  • For clumps, arrange pieces tightly together for even coverage.

4. Water Immediately

  • Mist the moss thoroughly, ensuring it makes good contact with the soil.

5. Keep Moist

  • Mist daily for the first 2-3 weeks until moss establishes and roots into the soil.

Planting Moss with a Slurry Method

Ideal for vertical surfaces, rocks, or difficult spots.

1. Blend Moss Fragments

  • Combine 2 cups of moss pieces with 2 cups of buttermilk (or yogurt) and a cup of water in a blender.
  • Blend into a paint-like slurry.

2. Apply the Slurry

  • Paint or pour the mixture onto soil, rocks, or wood surfaces.
  • Keep the area moist, misting daily until moss starts growing.

How to Maintain Moss in Your Garden

Once established, moss requires very little attention. Here’s how to keep it lush and healthy:

Watering

  • Keep moss consistently moist, especially in dry periods.
  • Use a mist setting or spray bottle to avoid dislodging moss.
  • In shady, humid environments, natural rainfall may suffice.

Clearing Debris

  • Gently remove fallen leaves, twigs, and debris regularly.
  • Use a soft broom or hand to avoid disturbing the moss.

Trimming

  • Trim overgrown or uneven patches with garden scissors.
  • This promotes a uniform, dense appearance.

Sunlight Management

  • If moss starts browning due to excess sunlight, create shade using nearby plants, garden screens, or shade cloth.

Common Moss Problems and Solutions

IssueCauseSolution
Yellowing or browning patchesToo much sun, lack of moistureIncrease watering, provide partial shade
Loose or lifting patchesInadequate contact with soilPress firmly and mist frequently until rooted
Invasion by weeds or grassCompetition for space/nutrientsRegularly clear weeds, maintain acidic soil
Mold or algae on mossPoor air circulation, excess moistureThin out dense patches, improve drainage

Benefits of Moss in Garden Landscapes

Still wondering why you should choose moss over grass or other ground covers? Here’s what makes moss a standout:

  • Eco-friendly: No fertilizers, pesticides, or mowing required.
  • Supports biodiversity: Provides habitat for insects and small wildlife.
  • Retains moisture: Keeps soil cool and reduces water evaporation.
  • Reduces erosion: Ideal for shady, sloped, or wet areas.
  • Aesthetic appeal: Adds ancient, mystical charm to any setting.

Frequently Asked Questions

Q: Can moss grow in sunny areas?
Some varieties, like Haircap Moss, tolerate dappled sunlight if kept moist. However, most moss thrives in shade.

Q: Does moss need soil to grow?
No — moss can grow on soil, wood, rocks, and even concrete if moisture and shade are adequate.

Q: How fast does moss spread?
Moss grows slowly at first but accelerates once established. Regular misting and care can speed up growth.

Q: Is moss safe for pets and children?
Yes — moss is non-toxic and safe for pets and kids to walk or play on.

Q: Can I transplant moss from the wild?
It’s best to purchase nursery-grown moss or forage responsibly (with permission) to protect wild habitats.


Final Thoughts

Planting and maintaining moss in your garden is a rewarding, low-maintenance way to create a serene, naturally beautiful outdoor space. Whether you’re covering a shady patch of ground, adding texture between stepping stones, or designing a Zen retreat, moss brings softness, color, and tranquility to your landscape.

By choosing the right variety, ensuring proper planting conditions, and maintaining consistent moisture, you’ll enjoy a vibrant, evergreen moss garden that transforms your space into a soothing, green sanctuary.