How to Propagate a Prayer Plant – Share the Joy of Greenery!

How to Propagate a Prayer Plant – Share the Joy of Greenery!

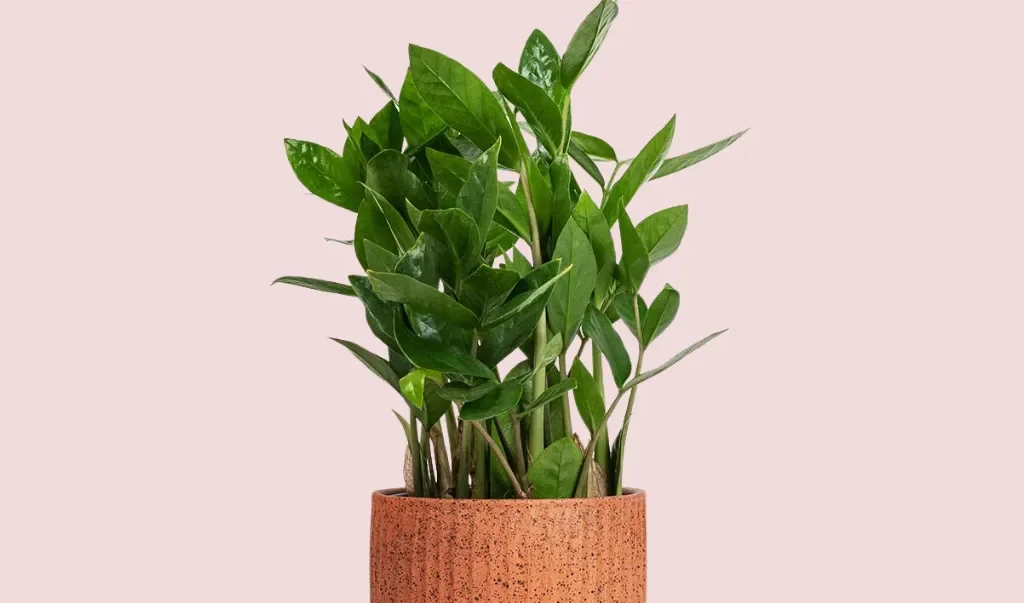
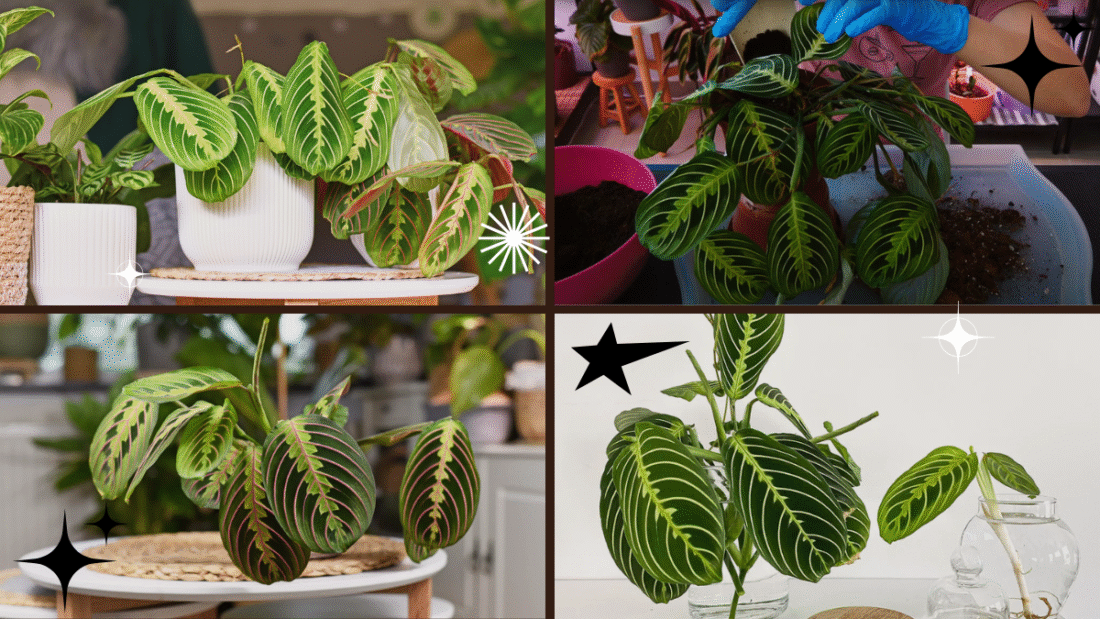
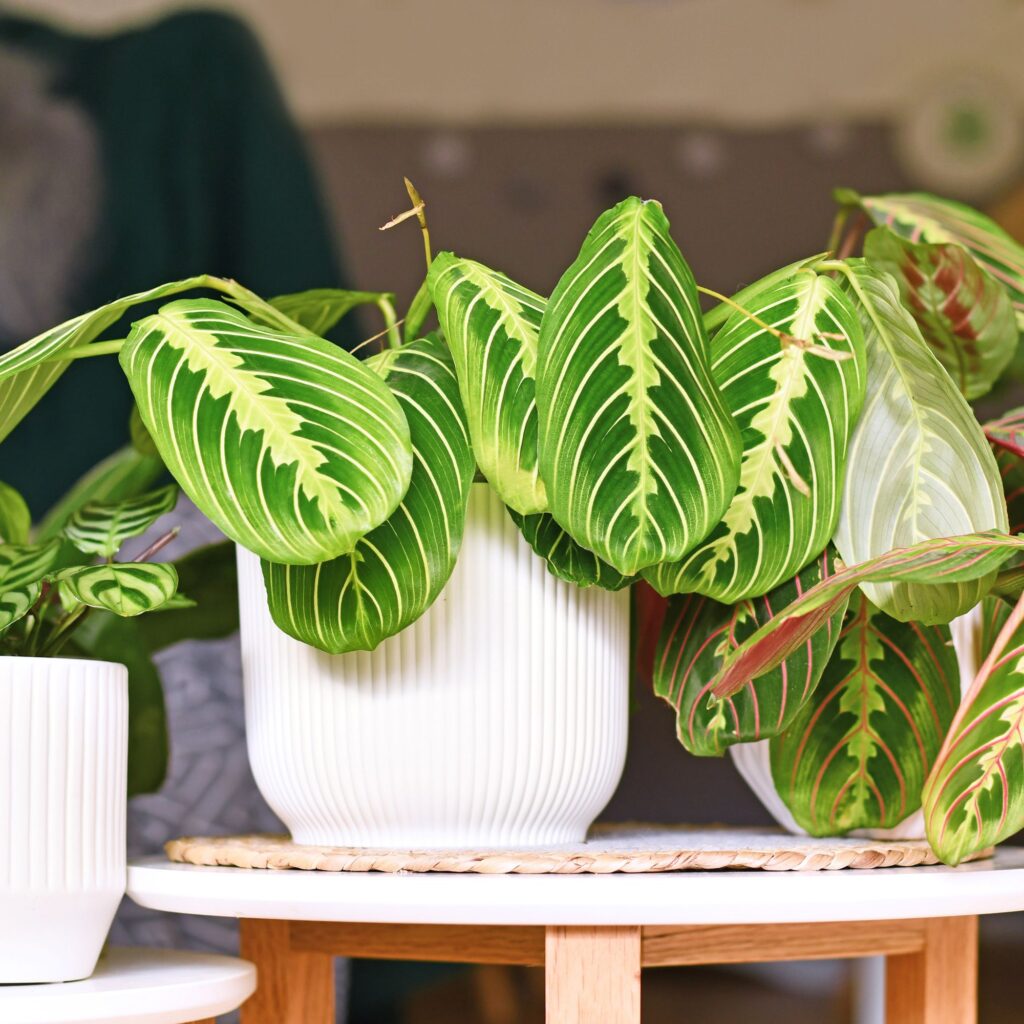
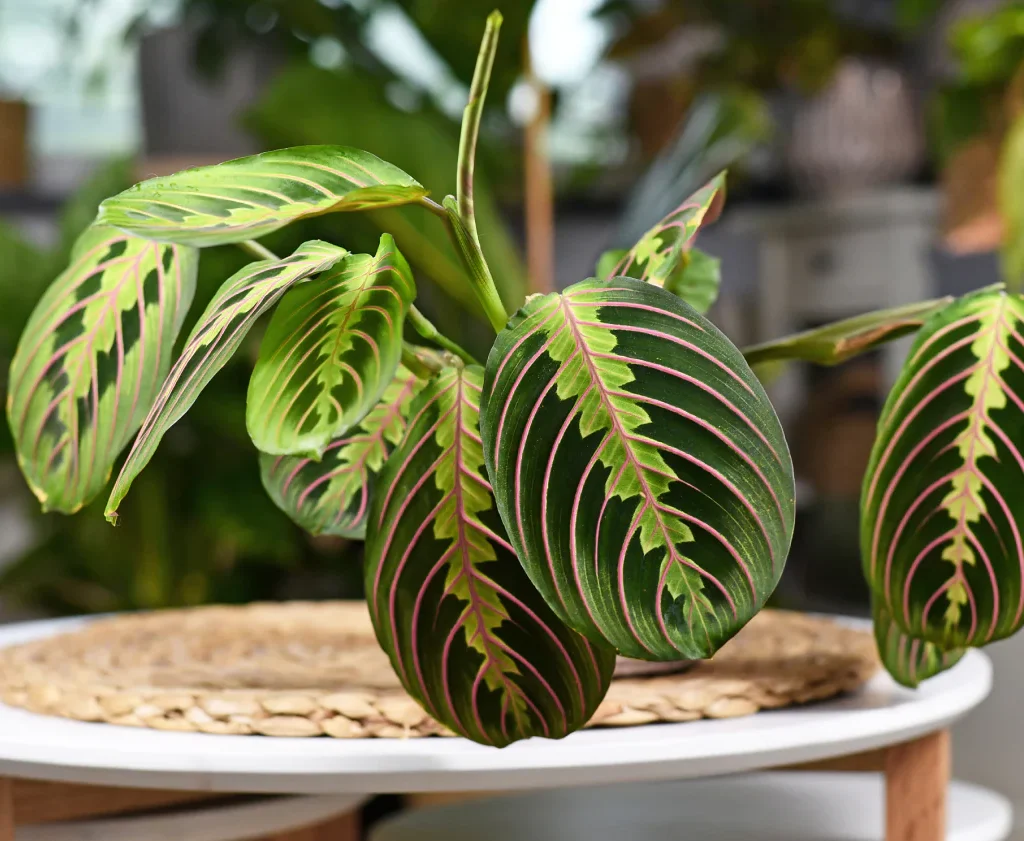
If you’re a plant lover, you probably already know the unique charm of a prayer plant. Known for its beautifully patterned leaves and fascinating habit of folding its foliage upwards at night — as if in prayer — the prayer plant (Maranta leuconeura) is a favorite in many homes. But what makes this stunning houseplant even more delightful is how easily it can be propagated, allowing you to expand your indoor jungle, rejuvenate a mature plant, or share a piece of greenery with friends and family.

In this complete guide, we’ll show you everything you need to know about how to propagate a prayer plant, covering different methods, essential supplies, expert tips, and aftercare. Whether you’re new to propagation or already have a few cuttings rooting on your windowsill, this guide is here to help you multiply your greenery with ease.


Why Propagate a Prayer Plant?

Propagation isn’t just about saving money on new plants — it’s a gratifying process that deepens your connection with nature. Here’s why you should consider propagating your prayer plant:

  • Expand your indoor plant collection without spending a dime.
  • Rejuvenate an overgrown or leggy plant by trimming and regrowing.
  • Create thoughtful, living gifts for family and friends.
  • Experiment and learn new plant care skills.
  • Add lush greenery to different rooms with your very own propagated cuttings.

The prayer plant is especially suitable for propagation because of its forgiving nature, attractive foliage, and fast rooting tendencies.


The Best Ways to Propagate a Prayer Plant

There are two main methods to propagate a prayer plant:

  1. Stem Cuttings (in water or soil)
  2. Root Division

Both are beginner-friendly and effective. Let’s dive into the details of each method.


What You’ll Need

Before you start, gather these basic propagation supplies:

  • A healthy, mature prayer plant
  • Sharp, sterilized scissors or pruning shears
  • Small pots or containers
  • Well-draining potting mix (a peat-based mix with perlite is ideal)
  • A clean glass or jar for water propagation
  • Filtered or distilled water
  • A bright, warm location with indirect light
  • Optional: Rooting hormone powder

Method 1: Propagating Prayer Plant from Stem Cuttings

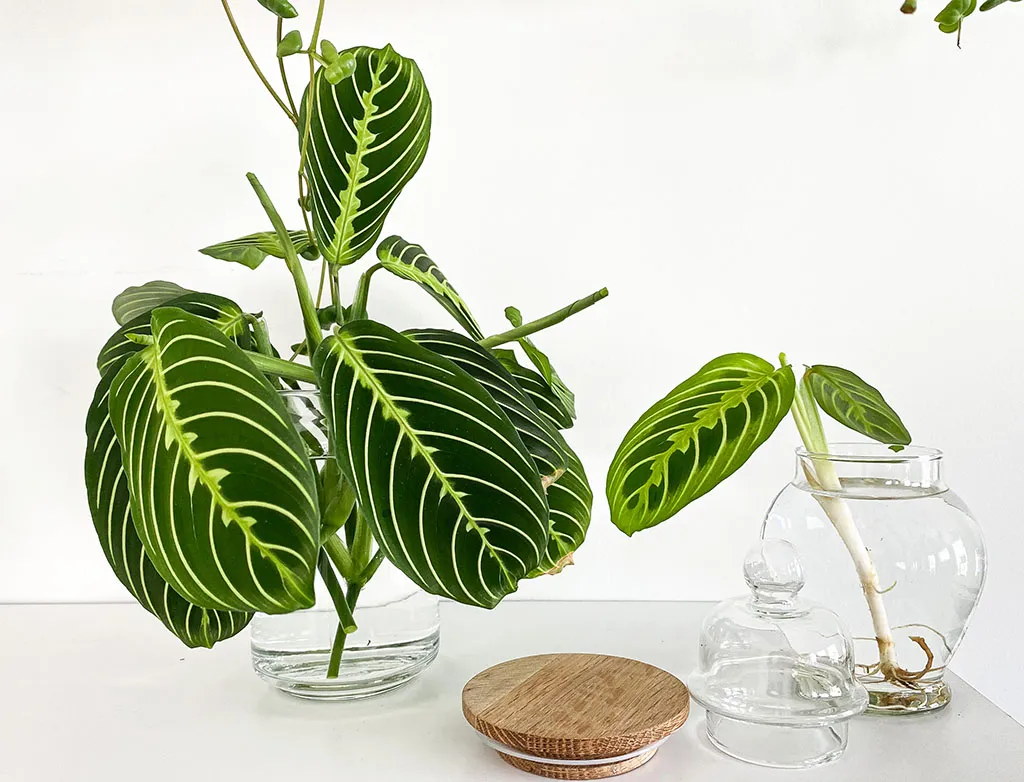
This is the most popular and visually satisfying propagation method, as you can watch roots forming in water before planting them in soil.

Step-by-Step Guide:

1. Choose a Healthy Stem

Select a healthy, vigorous stem with at least one or two leaves and a visible node. A node is the small bump where roots will grow — typically found just below a leaf.

2. Cut the Stem Cleanly

Using sharp, sterilized scissors or shears, make a clean cut just below the node. Ensure your cuttings are at least 3-5 inches long for the best chance of success.

3. Prepare the Cutting

If your cutting has several leaves, you can remove the lower ones near the node, leaving a couple of healthy leaves at the top. This reduces the cutting’s energy demand and focuses growth on root development.

4. Rooting in Water

  • Fill a glass jar or vase with filtered or distilled water (tap water with chlorine can hinder root growth).
  • Place the cutting into the jar so that the node is submerged.
  • Set the jar in a warm location with bright, indirect sunlight.
  • Change the water every 2–3 days to keep it fresh and clear.

Root growth should begin within 2–3 weeks, with roots becoming strong enough to plant in soil after about 4–6 weeks.

5. Transplanting into Soil

Once the roots are around 2 inches long, plant your cutting into a small pot filled with well-draining, peat-rich potting mix. Water gently and continue to keep the plant in indirect light.


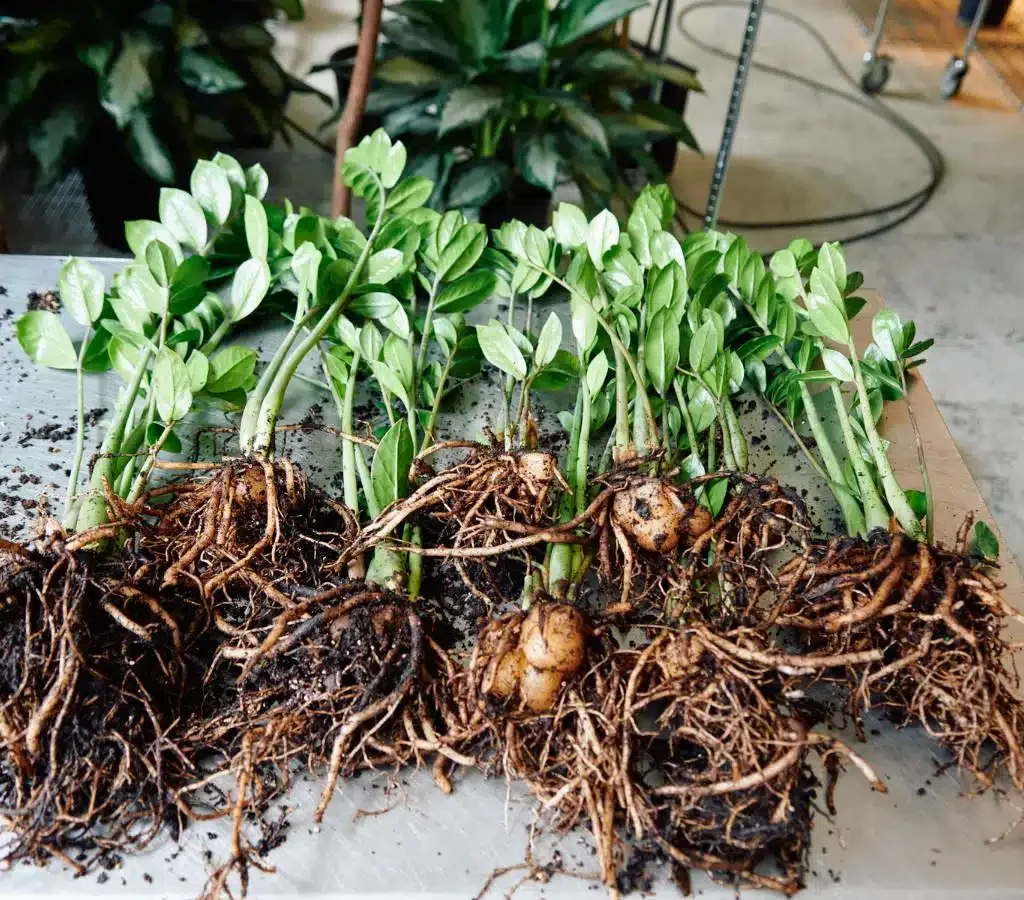
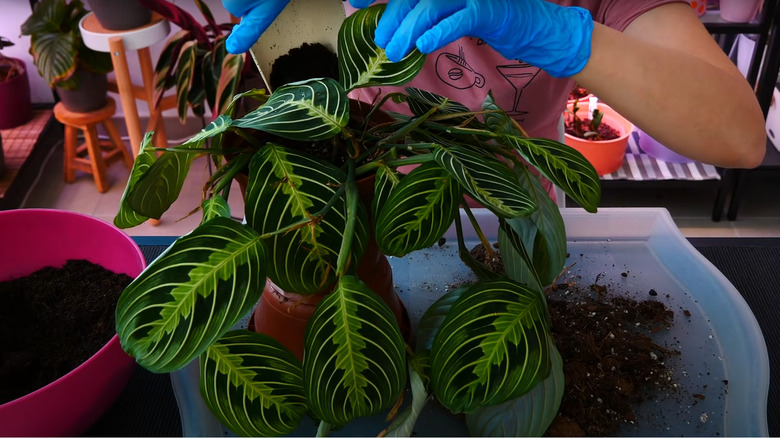
Method 2: Propagating Prayer Plant by Division

This method is perfect if your prayer plant has grown too large for its pot or has multiple stems and root systems.

Step-by-Step Guide:

1. Remove the Plant from Its Pot

Carefully take your mature prayer plant out of its container. Loosen the soil gently to expose the root system.

2. Divide the Root Ball

Look for natural separations in the plant where you can pull apart or cut sections, ensuring each division has a healthy cluster of roots and a few leaves attached.

3. Replant the Divisions

Plant each section in a separate pot with fresh, well-draining potting mix. Water lightly to settle the soil and roots.

4. Provide Proper Care

Place the new plants in bright, indirect light and maintain slightly moist soil. New growth typically appears within 2–4 weeks as the divisions adjust to their new homes.


Aftercare for New Prayer Plant Cuttings

Proper care after propagation is essential for helping your cuttings or divisions thrive. Here’s what your new plants will need:

Light

Prayer plants prefer bright, indirect sunlight. Avoid direct sun, as it can scorch delicate leaves.

Water

Keep the soil lightly moist but never soggy. Allow the top inch of soil to dry before watering again.

Humidity

As tropical plants, prayer plants love high humidity. Boost humidity with a pebble tray, humidifier, or by misting the leaves regularly.

Temperature

Maintain a consistent temperature of 65°F–80°F (18°C–27°C). Avoid placing plants near cold drafts or heating vents.

Fertilizer

Once your new plants are established (after 1–2 months), you can feed them monthly with a balanced, diluted houseplant fertilizer during the growing season (spring and summer).


Common Mistakes to Avoid

To ensure successful propagation, steer clear of these common pitfalls:

  • Using dull or dirty tools: Always sterilize scissors to prevent disease.
  • Skipping the node: No node means no roots for your stem cutting.
  • Overwatering cuttings: Whether in soil or water, too much moisture leads to rot.
  • Placing in direct sun: Bright, indirect light is key for healthy root and foliage development.
  • Ignoring humidity needs: Low humidity can cause leaves to curl and brown at the edges.

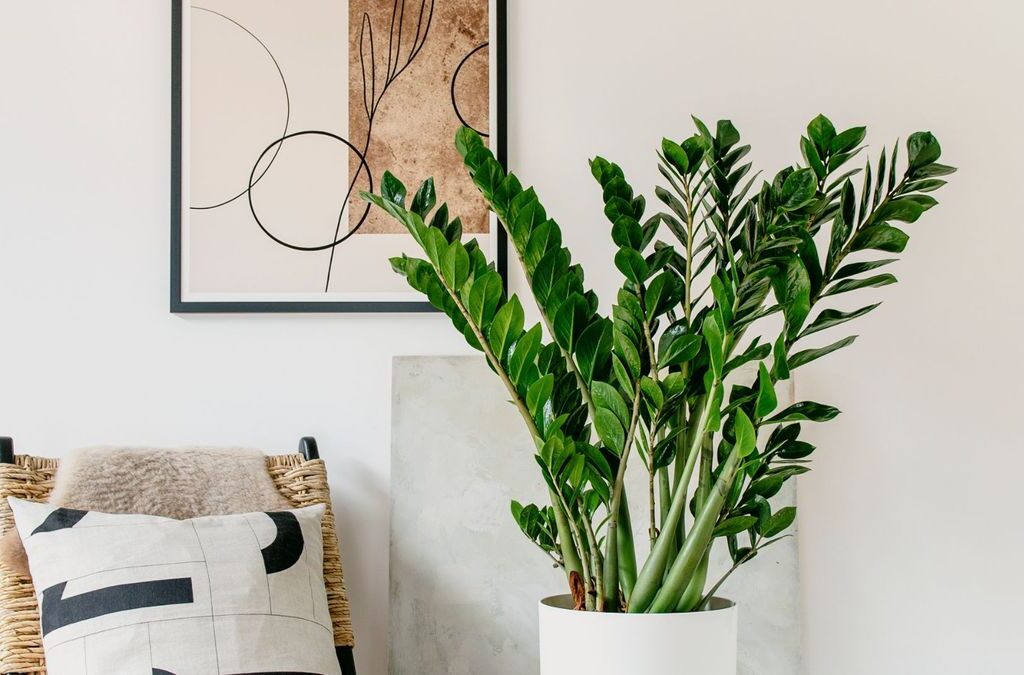
Fun Display Ideas for Your Propagated Prayer Plants

Once your new prayer plants are rooted and growing, get creative with how you display them:

  • Cluster them in stylish ceramic pots on a windowsill or side table.
  • Hang cuttings in transparent glass vases to showcase their roots before planting.
  • Create a mini prayer plant jungle by grouping several pots together for an eye-catching display.
  • Gift propagated plants in decorative containers for a heartfelt, green present.

Conclusion

Propagating a prayer plant is one of the most rewarding ways to deepen your plant-parent skills and share the calming joy of greenery. Whether you choose the simplicity of water propagation or the efficiency of root division, you’ll soon have vibrant new plants ready to brighten up your home — or someone else’s.

With their beautiful, patterned leaves and fascinating nightly movements, prayer plants are a perfect symbol of growth and grace. So why not multiply the magic? Grab your scissors, pick your healthiest stem, and start propagating today — because there’s always room for a little more green in your life.

How to Propagate a ZZ Plant – Create a Hardy and Stylish Display!

How to Propagate a ZZ Plant – Create a Hardy and Stylish Display!

ZZ plants (Zamioculcas zamiifolia) have become a staple in modern homes and offices for their glossy, deep green leaves, striking upright form, and nearly indestructible nature. Known for their ability to thrive in low light, tolerate neglect, and purify the air, ZZ plants are the perfect choice for both new and seasoned plant enthusiasts. But what makes them even more appealing is how easily you can propagate them and grow new plants to expand your stylish indoor jungle.

In this detailed guide, we’ll show you exactly how to propagate a ZZ plant through three simple, effective methods. Whether you want to fill your home with their elegant foliage or share a hardy houseplant gift, propagating ZZ plants is a fun, rewarding process.


Why Propagate a ZZ Plant?

There are plenty of great reasons to multiply your ZZ plant collection:

  • Create a cohesive look by placing multiple plants around your home or workspace.
  • Save money by growing new plants instead of buying more.
  • Gift meaningful greenery to friends and family.
  • Rejuvenate an older plant by trimming back and propagating leggy stems.
  • Learn and practice propagation techniques on one of the most forgiving plants around.

The Three Best Ways to Propagate a ZZ Plant

ZZ plants can be propagated through:

  1. Leaf Cuttings
  2. Stem Cuttings
  3. Division

Each method has its pros and a few considerations, but all are relatively easy and beginner-friendly.


What You’ll Need

Before you get started, gather these supplies:

  • A mature ZZ plant
  • Clean, sharp scissors or pruning shears
  • Small pots or containers
  • Well-draining potting mix (cactus or succulent mix works well)
  • A clean jar or glass of water (if using water propagation)
  • A bright, warm, indirect light location
  • Optional: Rooting hormone powder

Method 1: Propagating ZZ Plant by Leaf Cuttings

This is a slow but simple method and perfect if you only have a few leaves to spare.

Step-by-Step Guide:

1. Select Healthy Leaves
Choose glossy, plump leaves from your ZZ plant. Avoid any with signs of yellowing or damage.

2. Cut the Leaves Cleanly
Use clean scissors or shears to snip off individual leaves from the stem, ensuring you cut close to the base.

3. Optional: Dip in Rooting Hormone
Dip the cut end of the leaf into rooting hormone powder to help speed up root formation. This step is optional but can encourage success.

4. Plant the Leaves
Insert the cut end of each leaf into a small pot filled with well-draining soil, about half an inch deep.

5. Water Lightly
Mist or lightly water the soil to keep it slightly moist but never soggy.

6. Place in Indirect Light
Set your pots in a warm spot with bright, indirect light. Avoid direct sunlight which can scorch tender cuttings.

7. Wait for Rhizomes
Over time — often several months — small rhizomes (bulb-like structures) will form at the base of the leaf, eventually growing roots and new shoots.

Note: This method requires patience as ZZ plants are slow growers. Visible results may take 6–9 months.


Method 2: Propagating ZZ Plant by Stem Cuttings

Faster than leaf propagation, this technique lets you root whole stems either in water or soil.

Step-by-Step Guide:

1. Select a Healthy Stem
Pick a strong, upright stem with at least two or three pairs of leaves.

2. Cut the Stem
Using clean, sharp scissors, cut the stem close to the soil line.

3. Remove Lower Leaves
Gently remove the bottom few leaves to expose at least 2 inches of bare stem for rooting.

4. Choose Your Propagation Medium

  • In Water: Place the cut end of the stem in a jar or glass of clean water.
  • In Soil: Plant the cut end directly into a pot filled with well-draining soil.

5. Water and Care

  • Water Propagation: Change the water every week and keep the glass in indirect light.
  • Soil Propagation: Water lightly and ensure the soil remains barely moist.

6. Root Development
Roots will start forming within 4–8 weeks. In water, you’ll see roots clearly. In soil, gently tug on the cutting after a month — resistance indicates root growth.

7. Transplant
Once substantial roots have developed (around 2 inches long), move the water-propagated cutting into soil.


Method 3: Propagating ZZ Plant by Division

The quickest and most reliable method — ideal if your ZZ plant has multiple stems and a crowded pot.

Step-by-Step Guide:

1. Remove the Plant from the Pot
Gently take your ZZ plant out of its container. Loosen the soil around the roots.

2. Separate the Rhizomes
ZZ plants grow from thick, potato-like rhizomes beneath the soil. Carefully divide these with your hands or a clean knife. Each section should have at least one stem and attached roots.

3. Pot Each Section
Plant each divided section into its own pot with fresh, well-draining soil.

4. Water Sparingly
Water just enough to settle the soil and place the new plants in bright, indirect light.

5. Resume Normal Care
Once new growth appears (usually within 2–4 weeks), resume your regular ZZ plant care routine.


Post-Propagation Care Tips

After propagating, your new ZZ plants will need gentle care as they settle in.

  • Light: Keep them in bright, indirect light. Avoid direct sun, especially for young cuttings.
  • Watering: ZZ plants prefer dry soil over soggy conditions. Water only when the top inch feels dry.
  • Humidity & Temperature: These tropical natives like temperatures between 65°F–80°F (18°C–27°C) and moderate humidity.
  • Pest Check: Watch for common pests like spider mites or mealybugs and treat promptly if needed.
  • Patience: ZZ plants are famously slow growers — be patient and trust the process.

Common Mistakes to Avoid

Even hardy plants like ZZ can falter if propagated incorrectly. Avoid these pitfalls:

  • Skipping Rooting Time: Don’t rush the propagation process — especially with leaf cuttings.
  • Overwatering: Excess moisture can lead to rot. ZZ plants prefer dryness.
  • Using the Wrong Soil: Always opt for a light, well-draining mix designed for succulents or cacti.
  • Too Much Sun: New cuttings are sensitive to direct light. Gradually introduce them to brighter spots once established.

Creative Ideas for Displaying Your Propagated ZZ Plants

Once your propagated plants are thriving, showcase them in creative ways:

  • Clustered Planters: Group multiple ZZ plants together in a long, shallow container for a dramatic effect.
  • Stylish Pots: Use modern, minimalist ceramic pots to match your home’s decor.
  • Desk Buddies: Place small propagated ZZ plants in pretty containers on your work desk for a low-maintenance, mood-boosting addition.
  • Gifting: Pot up a propagated ZZ plant and tie it with a ribbon — a stylish, symbolic gift for housewarmings or birthdays.

Conclusion

Propagating ZZ plants is a fantastic way to multiply your greenery, enhance your décor, and share the joy of hardy houseplants with others. Whether you choose leaf cuttings, stem cuttings, or division, each method offers a fun, easy way to grow new plants from your existing one.

With their lush, deep green foliage and nearly indestructible nature, ZZ plants not only add a stylish touch to any space but also symbolize resilience, growth, and good fortune. So grab your scissors, pick a method, and start propagating — your future stylish display awaits!

How to Propagate a Jade Plant – Multiply Your Luck and Beauty!

How to Propagate a Jade Plant – Multiply Your Luck and Beauty!

Jade plants, with their plump, glossy green leaves and easygoing nature, are one of the most popular houseplants around the world. Known as a symbol of good luck, prosperity, and friendship, these charming succulents not only brighten up any room but are also incredibly simple to propagate. If you’ve ever wanted to multiply your jade plant collection or share a meaningful gift with a loved one, propagation is the perfect, rewarding way to do it.

In this detailed guide, we’ll walk you through the entire process of propagating a jade plant — from choosing the right cutting to planting and caring for your new baby jade plants. Let’s get started on multiplying both your luck and the natural beauty in your home!


Why Propagate a Jade Plant?

Before we dive into the how-to, let’s look at why propagating a jade plant is such a wonderful idea:

  • Expand Your Collection: One plant can give rise to many, filling your home with lush greenery.
  • Create Thoughtful Gifts: A propagated jade plant makes a meaningful present symbolizing good fortune and enduring friendship.
  • Rejuvenate an Older Plant: Propagation can help refresh a leggy or overgrown plant.
  • Learn a New Gardening Skill: It’s an easy and satisfying way to grow your green thumb.

Understanding Jade Plant Propagation

Jade plants (Crassula ovata) can be propagated through two main methods:

  • Leaf Cuttings
  • Stem Cuttings

Both techniques are simple and require minimal supplies, making jade plants one of the easiest houseplants to multiply.


What You’ll Need

Gather these basic tools and materials before you start:

  • A healthy jade plant
  • Sharp, clean scissors or pruning shears
  • Small pots or containers
  • Well-draining succulent or cactus potting mix
  • A small trowel or spoon
  • Optional: Rooting hormone powder (for faster rooting)
  • A bright, warm spot (but out of direct sunlight)

How to Propagate a Jade Plant from Stem Cuttings

Stem cuttings are the most reliable and popular way to propagate jade plants. Here’s a step-by-step guide:

1. Choose a Healthy Stem

Select a strong, healthy, mature stem with plump leaves. Avoid any that look shriveled, yellowed, or diseased.

2. Cut the Stem

Using clean, sharp scissors or shears, snip a 3–5 inch section of the stem. Ensure the cutting has at least two to three pairs of healthy leaves.

3. Remove Lower Leaves

Gently pluck off the leaves from the lower 1–2 inches of the stem. This is where new roots will form.

4. Let It Callous

Allow the cutting to dry out for a few days in a shaded, dry area. This step is crucial as it lets the cut end callous over, preventing rot when planted.

Pro Tip: In warm, dry climates, one to two days is enough. In humid conditions, give it three to four days.

5. Optional: Apply Rooting Hormone

Dip the calloused end into rooting hormone powder to encourage faster root growth. This step is optional but helpful, especially in cooler or humid environments.

6. Plant the Cutting

Fill a small pot with well-draining succulent or cactus soil. Insert the cutting about an inch deep into the soil. Firm the soil around the base gently.

7. Water Lightly

Mist the soil lightly or give it a small drink, ensuring you don’t overwater. Succulent cuttings are sensitive to excess moisture early on.


How to Propagate a Jade Plant from Leaf Cuttings

Leaf cuttings are another easy, though slightly slower, method of propagation.

1. Select a Healthy Leaf

Choose a plump, mature leaf from your jade plant. Twist or snip it cleanly from the stem.

2. Let It Callous

Allow the leaf to sit for several days in a dry, shaded spot until the cut end forms a protective callous.

3. Prepare the Soil

Use a shallow pot or tray filled with well-draining succulent mix.

4. Place the Leaf on the Soil

Lay the calloused leaf flat on the soil surface or gently insert the cut end into the soil.

5. Mist Occasionally

Lightly mist the soil to keep it barely moist. Roots and tiny new leaves will start forming at the cut end over several weeks.

Pro Tip: Patience is key with leaf propagation — it can take up to 4–6 weeks before visible roots and new growth appear.


Post-Propagation Care Tips

Once your cuttings are planted, proper care ensures they develop into healthy, thriving plants.

  • Light: Place your cuttings in a warm, bright spot with indirect sunlight. Avoid harsh, direct sun as it can scorch tender new growth.
  • Watering: Water sparingly. Let the soil dry out completely between waterings to avoid rot.
  • Temperature: Jade plants prefer temperatures between 65°F to 75°F (18°C to 24°C).
  • Fertilizing: Avoid fertilizing until the new plants have well-established roots — usually after 3–4 months.
  • Pest Check: Watch for common issues like mealybugs or aphids and treat promptly.

Common Mistakes to Avoid

Even though jade plant propagation is beginner-friendly, a few missteps can set you back. Here’s what to avoid:

  • Skipping the Callous Step: Planting a fresh cutting without allowing it to callous can lead to rot.
  • Overwatering: Newly propagated jade plants need far less water than mature ones. Only water when the soil is dry.
  • Using the Wrong Soil: Regular potting soil holds too much moisture. Always opt for a cactus or succulent mix.
  • Too Much Sun: While jade plants love bright light, young cuttings are sensitive to direct sun. Gradually acclimate them once established.

Creative Ideas for Displaying Propagated Jade Plants

Once your propagated plants take root, you can get creative with how you display them:

  • Mini Pots: Use small, colorful ceramic or terracotta pots for a windowsill garden.
  • Terrariums: Create a jade plant terrarium with pebbles, moss, and decorative stones.
  • Gift Plants: Pot them in decorative containers and give them as thoughtful, symbolic gifts for housewarmings, birthdays, or good luck charms.
  • Mixed Succulent Arrangements: Combine them with other succulents like Echeveria, Aloe, or String of Pearls in a shallow dish for a stunning tabletop display.

Conclusion

Learning how to propagate a jade plant is one of the easiest and most gratifying ways to grow your indoor garden. With just a few simple steps, you can turn a single plant into a thriving collection or heartfelt gifts for friends and family. The best part? Every new plant you nurture carries a bit of good luck, natural beauty, and personal pride.

So grab those scissors, choose your cuttings, and start multiplying your fortune and greenery today. In no time, you’ll have a thriving collection of jade plants adding charm, positivity, and life to every corner of your home.

How to Pot a Plant – Transform Your Space with Greenery!

How to Pot a Plant – Transform Your Space with Greenery!

Bringing nature indoors has never been more popular, and with good reason. Potted plants not only add a splash of color and life to your home but also improve air quality, boost your mood, and create a soothing atmosphere. Whether you’re working with a cozy apartment, a sunny windowsill, or a sprawling balcony, learning how to pot a plant properly is the first step toward building your own little indoor oasis.

In this guide, we’ll take you through everything you need to know about potting a plant — from choosing the right container to understanding soil mixes, and from essential tools to plant care tips. Let’s dig in!


Why Potting Plants Is Worth It

Before diving into the how-to, it’s important to understand why potting plants is such a wonderful addition to your living space:

  • Improves Air Quality: Many houseplants help purify the air by filtering toxins and releasing oxygen.
  • Boosts Mental Well-Being: Being surrounded by greenery has been shown to reduce stress, promote relaxation, and enhance focus.
  • Adds Aesthetic Appeal: Plants bring warmth, texture, and color to any room, complementing various décor styles.
  • Flexible & Portable: Potted plants can be moved easily to suit your mood or the seasons.

Now, let’s explore how to pot a plant like a pro.


What You’ll Need

Before you get started, gather these essential tools and materials:

  • A plant of your choice
  • A suitable pot with drainage holes
  • Potting mix appropriate for your plant
  • Small gardening trowel or spoon
  • Gardening gloves (optional)
  • Pebbles or small stones (for drainage, if needed)
  • Watering can or spray bottle

Step-by-Step Guide to Potting a Plant

1. Choose the Right Pot

Selecting the right pot is crucial for your plant’s health and growth. Here’s what to consider:

  • Size: The new pot should be about 1–2 inches larger in diameter than your plant’s current container. Too large a pot can retain excess moisture, leading to root rot.
  • Material: Common options include terracotta, ceramic, plastic, and metal. Terracotta is breathable but can dry out quickly, while plastic retains moisture better.
  • Drainage: Always opt for a pot with a drainage hole at the bottom. This prevents water from sitting in the soil and causing root rot.

2. Prepare the Pot

If your pot has large drainage holes, place a small piece of mesh, coffee filter, or a few pebbles over the holes. This keeps soil from spilling out while still allowing water to drain freely.


3. Select the Right Potting Mix

Different plants have different soil needs:

  • Succulents and Cacti: Prefer sandy, well-draining soil.
  • Tropical Plants (like Monstera or Pothos): Thrive in rich, airy, well-draining mixes.
  • Orchids: Need chunky, bark-based mixes for good airflow.
  • General Houseplants: Do well with high-quality, all-purpose potting soil.

Never use garden soil for potted plants — it can be too dense and may harbor pests or diseases.


4. Remove the Plant from Its Old Container

Gently tap the sides of the plant’s current pot to loosen the soil. Hold the plant near the base and carefully slide it out. If it’s stubborn, tip the pot sideways and use a tool like a butter knife to ease it out.

Pro Tip: If the roots are circling the root ball (root-bound), gently tease them apart with your fingers. This encourages outward growth in the new pot.


5. Position the Plant in the New Pot

Add a layer of fresh potting mix to the bottom of the new pot. The plant should sit at the same soil level as it did in its previous container. Place the plant in the center, adjusting the soil underneath if needed.


6. Fill in Around the Plant

Using your trowel or hands, fill in around the plant with potting mix. Press the soil lightly to remove air pockets but avoid compacting it too tightly, as plants need oxygen around their roots.

Leave about an inch of space between the soil surface and the rim of the pot to allow for easy watering.


7. Water Thoroughly

Give your newly potted plant a generous drink of water until it starts to drain from the bottom. This helps settle the soil around the roots and reduces transplant shock.


Post-Potting Care Tips

Once your plant is happily settled in its new home, keep these care tips in mind:

  • Water Wisely: Different plants have different watering needs. Check the soil’s top inch — if it feels dry, it’s time to water.
  • Light Requirements: Place the plant in an area that suits its sunlight preferences, whether it’s a sunny window or a shady corner.
  • Fertilize Occasionally: Use a balanced, water-soluble fertilizer every few weeks during the growing season (spring and summer).
  • Check for Pests: Regularly inspect leaves and soil for signs of pests like gnats, aphids, or mealybugs.

Common Potting Mistakes to Avoid

Even seasoned plant lovers make occasional errors. Here’s what to watch out for:

  • Overwatering: The number one killer of houseplants. Always check soil moisture before watering.
  • Using the Wrong Soil: Match your soil mix to your plant’s specific needs.
  • Skipping Drainage: Never pot a plant in a container without a drainage hole.
  • Ignoring Root Bound Plants: If roots are circling the bottom, tease them apart or trim lightly before repotting.
  • Sudden Relocation: Moving a plant from one environment to a vastly different one can cause stress. Gradually acclimate it to new conditions.

Creative Potting Ideas

Want to make your indoor plant setup extra charming? Try these ideas:

  • Decorative Planters: Opt for patterned, textured, or colorful pots to match your interior style.
  • Upcycled Containers: Use old teacups, baskets, or mason jars (with drainage solutions) for a unique touch.
  • Hanging Planters: Perfect for trailing plants like String of Pearls or Ivy.
  • Plant Stands: Elevate your green friends to add dimension and interest to your space.

Conclusion

Potting a plant might seem like a simple task, but doing it right makes a huge difference in your plant’s health and longevity. From selecting the perfect pot and soil mix to giving it the care it needs, every step contributes to creating a thriving green space in your home.

Whether you’re a beginner or a plant parent looking to expand your indoor garden, mastering the art of potting plants will not only enhance your décor but also bring a little more calm and vitality to your everyday life. So grab a pot, pick a plant, and start transforming your space with beautiful, living greenery today!

How to Plant Potatoes from a Potato – A Kitchen to Garden Miracle!

How to Plant Potatoes from a Potato – A Kitchen to Garden Miracle!

Potatoes are one of the most versatile and beloved vegetables worldwide. From crispy fries to hearty stews, they grace countless dishes and kitchens. But have you ever wondered if the potatoes in your pantry could actually become the seeds for your own flourishing garden? The good news is — yes! Planting potatoes from potatoes is not just possible; it’s an easy, rewarding, and surprisingly simple way to turn your kitchen scraps into a bountiful harvest. This “kitchen to garden miracle” is perfect for gardeners of all experience levels, and in this guide, you’ll learn everything you need to know to grow your own potatoes successfully, step-by-step.


Why Plant Potatoes from Potatoes?

Before diving into the how, it’s important to understand why planting potatoes from potatoes is such a great idea:

  • Cost-effective: Instead of buying expensive seed potatoes, you can start with the ones you already have.
  • Sustainable: Reduces food waste by repurposing sprouted or leftover potatoes.
  • Easy to grow: Potatoes are hardy and adaptable to many growing conditions.
  • Great yield: A single potato can produce multiple new potatoes, amplifying your harvest.
  • Fun and educational: A perfect project for beginner gardeners, kids, or anyone interested in food growing.

What You Need to Plant Potatoes

To start your potato planting journey, gather these essentials:

  • Seed potatoes: These can be grocery store potatoes, but certified seed potatoes are ideal as they’re disease-free. If using grocery store potatoes, select ones that have started sprouting (“eyes”).
  • Well-draining soil: Potatoes dislike soggy soil; loose, sandy loam enriched with organic matter is best.
  • Containers or garden space: Potatoes can grow in raised beds, garden rows, or large containers.
  • Fertilizer or compost: To nourish your plants for healthy growth.
  • Water source: Consistent moisture is key but avoid overwatering.

Step 1: Select and Prepare Your Potatoes

If you’re using potatoes from the kitchen, here’s how to prepare them:

Choose Potatoes with Eyes

“Eyes” are small indentations or sprouts from which new plants grow. Select potatoes that have healthy, greenish sprouts or small shoots.

Cut or Plant Whole?

  • If potatoes are small (around golf ball size), plant them whole.
  • Larger potatoes should be cut into pieces about the size of a chicken egg, each piece having at least 1-2 eyes.

Cure the Cut Pieces

After cutting, let the potato pieces cure (dry) for 2-3 days in a cool, shaded place. This allows the cut surfaces to callus over and helps prevent rot and disease when planted.


Step 2: Prepare Your Planting Site or Container

Potatoes thrive best in:

  • Loose, well-draining soil: Heavy clay or compacted soil can cause poor tuber development.
  • Full sunlight: Potatoes need at least 6 hours of direct sunlight daily.
  • pH between 5.0 and 7.0: Slightly acidic soil encourages tuber formation.

If planting in containers, choose ones at least 12 inches deep and wide to allow tubers room to grow.


Step 3: Planting the Potatoes

Here’s how to plant your prepared potato pieces:

  • Planting time: Ideally, plant potatoes in early spring when the soil temperature reaches 45°F (7°C).
  • Depth: Dig holes or trenches about 4 inches deep.
  • Spacing: Place potato pieces with the eyes facing up, spaced about 12 inches apart, and rows about 24-36 inches apart.
  • Cover: Gently cover the pieces with soil.

Step 4: Care and Maintenance

Once planted, your potato crop needs attentive care to ensure a healthy, productive harvest:

Watering

  • Keep soil consistently moist but not waterlogged.
  • Potatoes require about 1-2 inches of water per week.
  • Reduce watering as plants mature to avoid rot.

Hilling

  • When shoots reach 6-8 inches tall, mound soil or mulch around the base, covering the stems partially.
  • Repeat hilling every few weeks. This protects developing tubers from sunlight (which turns them green and toxic) and encourages more tuber growth.

Fertilizing

  • Use a balanced fertilizer or compost high in phosphorus and potassium.
  • Avoid excessive nitrogen, which promotes foliage growth but reduces tuber development.

Pest and Disease Control

  • Watch for pests like Colorado potato beetles and aphids. Handpick or use organic insecticides.
  • Prevent fungal diseases by rotating crops and avoiding planting potatoes where tomatoes or peppers recently grew.
  • Ensure good airflow and avoid overhead watering to reduce disease risks.

Step 5: Harvesting Your Potatoes

Your patience will soon pay off when it’s time to harvest:

  • New potatoes: These are baby potatoes harvested about 8-10 weeks after planting, when plants flower.
  • Mature potatoes: Harvest after the foliage has died back, typically 90-120 days post-planting.

How to Harvest

  • Gently dig around the plant with a fork or shovel, careful not to damage tubers.
  • Brush off excess dirt, but avoid washing until ready to use.
  • Let potatoes cure in a cool, dark place for a week or two to toughen their skin for storage.

Step 6: Storing Your Harvest

Proper storage extends your potatoes’ life:

  • Store in a cool (45-50°F), dark, and well-ventilated place.
  • Avoid refrigeration, as cold temperatures convert starch to sugar, affecting flavor.
  • Keep away from onions, which release gases that can spoil potatoes.

Bonus Tips for a Thriving Potato Garden

  • Use disease-free seed potatoes when possible: This reduces the risk of introducing blights.
  • Rotate crops: Don’t plant potatoes in the same spot each year to prevent soil-borne diseases.
  • Mulch heavily: Mulching helps retain moisture, control weeds, and keeps tubers cooler.
  • Experiment with varieties: Try Yukon Gold, Red Pontiac, or fingerlings for different flavors and textures.
  • Companion planting: Grow potatoes alongside beans, corn, or marigolds to improve yield and deter pests.

Kitchen to Garden Miracle: Why Growing Potatoes is So Rewarding

There’s something deeply satisfying about turning your kitchen potato scraps into a thriving garden bounty. Watching the green shoots emerge, nurturing the plants, and then harvesting your own potatoes brings a special connection to your food source. Plus, homegrown potatoes taste fresher, often better, and you know exactly how they were grown—without chemicals or pesticides.

Gardening is also a calming, enjoyable hobby that boosts mental health and encourages a sustainable lifestyle. The miracle of growing potatoes from potatoes is a wonderful example of how small steps can lead to big, delicious rewards.


Common Questions About Planting Potatoes from Potatoes

Can I plant supermarket potatoes?

Yes, you can, especially if they have begun sprouting. However, supermarket potatoes may be treated with sprout inhibitors or carry diseases. Certified seed potatoes are the safest and most reliable choice.

How long do potatoes take to grow?

It varies by variety and conditions but generally 90 to 120 days from planting to mature harvest.

Can I plant potatoes indoors?

Yes! Use large containers and provide sufficient light. Indoor planting is great for limited space gardeners.


Summary: The Simple Miracle of Potato Gardening

  1. Choose healthy potatoes with eyes.
  2. Cut large potatoes into pieces and cure.
  3. Prepare well-draining soil or containers.
  4. Plant 4 inches deep, eyes up, spaced well.
  5. Water moderately and hill soil around stems.
  6. Fertilize carefully and watch for pests.
  7. Harvest when plants flower for new potatoes or after foliage dies for mature tubers.
  8. Store properly for long-lasting freshness.

Final Thought

Planting potatoes from potatoes is a straightforward, cost-effective, and surprisingly magical way to bring a piece of your kitchen to your garden. It’s a journey that transforms humble tubers into a bountiful feast, connects you to nature, and rewards you with the rich taste of homegrown produce. Whether you have a backyard, balcony, or just a few containers, planting potatoes offers a deliciously tangible way to grow your own food and witness the kitchen-to-garden miracle firsthand.

How to Plant Plumeria Cuttings – Add Fragrance to Your Space!

How to Plant Plumeria Cuttings – Add Fragrance to Your Space!

If you’re a lover of beautiful, fragrant flowers and want to bring a touch of tropical paradise into your home or garden, planting plumeria cuttings is a fantastic way to do so. Plumeria, also known as frangipani, is renowned for its stunning blooms and intoxicating scent that can instantly uplift any space. Whether you’re a gardening novice or an experienced green thumb, growing plumeria from cuttings is a rewarding and straightforward process. In this guide, we’ll walk you through everything you need to know to successfully plant and nurture plumeria cuttings, ensuring you add that sweet, enchanting fragrance to your space.


Why Choose Plumeria?

Plumeria is a tropical flowering plant native to Central America, the Caribbean, and parts of South America. It has gained worldwide popularity because of its:

  • Exquisite, colorful flowers: Usually white, yellow, pink, or red, often with multiple hues.
  • Delightful fragrance: The flowers emit a sweet, heady aroma, especially in the evenings.
  • Low maintenance: Once established, plumeria plants are drought-tolerant and thrive in warm climates.
  • Versatility: Ideal as potted plants indoors, patio décor, or garden additions.

Benefits of Growing Plumeria from Cuttings

Growing plumeria from cuttings rather than seeds offers several advantages:

  • Faster flowering: Seed-grown plumeria can take years to bloom, whereas cuttings flower much sooner.
  • Easier propagation: Cuttings don’t require pollination or complex seed treatment.
  • Preserves variety: Cuttings produce plants identical to the parent, keeping your favorite flower color and fragrance.

Step 1: Choose the Right Plumeria Cutting

Selecting the right cutting is crucial for success. Here’s what to look for:

  • Healthy branch: Choose a firm, disease-free branch from a mature plumeria plant.
  • Length: Aim for a cutting about 12 to 18 inches long.
  • Age: Semi-hardwood cuttings work best – not too green or soft, but not too old and woody.
  • Leaf removal: Remove most of the leaves, leaving a few at the top to help with photosynthesis.

Step 2: Prepare the Cutting

Proper preparation increases rooting success:

  • Cut cleanly: Use a sterilized, sharp pruning shear to make a clean cut just below a node (the point where leaves grow).
  • Dry the cutting: Let the cutting dry for about 1-2 weeks in a shaded, well-ventilated area. This allows the cut end to callus over, reducing the risk of rot.
  • Optional rooting hormone: Dip the cut end in rooting hormone powder or gel to encourage faster root development.

Step 3: Choose the Planting Medium

Plumeria cuttings need a well-draining medium to avoid waterlogging and root rot:

  • Ideal mix: A combination of cactus soil mix, perlite, and coarse sand works great.
  • Container choice: Use a pot with drainage holes or a raised garden bed to ensure water doesn’t accumulate around the roots.

Step 4: Plant the Cutting

Here’s how to plant your plumeria cutting correctly:

  • Depth: Insert the cutting 3 to 4 inches deep into the soil.
  • Support: If needed, stake the cutting upright to keep it stable until roots develop.
  • Water: Lightly water the soil after planting but avoid soaking it.

Step 5: Provide Proper Care

Once planted, your cutting needs the right environment to thrive:

Light

  • Plumeria loves bright, indirect sunlight. After rooting, it can tolerate full sun, but initially, avoid intense midday sun to prevent stress.

Watering

  • Water sparingly. Plumeria are drought-tolerant, and overwatering is the most common cause of failure. Water only when the top inch of soil feels dry.
  • During rooting, mist the cutting lightly rather than soaking.

Temperature & Humidity

  • Plumeria prefer warm temperatures between 65-80°F (18-27°C).
  • They don’t tolerate frost well; if you live in colder climates, grow them in pots to bring indoors during winter.

Fertilizing

  • Once roots form and new growth appears, use a balanced fertilizer with a higher phosphorus content (e.g., 10-30-10) to encourage blooming.
  • Fertilize every 4-6 weeks during the growing season.

Step 6: Watch for Root Development

Rooting can take anywhere from 4 to 8 weeks:

  • Gently tug the cutting to feel for resistance, which indicates roots have developed.
  • New leaves and shoots are signs of successful rooting.
  • Be patient — rushing to water or transplant before roots develop can harm the cutting.

Step 7: Transplanting and Long-Term Care

Once rooted and growing:

  • Transplant the plumeria to a larger pot or garden spot with full sun.
  • Continue to water moderately and fertilize regularly.
  • Prune dead or unhealthy branches to encourage bushier growth.
  • Protect from cold weather by bringing indoor or covering during frost.

Troubleshooting Common Problems

  • Cutting rotting: Likely caused by excess moisture or planting before callus formed. Allow cuttings to dry longer next time and avoid overwatering.
  • No root growth: Could be due to low temperatures, poor soil drainage, or insufficient light.
  • Yellow leaves: Often from overwatering or nutrient deficiency — adjust watering and feed accordingly.
  • Pests: Watch for spider mites, aphids, or mealybugs. Use insecticidal soap or neem oil to treat infestations.

Tips to Enhance Fragrance and Blooming

  • Grow plumeria in a sunny location with at least 6 hours of direct sunlight.
  • Avoid excessive nitrogen fertilizers, which promote leaf growth but reduce flowers.
  • Deadhead spent blooms to encourage new flowering.
  • Ensure the plant is slightly root-bound in pots to stimulate blooming.

Why Your Space Will Love Plumeria

Adding plumeria to your garden, patio, or even indoors (with proper light) is like inviting a little slice of the tropics into your life. Their stunning flowers brighten spaces with vivid color, and the fragrance is known to be calming and uplifting—perfect for creating a serene atmosphere.


Summary: Easy Steps to Plant Plumeria Cuttings

  1. Select a healthy semi-hardwood cutting (12-18 inches).
  2. Let it dry and callus for 1-2 weeks.
  3. Prepare well-draining soil mix.
  4. Plant cutting 3-4 inches deep.
  5. Provide bright indirect light and minimal water.
  6. Wait 4-8 weeks for roots to develop.
  7. Transplant to sunlit location and care for plant.

Final Thought

Growing plumeria from cuttings is a simple, rewarding way to add exotic beauty and heavenly fragrance to your space. With patience and care, you can enjoy tropical blooms year after year, impressing friends and family with your gardening skills and the sweet scent that fills your home or garden. So grab a cutting, follow these steps, and start your fragrant journey with plumeria today!

How to Plant Pistachio Nuts – Grow Your Own Nutty Treats!

How to Plant Pistachio Nuts – Grow Your Own Nutty Treats!

Who wouldn’t love having their own supply of crunchy, buttery pistachios right from the backyard? Often enjoyed as a tasty snack, in desserts, or sprinkled on salads, pistachios are one of the world’s favorite nuts. The good news? You can grow your own pistachio trees at home and savor the satisfaction of harvesting these delightful treats yourself.

If you’ve ever wondered how to plant pistachio nuts and care for the trees, you’re in the right place. This comprehensive guide will walk you through everything you need to know—from choosing the right seeds to planting, nurturing, and finally enjoying your homegrown pistachios.


Why Grow Pistachio Nuts?

Before we dive into the planting process, let’s take a moment to appreciate why pistachio trees make such a great addition to your garden.

Benefits of Growing Pistachios:

  • Nutritious and delicious: High in protein, healthy fats, and antioxidants.
  • Drought-tolerant once established: Perfect for dry, arid, or Mediterranean-like climates.
  • Low maintenance: Minimal care after the first few years.
  • Long-lived and productive: A single tree can produce nuts for decades.
  • Beautiful and ornamental: Graceful branches and lush foliage add beauty to landscapes.

Pistachio Tree Basics

Pistachios come from the tree Pistacia vera, native to Central Asia and the Middle East. These hardy, sun-loving trees can grow up to 20–30 feet tall and live for over a century.

Key Pistachio Facts:

  • USDA Zones: 7–11
  • Pollination: Pistachio trees are dioecious — meaning there are separate male and female trees. You’ll need at least one male for every 8–12 female trees to produce nuts.
  • Time to bear nuts: 5–8 years, with full production in 15–20 years.
  • Lifespan: 100+ years

Can You Grow Pistachios from Store-Bought Nuts?

In most cases, store-bought roasted or salted pistachios won’t germinate. If you wish to grow pistachio trees from seed, you’ll need raw, unsalted, unprocessed pistachio nuts, ideally fresh and still in their shell.

Better yet, purchase viable pistachio seeds from a reputable nursery or online seed supplier to ensure germination success.


When and Where to Plant Pistachio Nuts

Pistachios love hot summers, cool winters, and low humidity. Choose a location with these conditions for best results.

Ideal Conditions:

  • Full sun: At least 7–8 hours of direct sunlight daily.
  • Well-draining soil: Sandy or loamy soil is ideal. Avoid clay or waterlogged areas.
  • Soil pH: Slightly alkaline to neutral (7.0–7.8)
  • Planting time: Late winter to early spring, after the danger of frost has passed.

How to Plant Pistachio Nuts — Step by Step

What You’ll Need:

  • Viable, raw pistachio seeds
  • Water for soaking
  • Seed-starting soil or sandy, well-draining potting mix
  • Small pots or seed trays
  • Clear plastic wrap or a humidity dome (optional)
  • A warm, sunny windowsill or greenhouse area

Step 1: Soak the Nuts

Begin by soaking your raw pistachio nuts in lukewarm water for 24 hours. This softens the hard outer shell and kickstarts germination.

After soaking, carefully crack open the outer shell, leaving the inner seed coat intact.


Step 2: Stratify the Seeds

To mimic natural winter conditions and increase germination rates, pistachio seeds benefit from cold stratification.

  • Place the seeds in a damp paper towel.
  • Seal them inside a plastic zip-lock bag.
  • Refrigerate at 35–45°F (2–7°C) for 6–8 weeks.

Check occasionally to ensure the paper towel stays moist but not soggy.


Step 3: Plant the Seeds

After stratification, it’s time to plant your pistachio seeds.

  • Fill small pots with a well-draining seed-starting mix.
  • Plant each seed about 1 inch deep.
  • Water lightly to moisten the soil.

Cover the pots with plastic wrap or a humidity dome to retain warmth and moisture.


Step 4: Provide Warmth and Light

Place your pots in a warm, sunny location — a south-facing windowsill or heated greenhouse is ideal. Pistachio seeds germinate best at temperatures around 75–85°F (24–29°C).

Keep the soil slightly moist but avoid overwatering, as pistachio seeds are prone to rot.


Step 5: Wait for Germination

Be patient — pistachio seeds can take 3–6 weeks (or longer) to germinate. Once the seedlings appear, remove the plastic cover and continue providing warmth and light.


Transplanting Pistachio Seedlings

When your seedlings reach about 4–6 inches tall and have several sets of true leaves, it’s time to transplant them outdoors or into larger pots.

Tip: If planting outdoors, wait until all risk of frost has passed and daytime temperatures stay consistently warm.

How to Transplant:

  • Dig a hole twice as wide and the same depth as the seedling’s root ball.
  • Space trees about 20 feet apart.
  • Water well after transplanting.

Caring for Your Pistachio Trees

Once your pistachio trees are in the ground, care is relatively simple.

Watering:

  • Keep soil moist (not soggy) during the first year.
  • After establishment, pistachios are drought-tolerant and only need deep watering every 2–4 weeks in dry climates.

Fertilizing:

  • Apply a balanced fertilizer in early spring.
  • Avoid high-nitrogen fertilizers, which encourage excessive foliage at the expense of nut production.

Pruning:

  • Lightly prune in winter to remove dead, diseased, or crossing branches.
  • Shape the tree to allow sunlight and air circulation through the canopy.

Dealing with Pests and Diseases

Pistachio trees are generally hardy but can face occasional problems.

ProblemCauseSolution
Aphids, mites, borersCommon sap-sucking insectsUse neem oil or insecticidal soap
Fungal diseases (blight)Excessive humidity, poor airflowPrune for airflow, avoid overhead watering
Root rotPoor drainageEnsure well-draining soil, avoid overwatering

Pollination and Nut Production

Since pistachios are dioecious, you’ll need one male tree for every 8–12 female trees to produce nuts.

  • Male trees release pollen in early spring.
  • Female trees bear nuts when pollinated by wind-carried pollen.

Ensure good airflow around your trees to aid natural pollination.


Harvesting Pistachio Nuts

Pistachios typically take 5–8 years to begin producing nuts and reach peak production in 15–20 years.

How to Harvest:

  • In late summer to early fall, the outer hull of the pistachio nut turns from green to a rosy beige and splits open.
  • Shake the branches or hand-pick the nuts.
  • Remove the outer hull immediately after harvest.
  • Dry the nuts in a sunny, well-ventilated area for 3–4 days.

Tip: Properly dried pistachios can be stored in airtight containers for up to a year.


Fun Growing Tips

  • Companion plants: Plant drought-tolerant herbs like lavender and rosemary nearby.
  • Potted pistachios: In colder zones, grow pistachios in large containers and bring them indoors for winter.
  • Patience pays off: Though slow-growing, a mature pistachio tree can yield 50–100 pounds of nuts annually.

Final Thoughts

While growing pistachios from seed takes time, patience, and a little effort, the rewards are absolutely worth it. These resilient, handsome trees not only enhance your garden’s beauty but also offer a satisfying supply of homegrown, nutritious nuts.

Now that you know how to plant pistachio nuts, why not give it a try? Start your own nutty adventure today — your future self (and taste buds) will thank you!

How to Plant Pinto Beans – The Perfect Addition to Your Garden!

How to Plant Pinto Beans – The Perfect Addition to Your Garden!

If you’re looking for an easy, rewarding, and nutritious crop to add to your garden, pinto beans are an excellent choice. Known for their rich flavor and versatility in dishes like chili, soups, and refried beans, pinto beans are a staple in many kitchens — and you can grow them right in your backyard with minimal effort.

In this comprehensive guide, we’ll show you how to plant pinto beans, care for them, and harvest a bountiful crop that’s as satisfying to grow as it is to eat. Whether you’re a seasoned gardener or a beginner, pinto beans are the perfect addition to your garden!


Why Grow Pinto Beans?

Before we dive into the planting process, let’s talk about why pinto beans deserve a spot in your garden.

Benefits of Growing Pinto Beans:

  • Easy to grow: Pinto beans thrive in warm climates and require little maintenance.
  • Nutrient-rich: High in protein, fiber, and essential minerals.
  • Soil-friendly: Beans naturally fix nitrogen in the soil, improving soil health for future crops.
  • Versatile in the kitchen: Great for soups, stews, burritos, and more.
  • Cost-effective: A small packet of seeds can produce a large harvest.

The Basics of Pinto Bean Plants

Pinto beans (Phaseolus vulgaris) are warm-season legumes that grow as either bush-type or pole-type plants.

  • Bush varieties grow into compact plants, making them ideal for small gardens and containers.
  • Pole varieties climb and require a trellis or support but often yield a larger harvest.

Both types produce green pods containing the distinctive speckled pinto beans.


When to Plant Pinto Beans

Timing is crucial for a successful pinto bean harvest.

Ideal Planting Time:

  • After the last frost date in your region.
  • Soil temperature should be at least 65°F (18°C) for seeds to germinate properly.
  • In most areas, this means planting in late spring to early summer.

Beans are sensitive to cold, so avoid planting too early when the soil is still cool.


Choosing the Right Location

Pinto beans love warmth and sunlight.

Site Requirements:

  • Full sun: At least 6–8 hours of direct sunlight daily.
  • Well-draining soil: Avoid heavy clay or soggy soil.
  • Slightly acidic to neutral pH: Ideal range is 6.0 to 7.0.

If your soil is poor or compacted, amend it with organic matter like compost or aged manure before planting.


How to Plant Pinto Beans – Step-by-Step Guide

What You’ll Need:

  • Pinto bean seeds (from a trusted seed supplier)
  • Garden bed or large containers
  • Garden trowel or hoe
  • Compost or organic fertilizer (optional)
  • Trellis or poles (for pole varieties)

Step 1: Prepare the Soil

Loosen the soil to a depth of about 6–8 inches. Remove weeds, rocks, and debris. Mix in a layer of compost to enrich the soil and improve drainage.

Tip: Beans don’t require nitrogen-rich fertilizer since they produce their own nitrogen, but a balanced, all-purpose fertilizer can be added if your soil is very poor.


Step 2: Sow the Seeds

Direct sowing is the best method for planting pinto beans. They don’t transplant well.

  • Plant seeds 1–1.5 inches deep.
  • Space seeds 3–4 inches apart in rows.
  • Space rows about 18–24 inches apart.

If planting pole beans, install trellises, stakes, or poles at the time of sowing to avoid disturbing the roots later.


Step 3: Water Gently

After planting, water the area gently but thoroughly to settle the soil. Keep the soil evenly moist but not waterlogged.


Caring for Pinto Bean Plants

Once your beans sprout, typically within 7–14 days, a little care will keep them growing strong.

Watering

  • Water regularly, especially during dry spells.
  • Aim for 1 inch of water per week.
  • Avoid wetting the foliage to reduce the risk of fungal diseases.

Weeding

  • Keep the area around your beans weed-free.
  • Mulch with straw or shredded leaves to suppress weeds and retain moisture.

Fertilizing

  • Pinto beans rarely need additional fertilizer.
  • If growth seems slow, use a low-nitrogen, balanced fertilizer sparingly.

Supporting Pole Beans

  • Train vines to climb trellises or poles.
  • Gently tie them as they grow if needed.

Common Pests and Problems

Like all garden crops, pinto beans have a few potential issues to watch for.

ProblemCauseSolution
AphidsSap-sucking insectsSpray with soapy water or neem oil
Bean beetlesLeaf-eating pestsHandpick or use organic insecticide
Fungal diseasesOverly wet conditionsWater at soil level, improve air circulation
Poor germinationCold or wet soilPlant when soil is warm and well-drained

Harvesting Pinto Beans

Pinto beans can be harvested either fresh or dried, depending on your preference.

For Fresh Beans:

  • Pick pods when they are plump and bright green.
  • Use immediately in recipes or store in the fridge for a few days.

For Dried Beans:

  • Allow pods to mature on the plant until they turn yellow or tan and feel dry.
  • Harvest on a dry day to prevent mold.

How to Harvest:

  • Pull up the entire plant or pick individual dry pods.
  • Place harvested pods in a dry, well-ventilated area to finish drying for about 1–2 weeks.
  • Shell the beans by hand or by gently crushing the pods.

Store dried beans in an airtight container in a cool, dark place for up to a year.


Saving Pinto Bean Seeds

Another great thing about growing pinto beans is you can save seeds for next season.

  • Choose your healthiest, most productive plants.
  • Allow some pods to dry fully on the plant.
  • Harvest and store the dried beans as you would for eating, but label them for seed use.

Properly stored, bean seeds remain viable for up to 3 years.


How Many Beans Will One Plant Produce?

On average:

  • A bush pinto bean plant yields about 1/2 to 1 cup of dried beans.
  • Pole varieties can produce slightly more over a longer period.

Plant accordingly based on your desired harvest size.


Fun Tips for Growing Pinto Beans

  • Succession plant: Sow new rows every 2–3 weeks in early summer for a staggered harvest.
  • Companion plant: Grow alongside corn, cucumbers, or squash for a mutually beneficial garden bed.
  • Container growing: Pinto beans can thrive in pots at least 8–12 inches deep.

Final Thoughts

Planting pinto beans is one of the most satisfying and straightforward gardening projects you can undertake. They’re hardy, easy to care for, and reward you with a nutritious, homegrown harvest that enhances your meals and improves your soil.

Whether you’re aiming for fresh green beans or dried beans for your pantry, pinto beans are the perfect addition to your vegetable garden. With just a little space, sunshine, and care, you can enjoy your own crop of these versatile legumes in no time.

So why not start your own pinto bean patch this season? Happy planting!

How to Plant a Pineapple Top – A Fun Way to Grow Tropical Fruits!

How to Plant a Pineapple Top – A Fun Way to Grow Tropical Fruits!

If you’ve ever enjoyed a juicy, golden pineapple and wondered if you could grow one yourself, the answer is a resounding yes! Believe it or not, you can turn the leafy top of a store-bought pineapple into a thriving tropical plant — right in your home or garden. Not only is it a fun and simple project, but it’s also incredibly satisfying to watch your very own pineapple plant grow over time.

In this comprehensive guide, we’ll walk you through everything you need to know about how to plant a pineapple top, from preparing the crown to caring for your new plant and even harvesting your homegrown fruit. Let’s get tropical!


Why Grow a Pineapple from a Top?

While most fruits grow from seeds, pineapples are unique — they can be propagated from the leafy crown on top of the fruit. This method is perfect for beginner gardeners and indoor plant enthusiasts alike.

Benefits of growing a pineapple top:

  • Easy and cost-effective: You only need a ripe pineapple and a pot.
  • Fun educational project: Great for kids and curious gardeners.
  • Attractive houseplant: Pineapple plants have a striking, exotic look.
  • Potential for homegrown fruit: With patience, your plant may produce a new pineapple in a couple of years.

Choosing the Right Pineapple

Success starts with selecting the right pineapple. Look for one with:

  • Healthy, green, unblemished leaves.
  • A firm, ripe fruit body.
  • No signs of rot or disease at the base of the leaves.

Avoid pineapples with dry, brown, or wilted tops, as these may not sprout successfully.


How to Plant a Pineapple Top – Step-by-Step Guide

What You’ll Need:

  • 1 ripe, healthy pineapple
  • Sharp knife
  • Small bowl of water
  • A pot (6–8 inches wide) with drainage holes
  • Well-draining potting soil (cactus mix or sandy loam works well)
  • Sunny windowsill or outdoor spot (if in warm climates)

Step 1: Remove the Pineapple Top

Hold the pineapple firmly and twist the leafy crown off with a firm, steady motion. Alternatively, you can cut off the top about half an inch below the leaves using a sharp knife.

Tip: Avoid leaving too much fruit flesh attached, as it may rot when planted.


Step 2: Prepare the Crown

  • Strip away a few layers of the small, lower leaves to expose about 1 inch of stem.
  • You may notice small, brown bumps around the stem — these are future roots.

Allow the crown to dry in a shaded, well-ventilated area for 24–48 hours. This drying period helps prevent rot once planted.


Step 3: Root the Pineapple Top (Optional Water Method)

You can root the pineapple crown in water before planting in soil:

  • Place the prepared crown in a small bowl or jar of water, with only the bare stem submerged.
  • Change the water every 2–3 days to keep it fresh.
  • After 2–4 weeks, you’ll see small roots emerging.

Alternative: You can plant the dried crown directly into soil without rooting in water.


Step 4: Plant the Pineapple Top

Fill a pot with well-draining soil. Create a hole in the center and gently press the crown into the soil, burying the exposed stem up to the base of the leaves.

Firm the soil around the plant and water lightly to settle it in place.

Tip: Ensure your pot has drainage holes — pineapples dislike soggy soil.


Step 5: Find a Sunny Spot

Pineapples thrive in warm, sunny conditions. Place your potted plant in a bright location:

  • Indoors: Choose a sunny windowsill or a spot with 6–8 hours of bright light.
  • Outdoors: A sunny, sheltered patio or garden corner works well in warm climates.

Ideal Temperature Range:
65°F to 85°F (18°C to 29°C)


Caring for Your Pineapple Plant

Growing a pineapple plant is relatively low-maintenance, but a few essentials will keep it happy and healthy:

Watering

  • Water the plant when the top inch of soil feels dry.
  • Avoid overwatering; pineapples prefer slightly dry conditions.
  • Water into the center of the leafy rosette occasionally to mimic natural rain collection.

Feeding

  • Use a balanced liquid fertilizer once a month during the growing season (spring and summer).
  • Avoid heavy fertilizing in fall and winter when growth slows.

Repotting

If your plant outgrows its pot, move it to a slightly larger one in spring or early summer.


When Will My Pineapple Produce Fruit?

Here’s where patience comes in — pineapple plants typically take 2 to 3 years to mature and produce fruit.

Signs your plant is ready to flower:

  • Grown to about 3–4 feet wide.
  • Healthy, full rosette of leaves.
  • Sometimes plants may produce a flower spike from the center.

Once a flower spike appears, it will develop into a baby pineapple over 5–7 months.

Bonus: The small, ornamental pineapple can be just as beautiful as it is delicious.


Encouraging Your Plant to Fruit

If your plant is healthy but hasn’t fruited after a couple of years, you can gently coax it along.

Ethylene Gas Method:

  • Place the plant inside a large plastic bag with a few ripe apples.
  • Seal the bag and leave for a week.
  • The apples emit ethylene gas, which can trigger blooming.

Return the plant to its sunny spot and continue regular care.


Common Problems and Solutions

ProblemCauseSolution
Brown, dry leaf tipsLow humidity or underwateringMist leaves and increase watering frequency
Rotting base or leavesOverwateringReduce watering and improve drainage
No fruit after 3 yearsLack of light or nutrientsMove to sunnier spot, fertilize regularly
Pests (mealybugs, scale)InfestationWipe leaves with soapy water or neem oil

Harvesting and Enjoying Your Homegrown Pineapple

When your pineapple turns golden yellow and emits a sweet fragrance, it’s ready to harvest.

  • Use a sharp knife to cut the fruit at the base of the stalk.
  • Let the harvested pineapple ripen further at room temperature if needed.

Fun Tip: You can save the new top and repeat the process, growing another plant!


Final Thoughts

Planting a pineapple top is one of the easiest and most enjoyable ways to bring a slice of the tropics into your home or garden. While it requires a little patience, the stunning plant and the thrill of harvesting your own pineapple make it well worth the wait.

It’s a project perfect for plant lovers, families, and anyone craving a bit of tropical charm. So the next time you enjoy a fresh pineapple, don’t toss the top — turn it into a new green adventure!

How to Plant Pepper Seeds – Start Your Spicy Adventure!

How to Plant Pepper Seeds – Start Your Spicy Adventure!

If you’re a fan of fresh, zesty flavors and a bit of garden excitement, growing your own peppers is the perfect project. Whether you prefer the sweet crunch of bell peppers, the heat of jalapeños, or the fiery bite of habaneros, planting pepper seeds is a fun, rewarding, and surprisingly simple way to start your spicy adventure.

In this detailed guide, we’ll walk you through everything you need to know about planting pepper seeds — from choosing your varieties to caring for your seedlings and transplanting them into the garden. Let’s get those peppers growing!


Why Grow Peppers from Seed?

While it’s easy to find pepper seedlings at garden centers, growing peppers from seed offers a whole new level of control, variety, and satisfaction:

  • Wider variety selection: Access hundreds of unique pepper varieties, from mild to extreme heat.
  • Healthier plants: Control over seed quality, soil, and growing conditions.
  • Longer growing season: Start seeds early indoors and enjoy an extended harvest.
  • Cost-effective: A single seed packet can yield dozens of pepper plants.

Choosing the Right Pepper Seeds

Before you plant, think about your taste preferences and your garden’s climate. Peppers range from sweet and mild to blisteringly hot.

Popular Pepper Types:

  • Sweet Bell Peppers: Great for salads, grilling, and stuffing. Varieties: ‘California Wonder,’ ‘Golden Bell,’ ‘Purple Beauty.’
  • Mild Peppers: Mild heat and great flavor. Varieties: ‘Banana Pepper,’ ‘Poblano,’ ‘Cubanelle.’
  • Medium-Heat Peppers: Add zesty flavor without overpowering spice. Varieties: ‘Jalapeño,’ ‘Cayenne,’ ‘Serrano.’
  • Hot to Super-Hot Peppers: For those who like it fiery. Varieties: ‘Habanero,’ ‘Ghost Pepper,’ ‘Carolina Reaper.’

Tip: Pay attention to the Scoville Heat Unit (SHU) rating on seed packets, which measures pepper spiciness.


When to Plant Pepper Seeds

Peppers are warm-weather crops that need a long growing season. Most gardeners start pepper seeds indoors 8-10 weeks before the last expected frost date.

For example:

  • If your last frost is around April 20, start your seeds indoors by late January to early February.

How to Plant Pepper Seeds – Step-by-Step

What You’ll Need:

  • Pepper seeds
  • Seed-starting trays or small pots
  • Seed-starting mix (light, well-draining soil)
  • Clear plastic dome or plastic wrap
  • Grow lights or sunny windowsill
  • Spray bottle for misting
  • Labels (to track your varieties)

1. Prepare the Containers

Use seed-starting trays, small pots, or recycled containers with drainage holes. Fill with a lightweight, sterile seed-starting mix.

2. Soak Seeds (Optional)

Soaking pepper seeds in warm water for 6–8 hours before planting can help speed up germination, especially for thick-skinned hot pepper varieties.

3. Plant the Seeds

  • Sow seeds 1/4 inch deep.
  • Place 1–2 seeds per cell or pot.
  • Cover lightly with soil and gently mist with water.

4. Create a Warm, Humid Environment

Peppers love warmth to germinate. Cover your tray or pots with a clear plastic dome or wrap to retain heat and moisture.

Ideal Germination Temperature:
75°F to 85°F (24°C to 29°C)

Use a seedling heat mat if your indoor environment is cool.


Caring for Pepper Seedlings

Watering

Keep the soil consistently moist but not soggy. Use a spray bottle to mist the surface gently.

Provide Plenty of Light

Once seedlings emerge (usually in 7–21 days), move them to a bright south-facing windowsill or under grow lights for 14–16 hours a day. Peppers are sun lovers and need plenty of light to grow strong.

Thin the Seedlings

When seedlings develop two sets of true leaves, thin them to one plant per cell or pot by snipping the weaker one at the soil line.


Transplanting Pepper Seedlings

Once seedlings are 4–6 inches tall and all danger of frost has passed, you can move them outdoors.

Hardening Off

Before transplanting, gradually acclimate seedlings to outdoor conditions:

  • Start by placing them outside in partial shade for a few hours a day.
  • Increase exposure to sunlight and wind over 7–10 days.

Prepare the Garden Bed

  • Choose a sunny location with at least 6–8 hours of direct sunlight daily.
  • Work compost or aged manure into the soil.
  • Space plants 18–24 inches apart in rows 24–36 inches apart.

Caring for Pepper Plants Outdoors

Watering

Keep soil consistently moist but not waterlogged. Peppers prefer even watering — irregular watering can cause blossom end rot or split fruit.

Fertilizing

Use a balanced fertilizer when plants start flowering. Avoid high-nitrogen fertilizers, which promote leafy growth at the expense of fruit.

Staking or Caging

Some larger pepper varieties benefit from staking or small cages to support branches laden with fruit.

Mulching

Apply organic mulch like straw or compost around plants to retain moisture, suppress weeds, and maintain soil warmth.


Common Pepper Growing Problems

  • Blossom End Rot: Caused by calcium deficiency or irregular watering.
  • Aphids: Small sap-sucking insects; spray with water or insecticidal soap.
  • Cutworms: Chew seedlings at the soil line; protect plants with collars.
  • Leaf Drop: Often a sign of too much or too little water.

Harvesting Peppers

Peppers can be harvested at various stages depending on your preference:

  • Green Peppers: Picked before ripening, with a crisper, slightly bitter taste.
  • Fully Ripe Peppers: Sweet and often turn red, yellow, orange, or purple, depending on variety.

Use sharp scissors or pruners to cut peppers from the plant to avoid damaging branches.


Storing and Using Fresh Peppers

  • Refrigerator: Fresh peppers last 1–2 weeks.
  • Freezing: Chop and freeze raw peppers for use in cooked dishes.
  • Drying: String up hot peppers to air-dry or use a dehydrator.
  • Pickling: Preserve sweet or hot peppers in vinegar brine for snacking and cooking.

Fun Pepper Facts

  • The world’s hottest pepper, the Carolina Reaper, tops 2.2 million SHU!
  • Peppers originated in Central and South America over 6,000 years ago.
  • Green bell peppers are simply unripe versions of red, yellow, or orange ones.

Final Thoughts

Planting pepper seeds is a gratifying way to add some spice and color to your garden and kitchen. With a bit of planning, warmth, and care, you can enjoy an impressive harvest of sweet, mild, or blistering hot peppers — perfect for fresh eating, cooking, or preserving.

Whether you’re a first-time grower or a seasoned gardener expanding your hot pepper collection, there’s always room to start your next spicy adventure.