If you’re searching for a way to bring natural charm and a sense of tranquility into your home, fern plants are an excellent choice. With their graceful fronds and lush textures, ferns add a touch of timeless beauty to any indoor space. These plants thrive in shaded, humid environments, making them perfect for bathrooms, living rooms, and shaded corners. Here are 8 stunning fern plants that not only enhance your décor but also improve air quality and create a relaxing atmosphere.
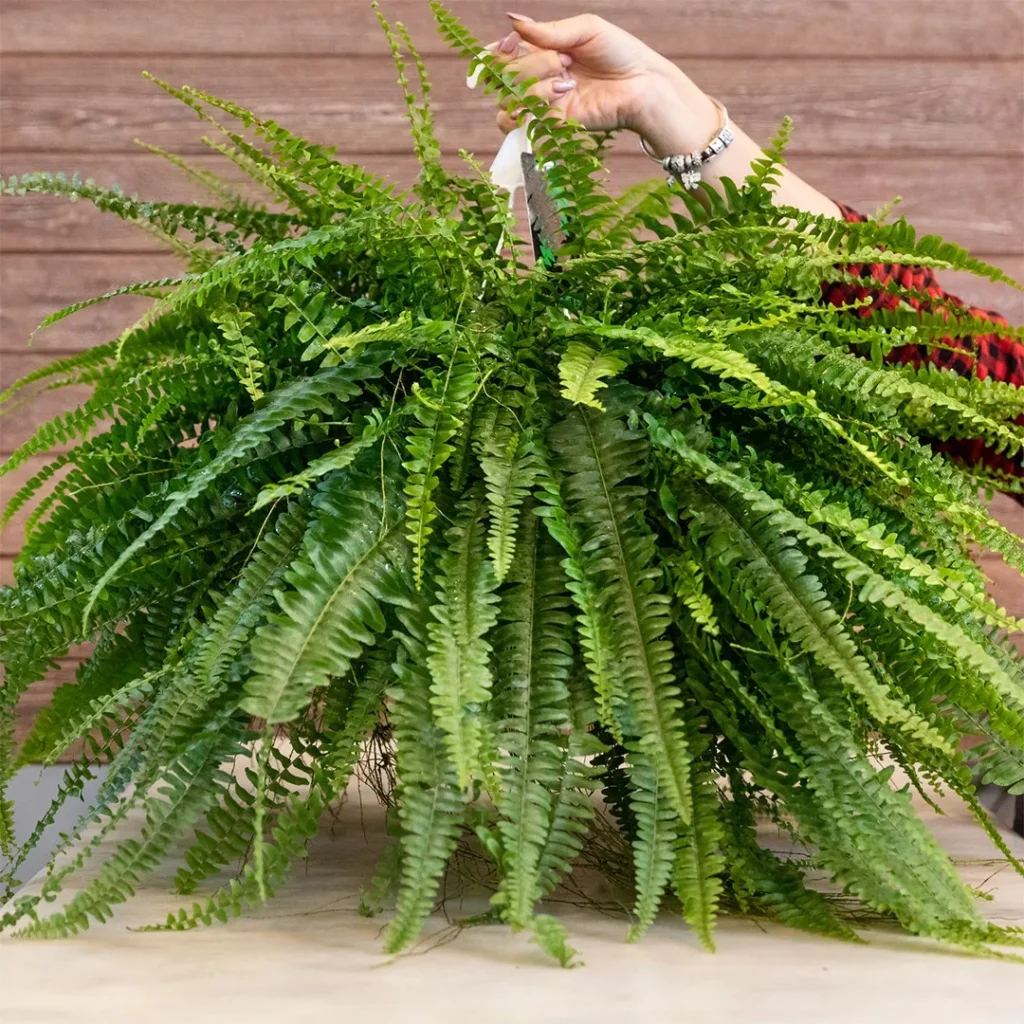
1. Boston Fern (Nephrolepis exaltata)
The Boston Fern is one of the most popular indoor ferns, beloved for its cascading, sword-shaped fronds that create a beautiful hanging display. Its feathery foliage adds softness and lush texture to any room. This fern thrives in bright, indirect light and high humidity, making it ideal for bathrooms or kitchens. Regular misting and moist, well-drained soil keep it healthy and vibrant. Besides its beauty, Boston Fern also purifies indoor air, removing toxins and freshening up your living space naturally.
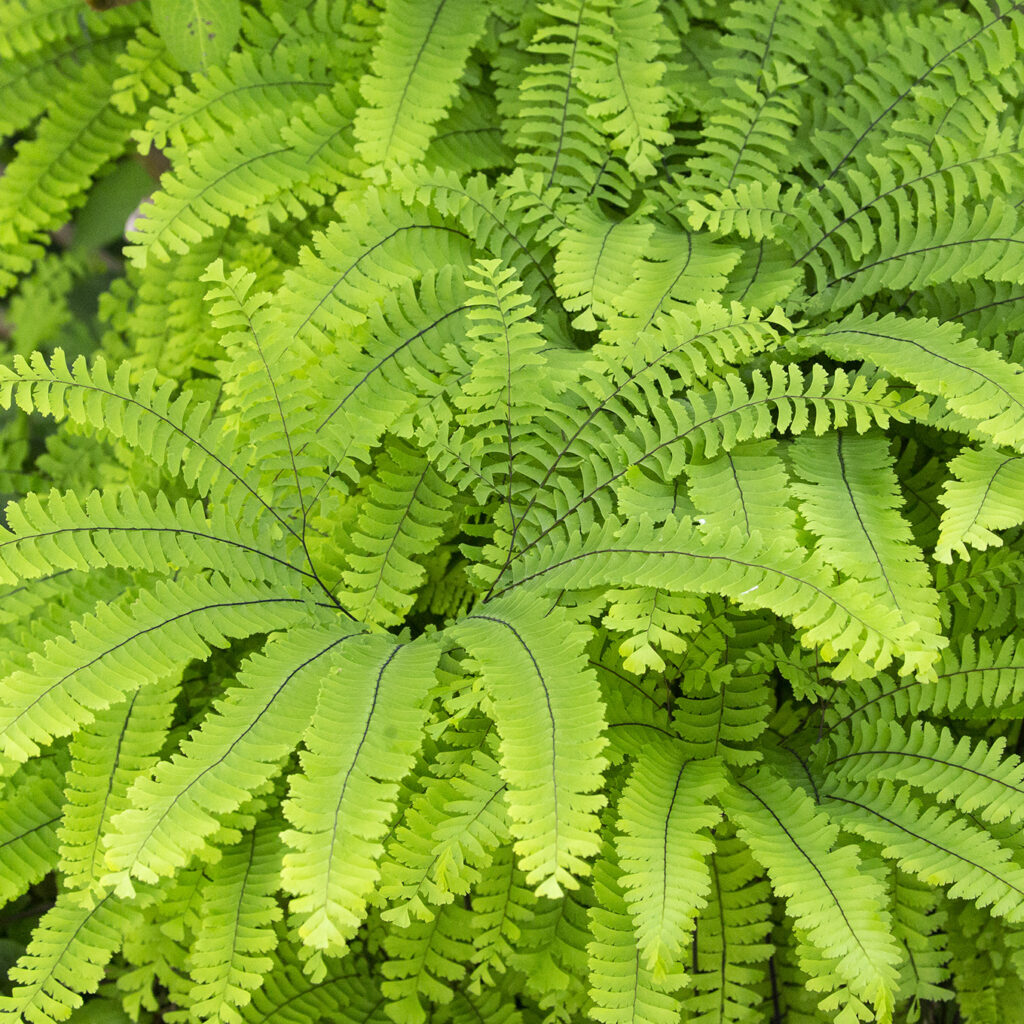
2. Maidenhair Fern (Adiantum spp.)
Known for its delicate, fan-shaped fronds and thin, black stems, the Maidenhair Fern is an elegant choice for indoor décor. Its soft, light-green leaves bring a refreshing and romantic feel to modern or rustic interiors. This fern requires consistent moisture, indirect light, and a humid environment to flourish. It’s perfect for terrariums, bathrooms, or shaded windowsills. Though slightly finicky, Maidenhair Fern rewards careful attention with graceful foliage that can soften any room’s aesthetic and uplift your mood.
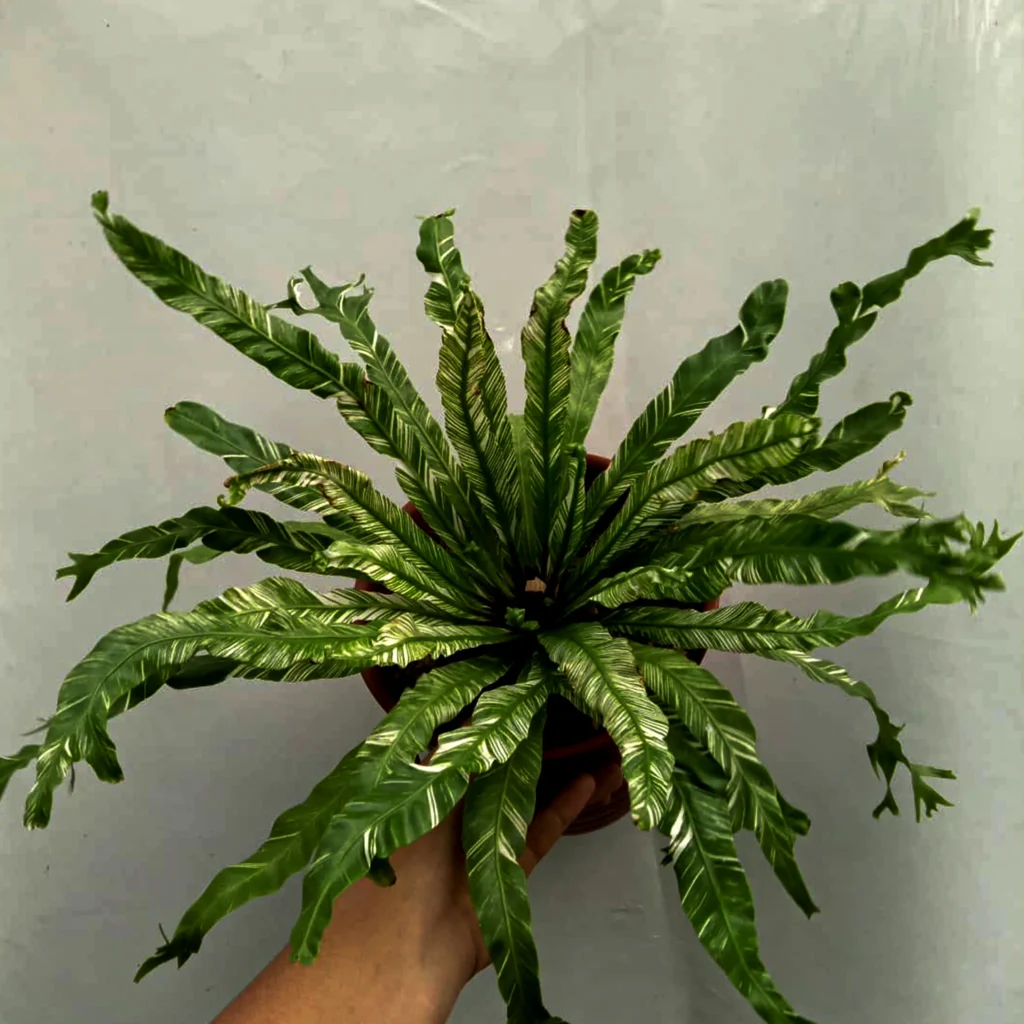
3. Bird’s Nest Fern (Asplenium nidus)
With its wide, wavy-edged fronds that radiate from a central rosette, the Bird’s Nest Fern offers a bold, modern look. Its smooth, glossy leaves differ from the feathery texture of other ferns, giving it a unique presence among indoor plants. This tropical beauty thrives in medium to low indirect light and prefers consistently moist soil with high humidity. It’s especially suitable for tabletops or as a focal plant in a bathroom. The Bird’s Nest Fern is easy to care for, making it a favorite among beginners.
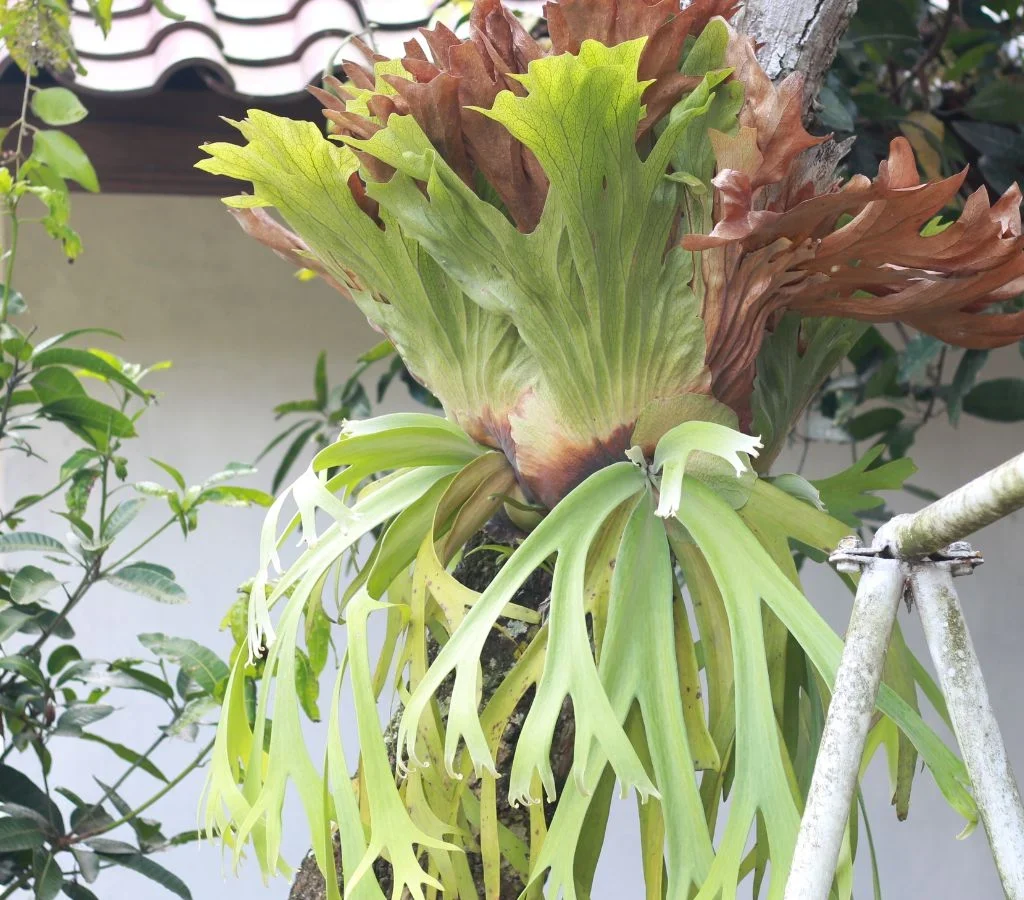
4. Staghorn Fern (Platycerium bifurcatum)
The Staghorn Fern is an extraordinary, sculptural plant with antler-like fronds that make it a conversation starter. Often mounted on wood or hanging in baskets, this epiphytic fern grows naturally on trees in the wild. It enjoys bright, indirect light and needs to be watered by soaking or misting the roots regularly. Staghorn Ferns are ideal for wall displays or hanging arrangements, offering a striking, artistic touch to modern or bohemian interiors while delivering natural, lush greenery indoors.
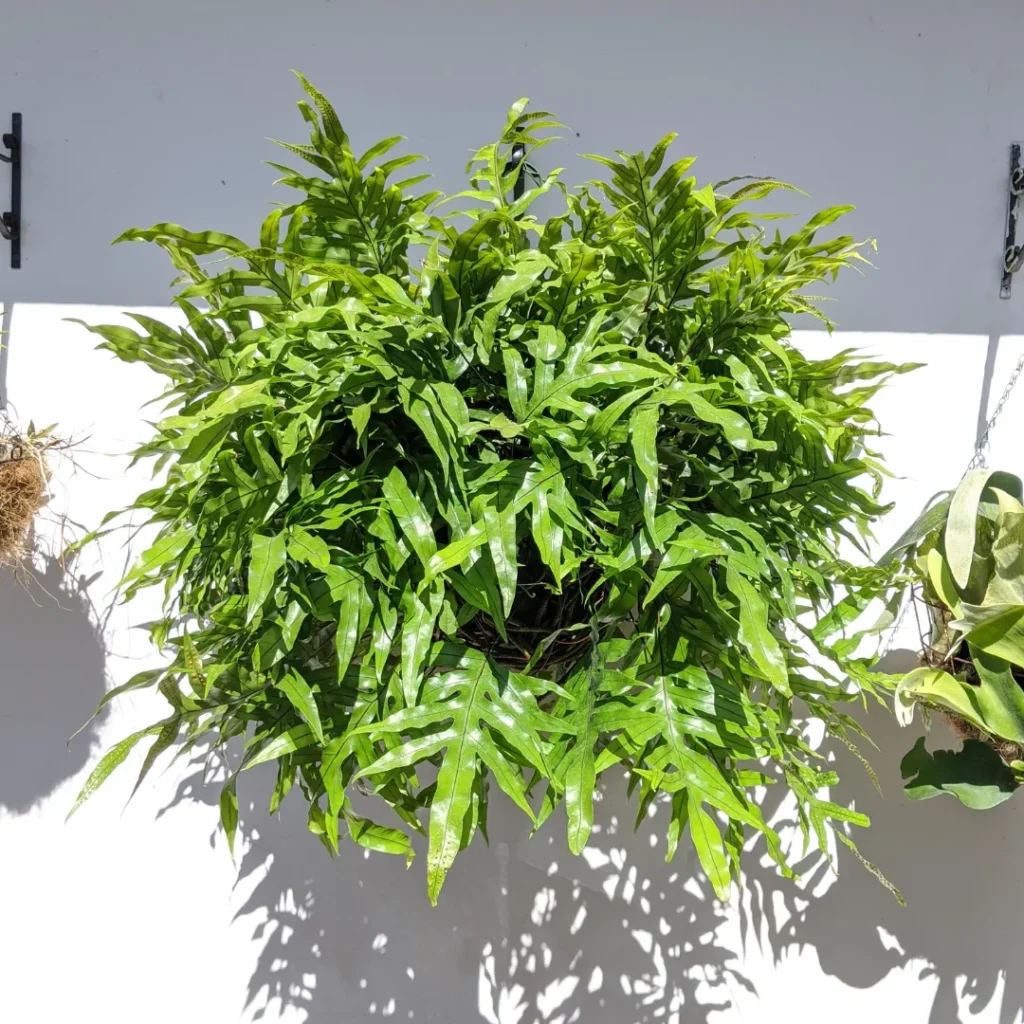
5. Kangaroo Paw Fern (Microsorum diversifolium)
Named for its quirky, paw-shaped fronds, the Kangaroo Paw Fern is a hardy, low-maintenance houseplant that adds a playful and lush vibe to your indoor garden. Its glossy, leathery leaves tolerate lower light levels and occasional drying out, making it a forgiving option for beginners. This fern thrives in indirect light and moderate humidity but can adapt well to average indoor conditions. Perfect for hanging baskets or decorative planters, it’s a wonderful addition to living rooms, offices, or shaded balconies.
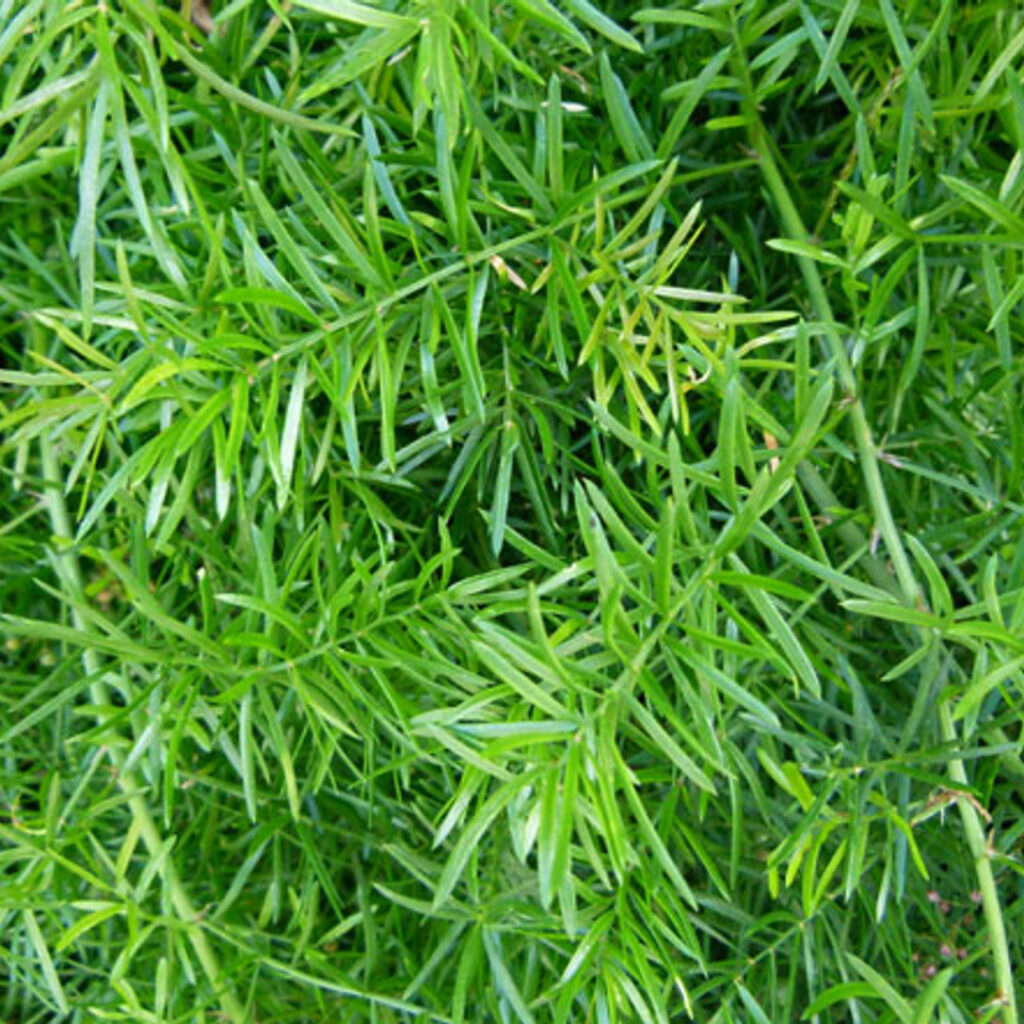
6. Asparagus Fern (Asparagus densiflorus)
Despite its name, the Asparagus Fern isn’t a true fern but is loved for its airy, feathery foliage that mimics fern-like softness. It’s an easy-to-grow plant that thrives in bright, indirect light and tolerates occasional neglect. Its arching stems and needle-like leaves create a fluffy, cloud-like appearance perfect for hanging baskets or tabletop arrangements. The plant enjoys slightly moist soil and benefits from misting during dry spells. Asparagus Fern adds delicate texture and an effortlessly lush feel to any indoor space.
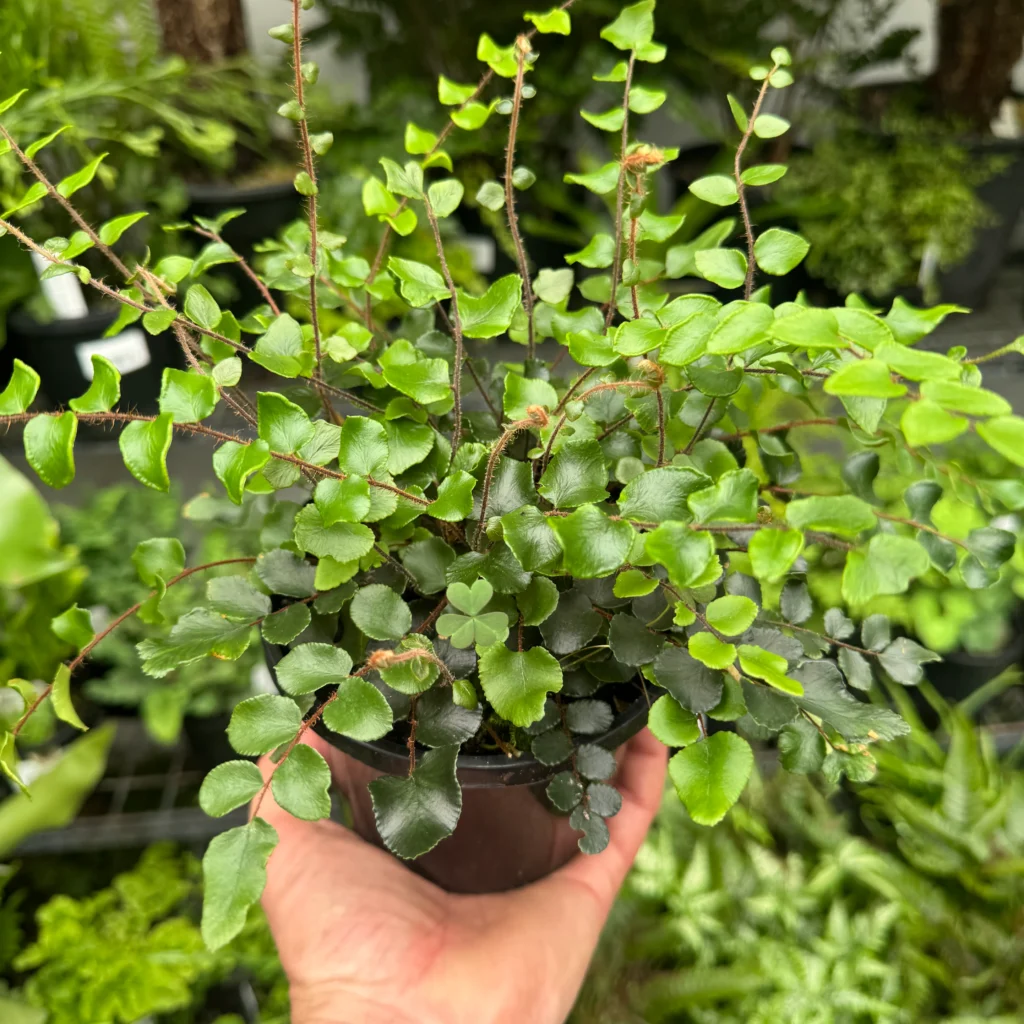
7. Button Fern (Pellaea rotundifolia)
The Button Fern is a charming, compact plant known for its small, round, leathery leaves that line wiry stems in a tidy, arching habit. Native to New Zealand, this fern tolerates drier conditions better than many other ferns, making it easier to manage indoors. It prefers indirect light and moderate humidity, thriving in well-drained soil. Its neat, attractive appearance makes it a wonderful choice for desks, shelves, or windowsills where a hint of natural elegance is desired.
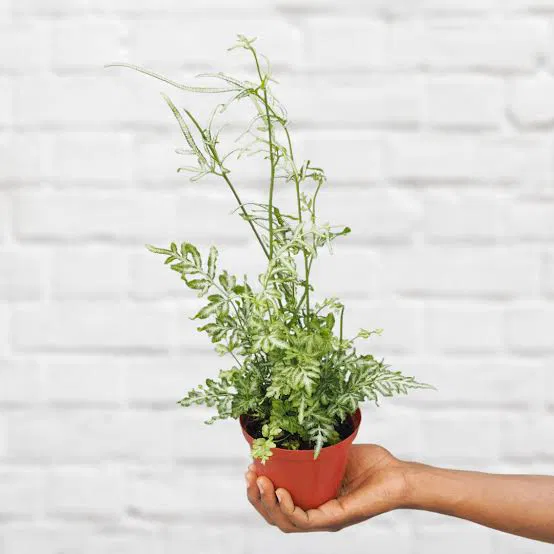
8. Silver Lace Fern (Pteris ensiformis)
With its striking variegated leaves, the Silver Lace Fern is one of the most decorative fern varieties for indoor spaces. Its delicate, feathered fronds feature central silver-white markings that brighten shady corners and pair beautifully with other indoor plants. This fern enjoys consistent moisture, indirect light, and a humid environment. It’s ideal for terrariums, hanging planters, or as an accent piece in plant groupings. The Silver Lace Fern’s refined foliage and lush growth pattern make it an irresistible addition to any home.
Final Thoughts
Ferns are the perfect plants for anyone looking to bring a touch of calming, lush greenery indoors. Whether you love the dramatic fronds of the Staghorn Fern, the feathery softness of a Boston Fern, or the dainty elegance of a Maidenhair Fern, there’s a perfect fern variety for every indoor space and style. Most ferns thrive in indirect light and high humidity, making them especially suited for bathrooms, kitchens, and shaded corners. Add these 8 gorgeous fern plants to your home and transform your space into a peaceful, green retreat.