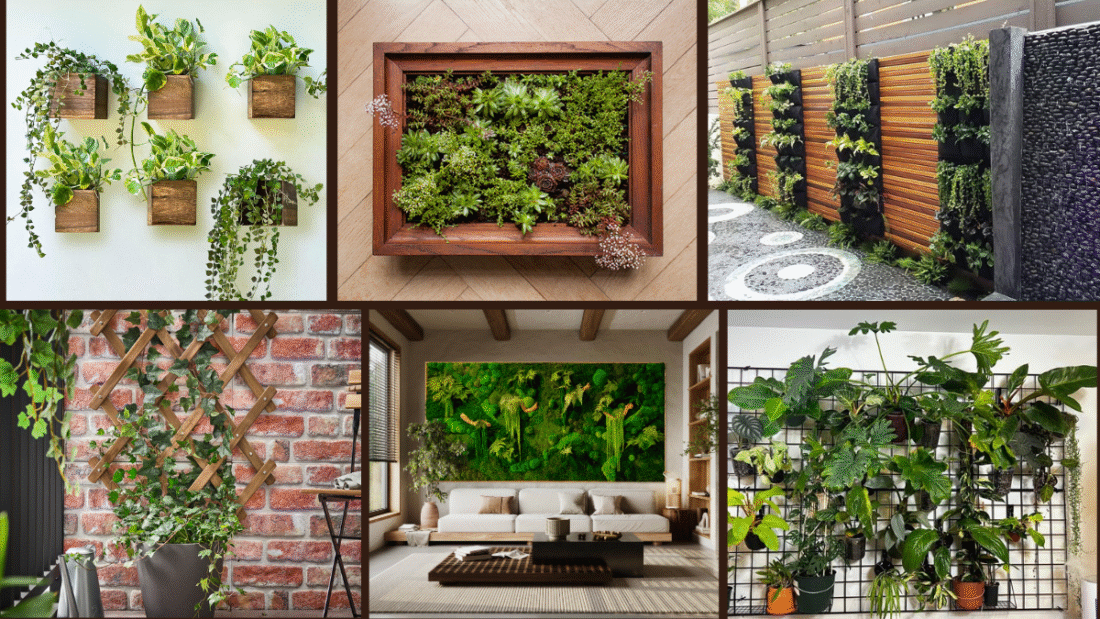
Why settle for plain, empty walls when you can turn them into breathtaking living art? Plant walls are one of the most creative ways to bring the outdoors inside, adding texture, color, and natural beauty to your interiors. From modern vertical gardens to charming rustic displays, plant walls transform ordinary spaces into lush, green sanctuaries. Here are 6 creative plant wall ideas to inspire your own living art masterpiece.
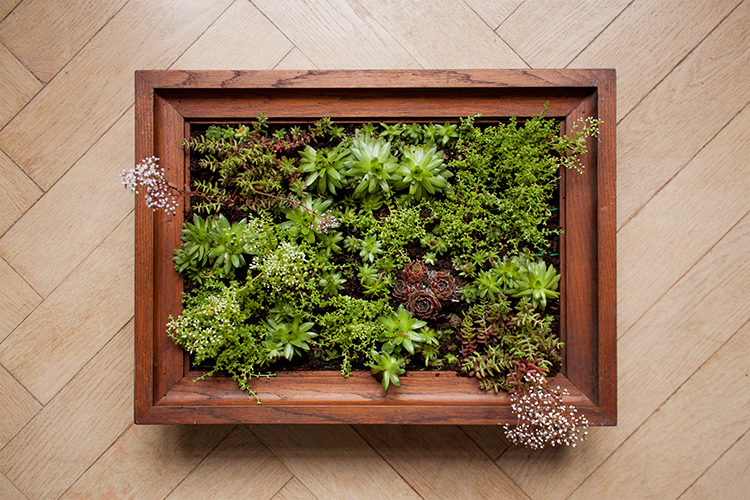
1. Framed Vertical Garden
Turn your favorite plants into an artistic focal point by creating a framed vertical garden. Use a wooden or metal frame filled with moss and attach small potted succulents, ferns, or air plants inside. This piece acts like a living painting and works beautifully in living rooms, entryways, or patios. Choose plants with different textures and shades of green for added visual depth and dimension.
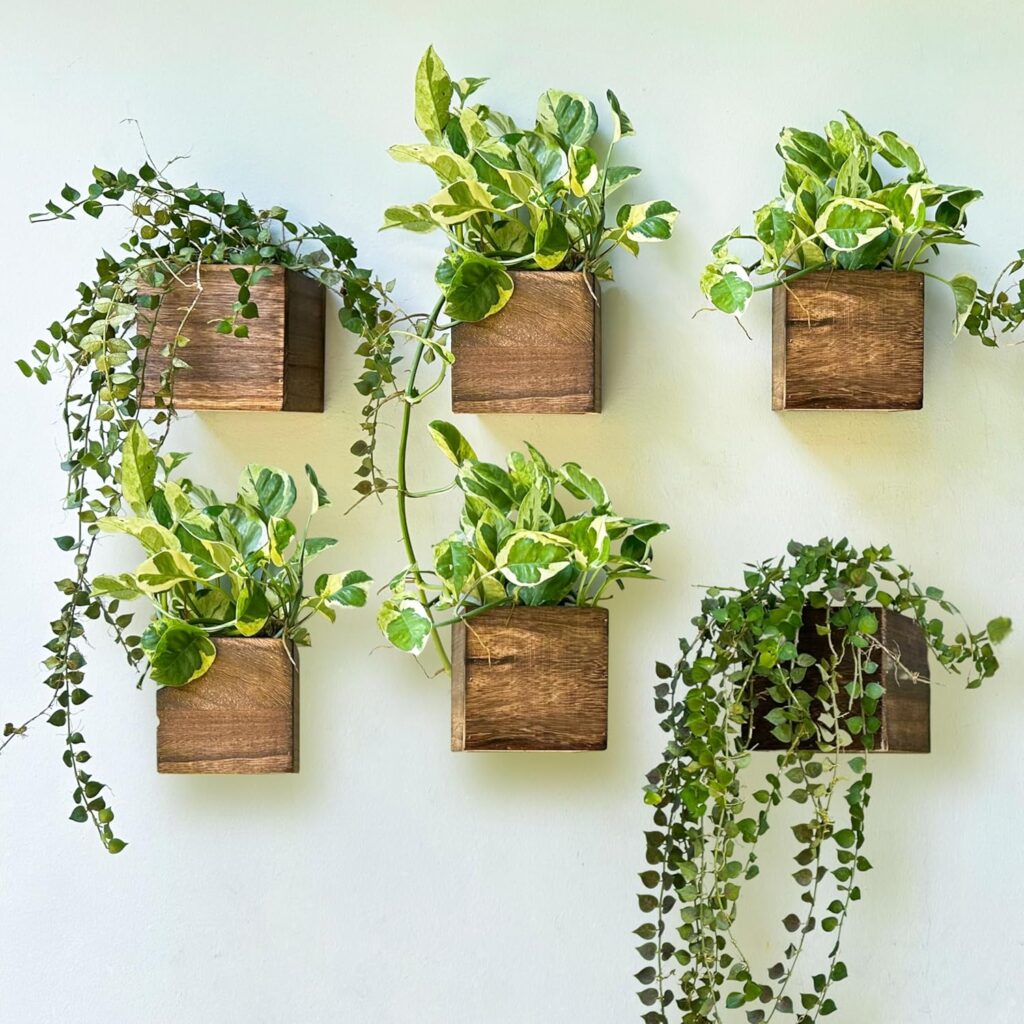
2. Wall-Mounted Planter Boxes
For a clean and modern look, install wall-mounted planter boxes made of wood, metal, or recycled materials. Arrange them in a geometric pattern or staggered design to create interest. Fill the boxes with trailing plants like pothos, ivy, or string of hearts, alongside upright plants such as snake plants or peace lilies. This plant wall idea is perfect for balconies, home offices, or kitchen areas, adding fresh air and a natural touch.
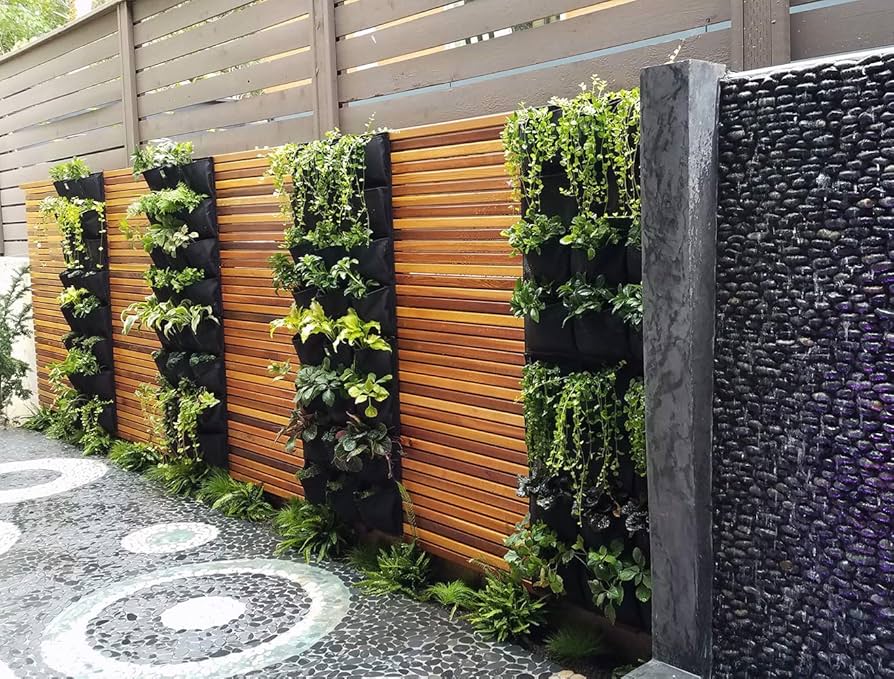
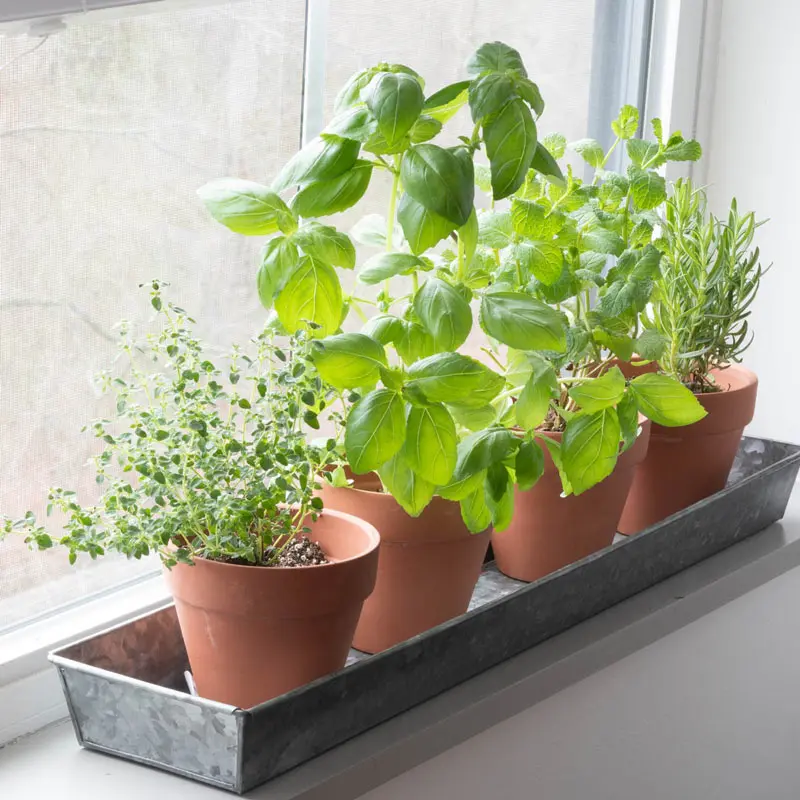
3. Hanging Pocket Garden
A fabric or felt pocket garden is a practical and lightweight option for creating a vertical plant wall, especially for renters or small-space dwellers. Each pocket holds a plant, allowing you to mix herbs, flowering plants, or succulents in a cascading design. These vertical gardens are great for balconies, patios, or kitchens and can double as an herb garden for fresh culinary additions at arm’s reach.
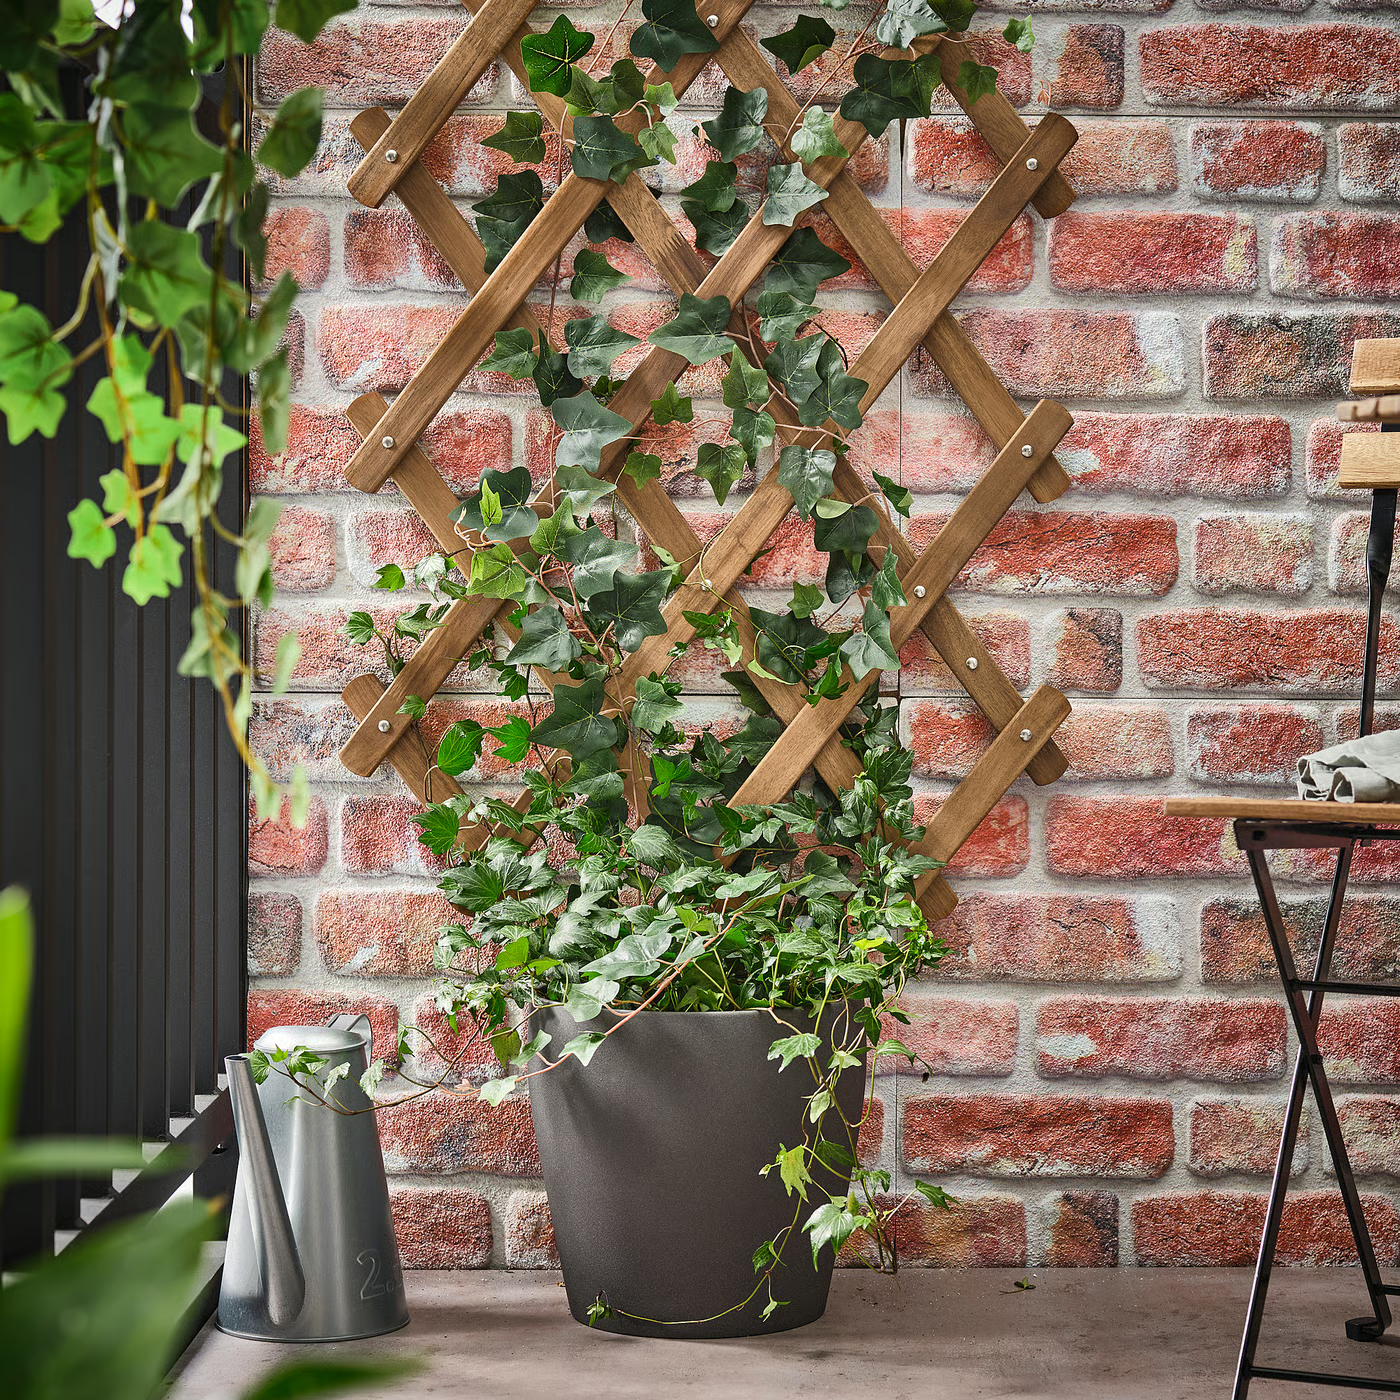
4. Rustic Wooden Trellis Wall
Embrace farmhouse charm by using a rustic wooden trellis as a plant wall frame. Attach small planters, hanging jars, or trailing vines to the trellis for a beautiful, natural feature. This idea works wonderfully on outdoor patios, garden fences, or sunrooms. The trellis adds a cozy, vintage feel while giving climbing plants a structure to grow on, making it both decorative and functional.
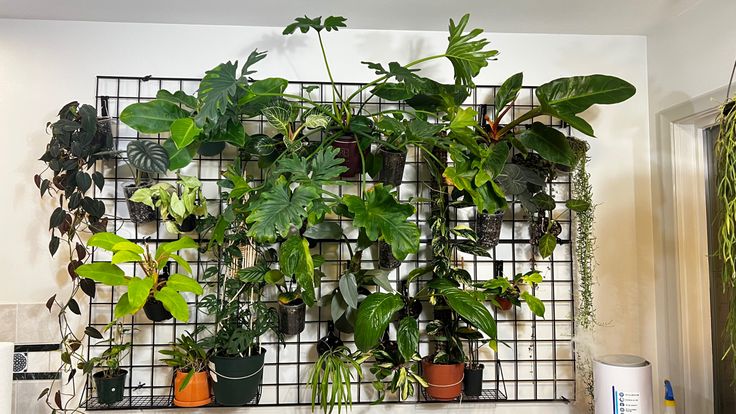
5. Grid Panel Plant Display
A simple metal grid or wire panel can be transformed into a chic plant wall with the addition of hooks and hanging planters. Attach a variety of plants in different shapes and colors to create an eclectic, modern look. This setup is ideal for small apartments or home offices, where floor space is limited but a touch of nature is still desired. It’s easy to rearrange plants as they grow, offering a flexible and ever-changing living wall.
6. Indoor Moss Wall Art
For a low-maintenance yet striking option, create a moss wall art piece. Preserved moss panels require no watering or sunlight and can be shaped into geometric patterns, natural landscapes, or abstract designs. Use different shades and textures of moss to create visual interest. This plant wall idea is perfect for bedrooms, bathrooms, or workspaces, offering a calming, biophilic element without the upkeep of live plants.
In today’s fast-paced world, having a serene, plant-filled space inside your home is one of the simplest yet most rewarding ways to unwind and reconnect with nature. A dedicated plant room or cozy green corner can boost your mood, improve air quality, and turn even the dullest corners into beautiful indoor sanctuaries. Whether you have an empty sunroom, a spare nook, or a bright windowsill, here are 7 inspiring plant room ideas to help you design your own leafy escape.
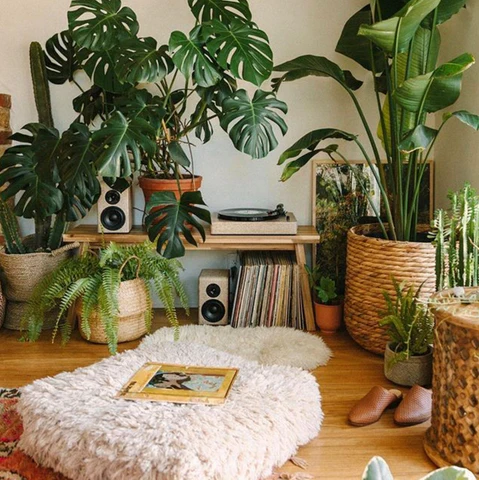
1. The Boho Jungle Escape
Create a lush, carefree atmosphere by turning your plant room into a bohemian jungle. Mix different types of hanging plants like String of Pearls, Spider Plants, and Pothos with large statement plants like Monstera and Areca Palm. Add textured elements like macramé hangers, rattan baskets, and colorful woven rugs. The layered greenery combined with cozy, earthy décor makes this a perfect retreat for relaxing with a book or enjoying a cup of tea.
2. Modern Minimalist Green Space
For those who appreciate clean lines and a clutter-free look, a minimalist plant room offers tranquility and style. Choose a few bold, sculptural plants like Snake Plant, Fiddle Leaf Fig, or Rubber Plant, and place them in sleek, neutral-toned pots. Keep the furniture minimal with simple wooden benches and floating shelves. The focus stays on the plants’ natural beauty while the room remains open and airy, perfect for meditating or working from home.
3. Windowsill Plant Haven
Turn your sunny window area into a charming, leafy haven with a collection of small to medium-sized potted plants. Combine colorful succulents, peace lilies, and trailing ivy to create a layered look. Use decorative ceramic or terracotta pots to add texture and personality. Not only will this brighten up your room, but it also makes the perfect spot for plants that love sunlight, bringing a touch of nature to your daily routine.
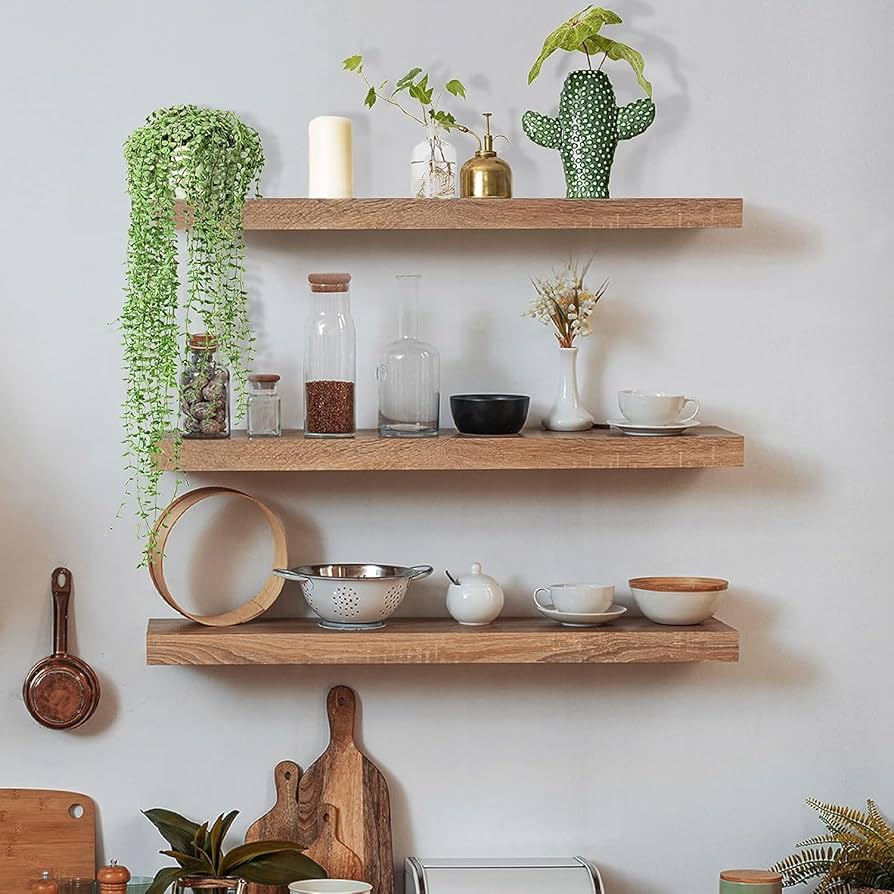
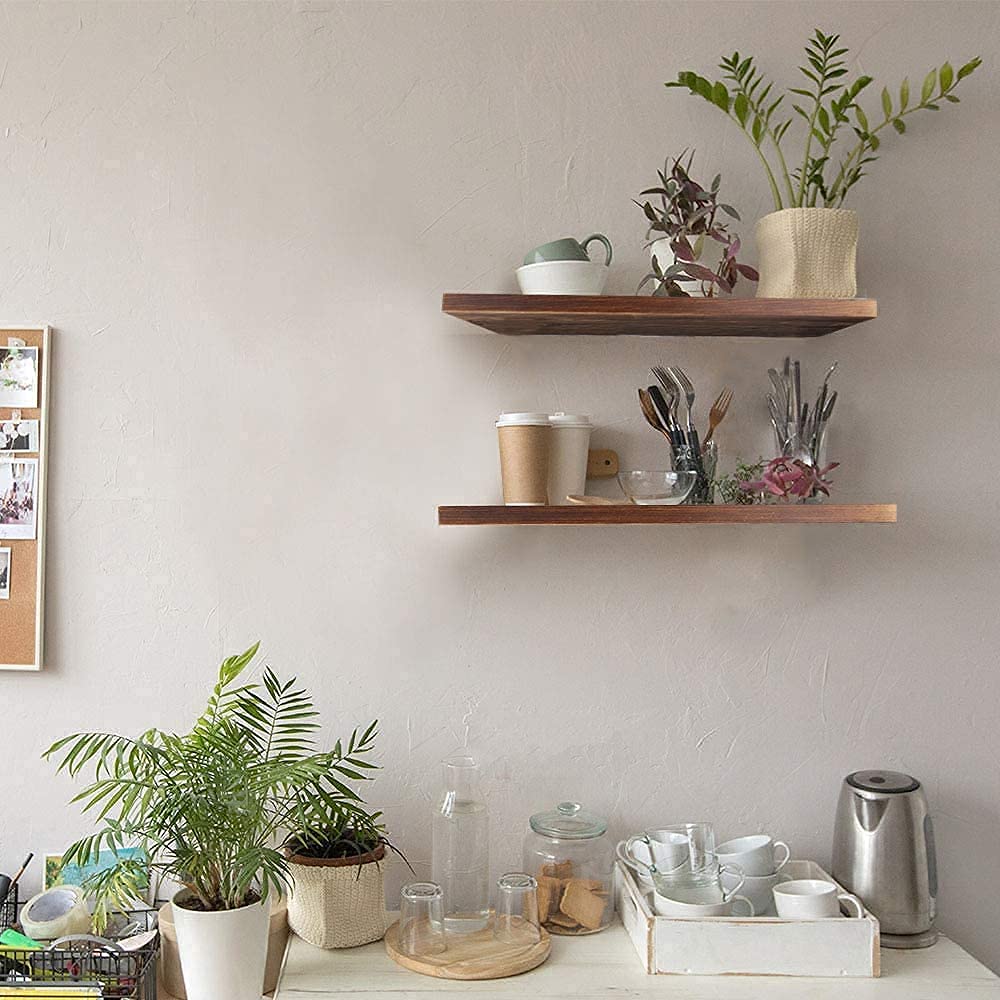
4. Rustic Shelf Display
Transform a bare wall into a rustic green feature by installing wooden shelves to showcase a variety of houseplants. Mix and match trailing vines, upright plants, and small succulents in terracotta or vintage-style pots. Add a few botanical prints or antique accessories to complete the look. This idea is ideal for small spaces and apartments where floor space is limited, but the desire for a thriving plant room remains strong.
5. Indoor Greenhouse Nook
If you’re passionate about plant care, set up a small indoor greenhouse corner using a glass cabinet or enclosed shelf unit. This setup is perfect for humidity-loving plants like Calathea, Ferns, and Orchids. Install LED grow lights and use misting bottles to maintain the ideal environment. It not only keeps your plants healthy and happy but also creates a visually stunning focal point in your home.
6. Cozy Reading and Plant Corner
Blend your love for plants and books by creating a cozy reading nook surrounded by greenery. Place a comfy armchair in a bright corner, with tall plants like Dracaena or Bird of Paradise nearby. Add hanging planters above and small potted plants on side tables or window sills. This calm, leafy space becomes the perfect spot to unwind, sip coffee, and escape into your favorite novel.
7. Zen-Inspired Plant Retreat
Design a serene, zen-like plant room for ultimate relaxation. Choose plants with soft, green foliage like Bamboo Palm, Peace Lily, and Boston Fern. Keep the décor simple with natural wood tones, pebbles, and soothing elements like a small tabletop fountain. A neutral color palette with touches of stone and linen enhances the calming vibe, making this plant room ideal for meditation, yoga, or quiet reflection.
Nothing transforms the mood of a room quite like the presence of lush, vibrant greenery. Indoor plants not only purify the air and brighten up spaces but also add a sense of calm and natural beauty to your home. Whether you prefer bold foliage, elegant palms, or trailing vines, there’s a perfect plant for every style and space. Here are 7 indoor plant ideas to give your home a fresh, inviting, and natural look.
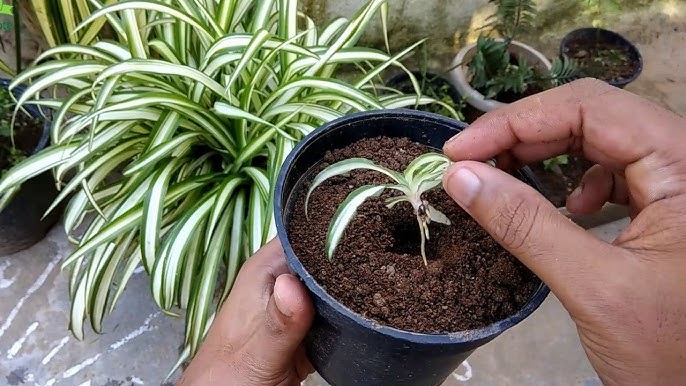
1. Spider Plant (Chlorophytum comosum)
The Spider Plant is one of the most charming and easy-to-grow houseplants around. Known for its arching, green-and-white striped leaves, it brings a lively, playful touch to any room. This low-maintenance plant thrives in indirect light and can tolerate occasional neglect, making it perfect for beginners. It also produces adorable baby offshoots, or “spiderettes,” which dangle from the mother plant like tiny green stars.
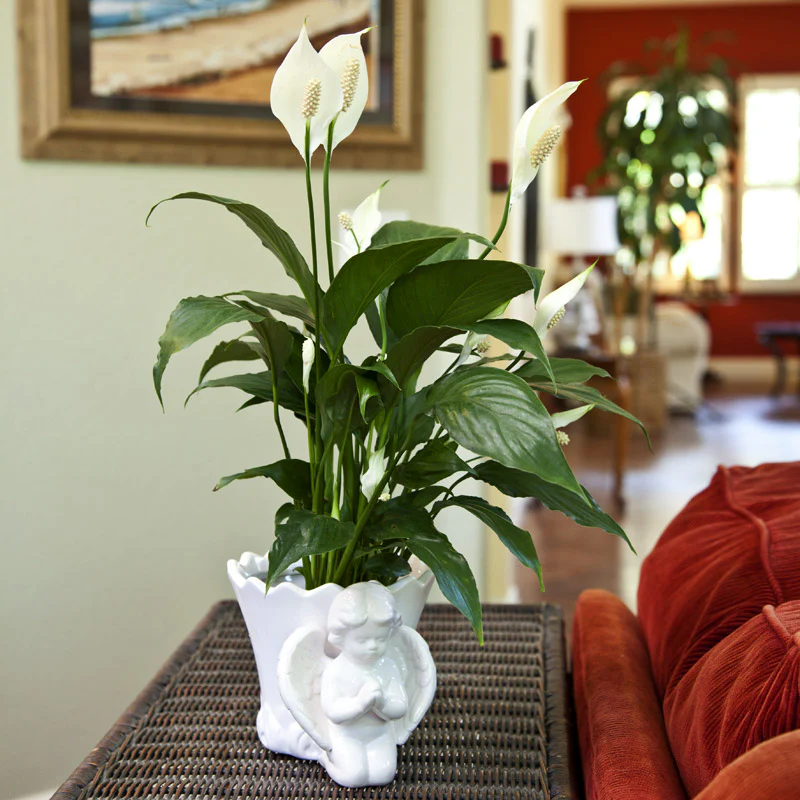
2. Peace Lily (Spathiphyllum)
If you want a plant that exudes elegance and simplicity, the Peace Lily is an excellent choice. Its glossy dark green leaves and graceful white blooms brighten up shaded corners and add a sophisticated, natural look. It’s known for its air-purifying qualities and thrives in low to medium light. Place it in your living room, bedroom, or office to enjoy its calming presence and occasional blooms year-round.
3. Boston Fern (Nephrolepis exaltata)
The Boston Fern brings soft texture and a touch of classic beauty to your indoor spaces. Its feathery, arching fronds look stunning in hanging baskets or perched atop plant stands. Ideal for bathrooms and kitchens where humidity levels are higher, this fern loves indirect light and regular misting. It’s a great way to create a lush, natural corner in your home with minimal effort.
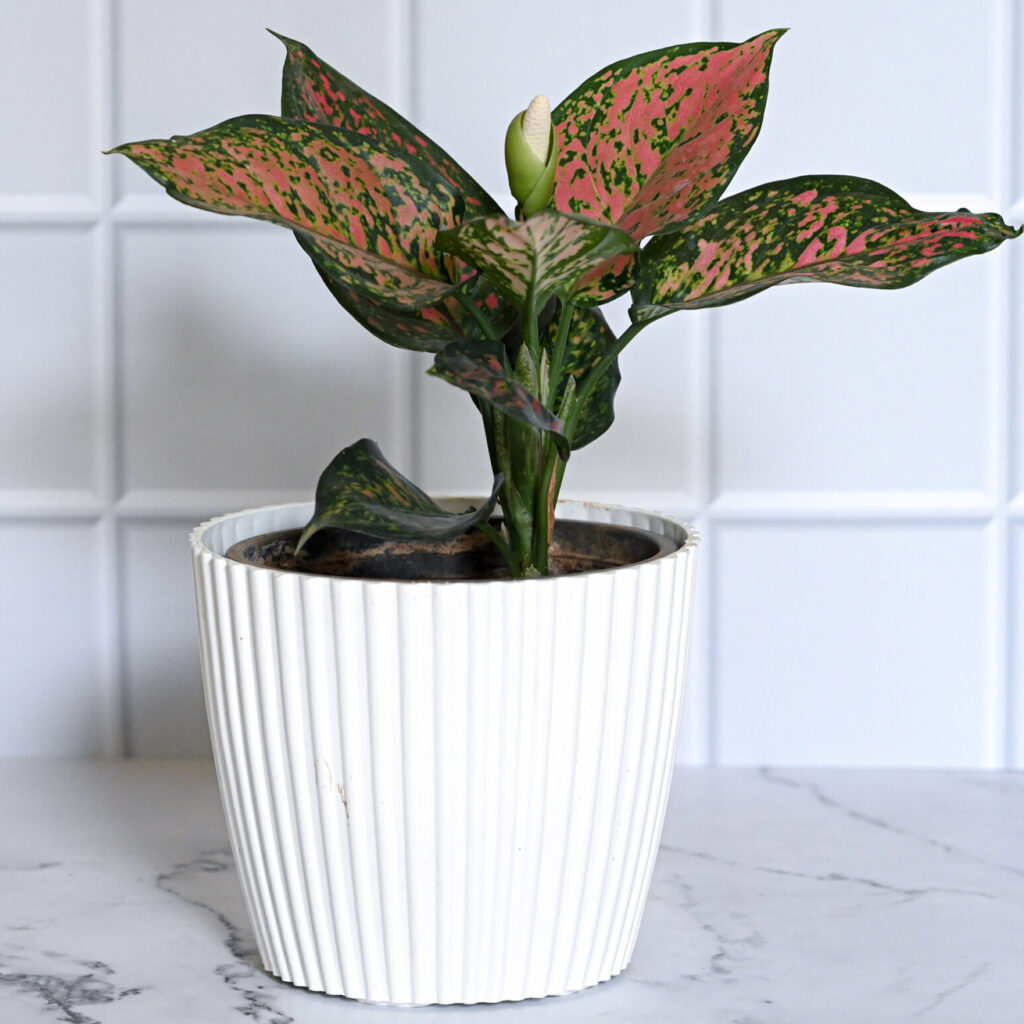
4. Chinese Evergreen (Aglaonema)
Known for its beautifully patterned leaves in shades of green, silver, and cream, the Chinese Evergreen is a versatile plant perfect for adding color to your interiors. It tolerates low light and requires very little maintenance, making it one of the most forgiving houseplants. Place it in decorative pots to enhance tabletops, shelves, or office desks with fresh, leafy charm.
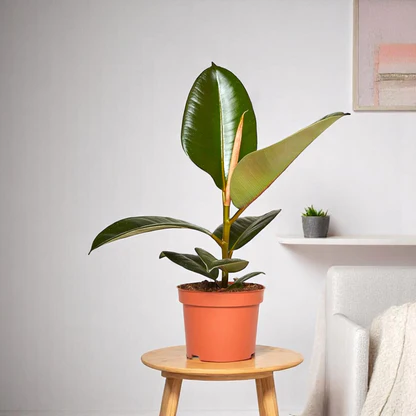
5. Rubber Plant (Ficus elastica)
For a bold, modern statement, the Rubber Plant is an excellent choice. Its thick, glossy leaves in deep green or burgundy shades add dramatic appeal to contemporary homes. It thrives in bright, indirect light but can adapt to lower-light spaces. Pair it with a sleek ceramic or metallic planter to complete its chic look and freshen up living rooms, hallways, or corners with ease.
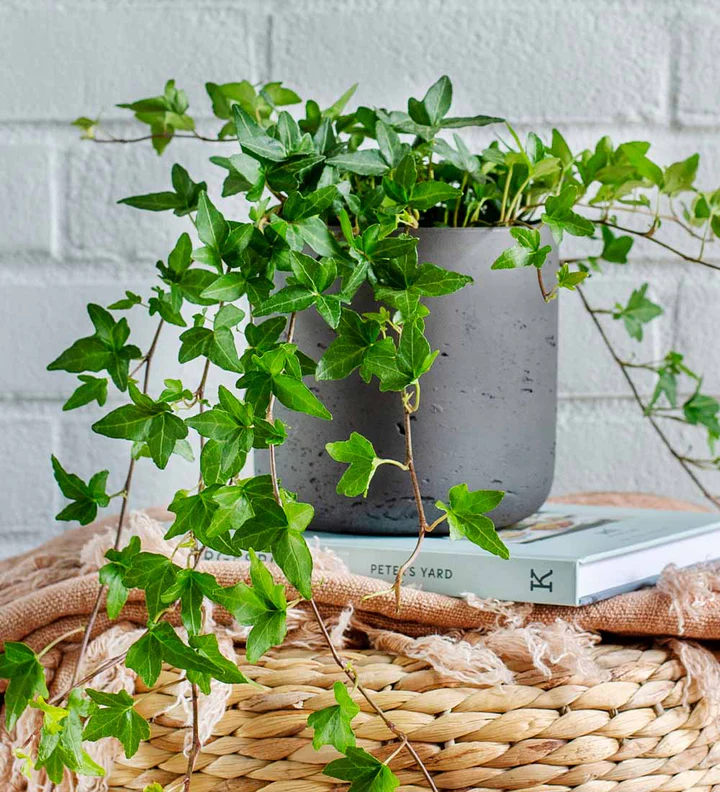
6. Trailing English Ivy (Hedera helix)
English Ivy is perfect for adding a graceful, cascading touch to shelves, bookcases, or hanging planters. Its trailing vines and rich green leaves create a romantic, old-world feel while softening hard edges in a room. It prefers bright, indirect light and slightly moist soil. Let it tumble from a high shelf or windowsill to bring a lush, organic vibe to any space.
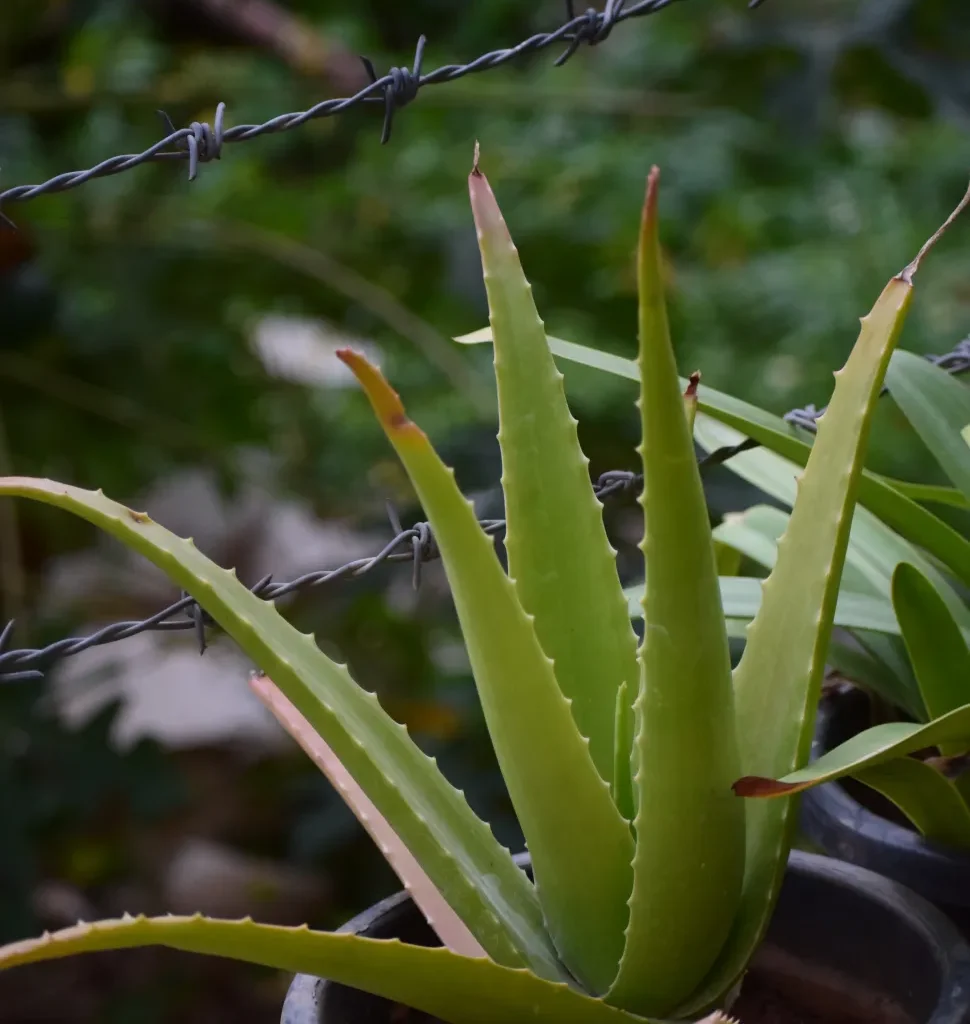
7. Aloe Vera
Functional and beautiful, Aloe Vera is a must-have indoor plant. Its spiky, fleshy leaves store water, making it a hardy, drought-tolerant option for sunny windowsills or kitchen counters. Aside from its sculptural appeal, it offers soothing gel for burns and skin irritations. Aloe thrives in bright light and minimal watering, making it a practical, fresh addition to any home.
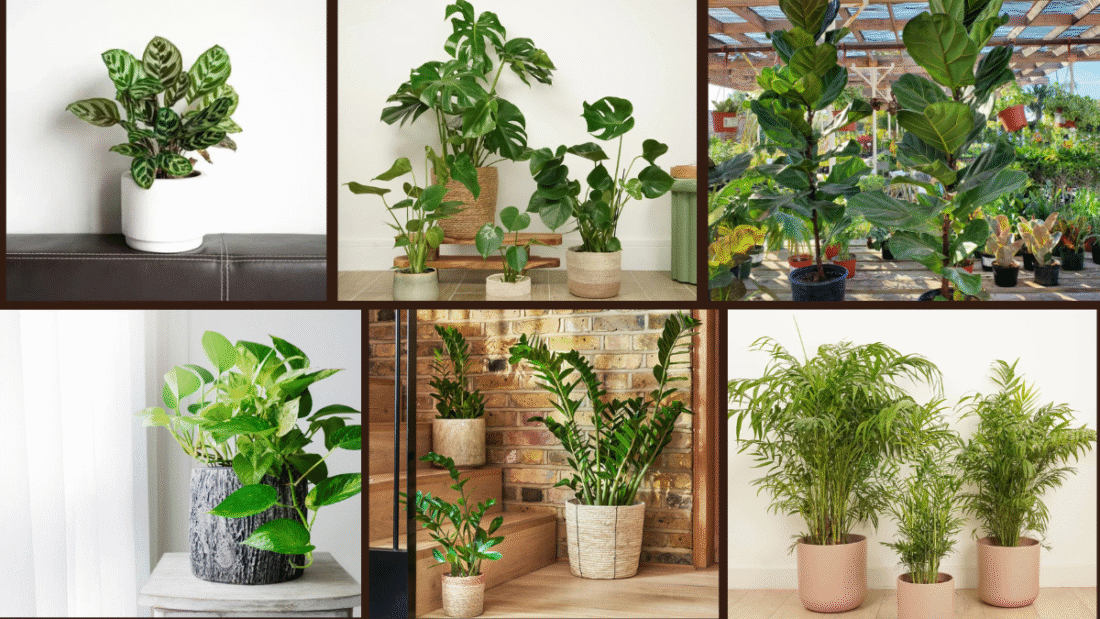
Houseplants have become more than just greenery — they’re an essential part of stylish home décor. Whether you’re aiming for a minimalist, bohemian, or contemporary vibe, the right plant can enhance your interior, purify the air, and add a calming, natural touch to any room. From striking foliage to sculptural shapes, here are 8 trendy house plant ideas that will effortlessly beautify your home and bring the outdoors inside.
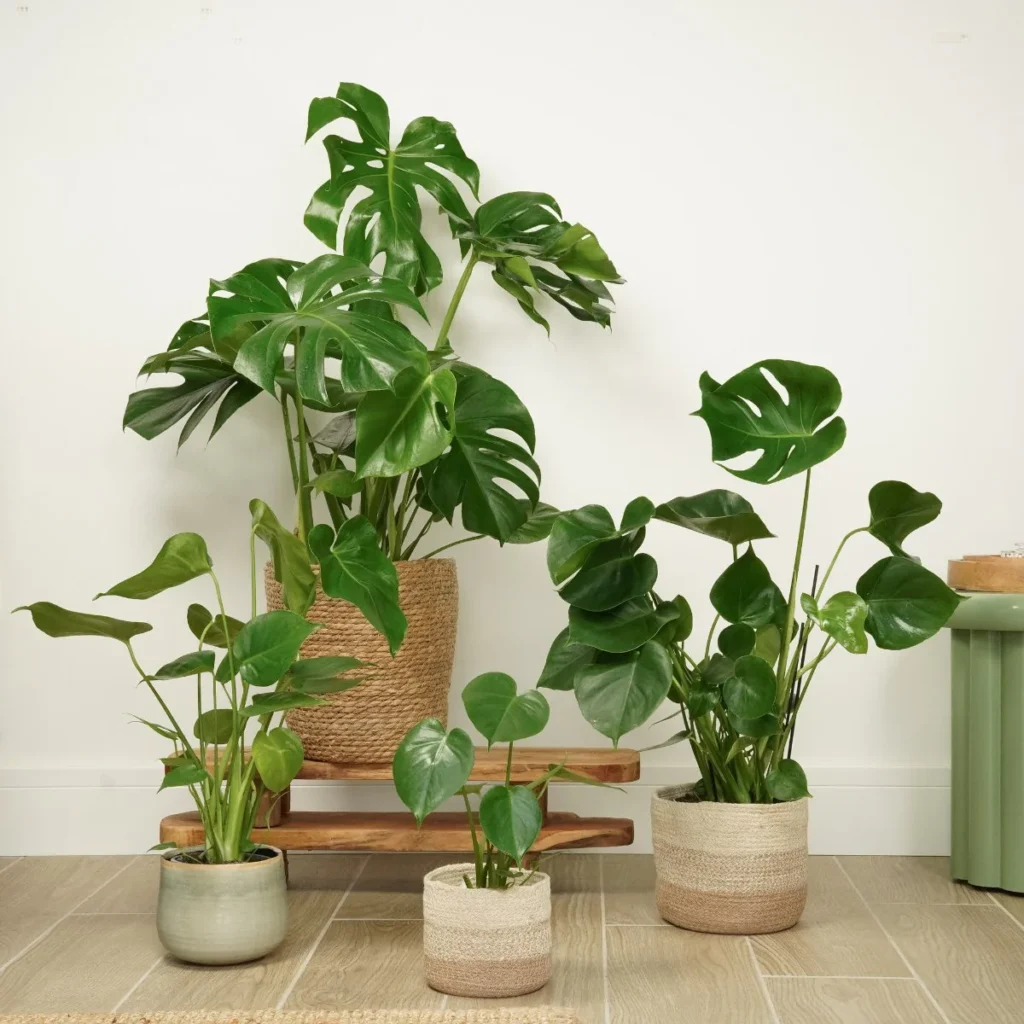
1. Monstera Deliciosa (Swiss Cheese Plant)
Famous for its large, dramatic leaves with natural holes, the Monstera Deliciosa adds instant tropical flair to your living space. This bold, trendy plant thrives in bright, indirect light and loves a humid environment, making it perfect for living rooms and bedrooms. Its lush foliage makes a stunning statement on the floor in a decorative pot or raised on a plant stand for added elegance.
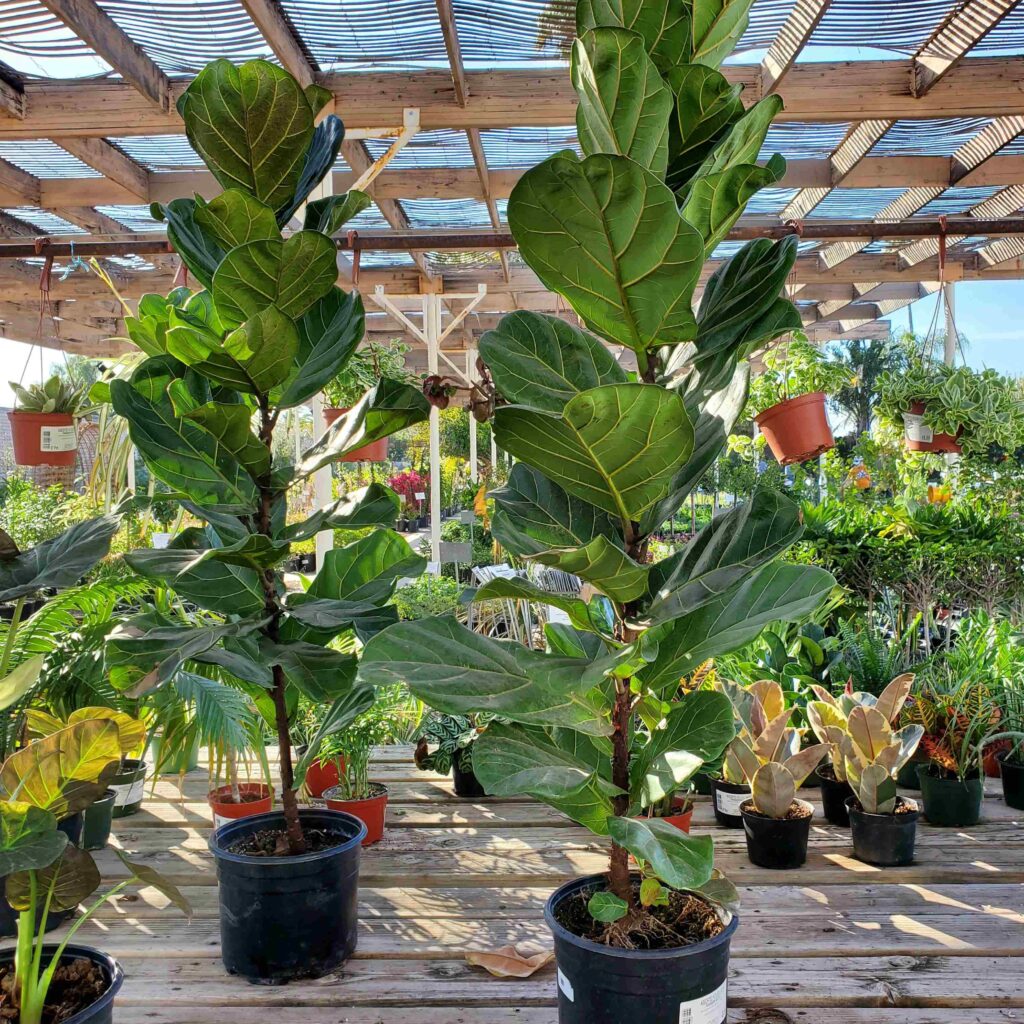
2. Fiddle Leaf Fig (Ficus lyrata)
A longtime favorite of interior designers, the Fiddle Leaf Fig features broad, violin-shaped leaves that add height and texture to any room. Perfect for empty corners or as a floor-standing focal point, this plant thrives in bright, indirect sunlight. Pair it with a woven basket or sleek ceramic planter to match your décor. It’s a chic and stylish way to elevate your home’s look.
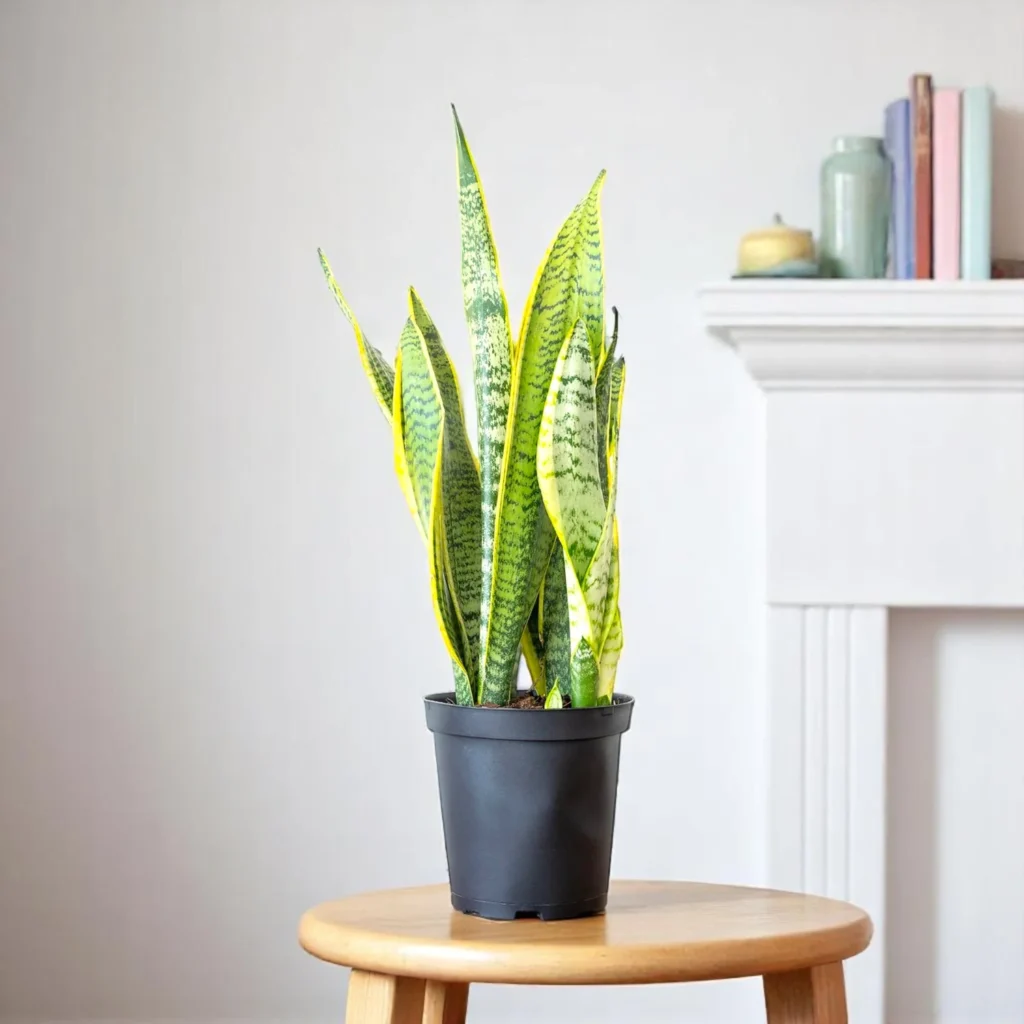
3. Snake Plant (Sansevieria)
If you’re looking for a hardy, low-maintenance plant with contemporary appeal, the Snake Plant is your go-to. Its tall, upright leaves with bold green-and-yellow variegation look stunning in modern, minimalistic interiors. It’s also one of the best air-purifying plants around, making it ideal for bedrooms, home offices, or bathrooms with filtered light.
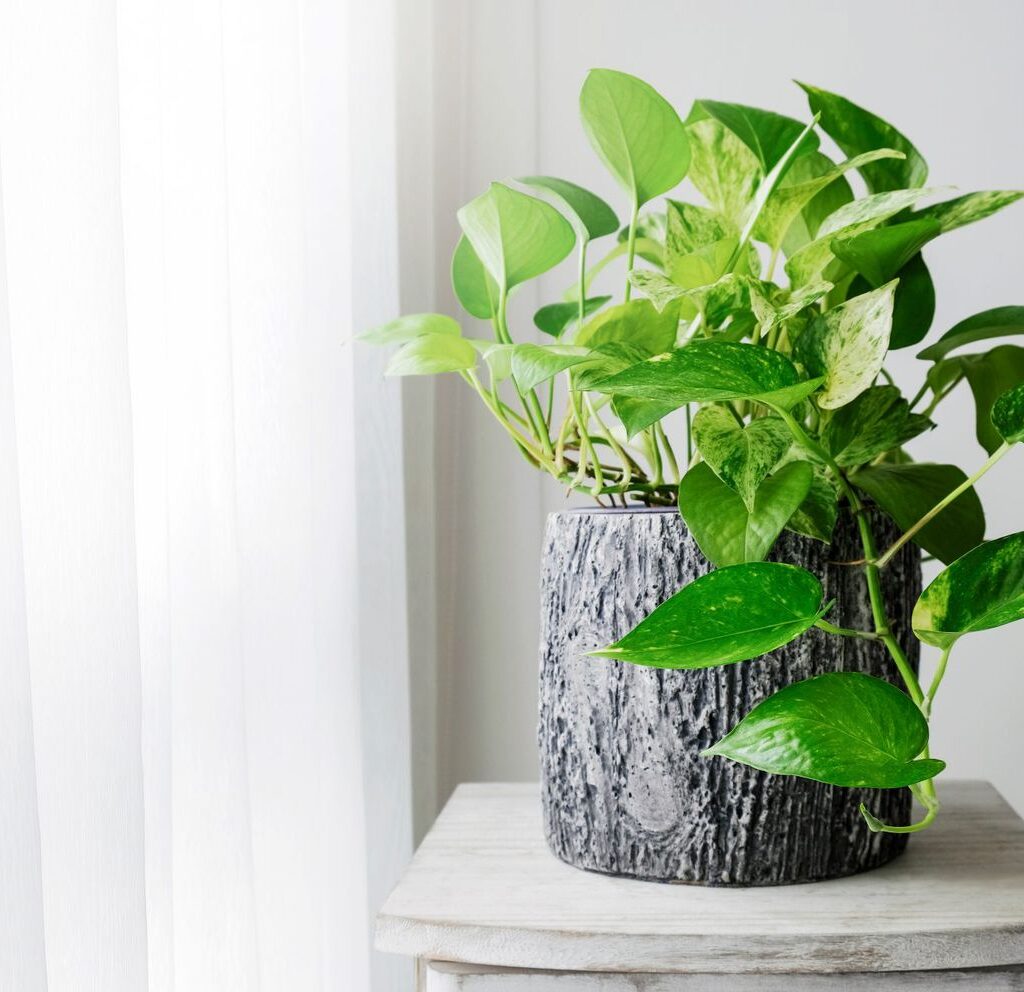
4. Pothos (Devil’s Ivy)
Perfect for beginners and busy homeowners, Pothos is a fast-growing, trailing plant known for its glossy, heart-shaped leaves. It looks beautiful cascading from shelves, hanging baskets, or tall plant stands. Available in various variegated forms like Golden Pothos or Marble Queen, this plant thrives in both bright, indirect light and low-light conditions, adding easy-going greenery to any corner.
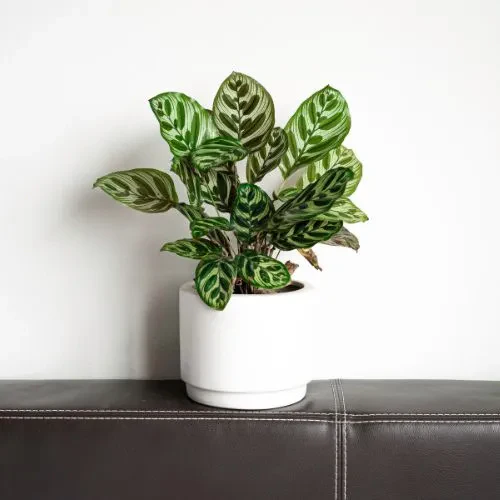
5. Calathea (Prayer Plant)
Known for its strikingly patterned leaves in shades of green, purple, and silver, the Calathea is a showstopper in any indoor plant collection. Its unique foliage folds up at night, earning it the nickname “prayer plant.” Best placed in areas with medium, indirect light and high humidity, this plant adds a touch of exotic beauty and texture to modern and boho interiors alike.
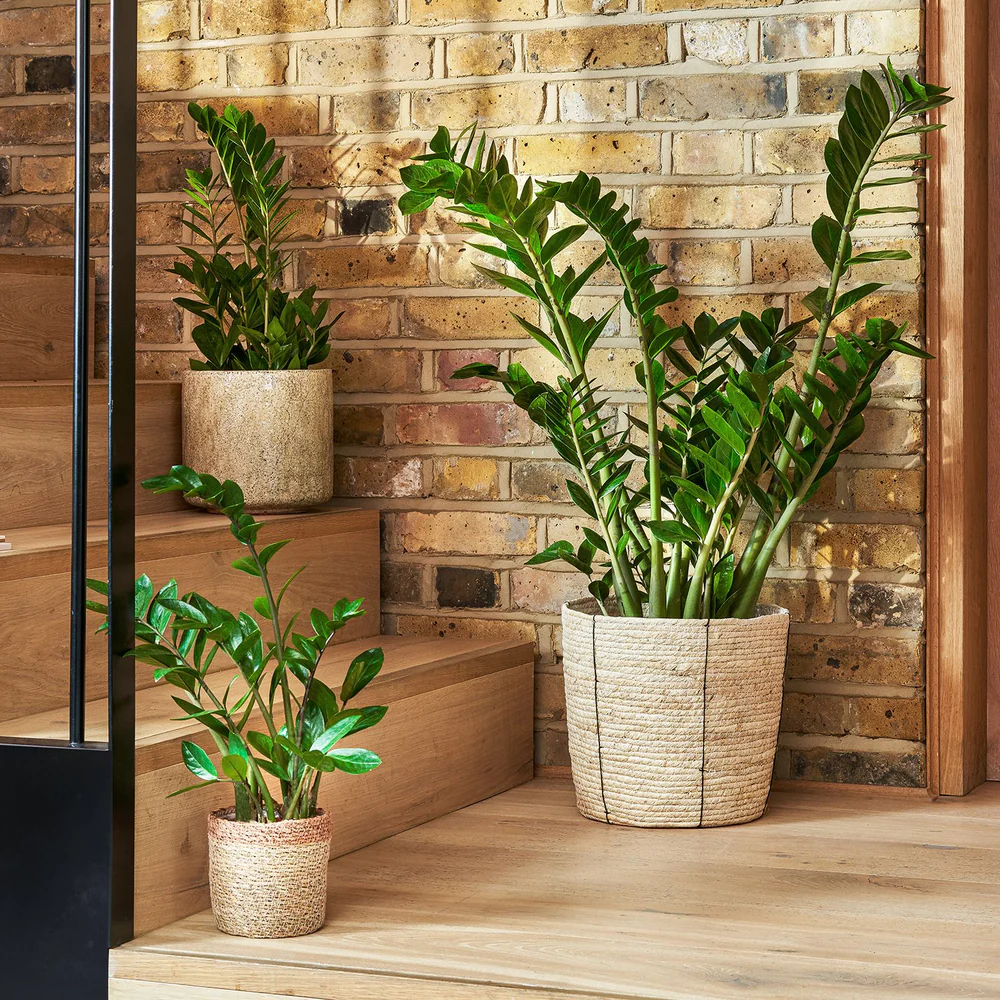
6. ZZ Plant (Zamioculcas zamiifolia)
The ZZ Plant is both beautiful and virtually indestructible, making it one of the most popular trendy houseplants. Its thick, waxy, dark green leaves give a rich, polished look that fits perfectly in contemporary spaces. It thrives in low-light, dry conditions, making it an ideal choice for offices, hallways, or dim corners where other plants struggle.
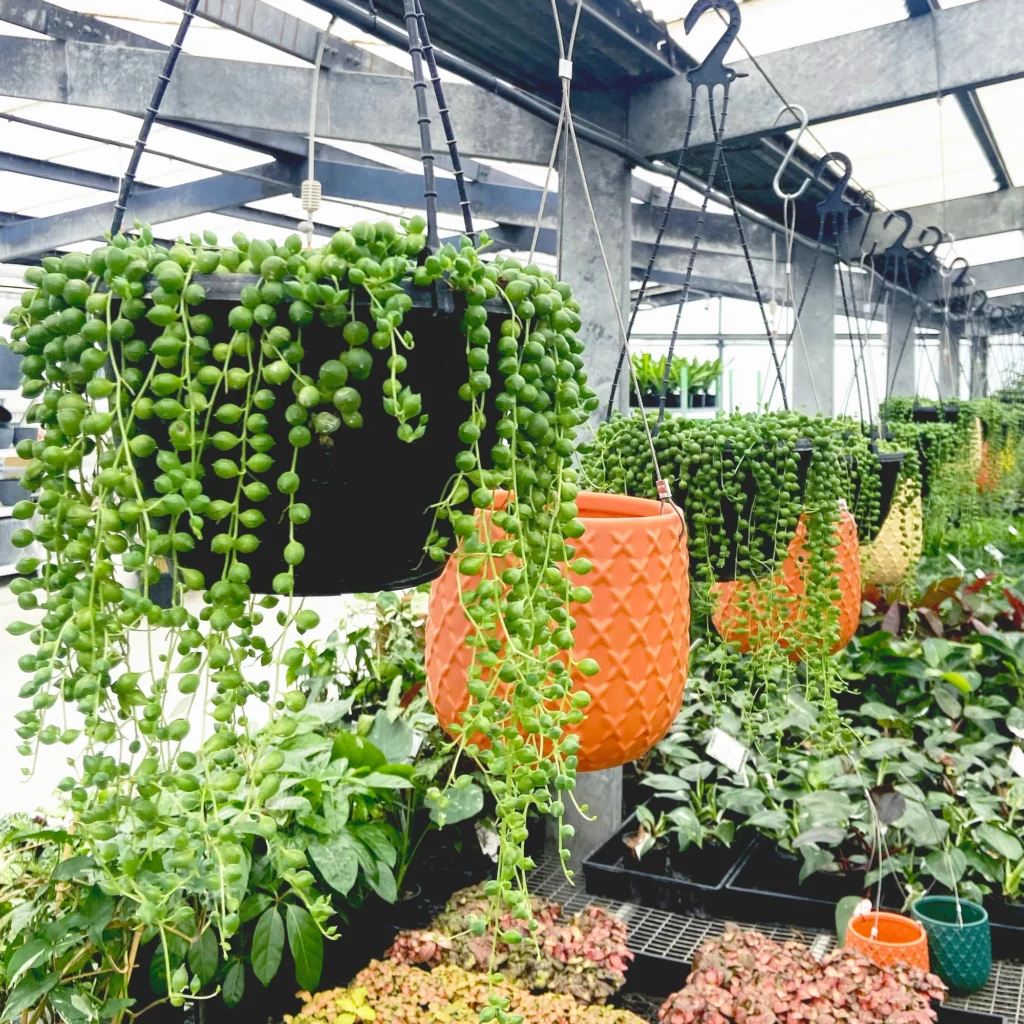
7. String of Pearls (Senecio rowleyanus)
For a playful, whimsical touch, the String of Pearls is a must-have. Its unique, bead-like foliage spills beautifully over the edges of hanging planters or shelves. This succulent prefers bright, indirect light and well-draining soil. Perfect for modern, eclectic, or boho-styled homes, it’s a conversation starter and a lovely way to add visual interest to vertical spaces.
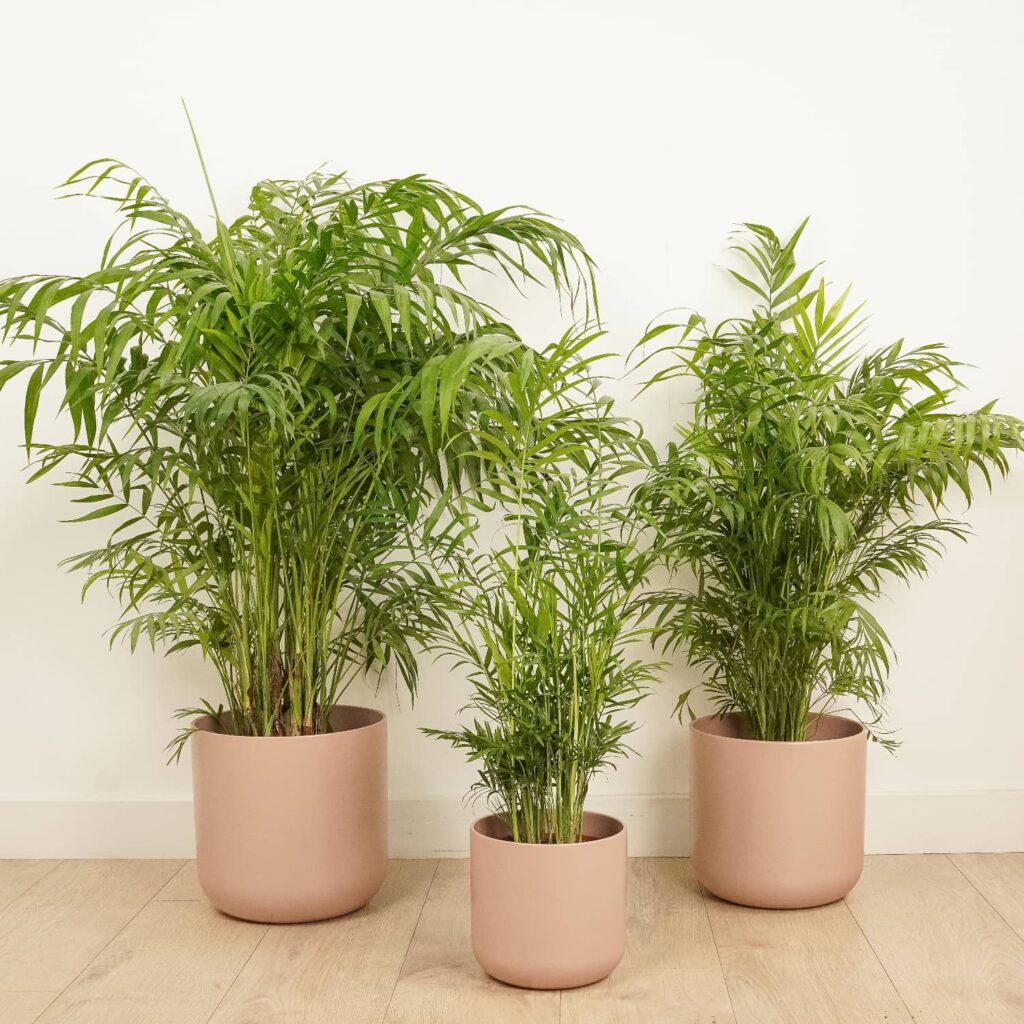
8. Parlor Palm (Chamaedorea elegans)
If you’re after classic elegance, the Parlor Palm is an enduring favorite. With its feathery, arching fronds, it softens any room and creates a light, airy atmosphere. This low-maintenance plant thrives in low to moderate light and prefers evenly moist soil. It looks particularly charming in vintage-inspired ceramic pots or paired with natural woven baskets in living rooms and bedrooms.
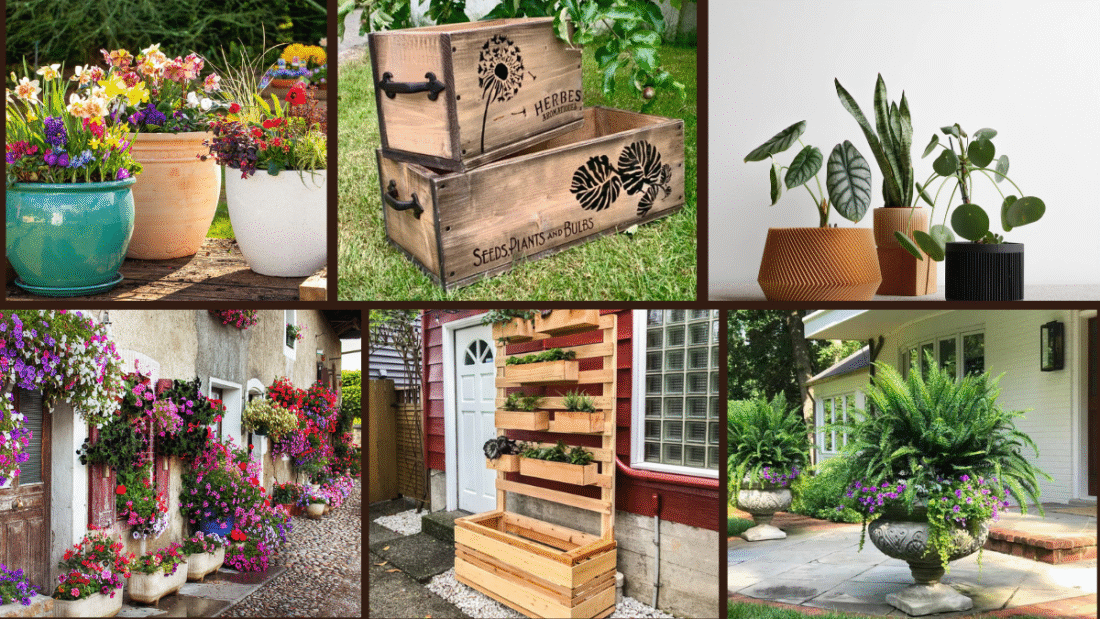
If you’re dreaming of a fresh new look for your garden, adding creative planters is one of the easiest ways to breathe life and personality into your outdoor space. Whether you prefer sleek modern styles, rustic charm, or playful upcycled designs, a well-placed planter can become a stunning focal point. Here are 7 garden planter ideas to inspire you and instantly transform your outdoor haven into a more beautiful, inviting retreat.
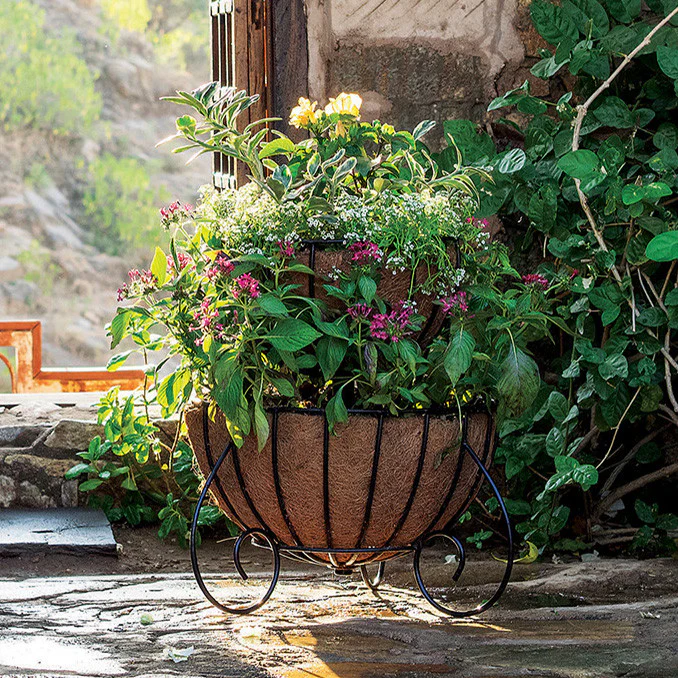
1. Tiered Planter Stands
Tiered planters are a fantastic way to add height, dimension, and lush greenery to your garden without taking up too much ground space. You can buy ready-made stands or stack pots and crates to create your own. Fill each tier with complementary plants — think cascading flowers on top, herbs in the middle, and compact succulents at the bottom. This layered look adds interest and makes your garden feel fuller and more dynamic.
2. Rustic Wooden Barrel Planters
For a charming, countryside feel, nothing beats classic wooden barrels as garden planters. Their deep, sturdy structure makes them ideal for growing small trees, shrubs, or flower combinations. You can arrange them solo for a bold statement or in clusters for a cottage-garden effect. Enhance their look with trailing ivy or seasonal flowers for an effortlessly welcoming garden vibe.
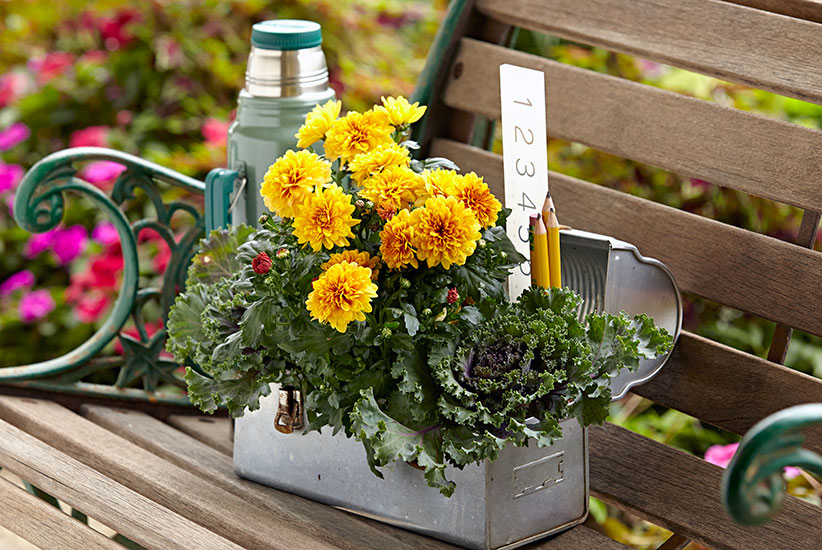
3. Upcycled Container Planters
Give old items a new lease on life by turning them into unique garden planters. Think vintage wheelbarrows, tin watering cans, old boots, or even teapots. These quirky containers add personality and rustic appeal to your garden while being eco-friendly. Choose colorful blooms or succulents to contrast with the aged finish of your upcycled planters and create an eye-catching display.
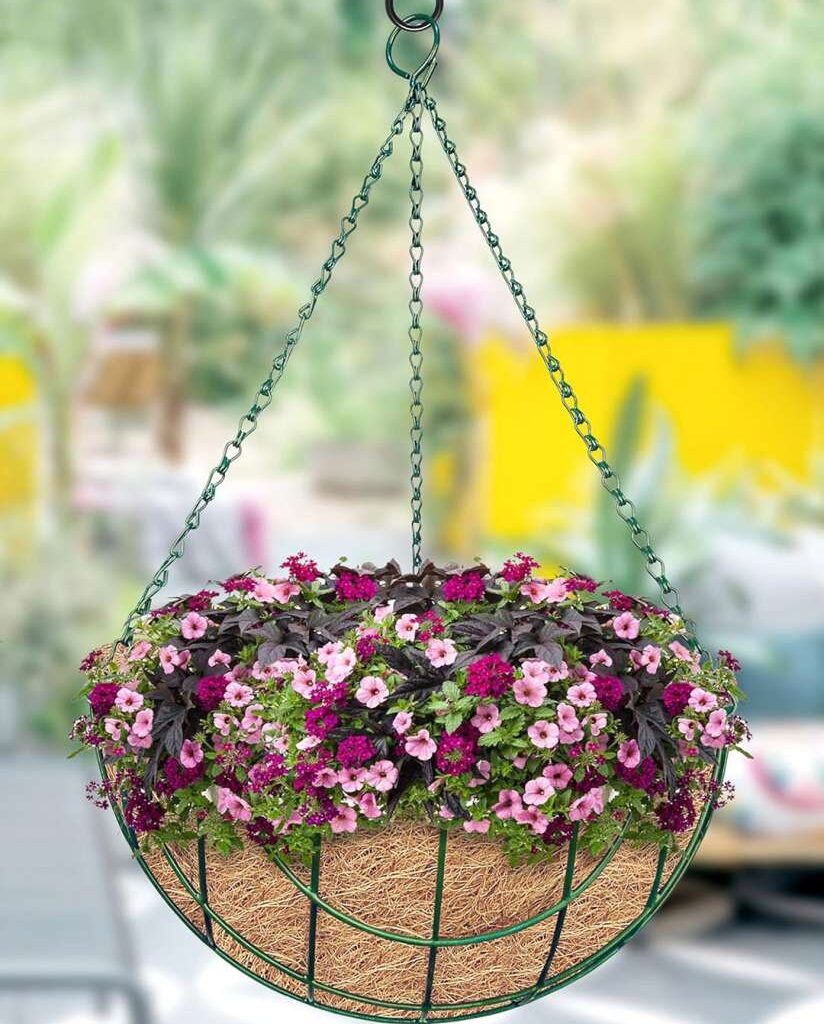
4. Hanging Basket Planters
Ideal for small spaces or patios, hanging baskets allow you to showcase cascading flowers and trailing greenery without taking up valuable ground space. Fill them with bright blooms like petunias, fuchsias, or trailing begonias, and hang them from pergolas, fences, or tree branches. Not only do they add height and color to your garden, but they also draw the eye upward, making your outdoor area feel more expansive.
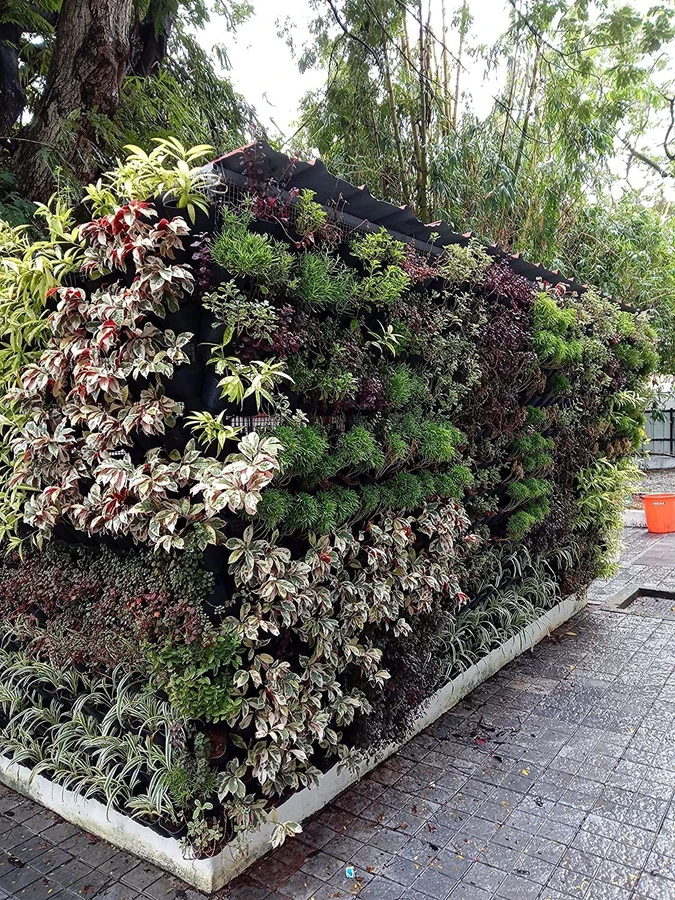
5. Vertical Wall Planters
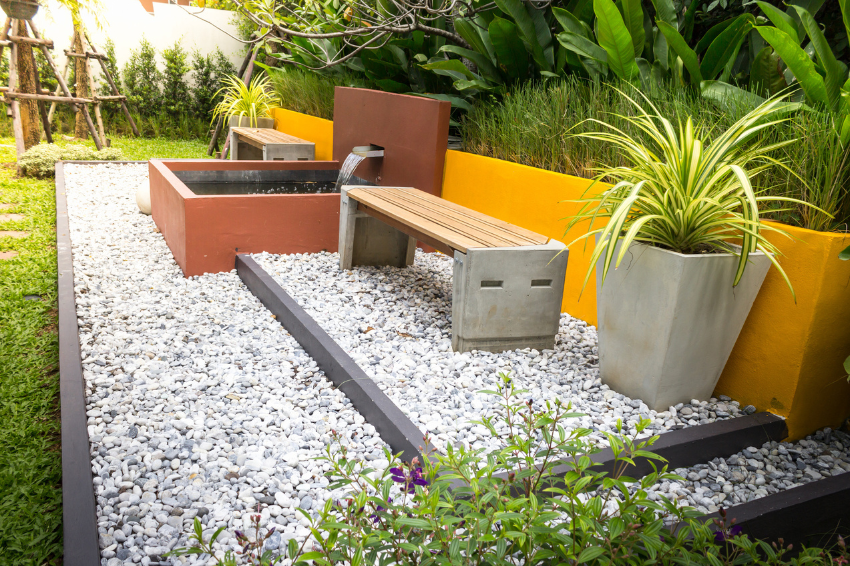
If you’re short on ground space or want to create a stunning green feature wall, vertical planters are a perfect solution. Use wall-mounted pocket planters, stacked pots, or a vertical wooden frame with planting boxes. Fill them with herbs, succulents, or flowering plants to create a living wall that adds texture and vibrancy to your garden. It’s a great way to turn plain fences or blank walls into lush, living art.
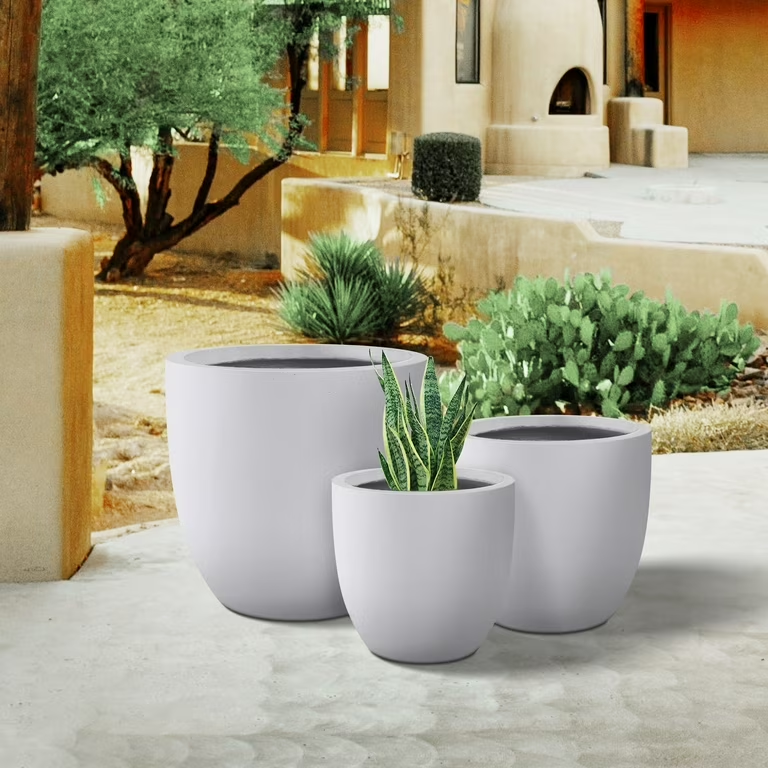
6. Modern Concrete Planters
For a clean, contemporary look, opt for sleek concrete or stone planters. Their minimalist design and neutral tones beautifully complement green foliage and vibrant flowers. Arrange them in groups of varying sizes for a polished, urban feel, or place a single, oversized planter as a statement piece. They’re durable, weather-resistant, and ideal for creating a chic, modern outdoor setting.
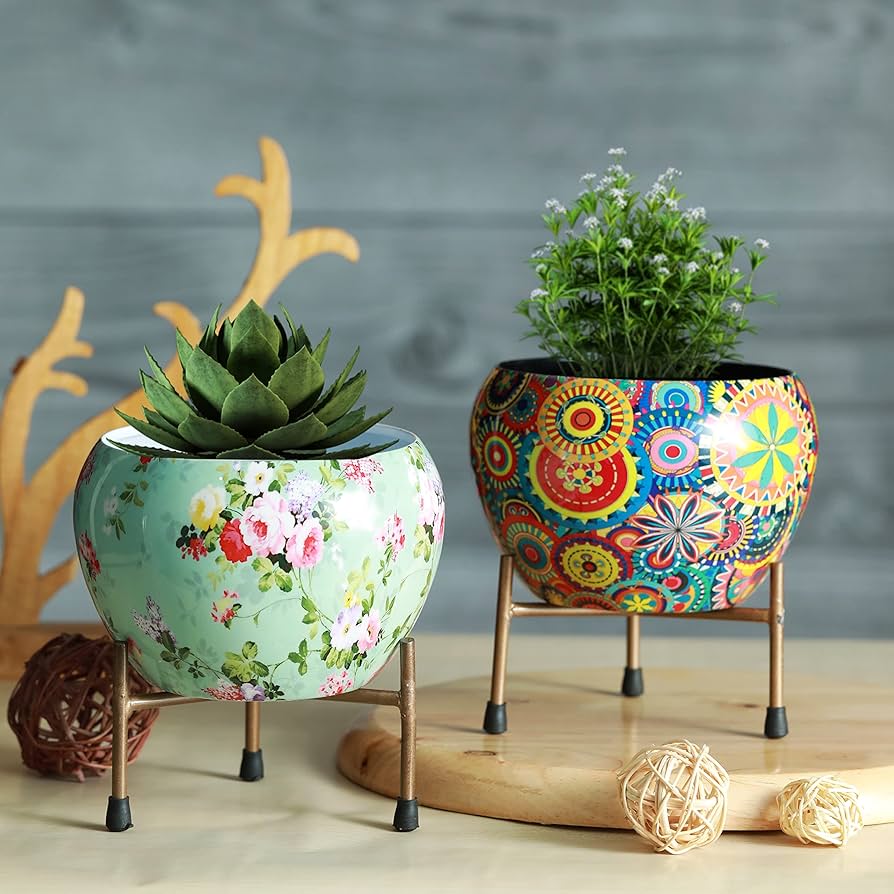
7. Colorful Ceramic Pot Planters
Bright, glazed ceramic pots add a pop of color and charm to any garden. Available in countless shapes, sizes, and patterns, these planters are perfect for showcasing your favorite plants and flowers. Arrange them along pathways, around seating areas, or on patios for an eye-catching, cheerful display. Mix and match colors and heights for a playful, eclectic garden atmosphere.
Your front door sets the tone for your entire home, and adding stylish planters can instantly boost its charm and warmth. Whether you prefer classic elegance, rustic flair, or a bold, modern look, a thoughtfully arranged planter by your entrance makes a lasting impression. From seasonal blooms to evergreen arrangements, here are 8 front door planter ideas to welcome your guests in style and elevate your home’s curb appeal.
1. Symmetrical Evergreen Planters
Nothing says timeless elegance like a pair of matching evergreen planters flanking your front door. Choose compact conifers like boxwood, dwarf spruce, or cypress, and plant them in classic urns or tall planters. Add seasonal touches like pinecones, ribbons, or mini lights during the holidays. These lush, green accents provide year-round beauty and a clean, polished look that never goes out of style.
2. Colorful Seasonal Flower Pots
Celebrate each season by updating your front door planters with fresh, vibrant flowers. In spring, use tulips, daffodils, and pansies; in summer, opt for petunias, marigolds, and begonias. Autumn calls for mums and ornamental kale, while winter can feature holly, evergreen branches, and red berries. Rotating your plants keeps your entrance looking lively and perfectly in tune with the season.
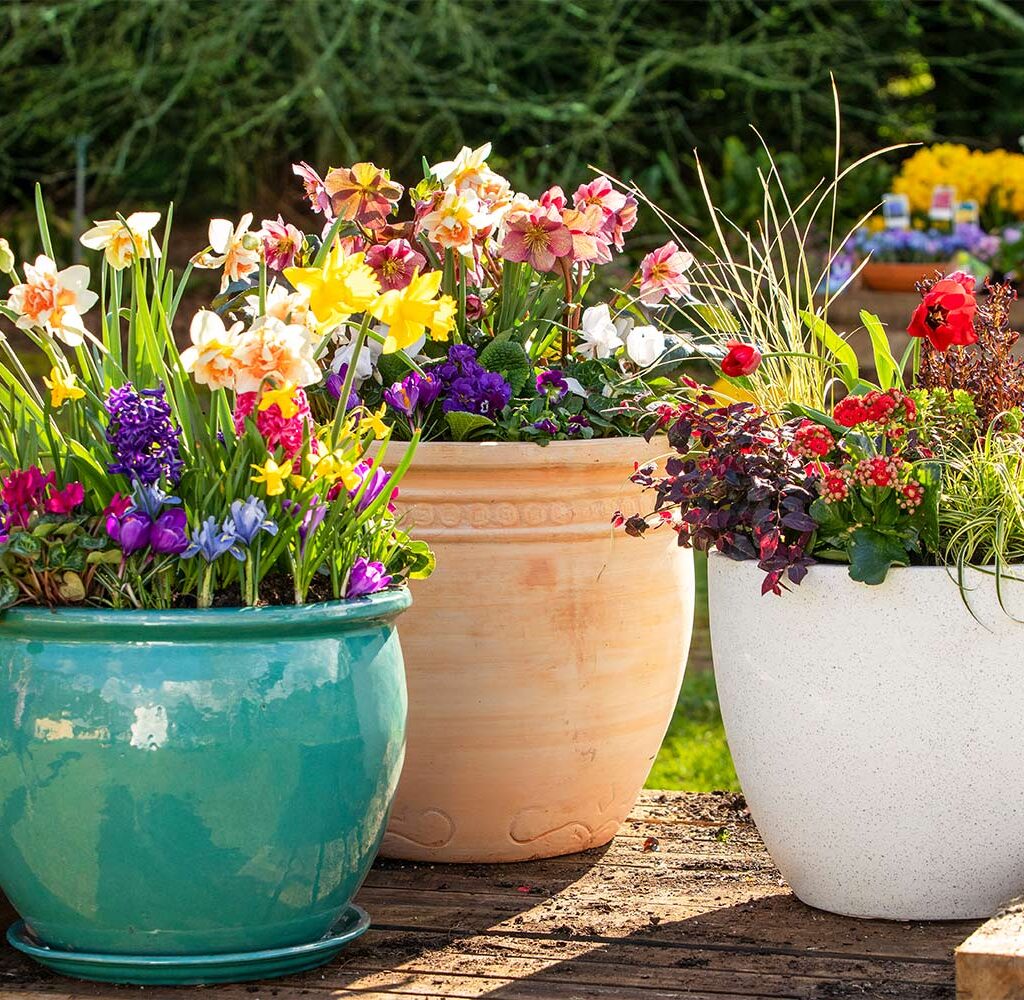
3. Rustic Wooden Crate Planters
For a touch of farmhouse charm, repurpose vintage wooden crates into beautiful front door planters. Stack or line them up and fill them with flowering annuals, trailing ivy, or potted herbs. Their natural, weathered look pairs wonderfully with cottage-style and country homes. Add stenciled house numbers or a chalkboard sign for a personalized, welcoming touch.
4. Hanging Basket Displays
Hanging baskets aren’t just for gardens — they make wonderful additions to front doors too. Install sturdy hooks or brackets beside your entryway and fill baskets with cascading flowers like fuchsia, lobelia, or trailing petunias. You can also use seasonal greens and berries in winter for a festive, vertical touch. Hanging planters add dimension and color to otherwise plain doorways.
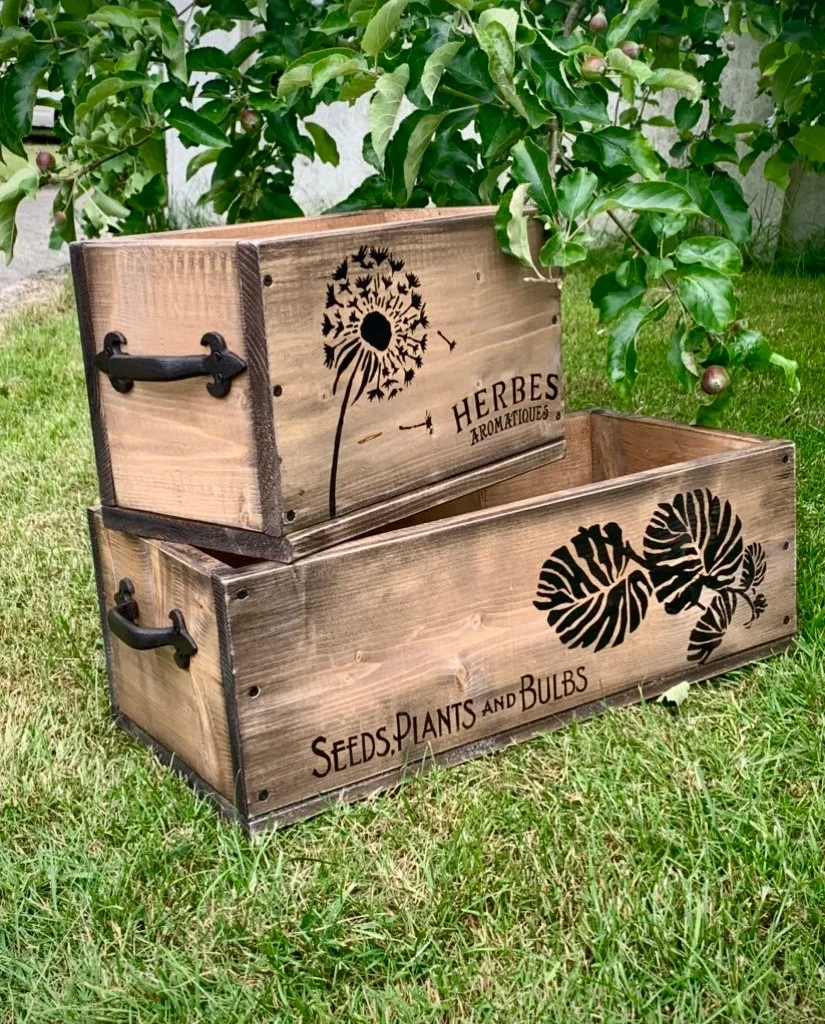
5. Modern Minimalist Planters
If your home leans toward a sleek, contemporary style, opt for clean-lined, minimalist planters in matte black, white, or concrete finishes. Choose statement plants like snake plants, ornamental grasses, or sculptural succulents. Keep the arrangement simple and uncluttered to complement your modern aesthetic. This look is sophisticated, low-maintenance, and perfect for urban spaces.
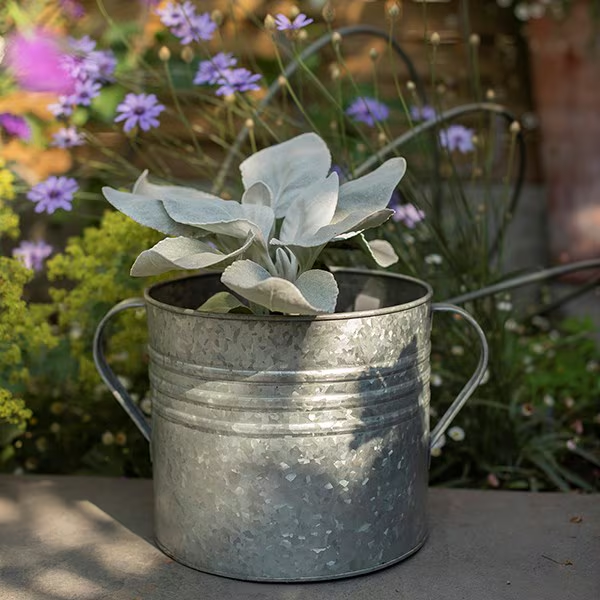
6. Vintage Metal Bucket Planters
Add a rustic, vintage touch to your front door with galvanized metal buckets filled with fresh flowers or foliage. These charming containers work wonderfully for seasonal displays — think sunflowers in summer, pumpkins in fall, or evergreen branches in winter. Arrange them solo or in pairs for a nostalgic, country-inspired entryway.
7. Lantern and Planter Combo
Create a cozy, welcoming vibe by pairing your planters with decorative lanterns. Nestle small potted plants or flowers around large lanterns on either side of your front door. Place battery-operated candles inside the lanterns for a warm evening glow. This combination is perfect for both modern and traditional homes, adding charm and light to your entrance.
8. Vertical Ladder Planter
Use a rustic wooden ladder as a unique, vertical planter stand by leaning it against a wall near your front door. Add small pots or baskets filled with flowering plants, herbs, or succulents on each step. It’s a space-saving, creative way to display multiple plants while adding character and charm to your front porch or entryway.
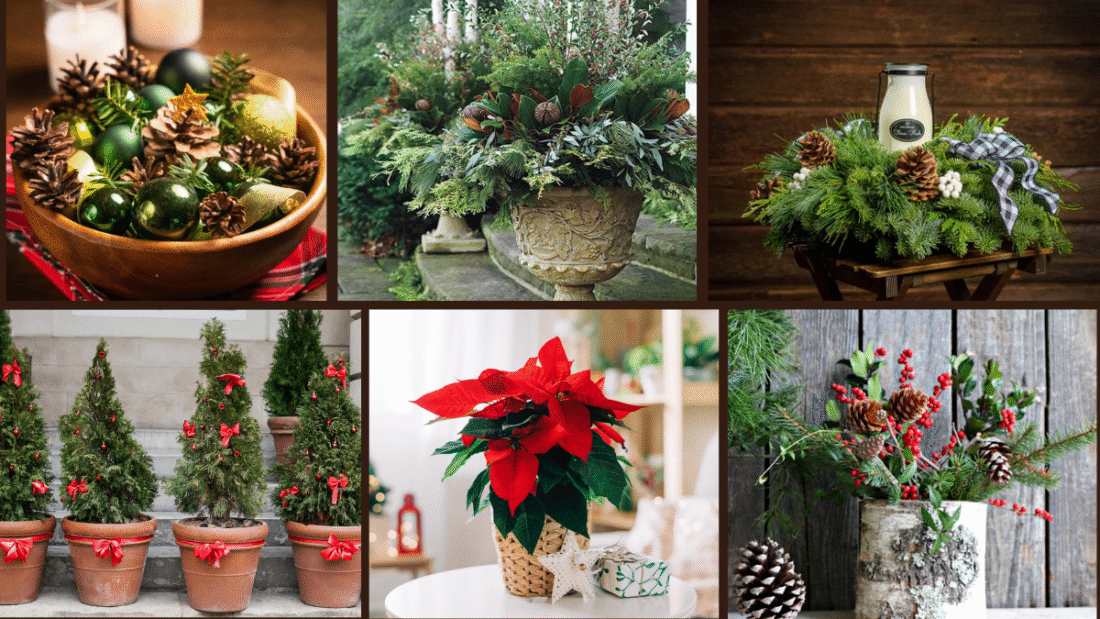
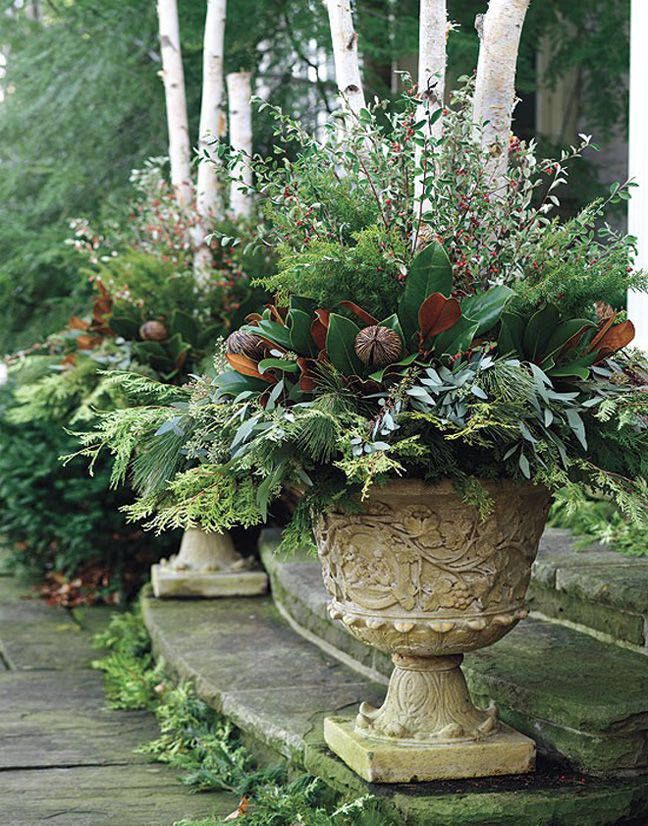
The holiday season is the perfect time to sprinkle some festive cheer around your home — and your planters can play a big role in that transformation. Whether you’re decorating your front porch, balcony, or patio, a thoughtfully designed Christmas planter can instantly boost curb appeal and welcome guests with seasonal charm. Here are 7 gorgeous Christmas planter ideas to inspire your festive décor and turn your outdoor spaces into holiday showstoppers.
1. Evergreen & Pinecone Arrangement
A classic holiday planter starts with lush evergreen branches — spruce, fir, or pine — combined with rustic pinecones. This timeless combination creates a full, textured look that works beautifully in any outdoor setting. Add in a few sprigs of cedar or juniper for variety and fragrance. Finish it off with a bright red ribbon or some festive ornaments for extra holiday flair.
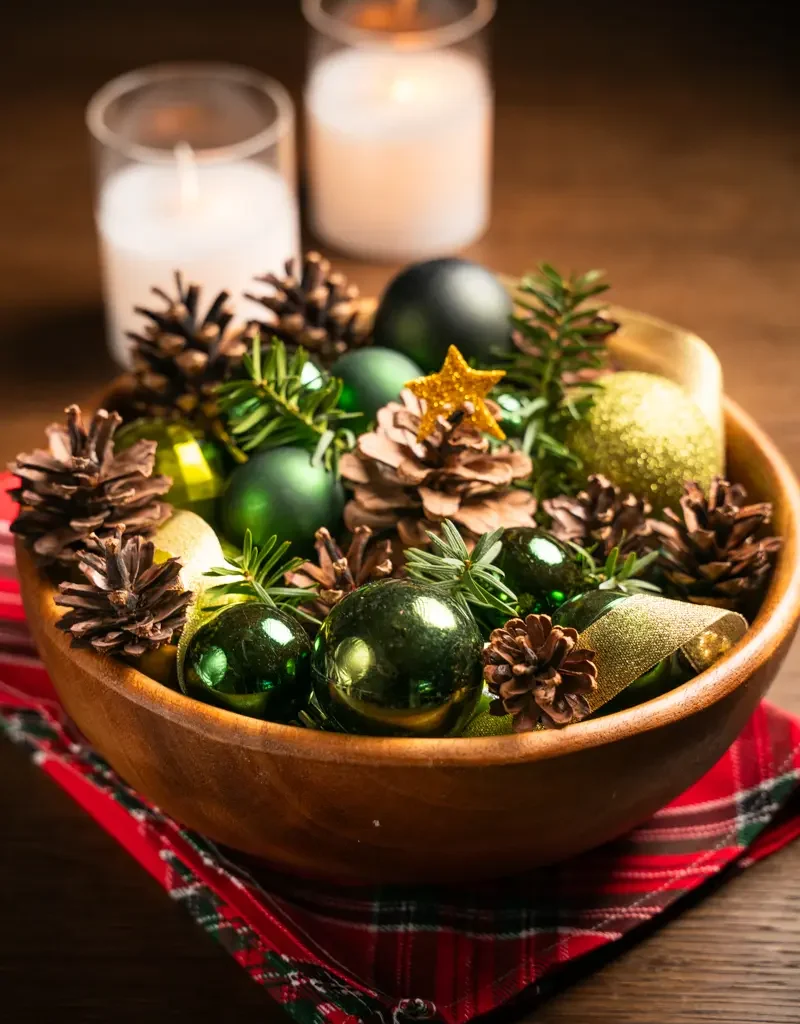
2. Ornament-Filled Urn Planter
Turn a simple urn or large planter into a sparkling holiday statement by filling it with oversized ornaments. Use shatterproof baubles in festive shades of red, gold, silver, and green. Mix in faux snow-covered branches or glittery picks for added texture. This idea is easy to put together and instantly elevates your porch or patio with a modern, cheerful vibe.
3. Rustic Lantern and Berry Planter
Combine holiday greenery with rustic charm by placing a vintage lantern in the center of your planter. Surround it with fresh pine, cedar, and eucalyptus branches, then tuck in clusters of red berries for pops of color. You can place a battery-operated candle inside the lantern for a cozy evening glow. It’s a perfect mix of farmhouse style and festive elegance.
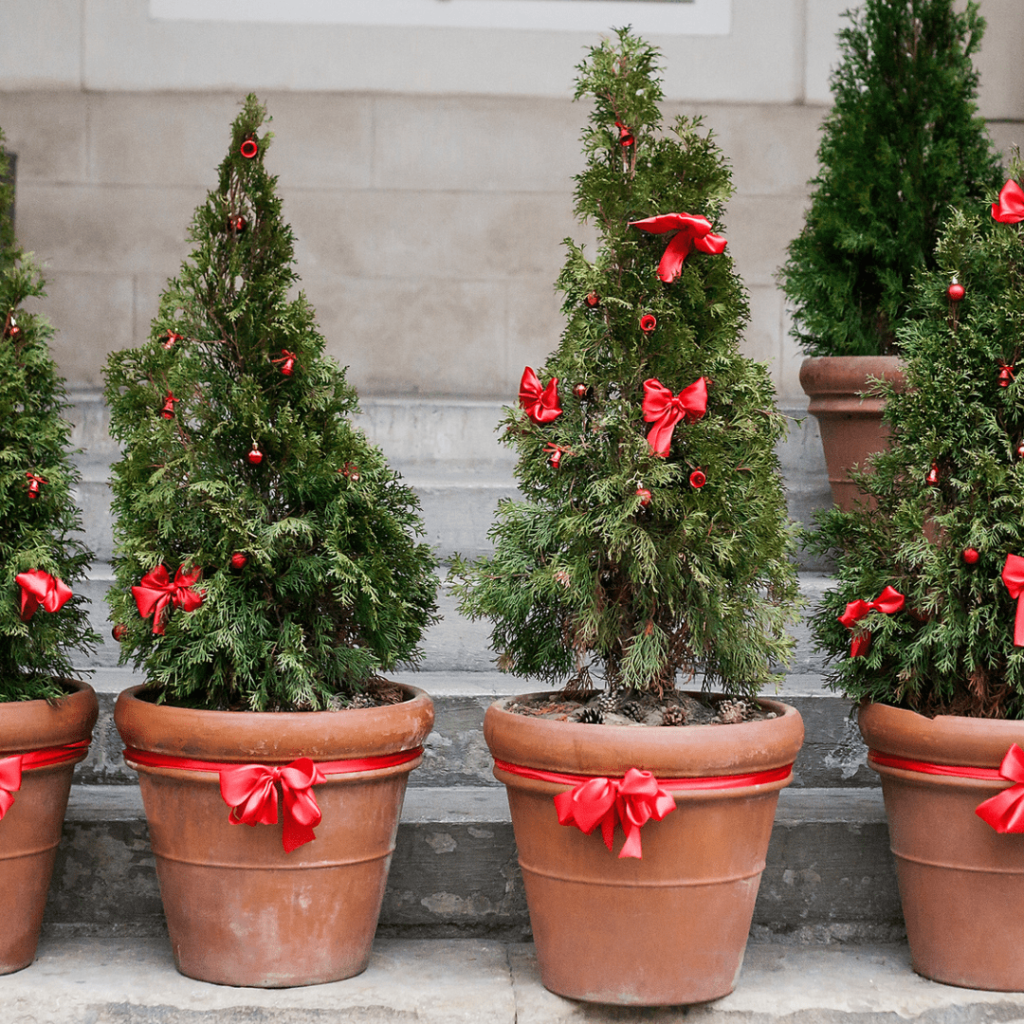
4. Mini Christmas Tree in a Pot
Bring the beauty of a Christmas tree outdoors by planting a small evergreen in a decorative pot. Decorate it with miniature ornaments, fairy lights, and a tiny tree topper. This charming idea works well on porches, entryways, or balconies, adding a personal touch to your exterior décor. Choose a dwarf Alberta spruce or cypress for a compact, manageable size.
5. Winter White Planter
Create a serene, snowy look with a white-themed Christmas planter. Use frosted branches, silver-dusted pinecones, white berry sprays, and faux snow to achieve a wintry feel. Add delicate white fairy lights to make it sparkle at night. This planter pairs beautifully with modern and minimalist homes, offering a crisp, elegant take on holiday décor.
6. Red Poinsettia Pot Display
Poinsettias are iconic Christmas flowers, and grouping them in decorative planters is an easy way to make a bold holiday statement. Use classic red blooms mixed with white or pink varieties for a festive contrast. Pair them with glossy green foliage or trailing ivy for added fullness. Place these planters by your front door or along your pathway to welcome holiday guests in style.
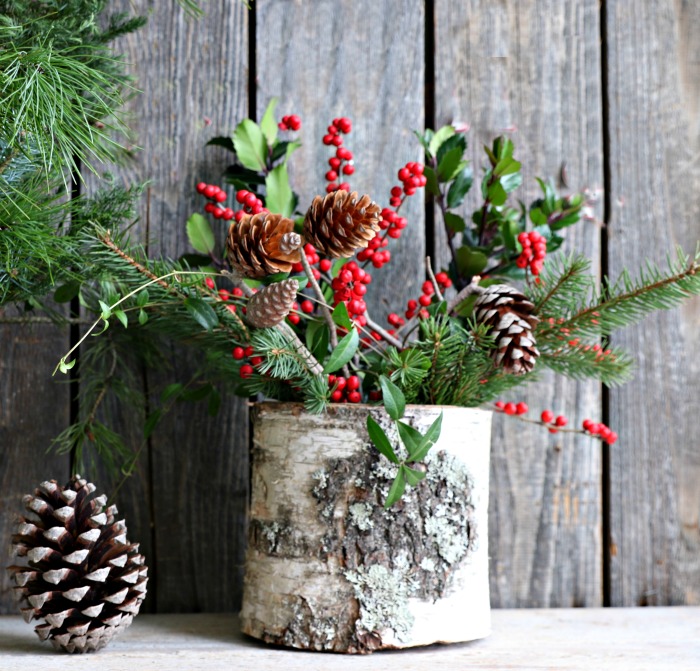
7. Natural Birch Log Planter
For a rustic, woodland-inspired Christmas planter, arrange birch logs upright in a large container surrounded by fresh greenery. Mix in sprigs of holly, red berries, and pinecones for texture and color. Tie a plaid ribbon around the base or logs for an extra festive touch. This natural, earthy display is perfect for cabins, countryside homes, or anyone who loves rustic holiday décor.
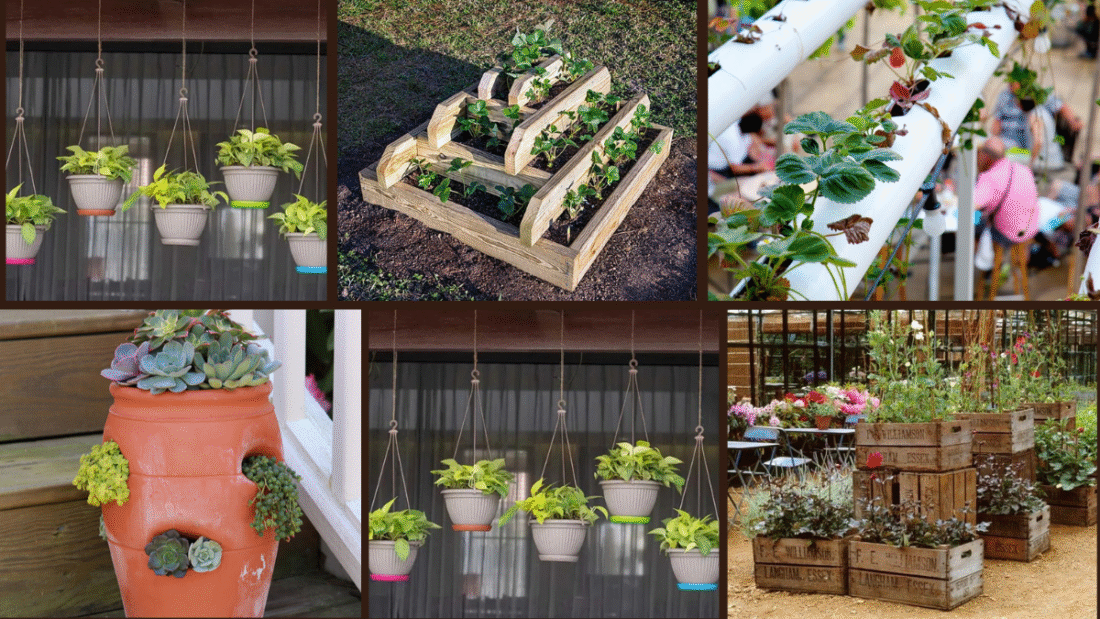
Nothing beats the sweet, sun-ripened taste of homegrown strawberries. Whether you have a sprawling garden or a small balcony, there’s always room to grow these delicious berries with a little creativity. The right planter can not only save space but also add charm to your outdoor area while ensuring your strawberries thrive. Here are 10 creative strawberry planter ideas to help you grow fresh, juicy berries with style.
1. Strawberry Tower Planter
A strawberry tower planter is perfect for maximizing vertical space and growing plenty of berries in a small area. These vertical structures have multiple planting pockets, allowing you to grow several strawberry plants while minimizing the footprint. Made from stacked pots or specially designed towers, this setup ensures excellent drainage and easy harvesting. It’s an ideal solution for patios and balconies.
2. Hanging Basket Planters
Hanging baskets aren’t just for flowers — they make fantastic strawberry planters too. These elevated planters save ground space while keeping your berries safe from pests. Use coconut liners or moss-filled baskets to hold soil and plants. Hang them from porch beams, pergolas, or sturdy hooks in sunny spots for a cascading display of sweet, ripe strawberries.
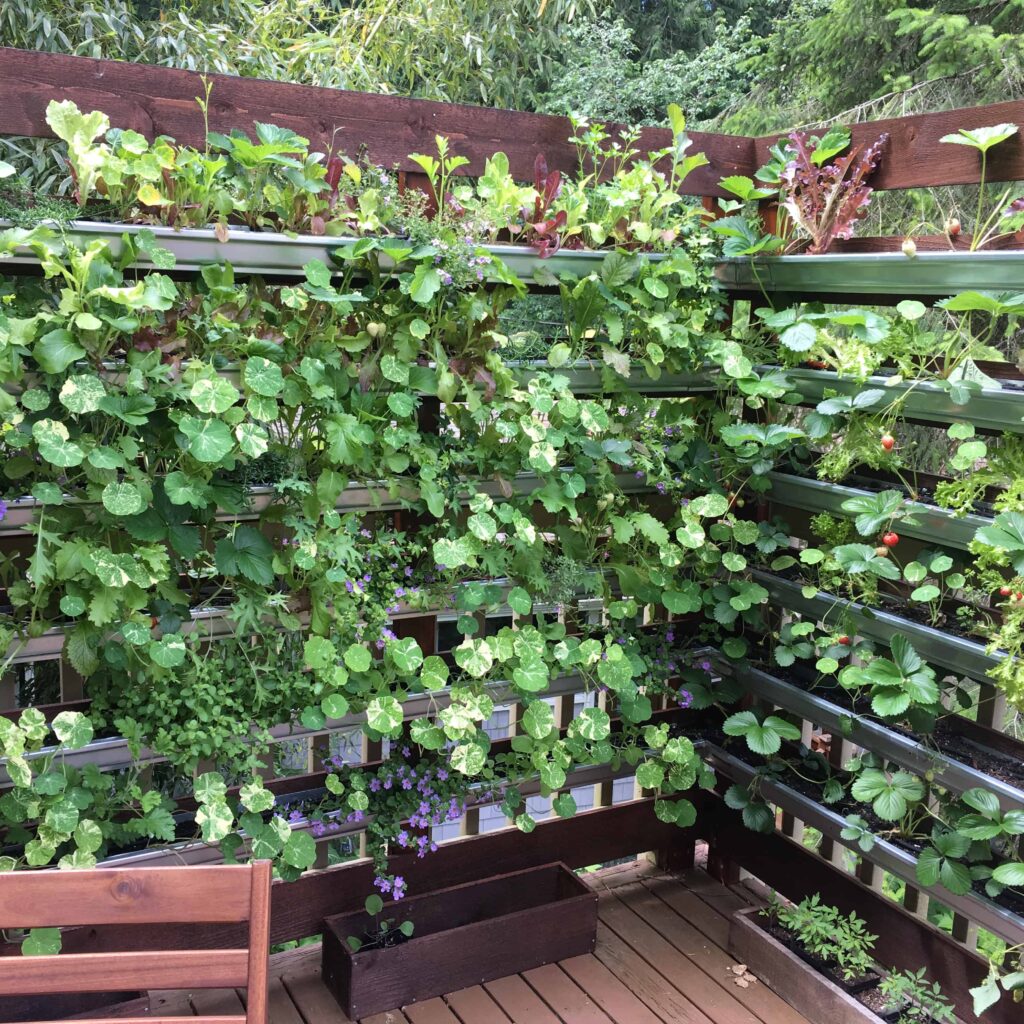
3. Gutter Garden Planters
Old or leftover rain gutters can be repurposed into clever strawberry planters. Mount them on fences, walls, or balcony railings for a space-saving, modern look. Gutters provide excellent drainage and can hold several plants along their length. Just make sure to drill drainage holes and position them in a spot with plenty of sunlight. This is a creative and affordable DIY idea for fresh berries at your fingertips.
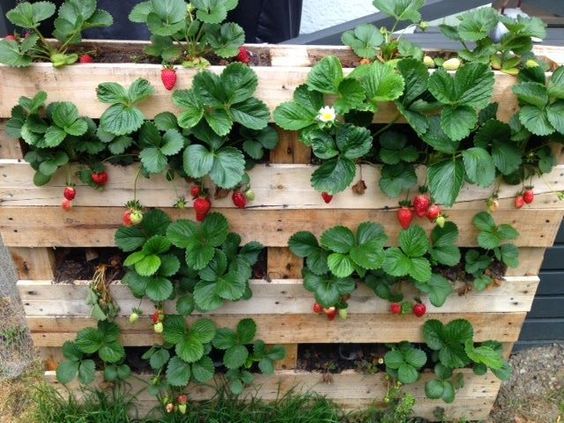
4. Vertical Pallet Strawberry Planter
Turn a wooden pallet into a rustic, vertical strawberry garden by adding planting pockets between the slats. Line the pallet with landscape fabric and fill it with soil, then tuck strawberry plants into each opening. Lean the pallet against a wall or fence for an attractive, space-efficient berry planter. It’s perfect for small backyards, balconies, or urban gardens.
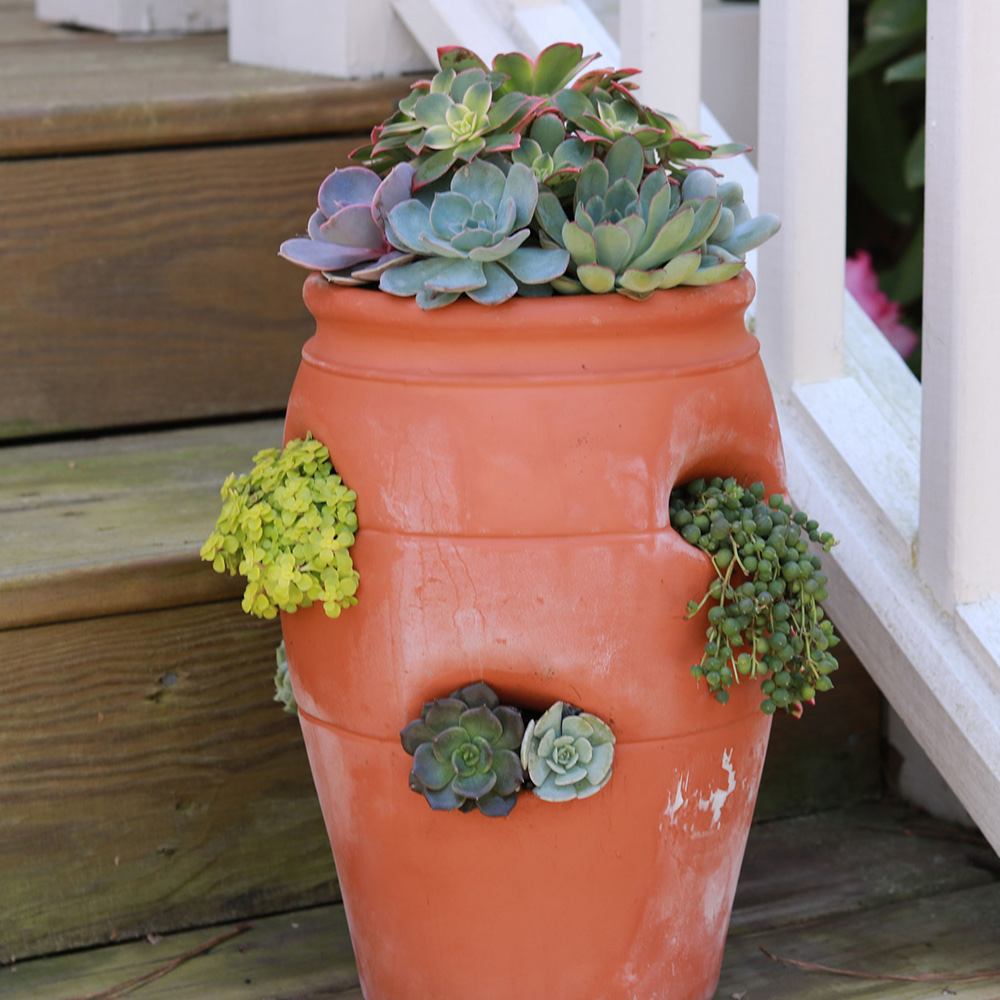
5. Terracotta Strawberry Pots
Classic terracotta strawberry pots feature side pockets, allowing you to plant multiple strawberry plants in one container. The side openings let berries spill out beautifully while keeping them elevated and clean. These timeless pots are decorative, breathable, and perfect for patios or sunny porches. Add a mixture of trailing and upright varieties for a lush, cascading effect.
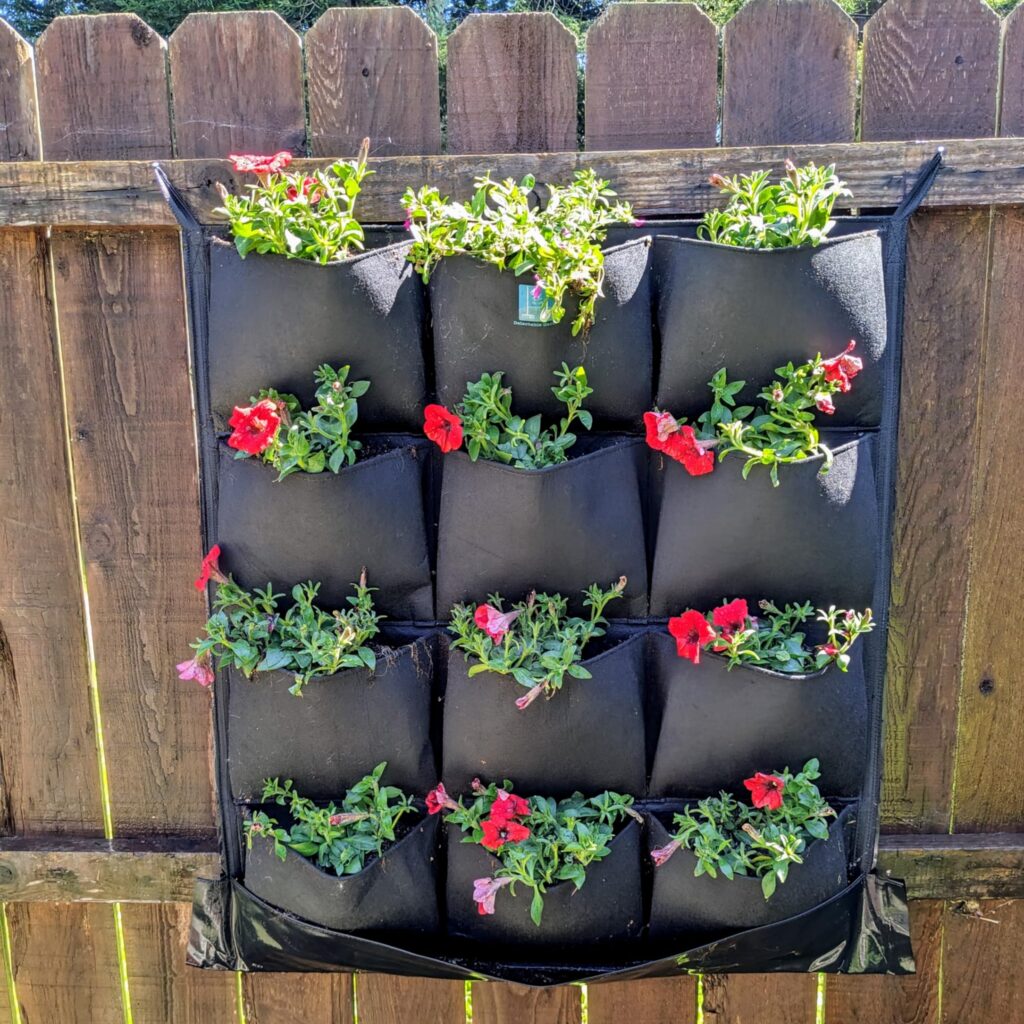
6. Hanging Pocket Planters
Fabric pocket planters or vertical wall pouches are excellent for growing strawberries in small or unconventional spaces. These planters feature multiple pockets for individual plants, making it easy to manage and harvest berries. Hang them on walls, fences, or balcony railings. Choose a breathable, sturdy fabric that allows good drainage while keeping soil securely in place.
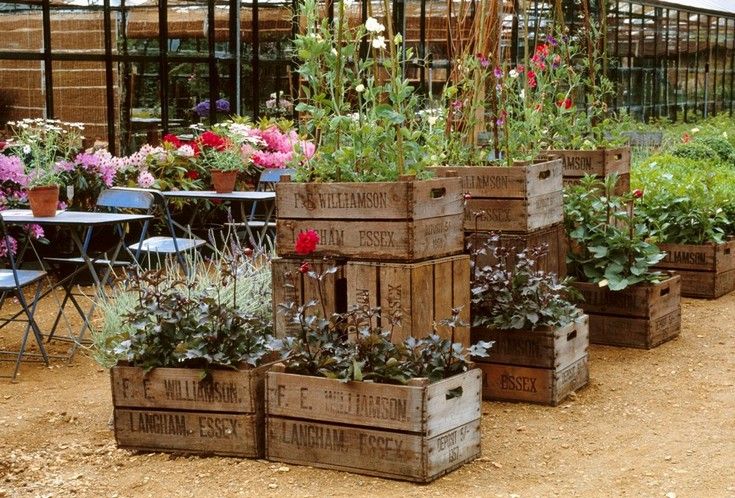
7. Repurposed Wooden Crates
Give old wooden crates a new life as rustic strawberry planters. Stack them to create a vertical garden, or line them up on your patio for a charming, country-inspired display. Drill holes for drainage, fill them with rich, well-draining soil, and plant your strawberry seedlings. Their portability makes it easy to reposition the crates for maximum sun exposure throughout the day.
8. PVC Pipe Strawberry Planter
For a modern and innovative setup, use wide PVC pipes as vertical strawberry planters. Cut planting holes along the sides and fill the pipes with soil, inserting strawberry plants into each opening. Secure the pipes upright on your patio, balcony, or garden for a compact, contemporary berry garden. This setup ensures excellent air circulation and space efficiency.
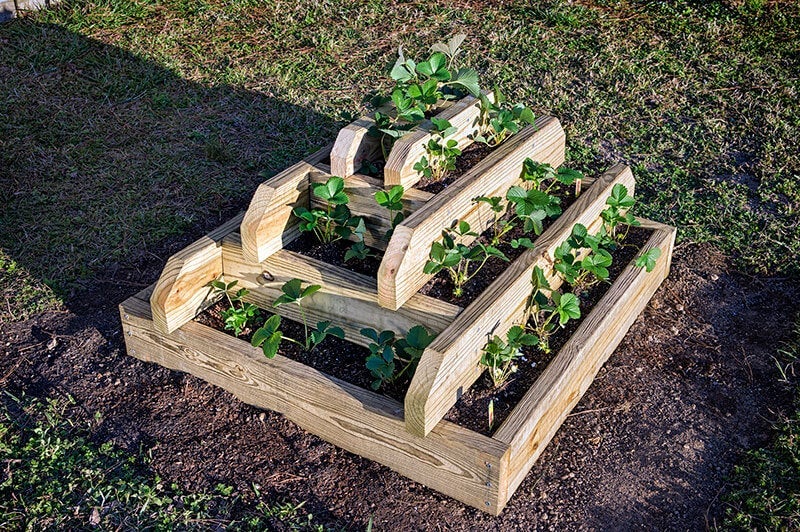
9. Tiered Garden Beds
Create a beautiful, cascading strawberry patch with tiered garden beds. Build or buy a multi-level wooden or stone planter with raised edges. Plant strawberries in each tier, allowing the berries to trail over the sides. This arrangement provides excellent drainage, easy access for harvesting, and a lovely focal point in your garden or yard.
10.Tiered Garden Beds
Repurpose a vintage wheelbarrow into a charming strawberry planter. Drill drainage holes in the base, fill it with fertile soil, and plant your strawberry starts. The mobile planter allows you to move your berry patch to sunnier spots as needed and adds a touch of rustic character to your outdoor space. It’s both functional and decorative, perfect for cottage-style gardens.
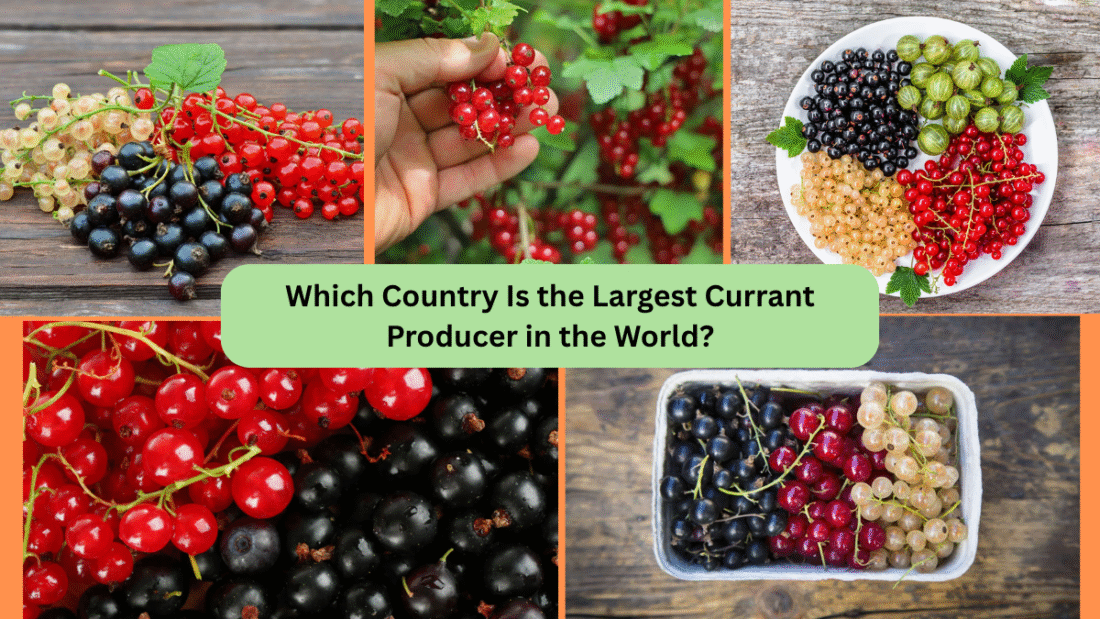
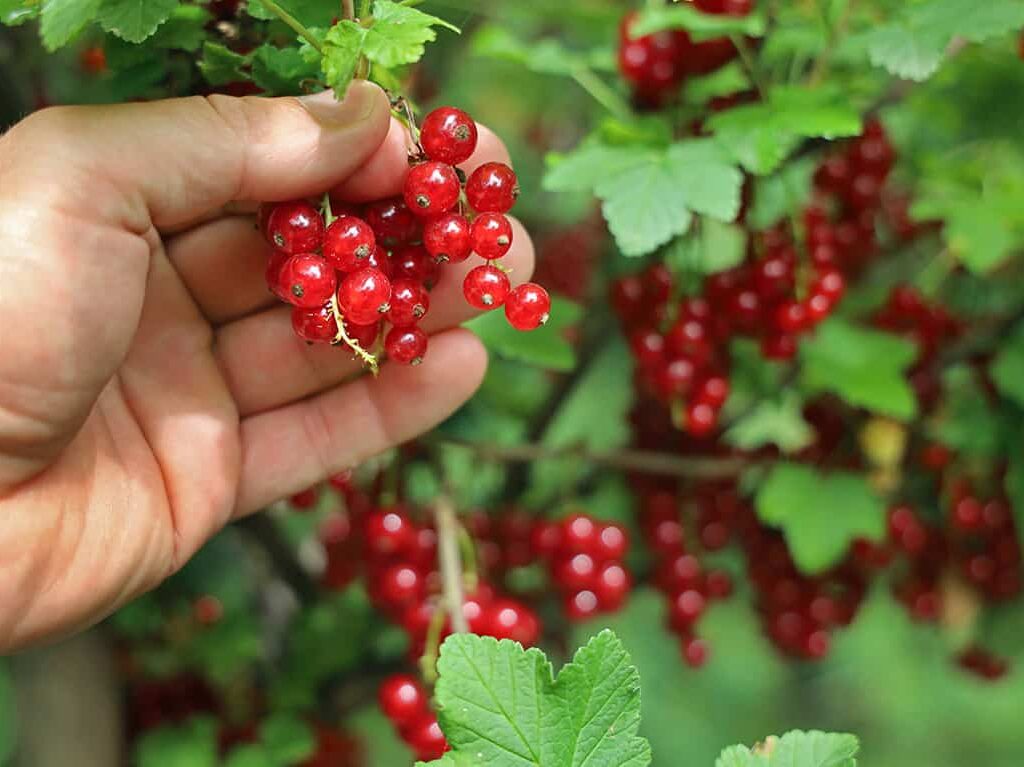
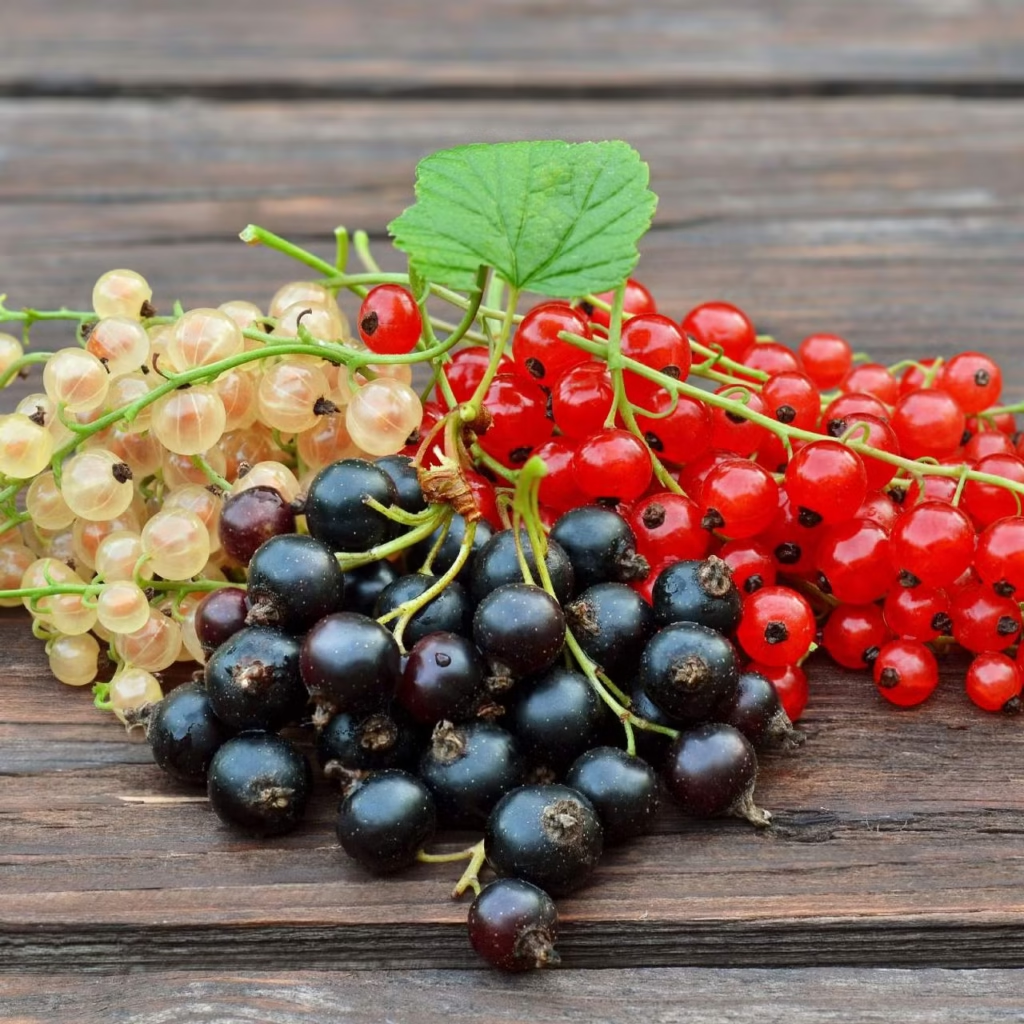
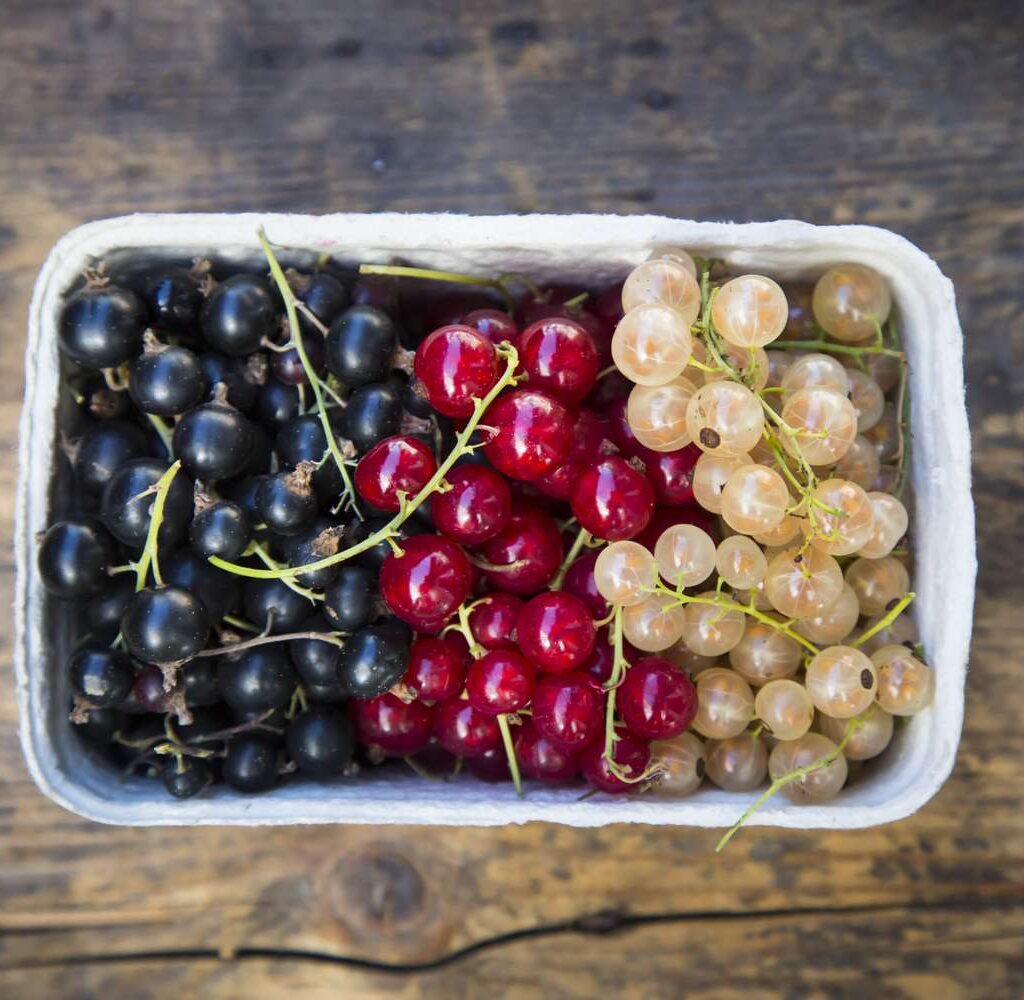
When it comes to berries, currants have long been celebrated for their rich flavor, vibrant colors, and impressive health benefits. Found in black, red, and white varieties, these tiny berries are a staple in jams, jellies, wines, and desserts across Europe and parts of Asia. But one question many might not know the answer to is — which country leads the world in currant production?
In this comprehensive article, we’ll explore which country is the largest currant producer in the world, dive into the history of currants, their uses, health benefits, global market trends, and the factors behind the top producer’s success.
What Are Currants?
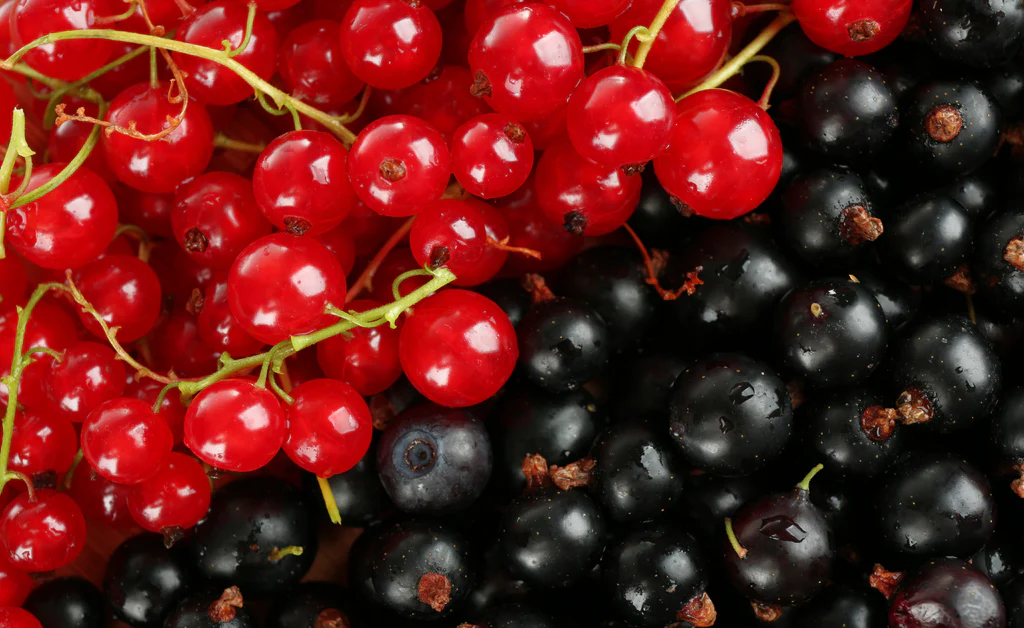
Currants are small berries that belong to the Ribes genus, native to the temperate regions of the Northern Hemisphere. They come in several varieties:
Blackcurrants (Ribes nigrum)
Redcurrants (Ribes rubrum)
White currants (a color variant of redcurrants)
Known for their tart flavor and high vitamin C content, currants have been a vital part of European kitchens and traditional medicine for centuries.
Which Country Is the Largest Currant Producer in the World?
Russia holds the title as the largest currant producer in the world.
Key Production Stats:
Annual Production: Approximately 156,000 metric tons
Main Varieties Grown: Predominantly blackcurrants, followed by red and white currants.
Primary Growing Regions: Central, Northwestern, and Southern Russia.
Russia’s dominance in currant production is largely due to its vast land area, favorable climate for berry cultivation, and a long-standing cultural tradition of using currants in food and medicine.
Other Leading Currant Producing Countries
Though Russia leads globally, several other countries also have significant currant production:
Poland
The world’s second-largest currant producer.
Particularly known for high-quality blackcurrants, exported widely to European markets.
Excellent climate and soil conditions make Poland a berry-farming hub.
Germany
A historic producer of both black and red currants.
Currants are an essential ingredient in German desserts, jams, and syrups.
Ukraine
Large-scale currant farming, especially blackcurrants.
Significant domestic and export markets.
United Kingdom
Known for its premium blackcurrants.
Famous for producing the fruit used in Ribena, one of the UK’s most popular fruit drinks.
Currant Farming: Varieties and Cultivation Practices
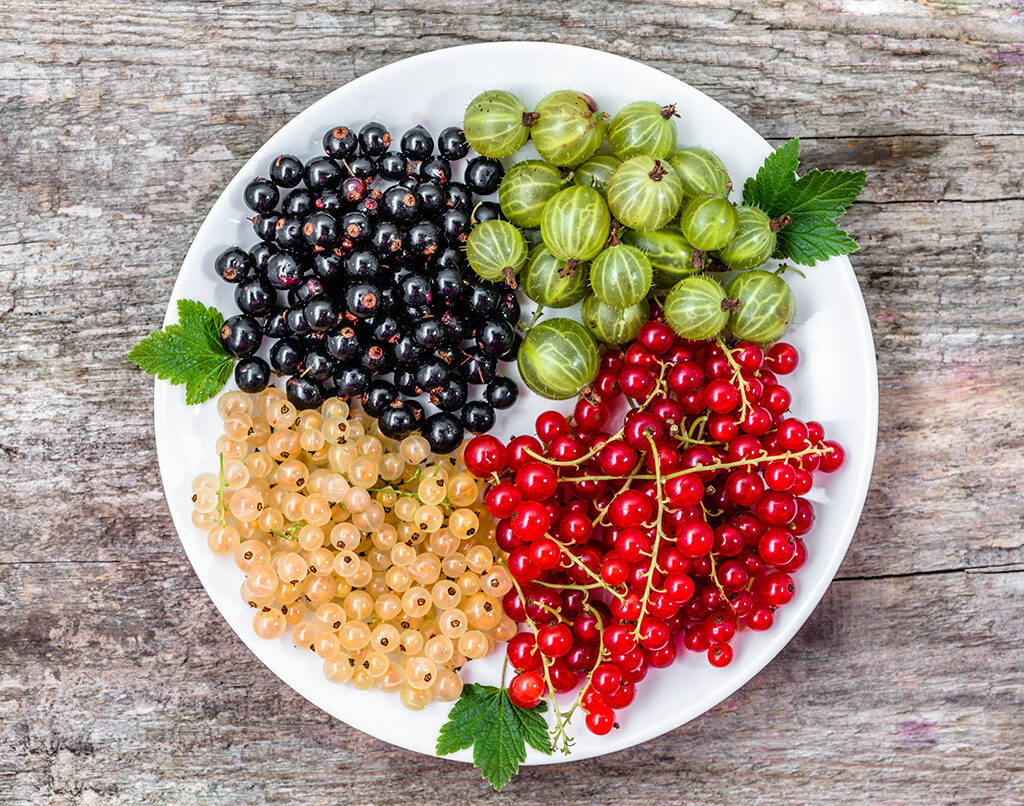
Currants thrive in cool, temperate climates with well-drained, fertile soil. The three main types of currants cultivated globally include:
Blackcurrants (Ribes nigrum)
Dark purple to black berries.
Rich in vitamin C, antioxidants, and anthocyanins.
Popular for juices, jams, wines, and medicinal use.
Redcurrants (Ribes rubrum)
Bright red berries.
Tart flavor, often used in jellies, sauces, and desserts.
White Currants
Pale, translucent berries.
Mildly sweet and less acidic than redcurrants.
Key farming practices include:
Pruning annually to improve yield and air circulation.
Protecting plants from pests like aphids and diseases such as mildew.
Irrigation during dry spells to maintain berry quality.
Using organic and natural fertilizers for healthier produce.
Culinary and Commercial Uses of Currants
Currants are highly versatile and feature prominently in various culinary and commercial applications:
Jams, jellies, and preserves
Fruit syrups and juices
Cakes, tarts, and pastries
Wine and liqueurs (especially blackcurrant wines)
Medicinal syrups for cough and cold remedies
Health supplements, owing to their high antioxidant content
In Eastern Europe and Russia, currant berries are a staple in household recipes and are often preserved for winter use.
Health Benefits of Currants
Currants, particularly blackcurrants, are considered a superfood because of their impressive nutritional profile:
Extremely high in Vitamin C: Boosts immunity and acts as a powerful antioxidant.
Rich in Anthocyanins: Help fight inflammation and protect against oxidative stress.
Good for Heart Health: May help reduce blood pressure and cholesterol levels.
Improves Eye Health: Blackcurrants contain compounds that may protect against vision loss.
Aids Digestion: High fiber content improves gut health.
Supports Skin and Hair Health: Antioxidants and vitamins promote healthy skin and hair.
Global Currant Market Trends
The global demand for currants has steadily increased in recent years, driven by growing health awareness and the popularity of superfoods.
Key market trends include:
Rising demand for organic currants in the EU and North America.
Growth in the health supplement industry, with currant extracts used for immunity-boosting products.
Increased use in functional beverages and natural colorants.
Expansion of currant-based food products in gourmet and health-conscious markets.
Why Is Russia the Largest Currant Producer?
Several factors contribute to Russia’s position as the global leader in currant production:
Vast Agricultural Land: Russia has enormous tracts of land suitable for berry farming.
Favorable Climate: The cool, temperate climate is ideal for currant cultivation.
Cultural Preference: Currants have deep roots in Russian culinary and folk medicine traditions.
Strong Domestic Demand: Used in teas, jams, desserts, and natural remedies.
Government and Private Investment: Berry farming is supported in several regions through agricultural initiatives.
Fun Facts About Currants
Currants are banned in several U.S. states because they can harbor a disease harmful to pine trees known as white pine blister rust.
Blackcurrant leaves are often used to flavor herbal teas.
In medieval Europe, currants were considered a medicinal berry before gaining popularity as a dessert ingredient.
Ribena, the famous British blackcurrant drink, was created during World War II when citrus imports were restricted.
Challenges in Currant Farming
Despite its popularity, currant farming presents some challenges:
Susceptibility to Mildew and Pests: Regular pruning and organic treatments are necessary.
Short Shelf Life: Fresh currants spoil quickly, limiting export potential without processing.
Market Volatility: Prices fluctuate based on harvest volumes and export demand.
Advancements in disease-resistant cultivars and improved farming techniques are helping overcome these challenges.
Conclusion
In summary, Russia proudly holds the title of the largest currant producer in the world, thanks to its ideal climate, vast land resources, and a deep cultural affinity for currants in food and medicine. Following closely behind are Poland, Germany, Ukraine, and the UK, each contributing significantly to the global currant market.
With the rise of health-conscious eating and the growing popularity of functional foods, the global demand for currants — especially organic and processed products — is expected to continue its upward trend.
Whether enjoyed fresh, in preserves, or as a rich, tangy addition to desserts and health products, currants remain one of the world’s most valued and versatile berries.
FAQs
Q: Which country grows the most currants globally? A: Russia is the largest currant producer in the world.
Q: Are currants good for your health? A: Yes — currants are rich in vitamin C, antioxidants, and dietary fiber, offering numerous health benefits.
Q: What are the different types of currants? A: The main types are blackcurrants, redcurrants, and white currants.
Q: Can currants be grown in warmer climates? A: Currants thrive in cool, temperate climates. Warmer regions require shaded areas and irrigation.
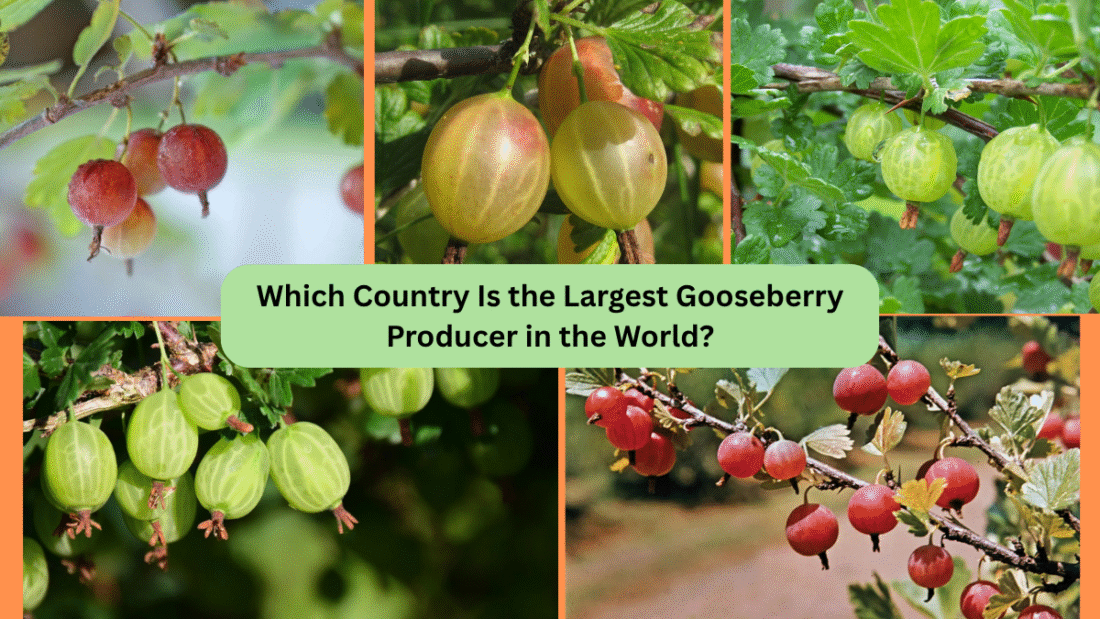
Gooseberries — those small, tart, and nutrient-packed berries — have long been cherished in traditional medicine, kitchen recipes, and backyard gardens across Europe and Asia. Known for their versatility and health benefits, these berries thrive in temperate climates and have recently enjoyed a resurgence in popularity due to the growing demand for superfoods.
But which nation leads the world in producing this fascinating fruit? In this comprehensive article, we’ll uncover which country is the largest gooseberry producer in the world, explore the history of the fruit, its health benefits, farming practices, and the global market trends surrounding it.
What Are Gooseberries?
Gooseberries (Ribes uva-crispa) are small, round berries that grow on deciduous shrubs in cool, temperate regions. They come in various shades of green, yellow, red, and purple, depending on the variety. Gooseberries are prized for their unique tart flavor, which can range from sharply acidic to mildly sweet as they ripen.
Rich in vitamin C, antioxidants, and dietary fiber, gooseberries have long been valued both as a culinary ingredient and a natural remedy for a range of health issues.
Which Country Is the Largest Gooseberry Producer in the World?
India is currently the largest gooseberry producer in the world.
Key Production Stats:
Annual Production: Over 1.2 million metric tons
Primary Varieties Grown: Indian gooseberry (also known as Amla)
Main Producing States: Uttar Pradesh, Madhya Pradesh, Gujarat, Rajasthan, Maharashtra, and Tamil Nadu.
India’s dominance is largely due to the cultivation of Phyllanthus emblica, commonly known as Amla or Indian gooseberry, which is botanically different from the European gooseberry (Ribes uva-crispa) but widely recognized in the same category due to similar nutritional and medicinal benefits.
Why Is India the Largest Gooseberry Producer?
Several factors contribute to India’s top position in gooseberry production:
Favorable Climate: India’s tropical and subtropical climate is highly suitable for growing Indian gooseberries, particularly in states like Uttar Pradesh and Madhya Pradesh.
High Domestic Demand: Gooseberry, or Amla, holds immense significance in Ayurvedic medicine and is a staple in Indian households for its immunity-boosting, digestive, and cosmetic uses.
Diverse Uses: Beyond consumption as a fresh fruit, gooseberries in India are processed into powders, pickles, juices, candies, oils, and cosmetics, fueling widespread cultivation.
Government Support: Various state governments promote gooseberry farming due to its economic viability, drought tolerance, and low maintenance costs.
Other Leading Gooseberry Producing Countries
While India leads globally, several other countries also contribute significantly to gooseberry production, especially the European variety:
Russia
Russia is a major producer of the European gooseberry (Ribes uva-crispa).
Gooseberries grow abundantly in rural homesteads and commercial orchards.
The berries are used in jams, pies, and homemade wines.
United Kingdom
Historically, gooseberries were widely cultivated in the UK, particularly in northern regions.
The British have a long-standing tradition of making gooseberry jam, fools, and crumbles.
Germany
Gooseberries are popular in German cuisine and feature prominently in traditional desserts.
Poland
An emerging player in European gooseberry production, particularly for export markets.
Gooseberry Farming: Varieties and Cultivation Practices
There are two primary types of gooseberries grown worldwide:
Indian Gooseberry (Amla)
Botanical Name: Phyllanthus emblica
Larger fruit, known for high medicinal value.
Tolerates drought and grows in a variety of soil types.
Requires minimal care and grows well in tropical and subtropical climates.
Harvest Season: October to February (India)
European Gooseberry
Botanical Name: Ribes uva-crispa
Smaller, juicier berries, cultivated mainly for desserts and preserves.
Prefers cool, temperate climates with moist, well-drained soil.
Harvest Season: June to August (Europe)
Key farming practices include:
Regular pruning for better air circulation.
Application of organic manures and bio-fertilizers.
Protection from pests like aphids and diseases like mildew.
Culinary and Commercial Uses of Gooseberries
Gooseberries are celebrated for their tangy flavor and versatility in the kitchen. Popular uses include:
Jams, preserves, and chutneys
Gooseberry pies and crumbles
Juices, sherbets, and smoothies
Pickles (especially in India)
Dried candies and mouth fresheners
Hair and skin care oils (Amla oil is a bestseller globally)
In Europe, gooseberries are often combined with other fruits for mixed berry jams and compotes.
Health Benefits of Gooseberries
Gooseberries, particularly Indian Amla, have been used in traditional medicine for centuries. Their health benefits include:
Rich in Vitamin C: Boosts immunity and acts as a powerful antioxidant.
Aids Digestion: High in fiber and known to improve gut health.
Good for Skin and Hair: Regular consumption promotes glowing skin and stronger hair.
Anti-inflammatory and Anti-aging Properties: Thanks to its high antioxidant content.
Helps Regulate Blood Sugar: Studies suggest Amla may support blood glucose control.
Supports Heart Health: By reducing cholesterol levels and improving circulation.
Global Gooseberry Market Trends
The demand for gooseberries, especially Indian gooseberry products, has surged in global markets due to rising health awareness and the popularity of natural wellness remedies.
Key market trends include:
Growth in the organic and herbal supplement industry.
Increasing use of Amla in haircare and skincare products.
Expansion of export markets in the USA, Middle East, and Europe.
Rising demand for functional foods and superfruits.
Countries like India have capitalized on these trends by increasing cultivation areas and investing in food processing and value-added products.
Fun Facts About Gooseberries
The word “gooseberry” possibly comes from the Old English ‘gros’, meaning ‘to grow’.
In medieval Europe, gooseberries were considered medicinal before they became popular in culinary recipes.
Amla trees can live and bear fruit for over 50 years.
Gooseberry wine was once a popular drink in 18th-century England.
In traditional British horticulture, competitive gooseberry growing was a serious pastime, with contests for the largest berry.
Challenges in Gooseberry Farming
Despite its benefits, gooseberry farming faces several challenges:
Susceptibility to mildew and pest attacks in European varieties.
Limited shelf life of fresh gooseberries, especially in humid conditions.
Market price fluctuations due to seasonal yields.
Inconsistent rainfall affecting yields in drought-prone regions.
Modern farming techniques, improved varieties, and post-harvest processing have helped address some of these issues.
Conclusion
To summarize, India proudly holds the title of the largest gooseberry producer in the world, mainly due to the widespread cultivation of the highly valued Amla variety. Its dominance is driven by favorable growing conditions, immense domestic demand, and its revered status in traditional medicine.
Other notable producers include Russia, the UK, Germany, and Poland, which primarily cultivate the European gooseberry for culinary uses. With growing global interest in natural wellness, the future of gooseberry farming — particularly in India — looks bright and promising.
Whether enjoyed fresh, pickled, juiced, or as an ingredient in herbal remedies, gooseberries remain one of the world’s most beneficial and versatile fruits.
FAQs
Q: Which country grows the most gooseberries in the world? A: India is the world’s largest gooseberry producer.
Q: Are Indian gooseberries and European gooseberries the same? A: No — Indian gooseberry (Phyllanthus emblica) differs botanically from European gooseberry (Ribes uva-crispa), but both are valued for similar health benefits.
Q: What is Amla used for? A: Amla is used in herbal medicines, cosmetics, juices, pickles, and health supplements.