Plants have always been more than just greenery in our homes—they bring life, beauty, and positive energy. Among them, money plants are especially revered for their association with prosperity, good fortune, and abundance. Beyond symbolism, money plants are easy to care for, visually appealing, and can enhance indoor air quality.
In this guide, we’ll explore 7 money plants that not only bring luck but also add charm and freshness to your home or office.
1. Pothos (Epipremnum aureum)
Also known as Devil’s Ivy, Pothos is one of the most popular money plants worldwide.
Why It Brings Good Fortune
- Symbolizes wealth, luck, and prosperity in Feng Shui
- Believed to attract positive energy to homes and workplaces
Features and Care
- Heart-shaped green leaves, often variegated with yellow or white
- Thrives in low light and minimal care
- Can grow in water or soil
- Requires watering only when the top layer of soil is dry
Tip: Place a Pothos in the northeast corner of your home or office for maximum prosperity.
2. Lucky Bamboo (Dracaena sanderiana)
Lucky Bamboo is a classic symbol of luck and wealth in Asian cultures. It’s often gifted during housewarmings, weddings, and business openings.
Why It Brings Good Fortune
- Represents good luck, wealth, and growth
- In Feng Shui, the number of stalks matters:
- 2 stalks: love and relationships
- 3 stalks: happiness
- 5 stalks: health
- 8 stalks: wealth and abundance
Features and Care
- Grows in water or soil
- Thrives in indirect sunlight
- Requires water changes every 7–10 days
- Fertilize sparingly
Tip: Keep Lucky Bamboo near the entrance of your home to attract positive energy.
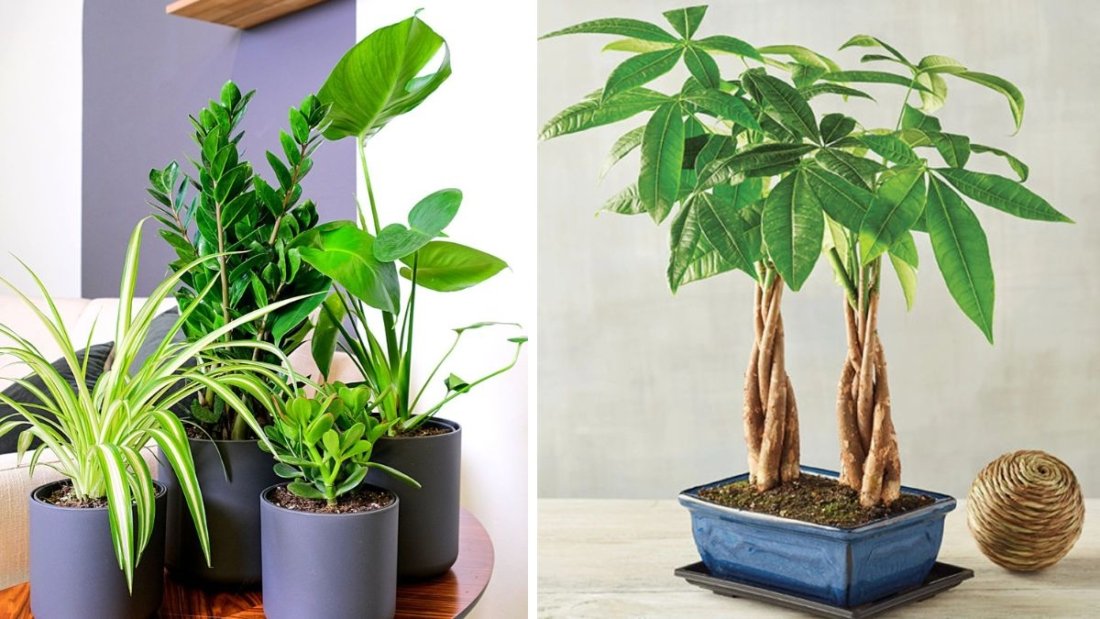
3. Money Tree (Pachira aquatica)
The Money Tree, or Pachira aquatica, is a popular indoor plant known for its braided trunk and lush green foliage.
Why It Brings Good Fortune
- Associated with bringing wealth and financial stability
- Symbolizes prosperity, growth, and harmony in Feng Shui
Features and Care
- Thrives in indirect sunlight
- Prefers moist but well-draining soil
- Water weekly, avoid waterlogging
- Can grow 6–8 feet indoors with proper care
Tip: Place the Money Tree in the southeast corner of your home, which is considered the wealth corner.
4. Jade Plant (Crassula ovata)
The Jade Plant, also called the money plant in some cultures, is a succulent with thick, shiny leaves.
Why It Brings Good Fortune
- Symbolizes wealth, prosperity, and good luck
- Rounded leaves resemble coins, which is why it’s associated with financial growth
Features and Care
- Thrives in bright, indirect sunlight
- Requires well-draining soil
- Water sparingly, especially in winter
- Can live for decades with proper care
Tip: Keep the Jade Plant near windows to receive sunlight and maximize its positive energy.
5. Crescent Money Plant (Xanthostemon chrysanthus)
The Crescent Money Plant is less common but is believed to bring strong prosperity energy into homes.
Why It Brings Good Fortune
- Associated with financial stability and protection against negative energy
- Symbolizes growth and abundance in business
Features and Care
- Bright green foliage, sometimes with golden edges
- Thrives in well-lit areas but avoids harsh direct sunlight
- Water moderately, keeping soil slightly moist
Tip: Position this plant in your office or near a workspace to attract professional success.
6. Pachira Money Plant in Water (Hydroponic Money Plant)
A variant of the traditional Money Tree, the hydroponic version grows in water instead of soil.
Why It Brings Good Fortune
- Ideal for Feng Shui practices
- Attracts prosperity and removes negative vibes from indoor spaces
Features and Care
- Can grow braided or straight stalks in glass vases
- Replace water every 7–10 days to prevent stagnation
- Add a few drops of liquid fertilizer monthly
Tip: Use a clear glass vase to allow visibility of roots, which symbolizes transparency and growth in life and wealth.
7. Silver Money Plant (Plectranthus verticillatus)
Also known as Swedish Ivy, the Silver Money Plant is a trailing plant that looks beautiful in hanging baskets or shelves.
Why It Brings Good Fortune
- Promotes abundance and financial growth
- Believed to bring positivity and protect against negativity
Features and Care
- Thrives in moderate sunlight
- Requires regular watering but avoid overwatering
- Can be grown in water or soil
Tip: Hang it in living rooms or near windows for both beauty and prosperity benefits.
Tips to Maximize the Luck and Beauty of Money Plants
- Proper Placement: In Feng Shui, the northeast and southeast corners of your home or office are considered ideal for placing money plants.
- Cleanliness: Keep leaves free from dust; healthy plants attract positive energy.
- Fresh Water: For hydroponic plants, replace water weekly and remove dead leaves.
- Sunlight: Ensure plants get adequate indirect sunlight for growth.
- Positive Vibes: Talk to your plants or simply enjoy their presence—plants thrive in a calm environment.
- Pruning: Trim dead or yellow leaves to encourage new growth and maintain the plant’s beauty.
- Gifting: Giving a money plant as a gift is considered auspicious and spreads prosperity.
Why Money Plants Are More Than Just Luck
Money plants aren’t just symbols—they also bring real benefits:
- Air purification: Many money plants, like Pothos and Lucky Bamboo, help remove indoor pollutants.
- Stress reduction: Indoor plants create a calming effect, reducing stress and improving mental health.
- Aesthetic appeal: With their vibrant green leaves and unique shapes, money plants enhance home décor.
- Low maintenance: Most money plants are easy to care for, requiring minimal effort.
Fun Facts About Money Plants
- Some money plants can survive weeks without water, making them ideal for busy individuals.
- The braided trunks of Pachira aquatica are thought to “trap wealth” in Feng Shui.
- Heart-shaped leaves of Pothos symbolize love and harmony in addition to wealth.
- Lucky Bamboo is technically not a bamboo but belongs to the Dracaena family.
Conclusion
Money plants are more than just indoor greenery—they are symbols of prosperity, positivity, and abundance. From the classic Pothos to the elegant Money Tree, these plants bring both beauty and fortune into homes and offices.
Incorporating these 7 money plants into your living or workspaces is a simple yet powerful way to enhance your environment, attract positive energy, and enjoy the beauty of nature indoors. Whether you grow them in soil or water, hang them in baskets, or place them on tables, these plants are sure to brighten your surroundings and invite good fortune.
