Why Is Mulching Important in Summer?

Why Is Mulching Important in Summer?

As summer arrives, bringing with it intense heat and prolonged dry spells, gardeners must take extra care to protect their plants and soil. One of the most effective and eco-friendly strategies for maintaining a healthy garden during the hot months is mulching. More than just a decorative ground cover, mulch serves as a vital shield against the stress of summer weather.

This article explores why mulching is important in summer, its many benefits, the best materials to use, proper mulching techniques, and common mistakes to avoid. Whether you’re a home gardener or a landscape professional, understanding the power of mulch can transform your summer gardening experience.


What Is Mulching?

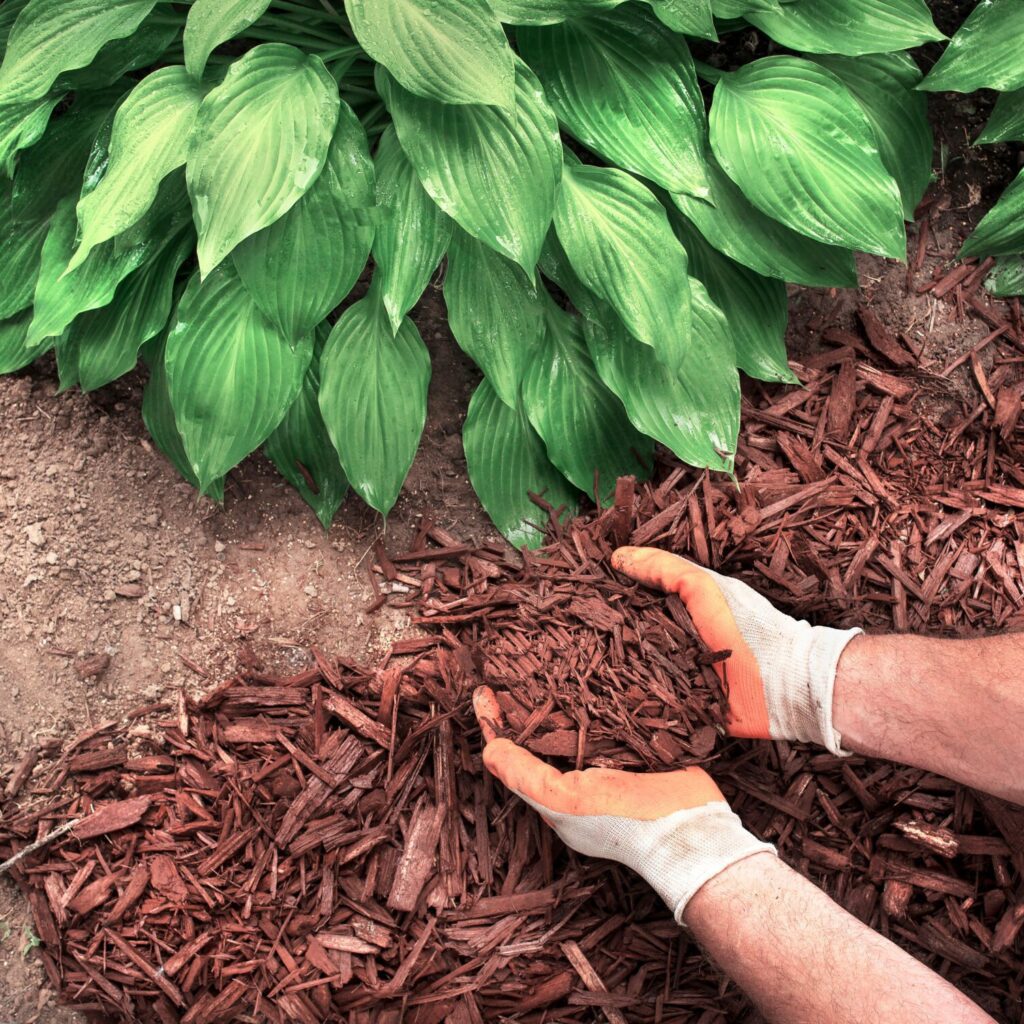
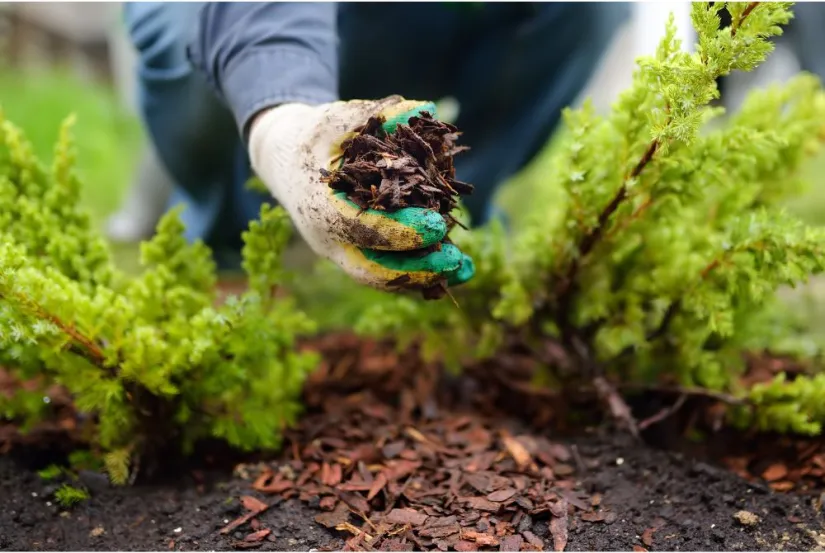
Mulching is the process of covering the soil surface with a protective layer of organic or inorganic material. This layer helps regulate soil temperature, retain moisture, suppress weeds, and improve soil health.

Mulch can be:

  • Organic: Bark chips, straw, grass clippings, compost, shredded leaves.
  • Inorganic: Gravel, landscape fabric, plastic sheeting, rubber mulch.

Each type of mulch has specific uses and benefits, especially during hot summer months when plant stress is at its peak.


Why Mulching Is Crucial in Summer

Summer brings challenges such as high temperatures, dry soil, and increased competition from weeds. Mulching directly addresses these problems by providing a natural buffer between the sun and your soil.

Here’s how mulching benefits your garden during summer:


1. Retains Soil Moisture

Summer heat leads to rapid evaporation of water from the soil. A layer of mulch helps conserve moisture by slowing down evaporation. This means:

  • Less frequent watering.
  • Better water efficiency.
  • More consistent moisture for plant roots.

Mulching is especially important in drought-prone areas or for gardeners practicing water-wise landscaping.


2. Regulates Soil Temperature

In the peak of summer, soil temperatures can become extremely high, often damaging plant roots. Mulch acts as an insulating blanket, keeping the soil cooler during hot days and warmer during cool nights.

Consistent soil temperature:

  • Protects root systems.
  • Encourages steady plant growth.
  • Reduces stress on young or shallow-rooted plants.

3. Suppresses Weeds

Weeds compete with garden plants for sunlight, water, and nutrients. By creating a physical barrier, mulch:

  • Blocks sunlight from reaching weed seeds.
  • Prevents weed germination and growth.
  • Reduces the need for chemical herbicides or frequent weeding.

A well-mulched bed can reduce weed growth by up to 90%, saving time and labor.


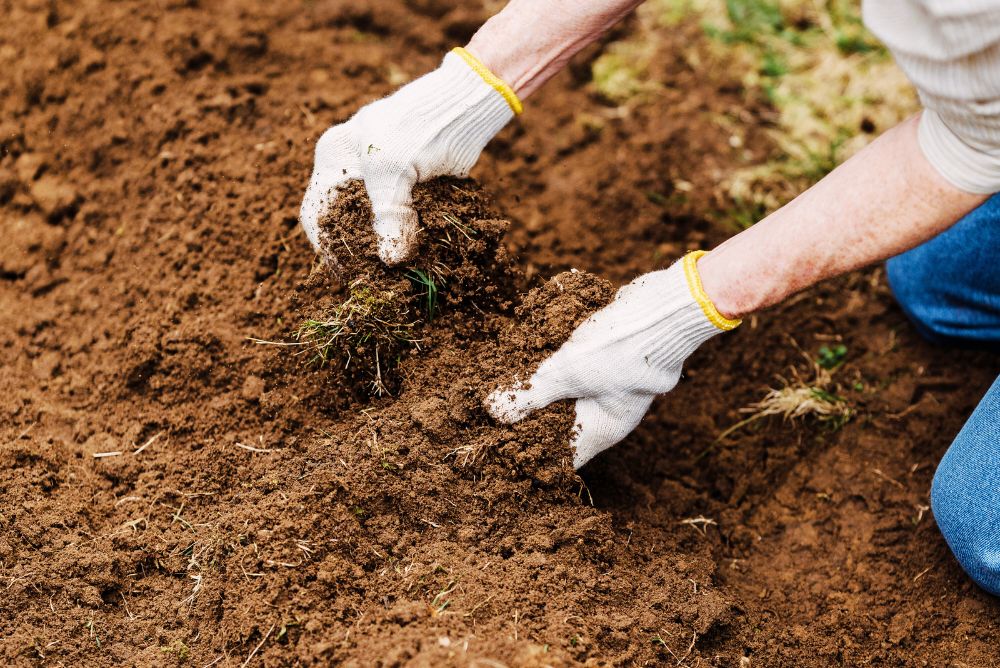
4. Prevents Soil Erosion and Compaction

Summer storms can wash away topsoil and compact the ground with heavy rains. Mulch protects the soil from direct rainfall impact, helping to:

  • Prevent erosion on slopes or bare areas.
  • Maintain soil structure and porosity.
  • Keep nutrients from leaching away.

This is especially important in raised beds and sloped gardens.


5. Improves Soil Fertility and Structure (Organic Mulch)

As organic mulch breaks down, it enriches the soil by:

  • Adding organic matter and nutrients.
  • Improving soil texture and drainage.
  • Feeding beneficial soil organisms like earthworms and microbes.

Over time, mulching leads to a healthier soil ecosystem, ideal for productive gardening.


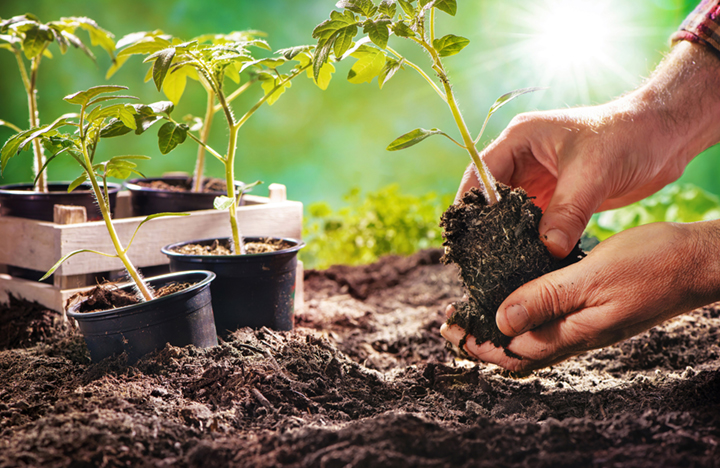
6. Protects Plant Roots from Damage

Exposed roots are vulnerable to heat stress and physical damage from tools or foot traffic. Mulch acts as a buffer, shielding roots and promoting a more stable environment for growth.


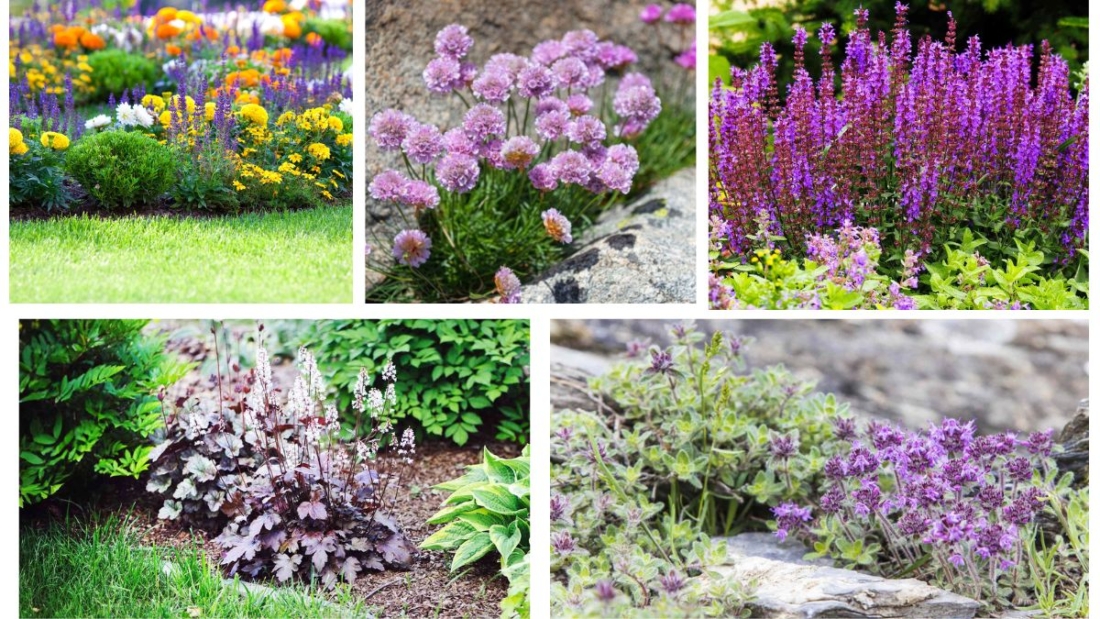
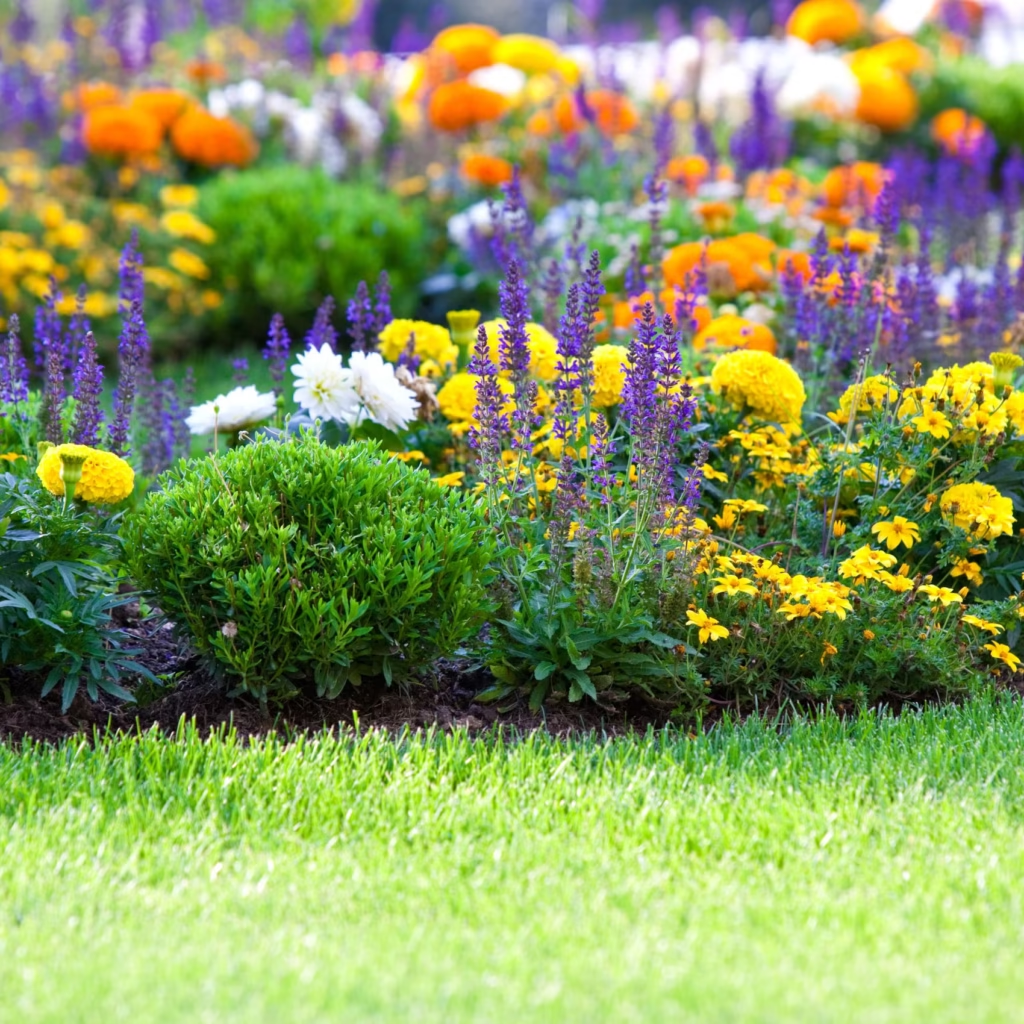
7. Enhances Aesthetic Appeal

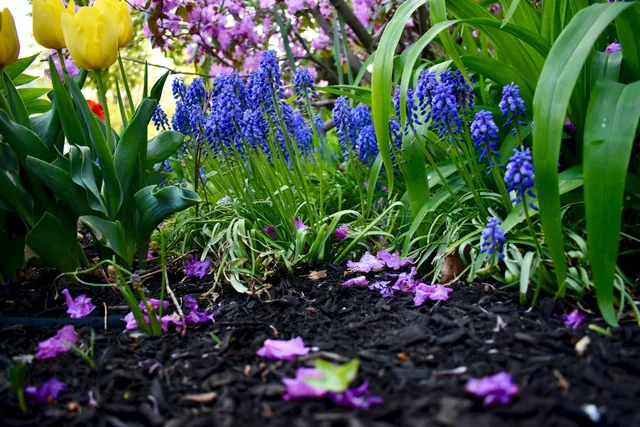
Beyond functionality, mulch provides a clean, finished look to garden beds, pathways, and borders. It can unify a landscape design and highlight plant groupings while creating contrast with foliage and flowers.


Best Mulching Materials for Summer

Here are some top choices for summer mulching, along with their benefits:

Organic Mulches:

  1. Shredded Bark or Wood Chips
    • Long-lasting
    • Attractive appearance
    • Ideal for trees, shrubs, and perennial beds
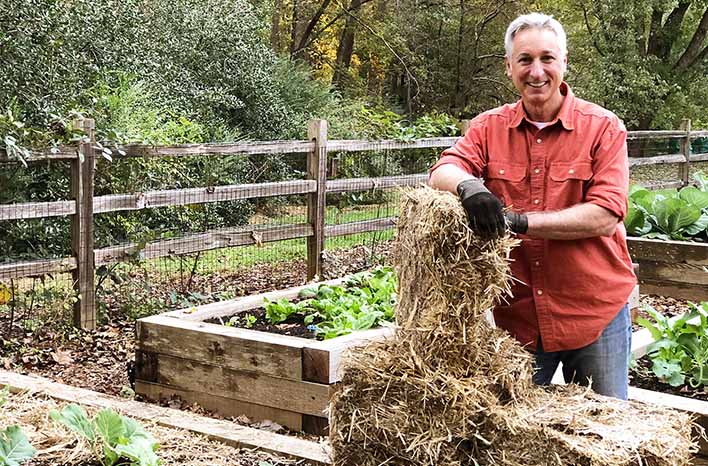
  2. Straw or Hay (seed-free)
    • Light and easy to spread
    • Great for vegetable gardens
    • Breaks down quickly, improving soil
  3. Compost
    • Nutrient-rich
    • Best for flower beds and vegetables
    • Needs more frequent replenishment
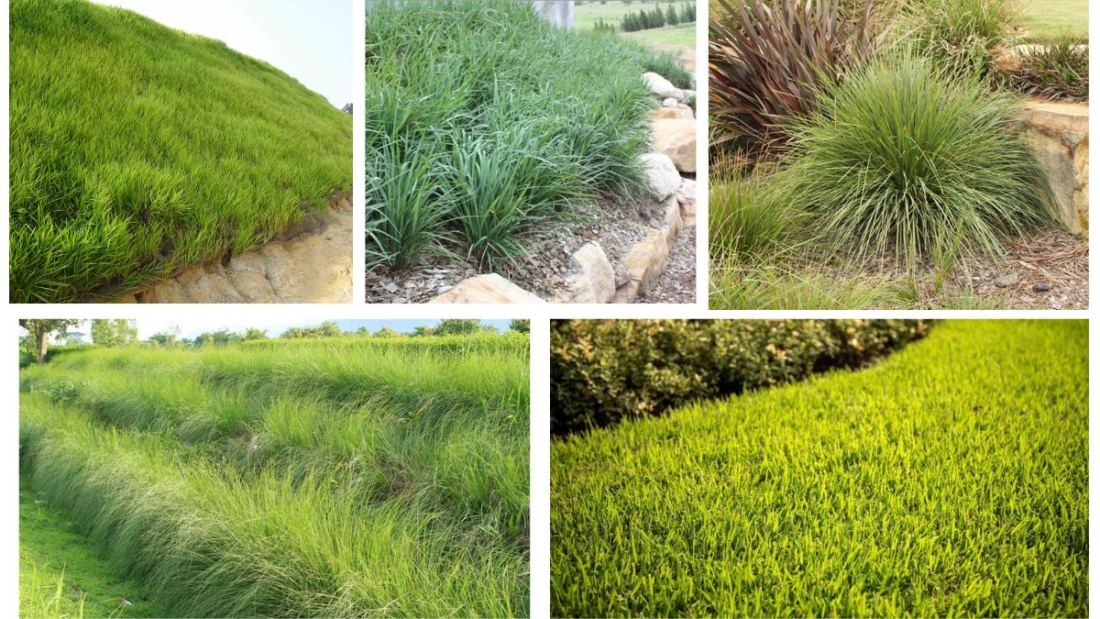
  4. Grass Clippings
    • Readily available
    • Excellent for nitrogen
    • Apply in thin layers to avoid matting
  5. Shredded Leaves
    • Free and abundant in autumn
    • Breaks down into rich humus

Inorganic Mulches:

  1. Gravel or Pebbles
    • Ideal for xeriscapes or succulents
    • Does not decompose
    • Reflects heat — may increase soil temps in extreme heat
  2. Landscape Fabric
    • Long-lasting weed barrier
    • Use beneath decorative mulch
  3. Plastic Sheeting
    • Used in commercial agriculture
    • Retains heat and moisture
    • Not breathable — can cause overheating in some areas

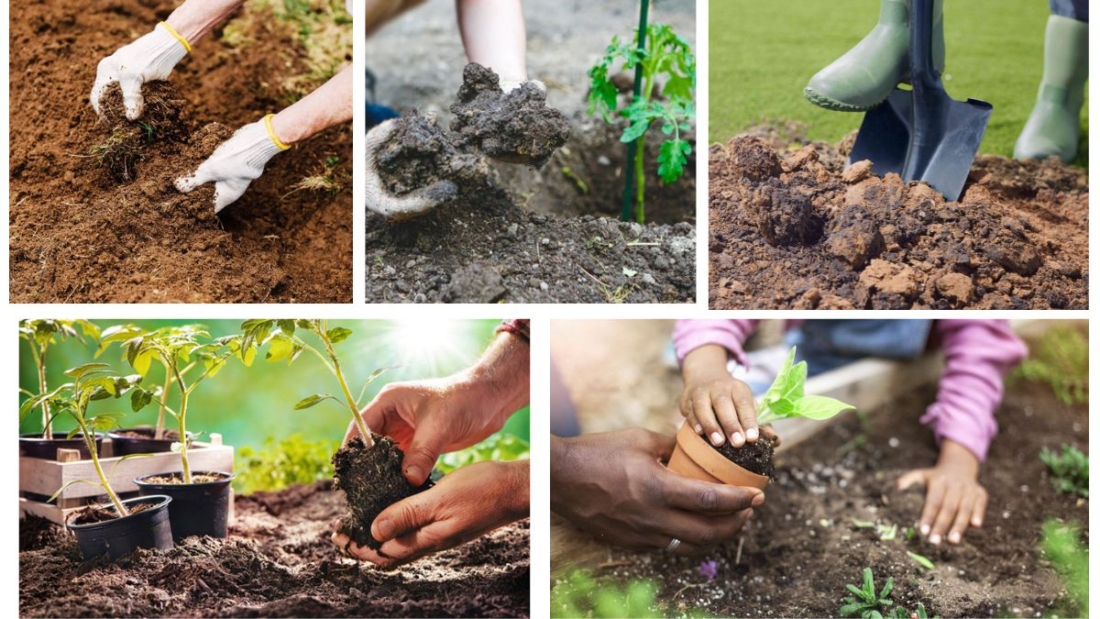
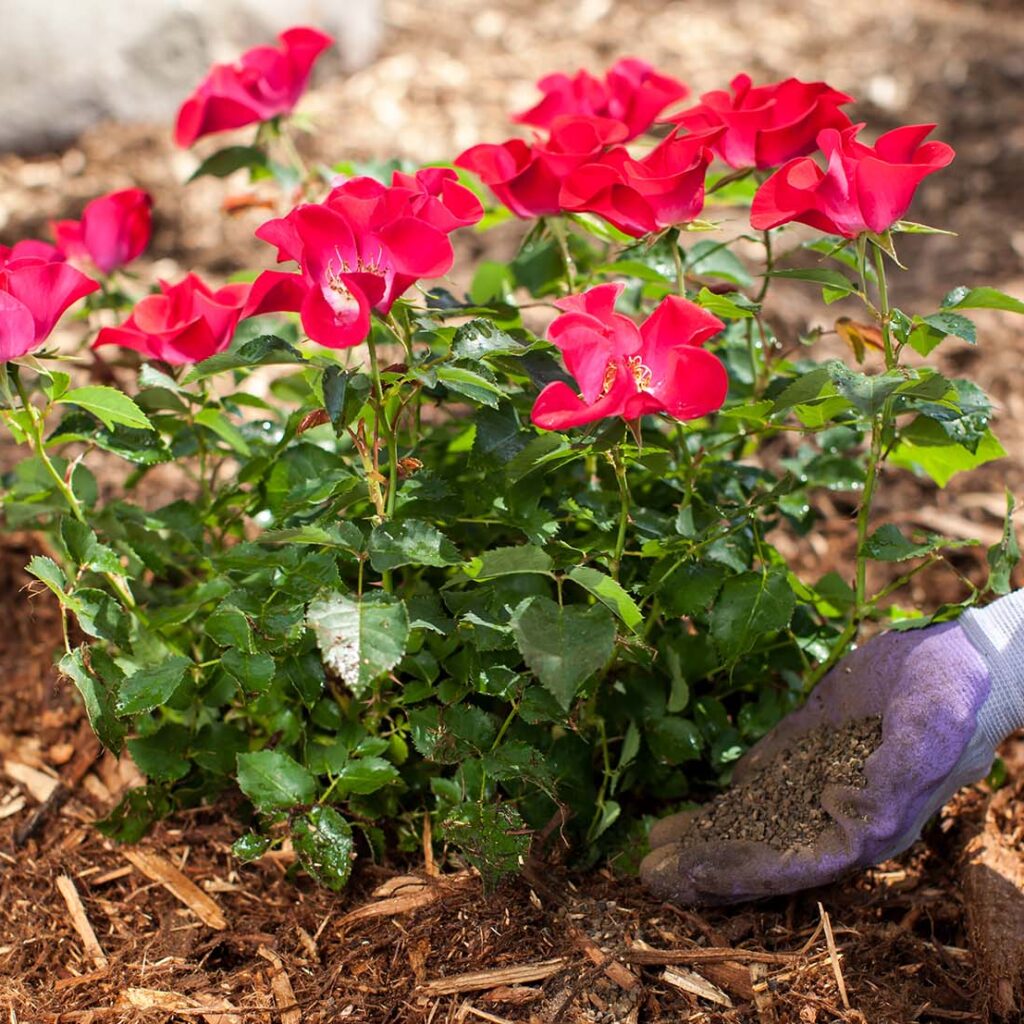
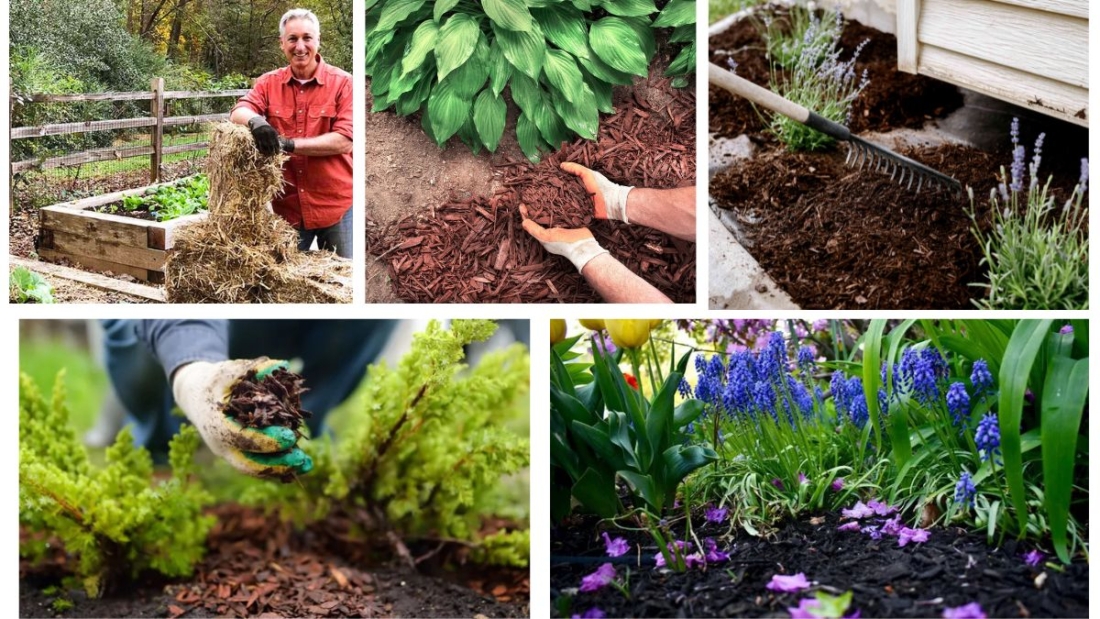
How to Apply Mulch in Summer

Applying mulch correctly is key to maximizing its benefits:

Step-by-Step Guide:

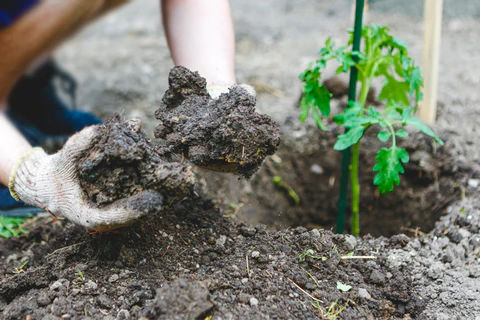
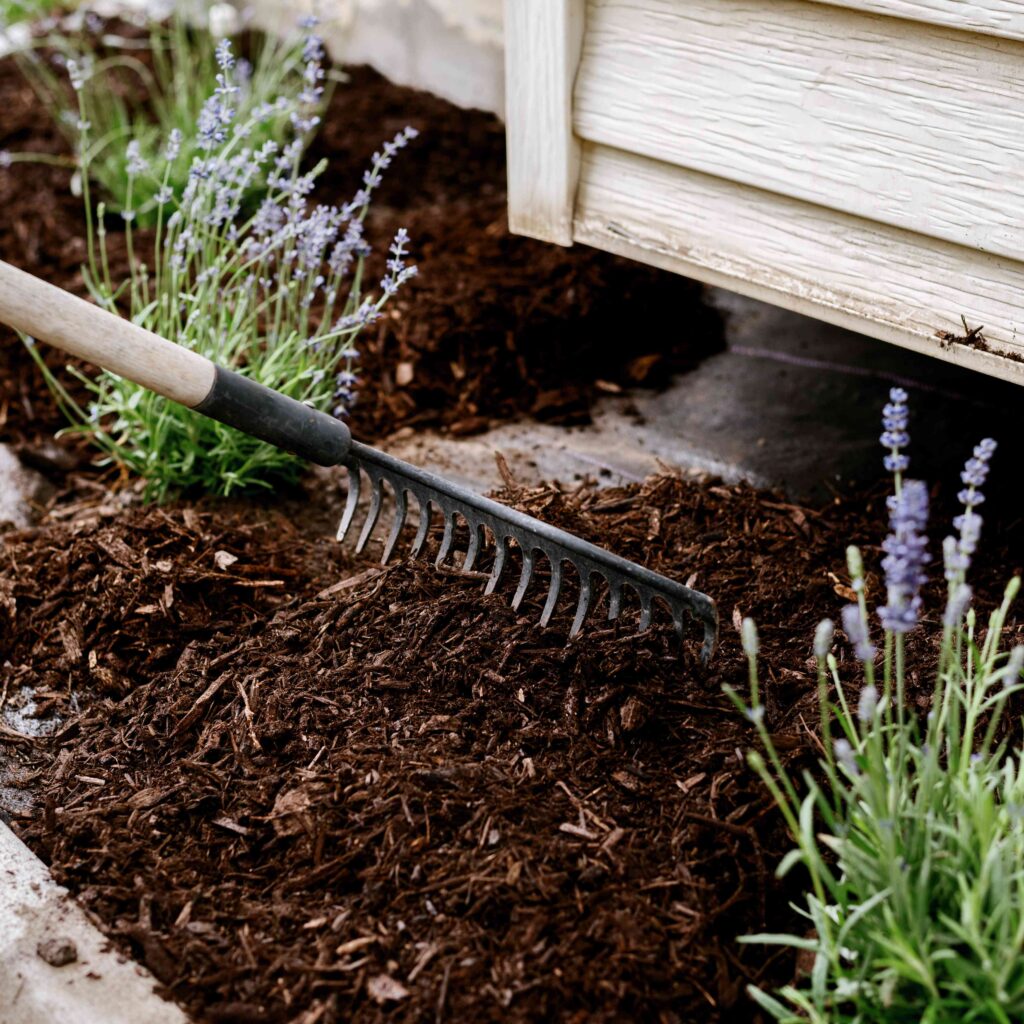
  1. Clear the area: Remove weeds and grass before mulching.
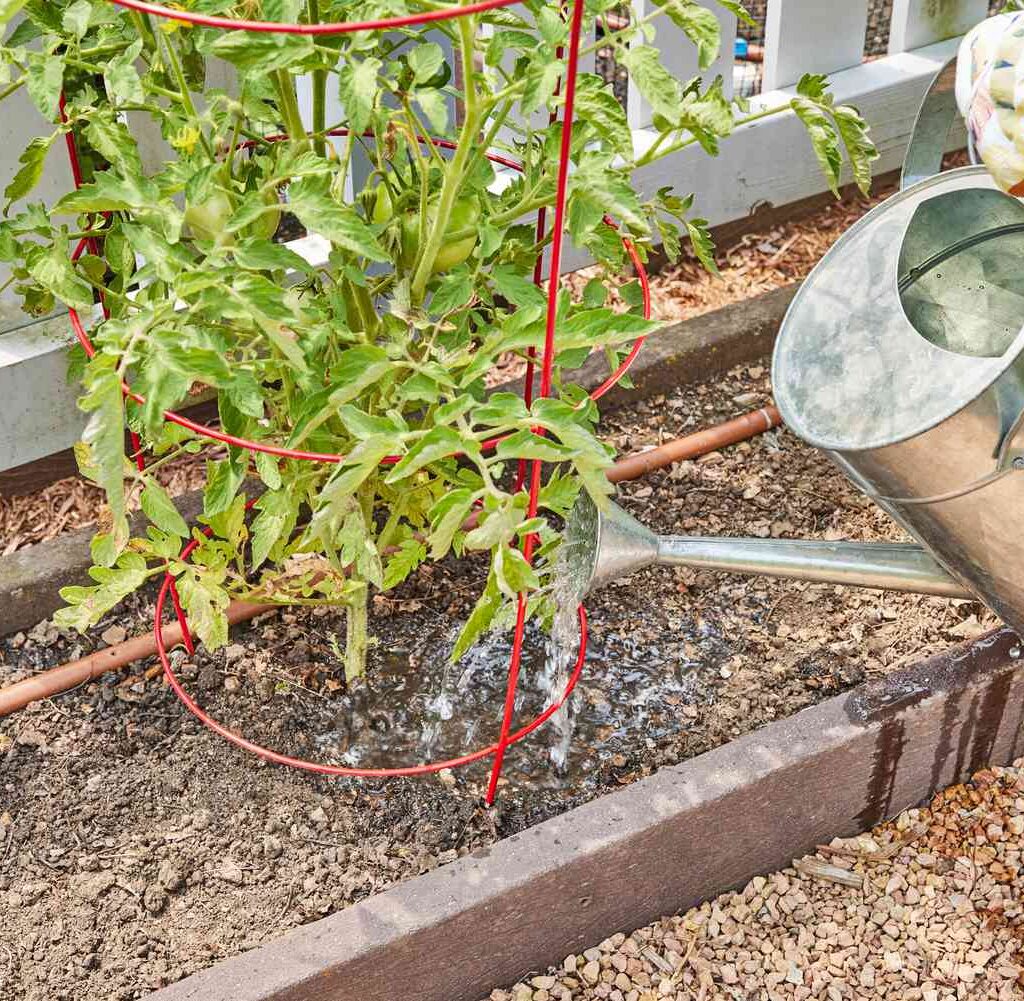
  2. Water the soil: Mulch retains moisture best when soil is already damp.
  3. Spread evenly: Apply mulch 2–4 inches deep. Too little won’t suppress weeds; too much may suffocate roots.
  4. Keep mulch away from stems/trunks: Leave a 1–2 inch gap around plant bases to prevent rot or pest infestation.
  5. Replenish as needed: Organic mulches decompose over time and may need refreshing once or twice per year.

Common Mistakes to Avoid

  1. Over-mulching: More than 4 inches can suffocate roots and cause fungal issues.
  2. Volcano mulching: Piling mulch against tree trunks encourages decay and pest problems.
  3. Using fresh manure or un-composted materials: May burn plants or introduce weeds.
  4. Not replenishing mulch: Degraded mulch won’t retain its effectiveness.
  5. Using dyed mulch near edibles: Some colored mulches may contain chemicals — avoid in vegetable gardens.

Mulching Around Specific Plants

Different plants benefit from mulch in unique ways:

  • Vegetables: Straw or compost encourages growth and reduces splash-back from soil-borne diseases.
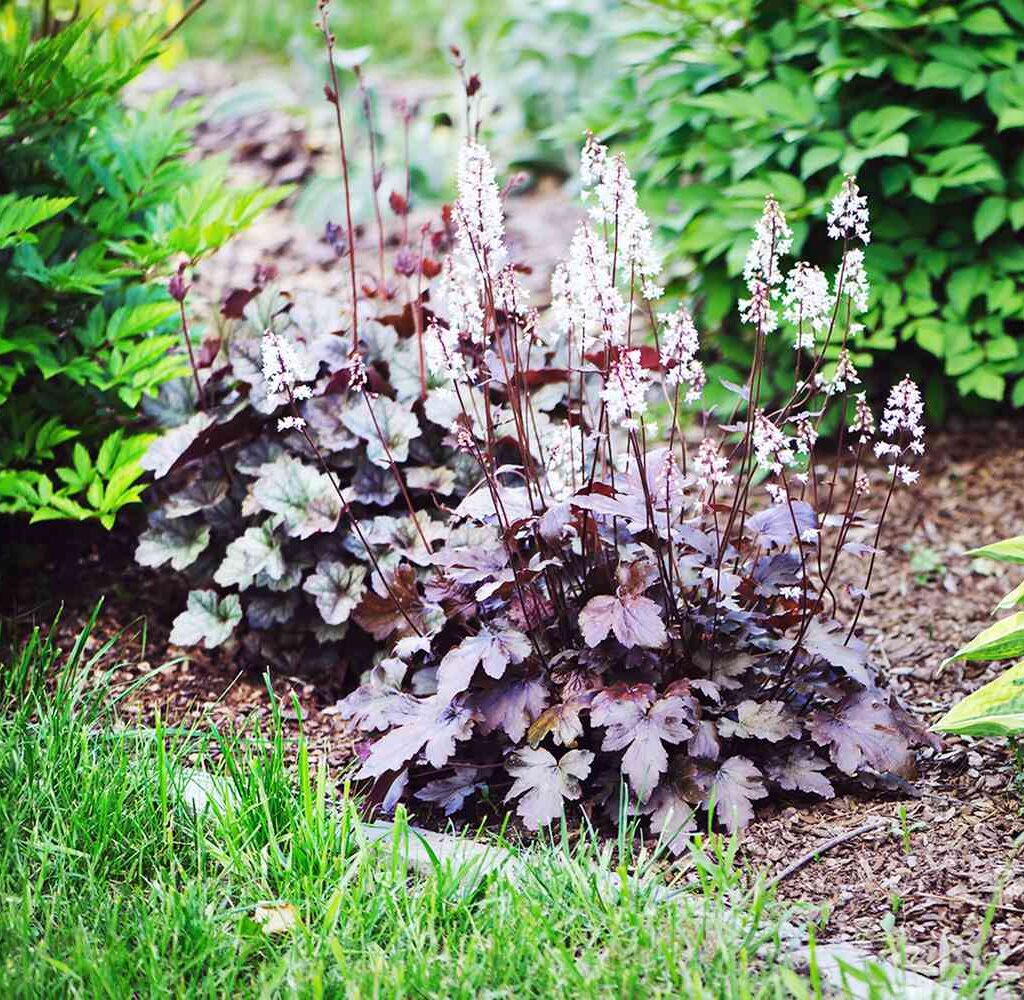
  • Trees & Shrubs: Wood chips retain moisture and prevent weed competition.
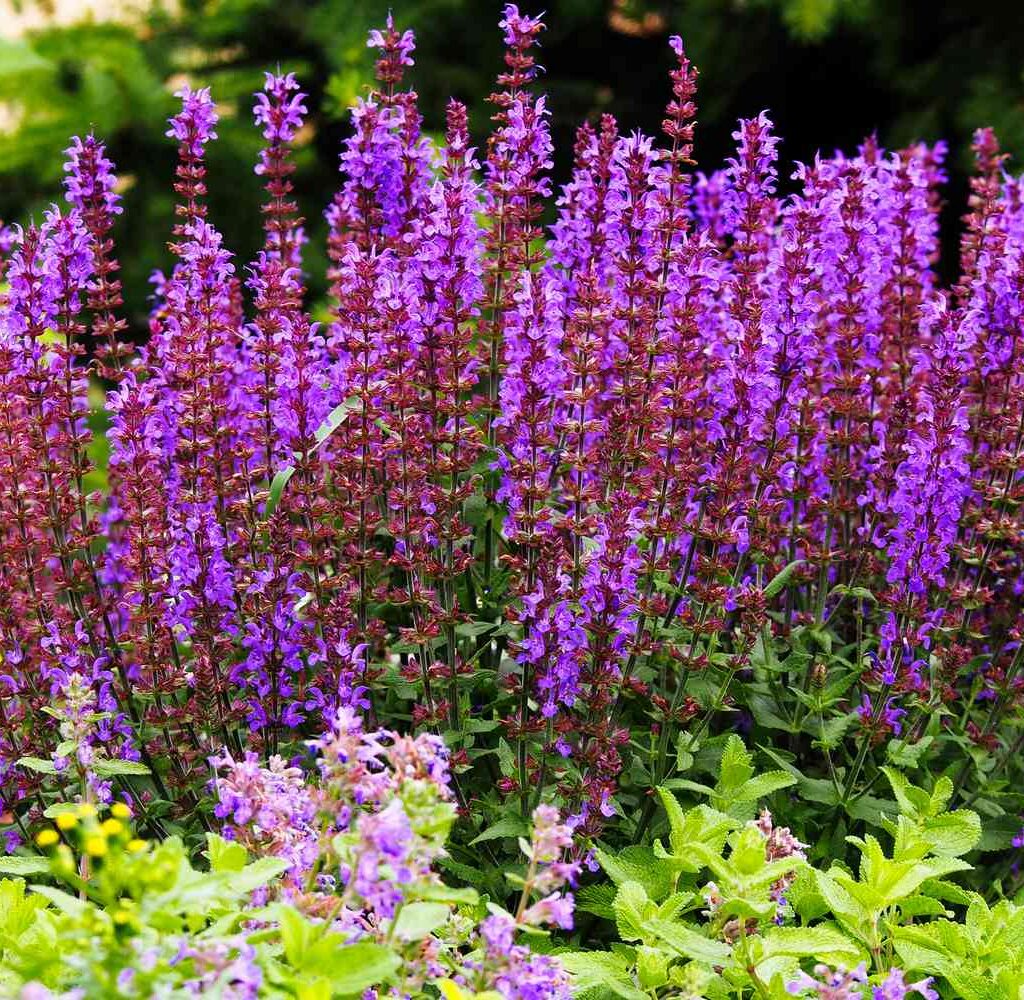
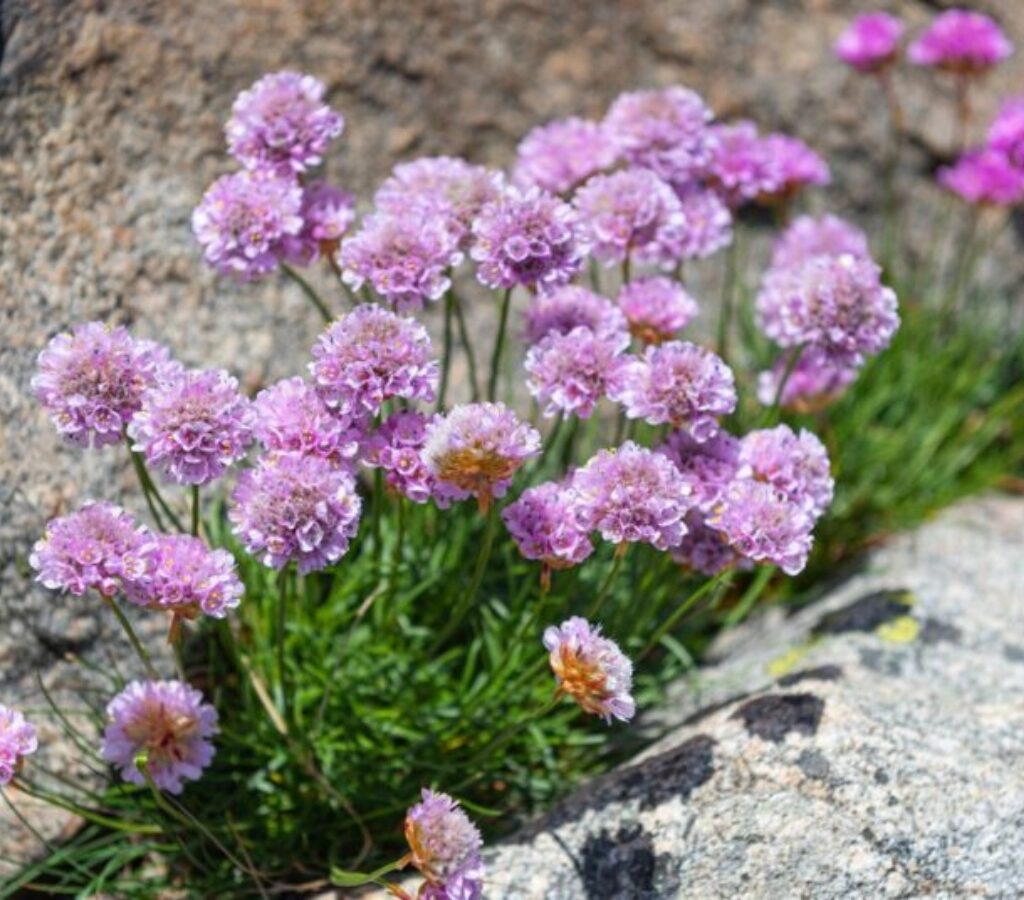
  • Perennials & Flowers: Shredded bark or leaf mulch enriches soil and adds beauty.
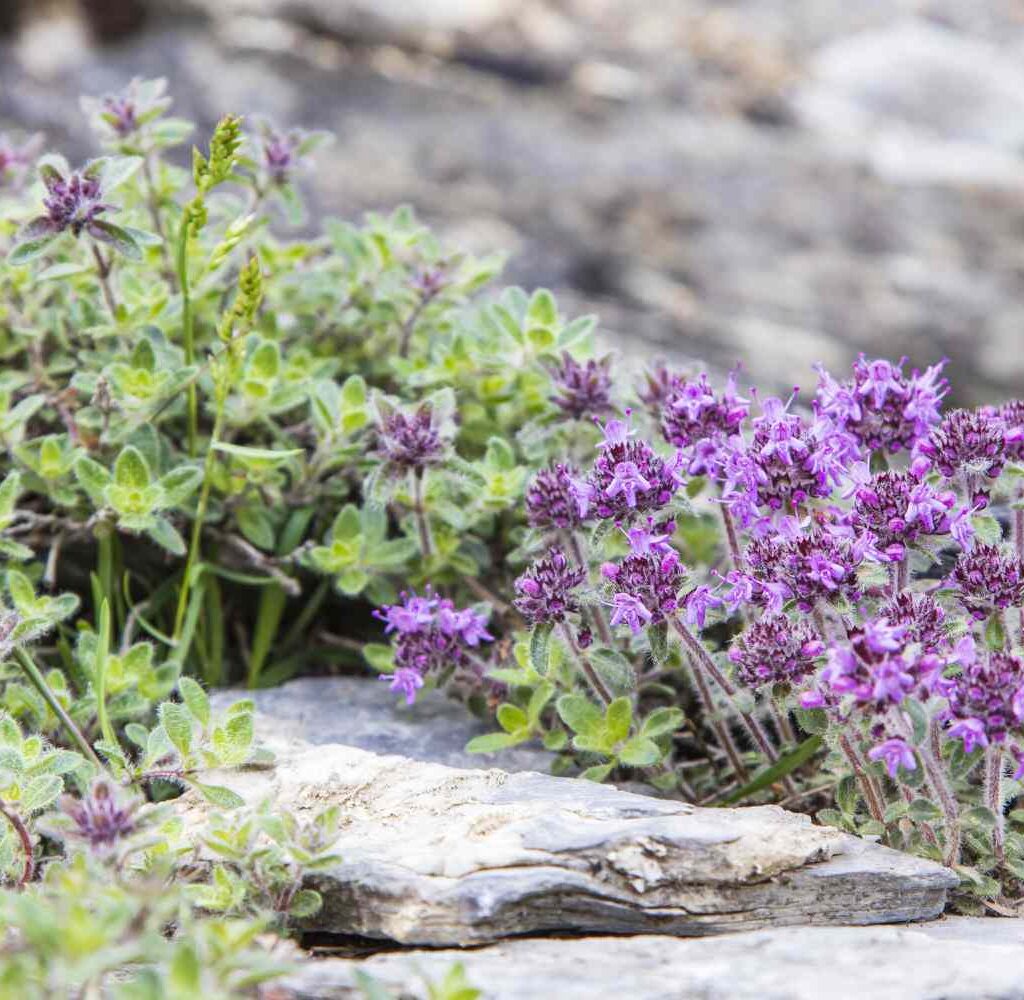
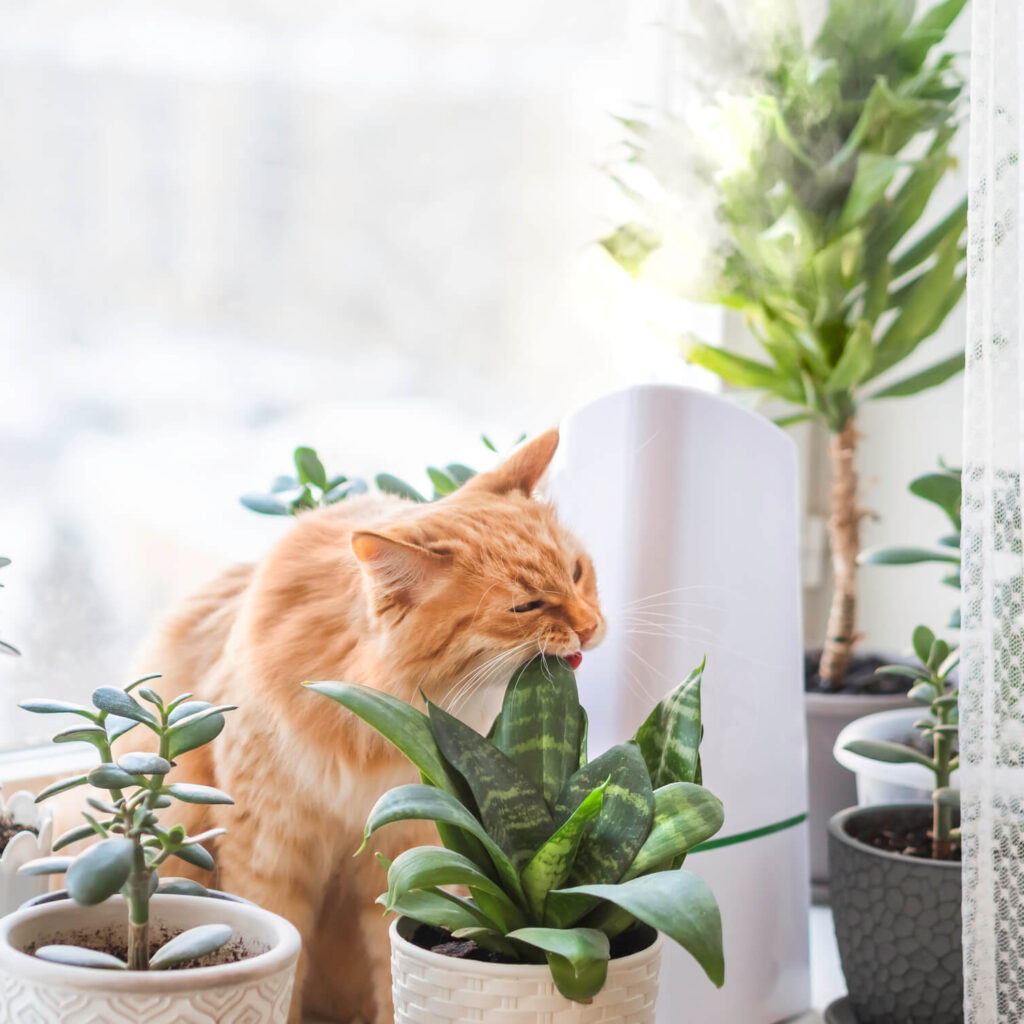
  • Succulents & Cacti: Gravel or sand-based mulches aid drainage and prevent stem rot.

Tailoring mulch to your plant’s needs ensures long-term success.


Environmental Benefits of Mulching

Mulching isn’t just good for plants — it also helps the planet:

  • Reduces water usage: Essential for sustainable gardening during drought.
  • Minimizes chemical inputs: Less need for fertilizers and herbicides.
  • Supports biodiversity: Encourages soil life, insects, and pollinators.
  • Recycles garden waste: Turning leaves or grass clippings into mulch reduces landfill use.

Conclusion

Mulching in summer is one of the most effective ways to protect and nourish your garden. From conserving moisture and regulating soil temperatures to suppressing weeds and improving soil quality, mulch is a gardener’s best friend during the hot, dry months.

By choosing the right materials, applying them correctly, and avoiding common mistakes, you can ensure your garden not only survives summer but thrives in it. Whether you’re cultivating vegetables, flowers, or trees, a well-mulched garden is healthier, more sustainable, and far more beautiful.

So, as the summer sun intensifies, don’t forget this simple yet powerful tool — mulch your way to a better garden.

What Are the Best Low-Growing Perennials?

What Are the Best Low-Growing Perennials?

In garden landscapes, not every plant needs to command attention through towering heights or dramatic displays. Sometimes, the most impactful additions are those that hug the ground, filling gaps, softening borders, or creating seamless green carpets punctuated with delicate blooms. Low-growing perennials are the unsung heroes of gardens, offering year-after-year color, texture, and coverage without requiring constant replanting.

In this article, we’ll explore what low-growing perennials are, their benefits in landscaping, how to select them for your space, and introduce some of the very best options for a variety of garden styles and climates.


What Are Low-Growing Perennials?

Low-growing perennials are plants that stay relatively close to the ground, typically growing no more than 6 to 18 inches tall. Unlike annuals, which live for a single growing season, perennials return year after year, often expanding in size and vigor.

These plants are commonly used for:

  • Ground covers
  • Border edging
  • Rock gardens
  • Pathway plantings
  • Filling gaps between larger shrubs or perennials

They often feature attractive foliage, seasonal flowers, and sometimes fragrant or evergreen characteristics, making them valuable for adding diversity to garden beds.


Benefits of Low-Growing Perennials in Landscaping

Incorporating low-growing perennials offers several advantages:

  • Year-round structure: Many retain foliage in colder months.
  • Weed suppression: Dense foliage crowds out invasive weeds.
  • Erosion control: Ground covers help stabilize soil on slopes or around tree bases.
  • Low maintenance: Once established, perennials need minimal care.
  • Pollinator support: Many species offer nectar for bees and butterflies.
  • Aesthetic cohesion: They soften hard edges and connect taller plantings.

Their versatility makes them essential elements in well-designed landscapes.


How to Choose the Best Low-Growing Perennials

When selecting low-growing perennials, consider:

  • Sun exposure: Full sun, partial shade, or full shade.
  • Soil type: Well-drained, moist, clay, or sandy.
  • Moisture needs: Drought-tolerant or moisture-loving.
  • Bloom period: Early spring, summer, or fall.
  • Hardiness zone: Choose plants suited to your region’s climate.
  • Evergreen vs. deciduous: Some retain leaves year-round.

Matching the plant’s growing requirements to your garden conditions ensures long-term success.


15 Best Low-Growing Perennials for Gardens

Here’s a curated list of some of the most attractive, reliable, and easy-to-grow low-growing perennials:


1. Creeping Thyme (Thymus serpyllum)

Height: 2–3 inches
Sun: Full sun
Bloom Time: Summer

A fragrant, mat-forming ground cover with tiny purple blooms that attract pollinators. It’s drought-tolerant and perfect for pathways and borders.


2. Sedum (Stonecrop)

Height: 3–6 inches
Sun: Full sun
Bloom Time: Late summer to fall

Succulent leaves and starry flowers make sedums excellent for dry, poor soils and rock gardens.


3. Ajuga (Bugleweed)

Height: 4–8 inches
Sun: Part shade to full sun
Bloom Time: Spring

Features attractive, glossy foliage in green, bronze, or variegated hues, with spikes of blue or purple flowers.


4. Hosta (Miniature Varieties)

Height: 6–12 inches
Sun: Partial to full shade
Bloom Time: Summer

Beloved for their wide leaves in various shades of green, blue, and gold, hostas add texture to shaded spots.


5. Lamb’s Ear (Stachys byzantina)

Height: 6–12 inches
Sun: Full sun to partial shade
Bloom Time: Late spring to early summer

Silvery, velvety foliage creates a soft, tactile ground cover in borders or under roses.


6. Heuchera (Coral Bells)

Height: 8–12 inches
Sun: Part shade to sun
Bloom Time: Spring to summer

Known for colorful foliage in burgundy, lime, and silver hues, with delicate flower spikes.


7. Phlox subulata (Creeping Phlox)

Height: 4–6 inches
Sun: Full sun
Bloom Time: Spring

Forms a dense carpet of flowers in pink, purple, or white, ideal for slopes and sunny borders.


8. Campanula (Bellflower)

Height: 6–12 inches
Sun: Full sun to part shade
Bloom Time: Summer

Charming bell-shaped flowers in shades of blue, purple, or white, loved by pollinators.


9. Epimedium (Barrenwort)

Height: 6–12 inches
Sun: Partial to full shade
Bloom Time: Spring

A shade-loving perennial with heart-shaped leaves and delicate, spidery flowers.


10. Mazus reptans

Height: 2–4 inches
Sun: Full sun to part shade
Bloom Time: Spring to summer

A fast-spreading ground cover producing tiny purple-blue flowers and green mats ideal for between stepping stones.


11. Sweet Woodruff (Galium odoratum)

Height: 6–12 inches
Sun: Partial to full shade
Bloom Time: Spring

A fragrant, shade-loving ground cover with star-shaped white flowers and whorled leaves.


12. Creeping Jenny (Lysimachia nummularia)

Height: 2–4 inches
Sun: Full sun to partial shade
Bloom Time: Summer

Fast-growing, golden-leaved ground cover that spreads quickly, great for moist areas and around ponds.


13. Tiarella (Foamflower)

Height: 6–12 inches
Sun: Part to full shade
Bloom Time: Spring

Produces frothy spikes of tiny white or pink flowers above attractive foliage.


14. Pulmonaria (Lungwort)

Height: 8–12 inches
Sun: Partial to full shade
Bloom Time: Early spring

Features spotted leaves and clusters of pink, blue, or violet flowers.


15. Dianthus (Pinks)

Height: 6–12 inches
Sun: Full sun
Bloom Time: Spring to summer

Low-growing forms offer fragrant, fringed flowers in pink, red, and white shades.


Maintenance Tips for Low-Growing Perennials

To keep these perennials thriving:

  • Mulch around plants to retain moisture and suppress weeds.
  • Divide clumps every 3–5 years to maintain vigor.
  • Deadhead spent flowers to prolong blooming.
  • Remove debris in fall to prevent disease.
  • Avoid overwatering; many low-growers prefer slightly dry conditions.

Conclusion

Low-growing perennials provide invaluable structure, color, and coverage in both formal and informal gardens. From shade-loving ground covers like Sweet Woodruff and Hostas to sun-loving favorites like Creeping Phlox and Sedum, these plants reduce maintenance while enhancing beauty.

By choosing perennials suited to your site’s sun, soil, and moisture conditions, you can build a flourishing, long-lasting, and visually cohesive landscape. Incorporating a variety of textures, bloom times, and foliage colors ensures year-round interest and ecological support for pollinators.

Whether edging a flower border, filling gaps between pavers, or stabilizing a sloped garden bed, low-growing perennials are versatile, beautiful, and essential additions to any garden.

How Can You Improve Clay Soil for Gardening?

How Can You Improve Clay Soil for Gardening?

Soil is the foundation of every successful garden, and its texture, structure, and nutrient content directly affect plant health and productivity. Among the various soil types, clay soil is both a blessing and a challenge for gardeners. While rich in nutrients, clay soil’s dense, compacted nature often leads to poor drainage, root suffocation, and difficulty in cultivation. The good news is that with the right techniques, clay soil can be transformed into a fertile, well-draining, and productive growing medium.

In this article, we’ll explore how you can improve clay soil for gardening, what makes clay soil unique, its advantages and disadvantages, and step-by-step methods to enhance its structure, drainage, and fertility.


What Is Clay Soil?

Clay soil consists of very fine mineral particles with minimal organic matter. These particles are so small that they pack tightly together, leaving little space for air and water movement. While it holds nutrients exceptionally well, its poor drainage and tendency to compact can make it difficult for plant roots to thrive.

Characteristics of clay soil:

  • Feels sticky when wet and hard when dry.
  • Forms clumps or rolls into a ball when squeezed.
  • Drains slowly, retaining water for long periods.
  • Cracks and hardens during dry spells.
  • Tends to be alkaline in pH.

Advantages of Clay Soil

Despite its challenges, clay soil offers some benefits:

  • Nutrient-rich: Holds essential minerals like potassium, calcium, and magnesium.
  • Moisture-retentive: Retains water longer than sandy soils.
  • Good foundation for organic amendments: Responds well to soil improvement techniques.

If managed correctly, clay soil can support healthy plant growth and productive gardens.


Challenges of Gardening in Clay Soil

Clay soil presents several obstacles for gardeners:

  • Poor drainage: Causes waterlogged roots and root rot.
  • Compaction: Makes it hard for roots to penetrate.
  • Slow warming in spring: Delays planting schedules.
  • Tendency to become hard and cracked when dry.
  • Difficult cultivation: Can stick to tools and become heavy and unworkable.

The key to overcoming these challenges lies in modifying the soil’s texture and improving aeration and drainage.


How to Improve Clay Soil for Gardening

Improving clay soil requires both short-term fixes and long-term amendments. Here’s a comprehensive step-by-step guide:


1. Add Organic Matter

The single most effective way to improve clay soil is by adding generous amounts of organic material.

Why it works:
Organic matter loosens compacted soil, increases pore space for air and water, encourages beneficial soil organisms, and improves overall fertility.

Materials to use:

  • Compost
  • Well-rotted manure
  • Leaf mold
  • Grass clippings (in moderation)
  • Shredded bark or wood chips

How to apply:

  • Spread a 2–4 inch (5–10 cm) layer of organic matter over the soil surface.
  • Work it into the top 8–12 inches (20–30 cm) of soil with a garden fork or tiller.
  • Repeat annually or every growing season for best results.

2. Incorporate Soil Conditioners

Soil conditioners are mineral or organic substances that improve soil structure and aeration.

Effective options include:

  • Gypsum (calcium sulfate): Helps break up clay particles without altering soil pH.
  • Coarse sand (in small amounts): When mixed thoroughly with organic matter.
  • Perlite or vermiculite: Enhances drainage and reduces compaction.

Caution: Never add sand alone to clay soil, as it can create a cement-like consistency.


3. Use Raised Beds

If working with dense clay is too difficult, consider building raised garden beds.

Advantages:

  • Improves drainage by elevating the growing area.
  • Allows you to control soil composition by adding quality topsoil and compost.
  • Warms up faster in spring.

Ensure raised beds are at least 12 inches (30 cm) deep for most plants.


4. Mulch Regularly

Applying mulch protects soil from compaction due to rainfall and suppresses weed growth.

Use organic mulches such as:

  • Straw
  • Shredded leaves
  • Bark chips
  • Grass clippings

Benefits:

  • Regulates soil temperature.
  • Retains moisture.
  • Gradually adds organic matter as it decomposes.

Apply a 2–3 inch (5–7.5 cm) layer around plants and replenish as needed.


5. Avoid Working Wet Soil

Working clay soil when it’s wet can lead to severe compaction and soil structure damage.

Best practice:
Wait until the soil is moist but not sticky. Test by squeezing a handful of soil — if it crumbles easily, it’s ready to work. If it forms a sticky ball, let it dry further.


6. Plant Clay-Tolerant Species

While improving soil, consider growing plants that naturally tolerate clay conditions.

Examples:

  • Coneflowers
  • Daylilies
  • Hostas
  • Bee balm
  • Black-eyed Susans
  • Asters

Native plants adapted to your region’s soil type often perform well in clay-heavy areas.


7. Encourage Earthworms and Beneficial Soil Life

Earthworms and soil microbes help aerate clay soil and break down organic material.

To attract them:

  • Add compost and mulch.
  • Avoid chemical fertilizers and pesticides.
  • Keep soil moist but not waterlogged.

8. Implement Cover Cropping

Cover crops improve soil structure and add organic matter.

Good choices for clay soil:

  • Ryegrass
  • Clover
  • Buckwheat
  • Vetch

Grow cover crops during the off-season, then till them into the soil before planting in spring.


Long-Term Benefits of Improving Clay Soil

Over time, consistent soil improvement efforts will:

  • Increase drainage and reduce standing water.
  • Create a loose, crumbly texture for easier planting.
  • Boost plant root health and development.
  • Enhance soil microbial activity and earthworm populations.
  • Support stronger, more productive plants.

Clay soil doesn’t improve overnight — but within a couple of growing seasons, noticeable changes in texture and plant performance will appear.


Mistakes to Avoid When Amending Clay Soil

  • Adding sand alone: Leads to a concrete-like mix.
  • Overworking wet soil: Causes severe compaction.
  • Neglecting regular organic matter additions: Slows improvement progress.
  • Using chemical fertilizers excessively: Disrupts soil organisms and structure.

Patience, observation, and consistent care are key to success.


Conclusion

Clay soil presents unique challenges, but it also offers remarkable gardening potential when properly managed. By incorporating organic matter, using soil conditioners like gypsum, applying mulch, and avoiding working the soil while wet, gardeners can significantly enhance clay soil’s structure, drainage, and fertility.

Raised beds, cover cropping, and choosing clay-tolerant plants offer practical solutions during the improvement process. Over time, these strategies will transform dense, stubborn clay into rich, productive soil capable of supporting a thriving, beautiful garden.

With careful attention and sustainable soil practices, even the heaviest clay can be turned into a gardener’s ally — fertile, nourishing, and full of life.

Which Houseplants Are Toxic to Cats?

Which Houseplants Are Toxic to Cats?

Houseplants bring life, color, and natural beauty to indoor spaces — they purify air, boost mood, and add aesthetic charm. However, for households with feline companions, some popular houseplants can pose serious health risks. Cats are naturally curious creatures, often nibbling on leaves, flowers, or stems, which makes knowing which houseplants are toxic to them crucial for their safety.

In this article, we’ll provide a comprehensive guide to which houseplants are toxic to cats, symptoms of plant poisoning, how to create a cat-safe indoor garden, and alternatives to common toxic plants.


Why Are Some Houseplants Toxic to Cats?

Many plants produce natural chemicals to defend themselves from herbivores, insects, and diseases. These substances, while harmless or even beneficial to humans, can be toxic to pets like cats when ingested, inhaled, or when sap comes into contact with skin.

Some toxic compounds include:

  • Calcium oxalate crystals (irritating to mouth and digestive tract)
  • Cardiac glycosides (affecting heart function)
  • Alkaloids and saponins (disrupting digestion and nervous system)
  • Essential oils (toxic to cats when concentrated)

Understanding which plants carry these risks can help pet owners make safer choices for their home environment.


Common Houseplants Toxic to Cats

Here’s a list of popular houseplants known to be toxic to cats, along with their potential effects:

1. Lilies (Lilium spp. and Hemerocallis spp.)

Toxicity: Extremely toxic. Even small amounts can cause severe kidney failure in cats.
Symptoms: Vomiting, drooling, lethargy, loss of appetite, kidney damage.

Note: All parts — leaves, stems, flowers, pollen, and even water from a vase — are dangerous.


2. Peace Lily (Spathiphyllum spp.)

Toxicity: Mild to moderate.
Symptoms: Mouth irritation, drooling, vomiting, difficulty swallowing.

Contains calcium oxalate crystals that can cause intense irritation if chewed.


3. Aloe Vera (Aloe barbadensis miller)

Toxicity: Mild to moderate.
Symptoms: Vomiting, diarrhea, lethargy, tremors.

While its gel is soothing for humans, the latex just beneath the leaf skin is toxic to cats.


4. Snake Plant (Sansevieria trifasciata)

Toxicity: Mild to moderate.
Symptoms: Nausea, vomiting, diarrhea.

Contains saponins, which can disrupt a cat’s digestive system.


5. Pothos (Epipremnum aureum)

Also known as Devil’s Ivy.
Toxicity: Mild to moderate.
Symptoms: Oral irritation, vomiting, drooling, difficulty swallowing.

Another plant with calcium oxalates, making it harmful if ingested.


6. Dieffenbachia (Dumb Cane)

Toxicity: Moderate.
Symptoms: Intense oral irritation, drooling, swelling, difficulty breathing, vomiting.

Its sap contains oxalates and enzymes that cause burning and swelling.


7. Philodendron (Philodendron spp.)

Toxicity: Mild to moderate.
Symptoms: Oral pain, drooling, vomiting, difficulty swallowing.

Shares similar toxins with Pothos and Peace Lily.


8. Sago Palm (Cycas revoluta)

Toxicity: Highly toxic and potentially fatal.
Symptoms: Vomiting, diarrhea, seizures, liver failure.

All parts are toxic, with seeds being the most poisonous.


9. ZZ Plant (Zamioculcas zamiifolia)

Toxicity: Mild to moderate.
Symptoms: Vomiting, diarrhea, skin irritation.

Contains calcium oxalate crystals that cause discomfort when chewed.


10. Dracaena (Dracaena spp.)

Toxicity: Mild to moderate.
Symptoms: Vomiting, appetite loss, drooling, depression.

Found in various varieties like Corn Plant, Marginata, and Lucky Bamboo.


Signs of Plant Poisoning in Cats

Recognizing the symptoms of plant toxicity can save your cat’s life. Common signs include:

  • Vomiting and diarrhea
  • Excessive drooling
  • Difficulty swallowing
  • Pawing at the mouth
  • Lethargy and weakness
  • Loss of appetite
  • Tremors or seizures
  • Difficulty breathing
  • Uncoordinated movements
  • Abdominal pain
  • Swollen mouth, tongue, or throat

If you suspect your cat has ingested a toxic plant, contact a veterinarian immediately. Bring a sample of the plant or its name for identification.


Safe Alternatives to Toxic Houseplants

You don’t have to give up indoor greenery entirely. Many beautiful, cat-safe plants are available for pet-friendly homes.

Popular Non-Toxic Houseplants for Cats:

  • Spider Plant (Chlorophytum comosum)
  • Areca Palm (Dypsis lutescens)
  • Parlor Palm (Chamaedorea elegans)
  • Calathea species
  • Prayer Plant (Maranta leuconeura)
  • Boston Fern (Nephrolepis exaltata)
  • African Violet (Saintpaulia)
  • Baby’s Tears (Soleirolia soleirolii)

These plants offer lush foliage and decorative appeal without posing a risk to curious cats.


How to Cat-Proof Your Indoor Garden

If you own houseplants and cats, follow these guidelines to minimize the risk of toxicity:

  1. Know what you’re growing.
    Research every plant’s safety before bringing it indoors.
  2. Place toxic plants out of reach.
    Use hanging baskets or high shelves, although agile cats may still access them.
  3. Create a cat garden.
    Plant cat-safe grasses like cat grass (Dactylis glomerata) or catnip (Nepeta cataria) as a distraction.
  4. Use deterrents.
    Citrus peels, vinegar sprays, or motion-activated devices can discourage plant-chewing.
  5. Prune and clean regularly.
    Remove fallen leaves or flowers to prevent accidental ingestion.
  6. Educate family members.
    Ensure everyone knows which plants are hazardous.

Can Cats Die from Eating Toxic Houseplants?

While many houseplant toxicities result in mild to moderate symptoms like vomiting and oral irritation, some plants — particularly lilies, sago palms, and certain bulbs — can be fatal without prompt treatment.

Even small amounts of certain plants can cause irreversible kidney or liver damage in cats, so taking plant toxicity seriously is vital for responsible pet ownership.


What to Do If Your Cat Eats a Toxic Plant

  • Remove plant material from the cat’s mouth if visible.
  • Rinse the mouth gently with water.
  • Call your veterinarian or an animal poison control hotline immediately:
    • ASPCA Animal Poison Control Center (USA): +1-888-426-4435
  • Provide the plant’s name and details on the amount ingested.
  • Follow veterinary instructions carefully.

Conclusion

Indoor houseplants can coexist safely with cats — as long as you know which species are harmful and take preventive measures. Popular plants like lilies, pothos, snake plants, and sago palms are toxic to cats, while others such as spider plants, parlor palms, and calatheas offer a safer alternative.

Knowing which houseplants are toxic to cats is essential for creating a safe, pet-friendly environment at home. By making informed choices, you can enjoy the benefits of indoor greenery while protecting your feline friend’s health and wellbeing.

Regularly inspecting your plant collection and replacing harmful species with safe alternatives ensures peace of mind and a happier, healthier home for everyone — both two-legged and four-legged.

How Long Does It Take for a Money Plant Cutting to Root in Water?

How Long Does It Take for a Money Plant Cutting to Root in Water?

The Money Plant (Epipremnum aureum, also known as Pothos, Devil’s Ivy, or Golden Pothos) is one of the most popular and beginner-friendly houseplants around the world. Known for its glossy, heart-shaped leaves and cascading vines, it’s loved not only for its aesthetic appeal but also for its reputation as a symbol of prosperity and good fortune.

One of the reasons for the plant’s enduring popularity is how easily it can be propagated from cuttings, particularly in water. For new plant owners and propagation enthusiasts alike, a common question arises: How long does it take for a Money Plant cutting to root in water?

This article explores the rooting process in detail — covering the timeline, influencing factors, care tips during propagation, and how to successfully transplant rooted cuttings into soil.


Understanding Money Plant Propagation

Money Plants are fast-growing vines native to Southeast Asia and thrive in a variety of conditions, making them a favorite for indoor environments. They can be propagated by:

  • Stem cuttings in water
  • Stem cuttings in soil

Rooting cuttings in water is particularly popular because it allows plant lovers to visually monitor root development and enjoy an attractive display at the same time.


How Long Does It Take for a Money Plant Cutting to Root in Water?

On average, it takes 7 to 14 days for a Money Plant cutting to begin developing visible roots in water. The time frame can vary based on several factors such as:

  • Temperature
  • Light availability
  • Water quality
  • Cutting health and maturity
  • Season

In ideal conditions, some cuttings may show root growth within a week, while others might take up to 3 weeks or more to establish strong roots suitable for transplanting.


Factors That Affect Rooting Time

Let’s explore the key factors influencing how quickly your Money Plant cuttings will root:


Temperature

Money Plants root faster in warm temperatures ranging from 20°C to 30°C (68°F to 86°F). Cooler temperatures slow down the metabolic processes within the cutting, delaying root development.


Light Conditions

Bright, indirect light encourages faster root growth. Insufficient light slows the process, while direct sunlight can cause cuttings to wilt or damage exposed parts.

Tip: Place your propagation jar near a bright window shielded with a sheer curtain.


Water Quality

Use clean, room-temperature, chlorine-free water. Tap water with high chlorine content can impede rooting. Filtered or rainwater is ideal.

Change the water every 3–5 days to prevent stagnation, bacterial growth, and nutrient depletion.


Cutting Health and Size

Healthy, disease-free cuttings root more reliably. Choose a stem section with 2–4 leaves and at least one visible node (a small bump along the stem where roots will grow).

Avoid taking cuttings with yellowing or damaged leaves.


Season

Rooting is typically faster in the spring and summer months when growth activity is naturally higher. In cooler seasons, root development may take longer.


How to Propagate Money Plant Cuttings in Water

Here’s a step-by-step guide to successfully rooting your cuttings:


Step 1: Select a Healthy Stem

Choose a robust, mature vine with at least one healthy node and a couple of leaves.

Tip: The node is where roots will emerge, so it’s crucial for successful propagation.


Step 2: Cut Below the Node

Using sterilized scissors or pruning shears, make a clean cut just below a node.

Recommended cutting length: 4 to 6 inches (10–15 cm)


Step 3: Remove Lower Leaves

Strip away any leaves near the bottom 1–2 inches of the cutting to avoid submerging them in water, which can lead to rot.


Step 4: Place in a Water-Filled Jar

Fill a clear glass jar with clean water and insert the cuttings so the nodes are submerged but the leaves remain above water.


Step 5: Position in Indirect Light

Place the jar in a spot with bright, indirect sunlight — like a windowsill with filtered light.


Step 6: Change Water Regularly

Change the water every 3–5 days to maintain oxygen levels and prevent algae or bacteria buildup.


Step 7: Wait for Roots to Appear

Within 7 to 14 days, you should see tiny white roots emerging from the nodes. Wait until roots are at least 2–3 inches long (5–7 cm) before transplanting.


How to Transplant Water-Rooted Cuttings into Soil

Once the roots reach a desirable length, typically within 2–4 weeks, you can move the cuttings to a soil-based pot.

Steps:

  1. Select a well-draining potting mix (houseplant mix or a blend of peat, coco coir, and perlite).
  2. Gently plant the rooted cuttings in soil, covering the roots but not the leaves.
  3. Water thoroughly and place in bright, indirect light.
  4. Avoid direct sun and overwatering for the first week after transplanting.

Common Rooting Problems and Solutions

ProblemCauseSolution
No roots after 3 weeksPoor lighting, low temperatureMove to brighter, warmer area
Cuttings turning yellowWater stagnation, dirty jarChange water regularly, clean container
Rotting stem endsSubmerged leaves, poor water hygieneRemove submerged leaves, trim damaged parts

Benefits of Propagating Money Plants in Water

  • Cost-effective way to multiply your plants
  • Visually appealing as decorative water displays
  • Great for gifts or plant swaps
  • Allows for easy monitoring of root growth
  • Quick, low-maintenance process perfect for beginners

Conclusion

How long does it take for a Money Plant cutting to root in water? Typically, under optimal conditions, it takes 7 to 14 days for roots to emerge, though it can take up to 3 weeks or more in cooler or less ideal environments.

Understanding the key factors — light, temperature, water quality, and cutting health — can help speed up the rooting process and improve your success rate. Regularly changing the water and placing your cuttings in a bright, warm spot will reward you with new roots in no time.

Once established, these propagated cuttings can either remain in water for decorative purposes or be potted into soil for long-term growth. Either way, propagating Money Plant cuttings is an easy, satisfying, and rewarding way to expand your indoor plant collection.

How many Times Should You Fertilize a Rose Plant?

How Many Times Should You Fertilize a Rose Plant?

Roses are among the most cherished garden plants in the world — celebrated for their elegance, fragrance, and diversity of colors and forms. While their blooms appear effortlessly beautiful, achieving consistently healthy, vibrant, and abundant flowers requires attentive care, particularly when it comes to fertilization.

One of the most common and important questions gardeners ask is: how many times should you fertilize a rose plant? Fertilizing roses isn’t a one-size-fits-all task. It involves understanding the plant’s needs at different growth stages and providing nutrients at appropriate intervals for optimum growth and blooming.

In this article, we’ll explore the proper fertilization schedule for rose plants, the types of fertilizers to use, factors that influence feeding frequency, and tips for keeping your roses nourished and thriving.


Why Fertilizing Roses Matters

Roses are considered heavy feeders, meaning they consume significant nutrients from the soil throughout their active growing season. Fertilizing replenishes essential nutrients that promote:

  • Strong, healthy foliage
  • Vigorous growth and new shoot development
  • Robust, colorful, and fragrant blooms
  • Disease resistance and stress tolerance

Without adequate nutrients, roses may develop weak stems, sparse blooms, yellowing leaves, and reduced vigor.


Nutrient Needs of Rose Plants

Roses require a balanced supply of primary and secondary nutrients:

Primary nutrients:

  • Nitrogen (N): Supports lush leaf and stem growth
  • Phosphorus (P): Promotes root development and flower formation
  • Potassium (K): Enhances disease resistance and overall plant health

Secondary nutrients and trace elements:
Magnesium, calcium, sulfur, and micronutrients like iron and manganese are also crucial for balanced growth.


How Many Times Should You Fertilize a Rose Plant?

On average, rose plants should be fertilized 3 to 4 times during the growing season. The exact frequency depends on factors such as rose variety, soil fertility, climate, and fertilizer type.

Let’s break it down by season and growth phase:


First Application — Early Spring (When New Growth Appears)

When: As soon as buds swell and leaves begin to unfurl in early spring.

Why: This feeding jumpstarts new growth after winter dormancy, supplying essential nutrients for shoot and leaf development.

What to use:
A balanced, slow-release granular fertilizer (e.g., 10-10-10 or 12-6-10) or an organic option like well-aged compost, fish emulsion, or seaweed extract.


Second Application — After First Bloom Cycle

When: Once the first flush of flowers begins to fade, usually 4–6 weeks after the initial feeding.

Why: Roses expend a lot of energy producing blooms. A post-bloom fertilizer application supports recovery, new bud formation, and continued flowering.

What to use:
A fertilizer higher in phosphorus (e.g., 5-10-5 or 10-20-10) encourages repeated blooming.


Third Application — Mid-Summer (Optional)

When: 6–8 weeks after the second feeding if the plant is still actively growing and blooming.

Why: This optional feeding sustains growth through the peak of summer, especially in regions with long growing seasons.

What to use:
A balanced fertilizer or organic compost tea to gently nourish without overstimulating in the heat.


Final Application — Late Summer (Stop Feeding 6–8 Weeks Before First Frost)

When: No later than mid to late summer (depending on your region’s frost dates).

Why: Fertilizing too late encourages tender new growth that won’t harden off before winter, increasing the risk of frost damage.

What to use:
A fertilizer lower in nitrogen but rich in potassium (e.g., 4-8-12) to promote sturdy stems and winter readiness.


Adjusting Frequency Based on Fertilizer Type

The type of fertilizer you use will influence how often you should apply it:

Slow-Release Granular Fertilizers

  • Typically applied every 6–8 weeks
  • Break down gradually, providing consistent nutrients
  • Good for busy gardeners or large rose gardens

Liquid and Water-Soluble Fertilizers

  • Applied more frequently, typically every 2–4 weeks during active growth
  • Ideal for rapid uptake and correcting deficiencies
  • Best combined with deep watering

Organic Fertilizers

  • Examples: compost, compost tea, fish emulsion, alfalfa meal
  • Applied monthly or as a soil amendment in spring and summer
  • Improve soil structure and microbial activity along with feeding

Factors That Influence Fertilizer Frequency

Not every rose plant has the same feeding needs. Consider these variables when determining how often to fertilize:

  • Soil fertility: Rich, well-amended soil needs less frequent feeding. Sandy or poor soils require more.
  • Climate: Roses in warm, long-growing regions need more frequent fertilizing than those in short seasons.
  • Rose type: Hybrid teas and floribundas, which produce continuous blooms, need more feeding than once-blooming shrub roses or climbers.
  • Growth stage: Young, newly planted roses should be fertilized lightly after settling in, while mature roses can handle a full feeding schedule.

Best Practices for Fertilizing Roses

To maximize the effectiveness of fertilizing and keep your roses thriving:

  • Always water the plant before and after applying granular fertilizers to prevent root burn.
  • Apply fertilizers at the drip line (the outer edge of the foliage canopy) rather than at the base to nourish the root tips.
  • Avoid over-fertilizing, which can lead to soft, weak growth, increased pest issues, and reduced bloom quality.
  • Mulch around rose bushes with organic matter to retain soil moisture and gradually enrich the soil as it decomposes.

Signs of Nutrient Deficiency in Roses

Knowing the symptoms of underfed roses can help you adjust your fertilizing routine:

DeficiencySymptoms
Nitrogen (N)Pale green leaves, stunted growth
Phosphorus (P)Poor flowering, purplish leaf edges
Potassium (K)Weak stems, dull flowers, scorched leaf margins
IronYellow leaves with green veins
MagnesiumInterveinal yellowing, particularly on older leaves

Timely fertilization with a balanced nutrient supply addresses and prevents these issues.


Conclusion

So, how many times should you fertilize a rose plant? The ideal schedule involves 3 to 4 feedings during the growing season, starting in early spring and concluding by late summer. The exact number depends on fertilizer type, climate, rose variety, and soil condition.

Properly timed fertilization, combined with good watering practices, sunlight, and regular pruning, will reward you with strong, healthy rose plants and breathtaking blooms from spring to fall.

By tailoring your fertilizing routine to your specific garden environment and observing your roses’ needs, you’ll ensure a garden filled with vibrant color, intoxicating fragrance, and continuous floral beauty.

How to Make Your Orchid Bloom Again

How to Make Your Orchid Bloom Again

Orchids are among the most elegant and captivating flowering plants, often gracing homes with their delicate, exotic blooms. While they’re prized for their beauty, many orchid owners find themselves perplexed when their plant’s vibrant flowers fade, leaving behind green leaves and bare stems. The good news is — with the right care and attention, your orchid can bloom again.

This article will guide you through the essential techniques and conditions needed to encourage repeat blooming in orchids, helping you understand their natural cycles and how to optimize your home environment to keep these stunning plants thriving year after year.


Understanding the Orchid’s Bloom Cycle

Before diving into how to make your orchid bloom again, it’s important to understand the plant’s natural life cycle.

Most orchids, particularly the popular Phalaenopsis (moth orchid), bloom once a year. Blooms typically last between 6 to 10 weeks, after which the flowers drop, and the plant enters a rest period (dormancy). During this phase, the orchid conserves energy and prepares for its next bloom.

Many first-time orchid owners mistakenly believe their plant has died once the blooms fade. In reality, with proper post-bloom care, your orchid can reward you with fresh blossoms season after season.


Steps to Make Your Orchid Bloom Again

Here’s a detailed, step-by-step guide to help your orchid rebloom successfully:


Assess the Health of Your Orchid

A healthy plant is essential for repeat flowering. Before focusing on reblooming, check for:

  • Firm, green leaves without yellowing or dark spots
  • Plump, healthy roots that are green or silvery-white
  • No signs of pests like mealybugs, spider mites, or aphids

If your orchid is healthy, it’s ready for the next stage of care.


Trim the Flower Spike

After the last bloom drops:

  • Inspect the flower spike (stem) for green nodes — small bumps along the stem.
  • If the spike remains green:
    • Cut just above a healthy node (typically the third or fourth node from the base). This can trigger a side shoot with new buds.
  • If the spike has turned brown and dry:
    • Cut it back to the base, near the leaves.

This pruning encourages the plant to direct energy into root and leaf growth, preparing it for a future bloom.


Provide the Right Lighting

Orchids need bright, indirect light to bloom again. Too little light is one of the most common reasons for poor flowering.

Ideal light sources:

  • East-facing windows (gentle morning sun)
  • South or west-facing windows with filtered light

If natural light is limited, consider using a full-spectrum grow light placed about 12 inches above the plant for 12–14 hours a day.

Tip: Leaves should be bright green. Dark green leaves may indicate insufficient light, while yellowish-green can mean too much.


Maintain Optimal Temperatures

Orchids, especially Phalaenopsis varieties, often need a temperature drop to trigger reblooming.

Ideal temperature range:

  • Daytime: 70–80°F (21–27°C)
  • Nighttime: 60–65°F (16–18°C)

A drop of about 10°F (5°C) at night for several weeks can signal the orchid that it’s time to produce a new flower spike.


Water Properly

Incorrect watering is a major cause of orchid stress, affecting their ability to rebloom.

Watering guidelines:

  • Water when the top 1 inch of the potting medium feels dry.
  • Use room-temperature, distilled, or rainwater when possible.
  • Water thoroughly, allowing excess water to drain out of the pot.
  • Avoid letting the plant sit in standing water.

Frequency: Typically once a week in summer and every 10–14 days in winter.


Feed Your Orchid Correctly

Fertilizing encourages healthy growth and flower production.

Use a balanced orchid fertilizer (20-20-20) or a bloom booster high in phosphorus (like 10-30-20).

Feeding schedule:

  • During active growth (spring and summer): Fertilize every two weeks.
  • During dormancy (fall and winter): Fertilize once a month or suspend feeding.

Always dilute fertilizer to half the recommended strength to avoid root burn.


Encourage Humidity

Orchids thrive in humid environments, mimicking their native tropical habitat.

Ideal humidity: 40–60%

Ways to increase humidity:

  • Place the pot on a pebble tray filled with water.
  • Use a humidifier nearby.
  • Group plants together to create a mini-humid microclimate.

Tip: Avoid misting leaves frequently, as excess moisture can lead to fungal problems.


Repot When Needed

Over time, the potting medium can break down, affecting drainage and air circulation around the roots.

When to repot:

  • Every 1–2 years
  • When roots are tightly crowded or growing over the pot’s edge
  • If the medium has become compacted or decomposed

Use a special orchid bark mix, not regular potting soil, to ensure proper aeration.


Watch for a New Spike

After providing ideal care, a healthy orchid will often produce a new spike during late fall or winter. You’ll notice a slender, green shoot emerging from the base of the plant, distinct from a root (which is typically rounded and silvery-green).

Support the new spike gently with a stake as it grows, and continue your care routine.


How Long Before an Orchid Blooms Again?

With proper conditions, most orchids will rebloom once a year, typically 8–12 months after their last flowering. Phalaenopsis orchids, for example, often bloom in late winter or early spring.

The precise timing depends on:

  • Plant health
  • Seasonal light and temperature changes
  • Quality of care during the rest period

Patience is key — orchids grow slowly, but the reward is worth the wait.


Common Reblooming Problems

If your orchid isn’t blooming, consider these troubleshooting tips:

ProblemLikely CauseSolution
No new spike formingInsufficient lightMove to a brighter spot
Stunted growthOverwatering or poor drainageAdjust watering and repot if needed
Yellowing leavesToo much direct sun or overfeedingMove to filtered light and reduce fertilizer
No blooms after new spikeInconsistent temperature or lightProvide a night temperature drop

Conclusion

Bringing your orchid back into bloom requires understanding its natural cycles and providing the right environment — bright, indirect light, appropriate temperatures, proper watering, regular feeding, and occasional repotting.

With patience and consistent care, your orchid can reward you with stunning, long-lasting blooms year after year. Many orchid enthusiasts proudly keep the same plants blooming for decades indoors, transforming their homes with grace and beauty.

So, don’t discard that post-bloom orchid. Follow these steps, nurture it through its resting phase, and you’ll soon be rewarded with a fresh display of exquisite flowers.

How Old Can a Jade Plant Get Indoors?

How Old Can a Jade Plant Get Indoors?

The Jade plant (Crassula ovata), also known as the money plant, friendship tree, or lucky plant, is a beloved houseplant recognized for its fleshy, oval-shaped leaves and tree-like structure. Revered in many cultures as a symbol of prosperity and good fortune, the Jade plant isn’t just a pretty addition to your home decor — it’s also remarkably long-lived.

A common question among houseplant enthusiasts is: How old can a Jade plant get indoors? Can these compact succulents truly become ancient living treasures within the walls of a home? In this article, we’ll explore the Jade plant’s longevity, factors influencing its lifespan, famous examples of aged Jade plants, and how you can help yours thrive for decades.


Introduction to the Jade Plant

Native to the arid regions of South Africa and Mozambique, the Jade plant belongs to the Crassulaceae family. It’s a succulent shrub prized for its ease of care, resilience, and beautiful jade-green, sometimes reddish-edged leaves. Indoors, it makes an ideal potted plant thanks to its ability to adapt to household conditions.

Key Features:

  • Fleshy, thick, oval leaves that store water
  • Woody, bonsai-like stems with age
  • White or pink star-shaped flowers (rare indoors)
  • Symbolic association with good luck and wealth

How Old Can a Jade Plant Get Indoors?

A well-cared-for indoor Jade plant can live 50 to 70 years or more. In some documented cases, Jade plants have survived and thrived for over 100 years, passed down through generations as heirlooms.

While many houseplants have relatively short lifespans, the Jade plant’s robust nature, combined with proper care and patience, makes it one of the longest-living indoor plants you can grow.


Factors That Influence a Jade Plant’s Lifespan

Several factors determine how long a Jade plant can live indoors. Here’s a closer look at each:


Growing Conditions

Jade plants are hardy, but their longevity heavily depends on the care they receive. Ideal conditions include:

  • Bright, indirect sunlight for at least 4–6 hours a day
  • Well-draining succulent or cactus potting mix
  • Minimal watering — allowing soil to dry out between waterings
  • Occasional feeding during the active growing season
  • Proper air circulation

Maintaining these conditions consistently over the years is crucial for promoting slow, steady growth and overall health.


Pot Size and Repotting

A Jade plant’s roots prefer slightly snug containers. Overpotting can lead to water retention and root rot. Repotting should be done every 2–3 years in younger plants and less frequently as the plant matures.

Older Jade plants may remain in the same container for many years if their soil is occasionally refreshed, allowing them to establish stable root systems that support long life.


Pruning and Shaping

Regular pruning encourages branching and controls size, giving Jade plants their characteristic bonsai-like appearance as they age. Removing leggy or unhealthy stems redirects energy to healthy growth, contributing to their longevity.


Protection from Pests and Disease

While generally hardy, Jade plants are susceptible to mealybugs, spider mites, and fungal infections if neglected. Regular inspection and prompt treatment are essential for ensuring a long, healthy life.


Seasonal Care Adjustments

Jade plants grow actively in the spring and summer and enter dormancy in fall and winter. Adjusting watering and feeding schedules to match these cycles prevents stress and promotes long-term survival.


Famous Old Jade Plants

Jade plants have earned a reputation for impressive longevity, with many stories of plants passed down through families for generations.

Notable Examples:

  • Family heirloom Jade plants: Many households report plants over 50 years old, thriving in windowsills and sunrooms.
  • Botanical conservatories: Some public gardens and conservatories feature Jade plants over 70–80 years old, often pruned into bonsai forms.
  • Historical plantings: Stories circulate of Jade plants planted in pots by great-grandparents still thriving a century later, serving as living testaments to family history.

How to Help Your Jade Plant Live for Decades

If you’re hoping your Jade plant will become a long-living member of your household, follow these detailed care practices:


Provide Plenty of Sunlight

Jade plants love bright, indirect light. A south or west-facing window is ideal. If natural light is limited, a grow light can supplement daylight hours.

Tip: Rotate the plant occasionally for even growth.


Use the Right Soil

A fast-draining succulent or cactus mix prevents root rot. You can also make your own by mixing potting soil with perlite or coarse sand.


Master Proper Watering

Jade plants hate soggy soil. Always let the top 1–2 inches of soil dry out before watering thoroughly. In winter, water sparingly — perhaps once a month depending on room conditions.


Fertilize Modestly

Feed your Jade plant with a balanced, water-soluble fertilizer diluted to half strength once a month during the growing season (spring and summer). Avoid fertilizing in fall and winter.


Prune for Shape and Health

Remove dead or leggy stems, promote branching by pinching off the growing tips, and shape the plant to encourage a tree-like form.


Repot Only When Necessary

Every 2–3 years for younger plants or when roots outgrow the pot. Mature Jade plants can stay in the same container for several years. Refresh the topsoil occasionally to replenish nutrients.


Protect from Cold

Though Jade plants can tolerate brief cool spells, they dislike temperatures below 50°F (10°C). Keep them indoors during winter months and away from drafty windows.


Watch for Pests

Inspect leaves and stems for pests like mealybugs and spider mites. Wipe with a damp cloth or treat infestations early with neem oil or insecticidal soap.


Do Jade Plants Flower Indoors?

While outdoor Jade plants may bloom in late winter with clusters of small, star-shaped white or pink flowers, flowering indoors is rare and typically occurs in very mature, well-cared-for plants.

Factors that encourage blooming:

  • Allowing the plant to become slightly root-bound
  • Reducing water and fertilizer in fall and winter
  • Providing cool nighttime temperatures around 50°F (10°C)

Though blooms are a delightful bonus, most indoor growers appreciate Jade plants for their foliage and longevity.


Conclusion

How old can a Jade plant get indoors? With proper care, a Jade plant can live 50 to 70 years, and in exceptional cases, over a century. Its impressive lifespan makes it not only a rewarding plant to grow but a potential family heirloom, passed down through generations.

By providing the right balance of light, soil, water, and seasonal care, and protecting it from pests and environmental stress, you can help your Jade plant thrive well beyond your lifetime — a living symbol of resilience, prosperity, and beauty.

So, whether you’re a new houseplant enthusiast or a seasoned gardener, consider nurturing a Jade plant. With patience and care, it might just outlive you and delight your descendants for decades to come.

How much Epsom Salt Can You Add to Tomato Plants?

How much Epsom Salt Can You Add to Tomato Plants?

Tomatoes are one of the most popular and rewarding crops to grow in home gardens, loved for their juicy flavor and culinary versatility. To help these sun-loving plants thrive, gardeners often turn to natural supplements and soil amendments, one of the most common being Epsom salt. But like any soil additive, using it in the right quantity is key — too little might be ineffective, while too much can be harmful.

If you’re wondering how much Epsom salt you can safely add to tomato plants, this article provides a detailed, evidence-based guide on the appropriate quantities, when and how to use it, and the benefits it can offer for your tomato garden.


What Is Epsom Salt?

Despite its name, Epsom salt isn’t actually salt — it’s a naturally occurring pure mineral compound of magnesium sulfate (MgSO₄). It takes its name from the saline spring in Epsom, England, where it was originally discovered.

Key Components:

  • Magnesium (Mg): Vital for photosynthesis and promoting strong, green leaves.
  • Sulfur (S): Important for protein synthesis and plant enzyme function.

Both magnesium and sulfur are essential secondary nutrients for plants, playing key roles in chlorophyll production, nutrient absorption, and fruit development.


Why Use Epsom Salt for Tomato Plants?

Tomatoes are particularly heavy feeders and often exhibit magnesium deficiency, especially in sandy or acidic soils. Common symptoms of magnesium deficiency in tomato plants include:

  • Yellowing between leaf veins (interveinal chlorosis)
  • Curling or dropping leaves
  • Poor fruit set and slow ripening

Adding Epsom salt can correct this deficiency and provide several potential benefits:

  • Improves leaf color and photosynthesis
  • Encourages stronger root systems
  • Enhances nutrient uptake (especially nitrogen and phosphorus)
  • Reduces blossom-end rot risk when combined with balanced calcium
  • Promotes better fruit yield and flavor

How Much Epsom Salt Should You Use for Tomato Plants?

The ideal amount of Epsom salt to use depends on the growth stage of your tomato plants and whether you’re applying it to the soil or as a foliar spray.

Let’s break it down:


At Planting Time

When planting tomato seedlings:

  • Mix 1 tablespoon of Epsom salt into the bottom of each planting hole.
  • Cover it with a layer of soil before placing the seedling to prevent direct root contact with the salt.

Why: This provides an initial boost of magnesium and sulfur to help young plants establish strong roots and healthy foliage.


As a Soil Drench During Growth

For established tomato plants during the growing season:

  • Dissolve 1 tablespoon of Epsom salt in 1 gallon of water.
  • Apply around the base of each plant every 2 to 4 weeks.

Why: Regular soil drenches replenish magnesium levels, particularly in fast-draining soils where nutrients leach away quickly.


As a Foliar Spray

Foliar feeding allows plants to absorb nutrients directly through their leaves:

  • Dissolve 1 to 2 tablespoons of Epsom salt in 1 gallon of water.
  • Spray directly onto the foliage, covering both the top and undersides of the leaves.
  • Apply every 2 to 3 weeks during active growth.

Why: This method quickly corrects visible magnesium deficiencies, improving leaf color and overall plant vigor.


For Blossom-End Rot Prevention

While Epsom salt can help plants absorb nutrients, it is not a direct remedy for blossom-end rot, which is primarily caused by calcium deficiency. However, excessive magnesium can compete with calcium for uptake.

Tip: Balance Epsom salt applications with calcium-rich amendments (like crushed eggshells or garden lime) to maintain nutrient harmony.


Signs of Overuse: How Much Is Too Much?

Although Epsom salt is generally safe for tomato plants, excessive use can harm plant health and soil quality.

Signs of Overuse:

  • Leaf scorch or browning leaf edges
  • Soil nutrient imbalances (excess magnesium can interfere with calcium and potassium uptake)
  • Salt buildup in the soil
  • Poor plant performance despite supplementation

Safe guideline: Avoid exceeding 1–2 tablespoons per plant per month during the growing season.


Best Practices for Using Epsom Salt on Tomatoes

To get the most from Epsom salt while avoiding potential pitfalls, follow these practical tips:

Test Your Soil

Before applying Epsom salt, conduct a soil test to check existing magnesium levels. Many garden centers and cooperative extension offices offer affordable soil testing services.

If soil magnesium is already sufficient, adding more can do more harm than good.


Use Moderation

Stick to the recommended quantities, whether applying as a soil drench or foliar spray. More is not always better.


Combine with Balanced Fertilizers

Epsom salt supplements magnesium and sulfur but lacks essential nutrients like nitrogen, phosphorus, and potassium. Use it alongside a balanced tomato fertilizer for complete nutrition.


Monitor Plant Health

Watch for visual cues like leaf color, vigor, and fruit development to adjust application frequency as needed.


Are There Alternatives to Epsom Salt?

If you prefer organic or alternative options, other magnesium sources include:

  • Dolomitic lime (calcium magnesium carbonate) — raises soil pH and adds magnesium.
  • Greensand (glauconite) — a natural mineral soil conditioner rich in iron, potassium, and magnesium.
  • Compost and organic matter — improves soil health and nutrient availability over time.

Conclusion

How much Epsom salt can you add to tomato plants? The safe and effective range is 1 tablespoon at planting time, followed by 1 tablespoon per gallon of water applied as a soil drench every 2–4 weeks, or a 1–2 tablespoon foliar spray per gallon of water every 2–3 weeks during the growing season.

When used properly, Epsom salt can help correct magnesium deficiencies, improve plant vigor, enhance photosynthesis, and boost tomato flavor and yields. However, moderation is crucial. Overuse can disrupt nutrient balance and negatively affect plant health.

Always begin with a soil test, combine Epsom salt with a balanced fertilization program, and monitor your tomato plants regularly to ensure they thrive in your garden.

With careful application, Epsom salt can be a helpful, affordable, and accessible supplement for your tomato plants — one more tool in the gardener’s toolkit for growing abundant, flavorful harvests.

Which Grasses Work Best for Erosion Control?

Which Grasses Work Best for Erosion Control?

Soil erosion is one of the most persistent and costly challenges faced in landscaping, agriculture, and environmental restoration projects. Whether it occurs due to wind, water, or human activity, erosion can lead to land degradation, reduced soil fertility, and increased runoff pollution. Fortunately, grasses are among the most effective natural tools for controlling erosion.

Their dense root systems stabilize soil, reduce surface water runoff, and prevent sediment displacement. But with a variety of grass species available, knowing which grasses work best for erosion control can make all the difference. This article will explore the top-performing grasses for erosion management, their growing conditions, and practical planting tips to protect your landscape and environment.


Why Use Grasses for Erosion Control?

Grasses are uniquely suited to erosion control because of their:

  • Extensive, fibrous root systems that hold soil in place.
  • Dense foliage and groundcover that reduces the speed of rainwater runoff.
  • Rapid growth rates which quickly stabilize exposed soil.
  • Low maintenance and tolerance to varying climates.

Unlike trees or shrubs, grasses can cover large areas, including slopes and stream banks, providing continuous ground coverage.


Top Grasses for Erosion Control

Let’s explore the most effective grasses commonly recommended for stabilizing soil and preventing erosion:


Buffalograss (Bouteloua dactyloides)

Native to: North America
Best for: Drought-prone areas, slopes, and sunny sites

Buffalograss is a warm-season, low-growing grass with a dense, mat-like growth habit. Its deep root system (up to 6 feet) effectively holds soil, making it ideal for erosion-prone landscapes.

Key benefits:

  • Highly drought-tolerant
  • Minimal mowing requirements
  • Excellent ground coverage

Limitations: Needs full sun; not ideal for shaded or wet areas.


Tall Fescue (Festuca arundinacea)

Native to: Europe, widely naturalized in North America
Best for: Cool, temperate regions, residential yards, and roadside slopes

Tall fescue is a cool-season grass known for its adaptability, deep root system, and tolerance to poor soils.

Key benefits:

  • Rapid establishment
  • Strong, deep fibrous roots
  • Tolerates moderate drought and shade

Limitations: Requires occasional mowing; not suited for very arid climates.


Bermudagrass (Cynodon dactylon)

Native to: Africa, widely used in warm regions
Best for: Warm climates, sports fields, and steep banks

Bermudagrass grows vigorously with aggressive stolons and rhizomes, creating a dense sod that resists soil erosion.

Key benefits:

  • Spreads quickly
  • Excellent drought tolerance
  • High foot traffic resilience

Limitations: Can be invasive; requires regular management in controlled areas.


Switchgrass (Panicum virgatum)

Native to: North America
Best for: Riverbanks, wetlands, and open fields

Switchgrass is a tall, native perennial grass with an extensive, fibrous root system capable of growing 5–10 feet deep. It’s widely used in conservation projects.

Key benefits:

  • Thrives in poor, wet, or dry soils
  • Excellent for stabilizing streambanks
  • Provides habitat for wildlife

Limitations: Tall growth may not suit manicured landscapes.


Ryegrass (Lolium perenne)

Native to: Europe and Asia
Best for: Quick erosion control in temperate regions

Perennial and annual ryegrasses establish rapidly, providing immediate groundcover to prevent soil erosion.

Key benefits:

  • Fast germination (within 5–10 days)
  • Affordable and easy to sow
  • Ideal for temporary cover or overseeding

Limitations: Less drought-tolerant; may need frequent reseeding in hot, dry areas.


Blue Grama (Bouteloua gracilis)

Native to: North American Great Plains
Best for: Dry, sandy, or rocky slopes

A drought-tolerant warm-season grass, Blue Grama forms dense tufts and has deep roots perfect for erosion-prone, arid environments.

Key benefits:

  • Minimal water requirements
  • Low-maintenance once established
  • Attractive, fine-textured appearance

Limitations: Grows best in full sun; slow to establish.


Creeping Red Fescue (Festuca rubra)

Native to: Europe and North America
Best for: Shady slopes, lawns, and woodland edges

This fine-leaved, cool-season grass spreads by underground rhizomes, forming a dense mat that holds soil effectively.

Key benefits:

  • Thrives in shade
  • Low maintenance
  • Tolerates poor, rocky soils

Limitations: Limited drought tolerance in full sun.


Comparison Table of Erosion Control Grasses

Grass SpeciesClimate TypeDrought ToleranceGrowth HabitIdeal Use
BuffalograssWarmExcellentMat-formingLawns, slopes, dry areas
Tall FescueCool/temperateModerateClumpingLawns, roadsides, banks
BermudagrassWarmExcellentSpreadingSlopes, sports fields
SwitchgrassCool/warmExcellentUpright, tallRiverbanks, conservation
RyegrassCoolLowClumpingQuick cover, overseeding
Blue GramaWarmExcellentTuft-formingDry slopes, native landscaping
Creeping Red FescueCoolLow-moderateSpreadingShady slopes, naturalized lawns

Tips for Planting Grasses for Erosion Control

Site Preparation

  • Remove existing weeds and debris
  • Loosen soil for better root penetration
  • Grade the area to minimize severe slopes

Seed Selection and Sowing

  • Choose native or region-appropriate species
  • Use seed mixes for diverse, multi-layered root systems
  • Broadcast seed evenly, using mulch or straw to reduce erosion before germination

Watering and Maintenance

  • Water lightly and frequently until established
  • Reduce watering frequency as roots develop
  • Mow at recommended heights to maintain dense growth and discourage weeds

Advantages of Grasses Over Other Erosion Control Methods

  • Cost-effective and quick to establish
  • Suitable for large and difficult-to-access areas
  • Adds visual appeal to landscapes
  • Supports pollinators and native wildlife
  • Requires minimal long-term maintenance

Unlike hardscapes or retaining walls, grasses provide a living, adaptable solution that improves soil health over time.


Conclusion

Which grasses work best for erosion control?
It depends on your climate, soil type, slope severity, and intended aesthetic. Grasses like Buffalograss, Tall Fescue, Bermudagrass, Switchgrass, and Blue Grama are among the most effective choices for securing soil and preventing erosion.

Their extensive root systems bind soil particles, reduce water runoff, and create a resilient, low-maintenance solution for protecting vulnerable landscapes. By selecting the appropriate species for your conditions and following best planting practices, you can establish a durable, eco-friendly erosion control system that benefits both your property and the local ecosystem.