Best Fast-Growing Care Plants for Your Garden

Best Fast-Growing Care Plants for Your Garden

A garden is a living reflection of time and care — but not all gardeners have the patience to wait years before seeing lush growth. Thankfully, nature offers a range of fast-growing plants that can quickly transform a bare space into a vibrant green oasis. Whether you want flowers for instant color, vegetables for quick harvests, or shrubs for privacy, there are plenty of species that reward you with rapid growth when given the right care.

This article explores the best fast-growing plants for your garden, along with care tips to ensure they thrive.


Why Choose Fast-Growing Plants?

Fast-growing plants are a gardener’s dream for several reasons:

  1. Instant Impact – Quickly fills empty spaces in the garden.
  2. Seasonal Beauty – Allows you to experiment with changing layouts each year.
  3. Functional Benefits – Some provide shade, privacy, or erosion control in a short time.
  4. High Yield – Quick-harvest vegetables and herbs mean more food in less time.

Factors That Influence Fast Growth

Before planting, remember that “fast-growing” is relative. A plant’s growth speed depends on:

  • Climate – Some plants grow faster in warm, humid conditions.
  • Soil Quality – Rich, well-draining soil supports rapid root and leaf development.
  • Water Availability – Consistent watering promotes steady growth.
  • Sunlight – Most fast-growing plants require at least 6–8 hours of sunlight.
  • Fertilization – Balanced nutrients speed up plant metabolism.

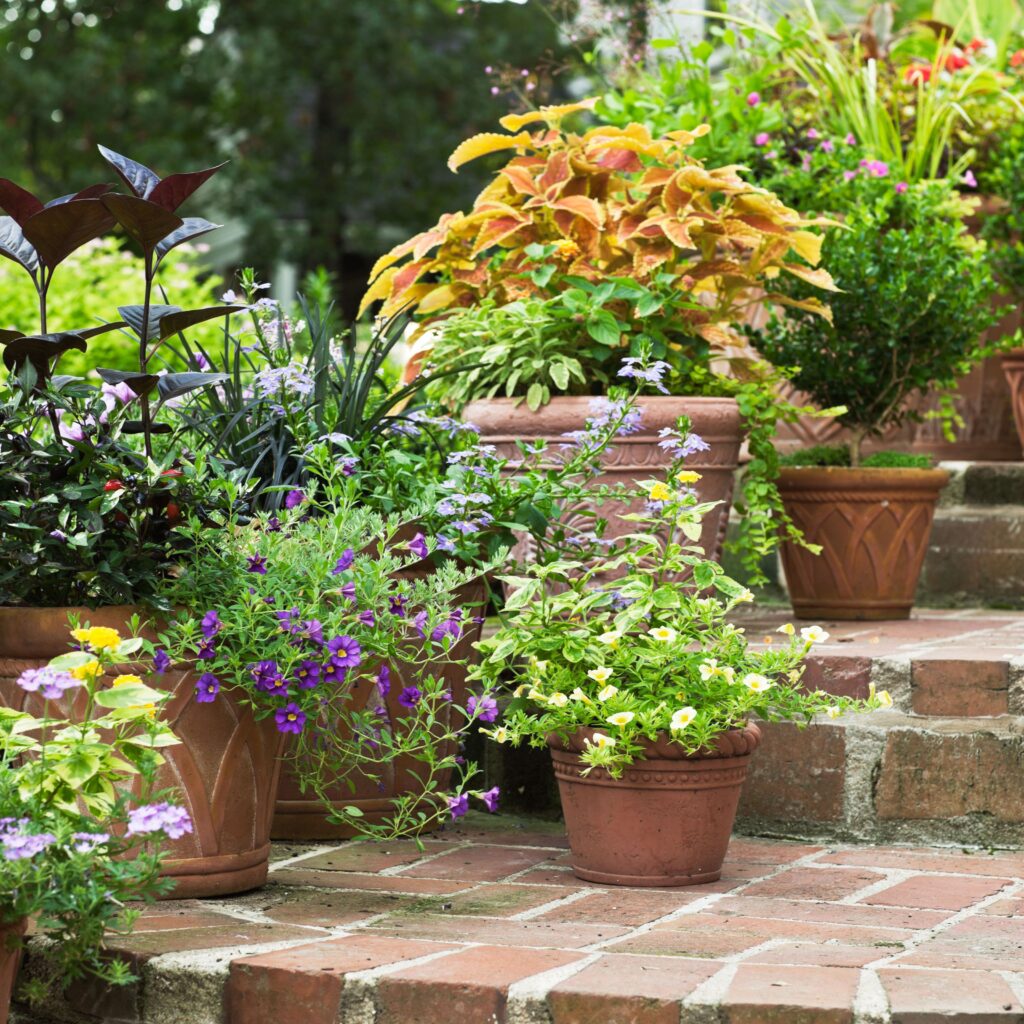
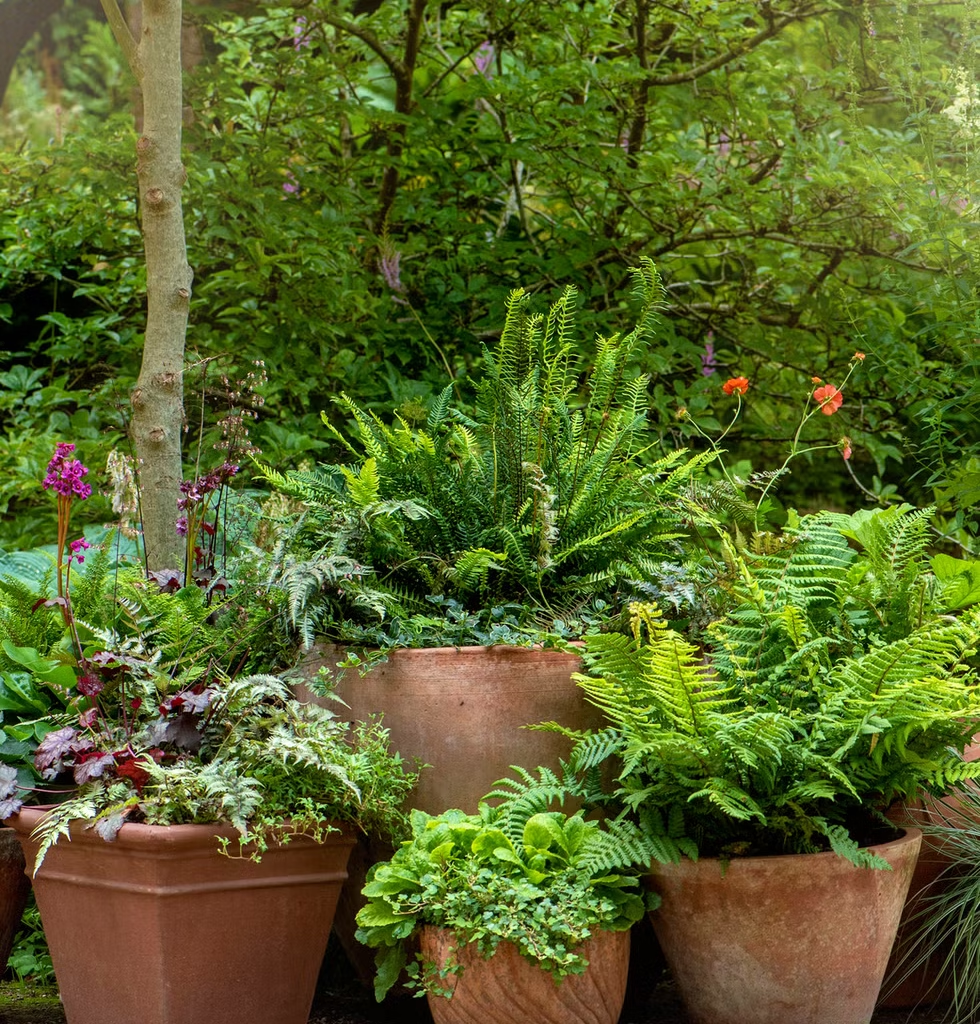
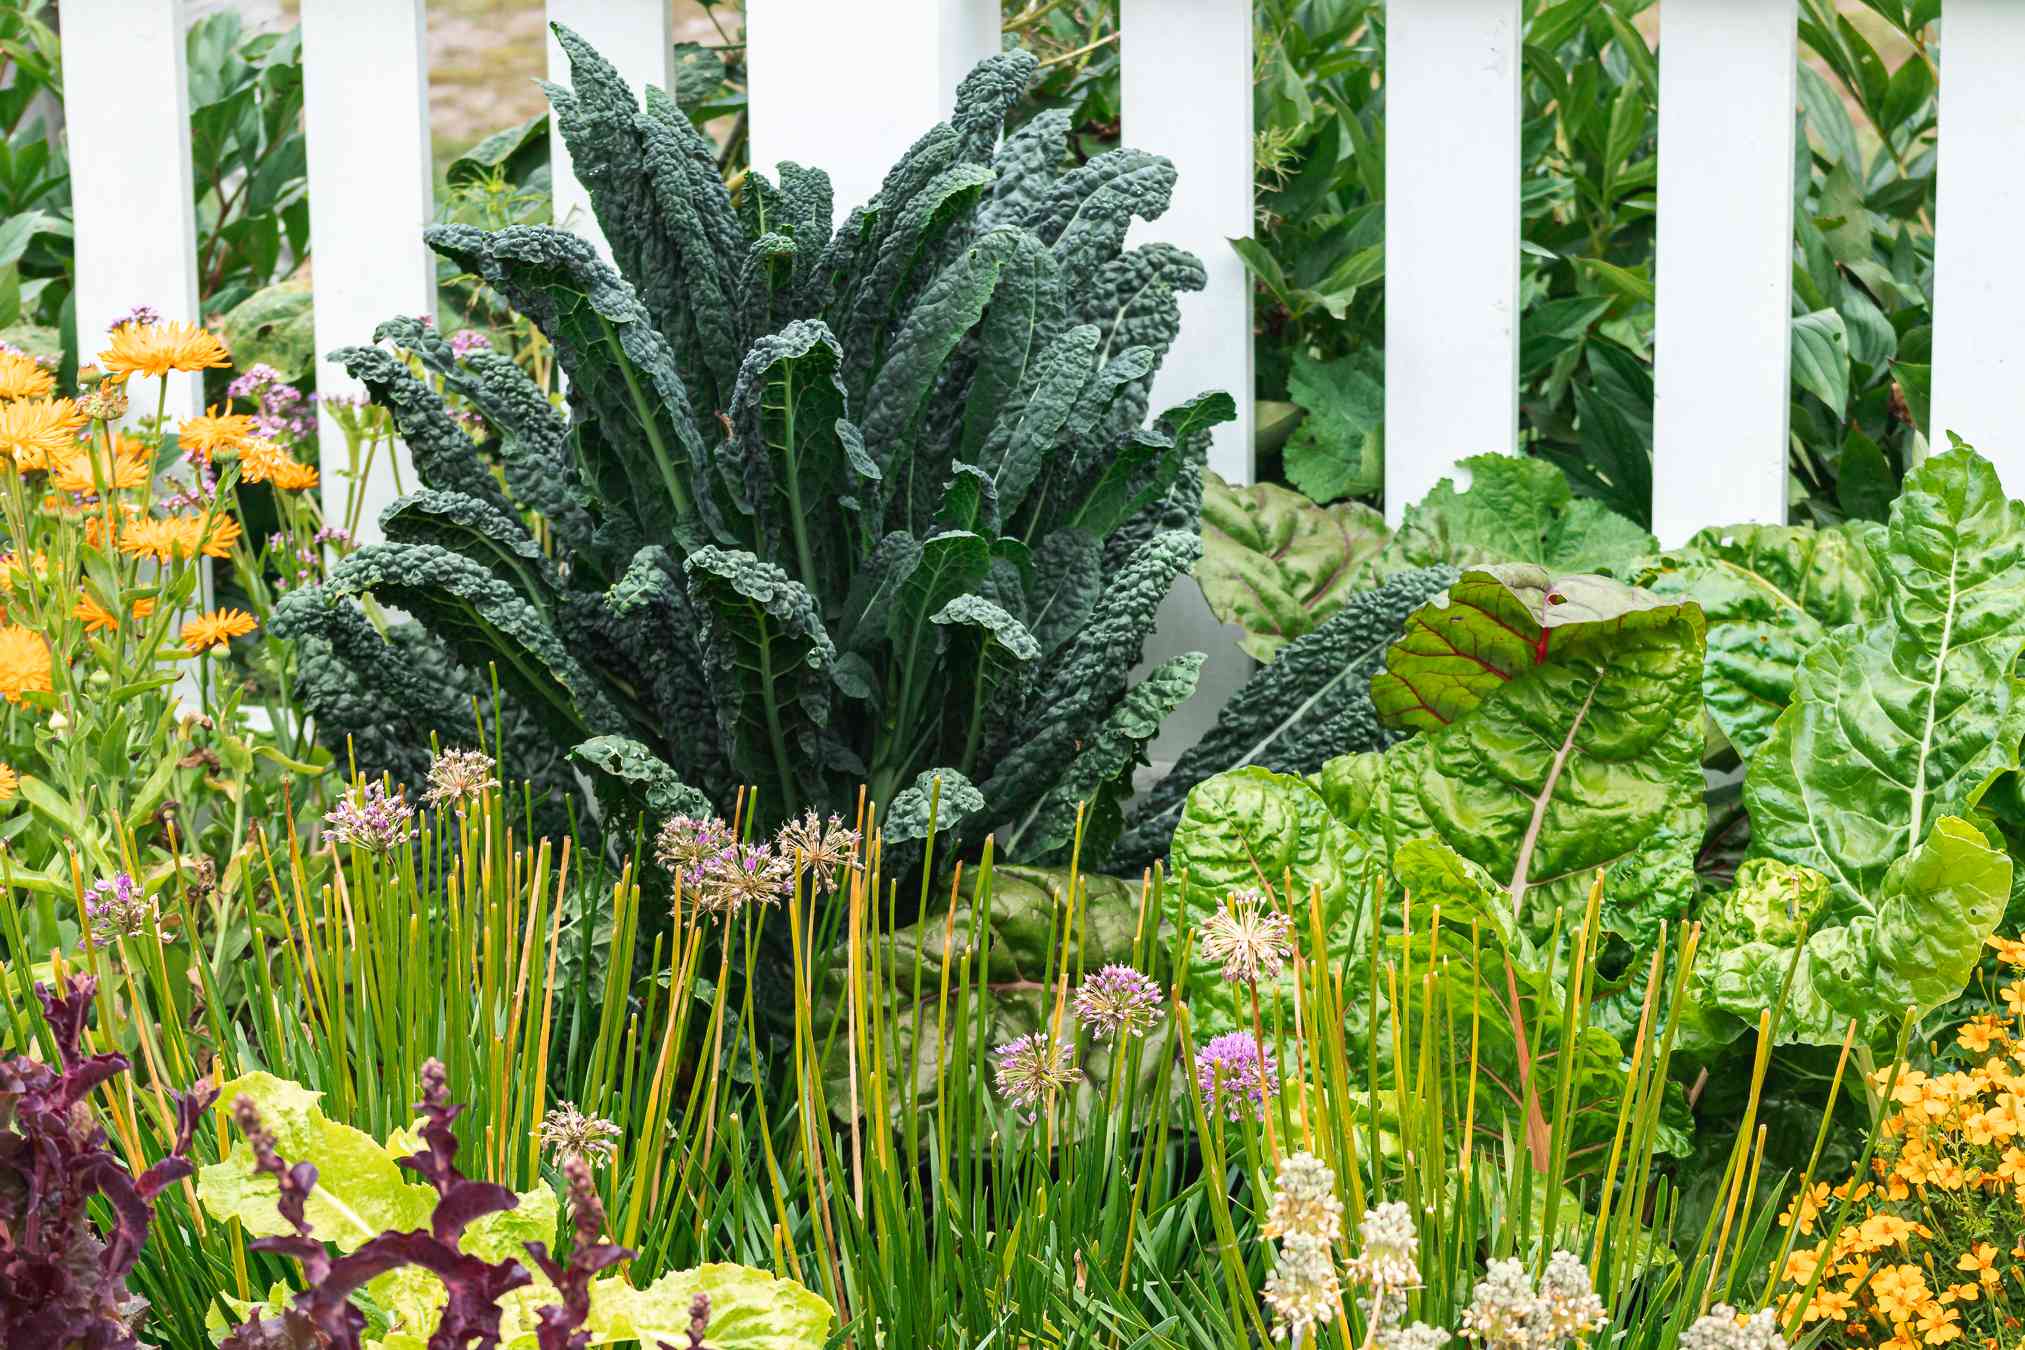
Best Fast-Growing Plants for Your Garden

Here’s a breakdown of top performers across different plant categories.


1. Sunflowers (Helianthus annuus)

  • Growth Speed: 70–100 days from seed to bloom.
  • Why It’s Great: Tall, cheerful, and perfect for adding height to your garden.
  • Care Tips:
    • Plant in full sun.
    • Water regularly but avoid waterlogging.
    • Support tall varieties with stakes.

2. Nasturtiums (Tropaeolum majus)

  • Growth Speed: 35–50 days to bloom.
  • Why It’s Great: Edible flowers and leaves, low maintenance.
  • Care Tips:
    • Prefers poor to average soil (too rich and you’ll get more leaves than flowers).
    • Direct sow seeds outdoors after frost.
    • Water moderately.

3. Sweet Alyssum (Lobularia maritima)

  • Growth Speed: Blooms within 6–8 weeks of sowing.
  • Why It’s Great: Low-growing, fragrant, and attracts pollinators.
  • Care Tips:
    • Full sun to partial shade.
    • Water lightly; drought-tolerant once established.
    • Shear back after blooming to encourage new flowers.

4. Radishes (Raphanus sativus)

  • Growth Speed: Ready to harvest in 3–4 weeks.
  • Why It’s Great: One of the fastest vegetable crops.
  • Care Tips:
    • Plant in cool seasons (spring/fall).
    • Keep soil consistently moist.
    • Thin seedlings early for proper root development.

5. Spinach (Spinacia oleracea)

  • Growth Speed: Harvestable leaves in 4–6 weeks.
  • Why It’s Great: Nutrient-rich and easy to grow in containers or beds.
  • Care Tips:
    • Prefers cooler temperatures.
    • Keep soil evenly moist.
    • Harvest outer leaves first to encourage regrowth.

6. Zucchini (Cucurbita pepo)

  • Growth Speed: Fruits in 50–60 days.
  • Why It’s Great: High-yielding and grows rapidly in warm weather.
  • Care Tips:
    • Plant in fertile, well-drained soil.
    • Provide at least 6 hours of sun daily.
    • Harvest regularly to encourage continuous production.

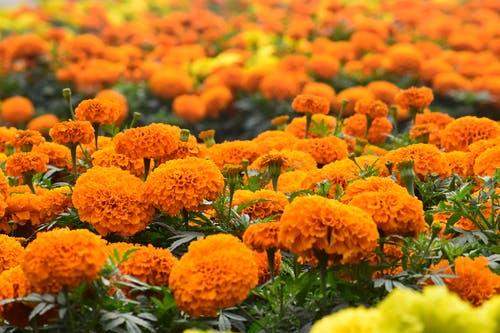
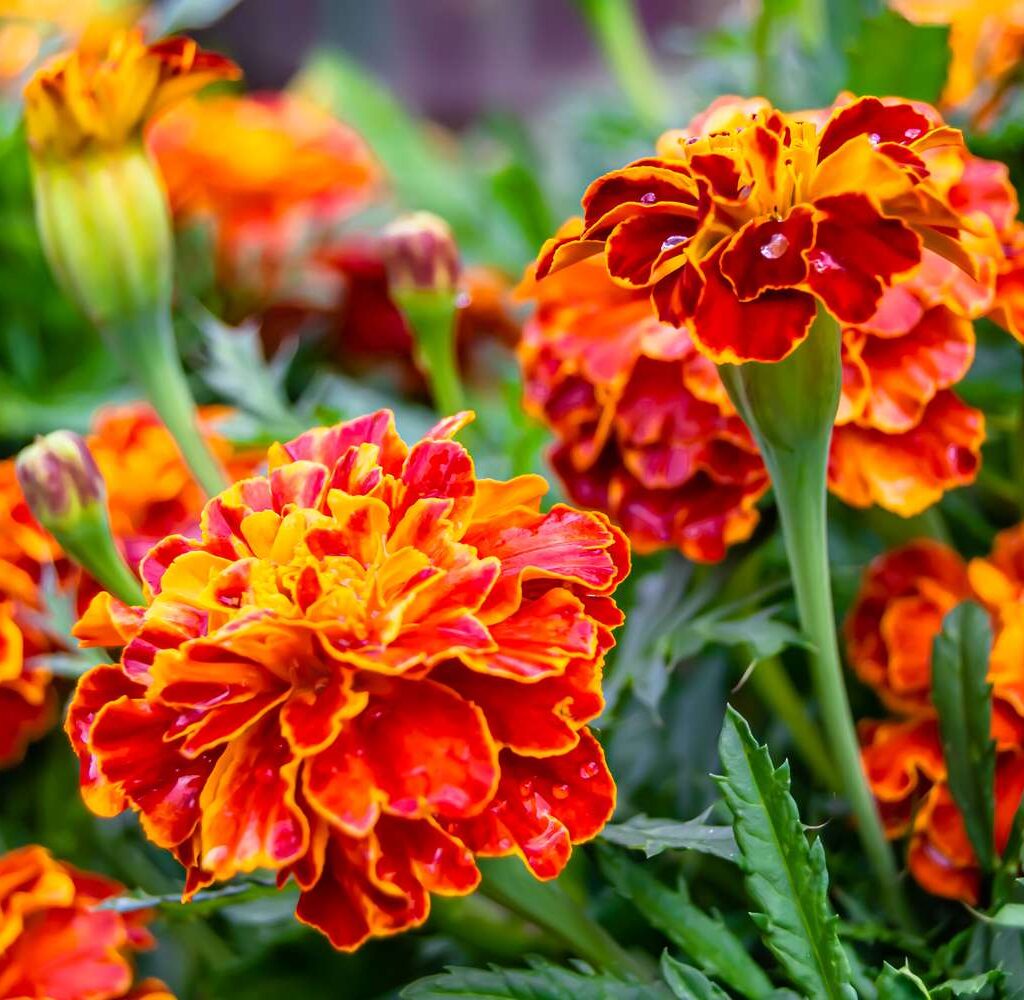
7. Marigolds (Tagetes spp.)

  • Growth Speed: Blooms within 8 weeks.
  • Why It’s Great: Pest-repelling flowers with bright colors.
  • Care Tips:
    • Full sun for best blooms.
    • Deadhead regularly.
    • Avoid overwatering to prevent root rot.

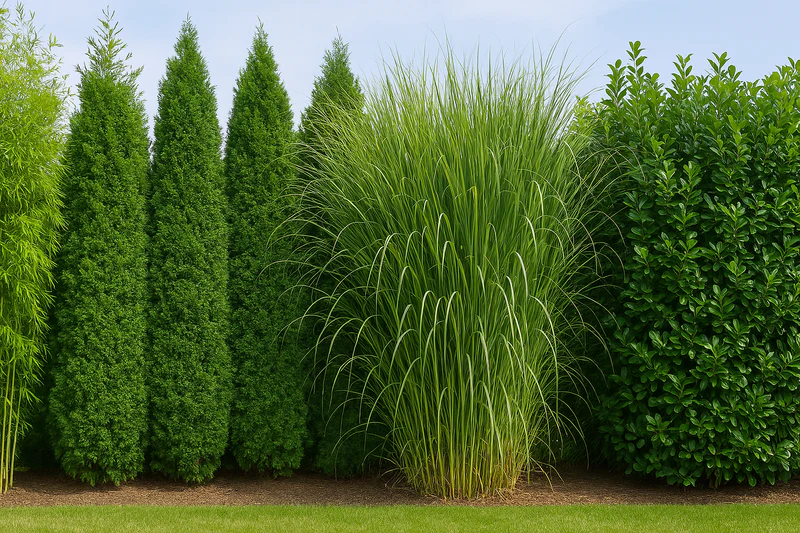
8. Bamboo (Bambusoideae)

  • Growth Speed: Some species grow up to 3 feet per day.
  • Why It’s Great: Ideal for privacy screens and exotic landscapes.
  • Care Tips:
    • Choose clumping varieties to avoid invasiveness.
    • Water deeply but infrequently.
    • Plant in full to partial sun.

9. Lettuce (Lactuca sativa)

  • Growth Speed: Harvest baby leaves in 3 weeks; full heads in 6–8 weeks.
  • Why It’s Great: Continuous harvest potential.
  • Care Tips:
    • Prefers cool weather.
    • Keep soil moist but not soggy.
    • Succession plant for a steady supply.

10. Morning Glory (Ipomoea purpurea)

  • Growth Speed: Vines grow several feet per week in summer.
  • Why It’s Great: Beautiful climbing plant for trellises and fences.
  • Care Tips:
    • Plant in full sun.
    • Train vines early for controlled growth.
    • Moderate watering.

Designing Your Garden with Fast-Growing Plants

To make the most of rapid growers:

  1. Layer Heights: Use tall plants like sunflowers at the back, medium-height plants like marigolds in the middle, and low plants like alyssum at the front.
  2. Mix Functions: Combine flowering plants for beauty with edible plants for utility.
  3. Rotate Crops: Prevent soil depletion and pest buildup by changing plant locations each season.
  4. Plan for Continuous Bloom/Harvest: Stagger planting times for year-round interest.

Care Essentials for Fast-Growing Plants

Even though these plants grow quickly, they still require proper care:

  • Watering: Most need consistent moisture but dislike soggy soil. Use mulch to retain moisture.
  • Fertilization: Use a balanced, slow-release fertilizer for steady nutrient supply.
  • Pruning/Deadheading: Encourages more blooms and healthier growth.
  • Pest Control: Check leaves regularly for pests; fast growth can sometimes attract insects.
  • Sunlight: Ensure plants get enough light — insufficient light slows growth.

Common Mistakes to Avoid

  • Overcrowding: Leads to competition for resources and slower growth.
  • Over-Fertilizing: Can cause excessive leafy growth but fewer flowers/fruits.
  • Neglecting Soil Health: Poor soil will slow even the fastest growers.
  • Ignoring Light Needs: Shade-loving and sun-loving plants must be placed accordingly.

Conclusion

Fast-growing plants are the quickest way to turn an empty garden into a lush, productive space. From sunflowers that tower in weeks to radishes ready in less than a month, the possibilities are endless.

By combining different plant types, maintaining healthy soil, and providing the right amount of water and sunlight, you can create a thriving, ever-changing garden that looks mature and vibrant in record time. The key is to choose plants suited to your climate and style, then give them the care they need to flourish.

With thoughtful planning and attention, your garden can become a living showcase of color, fragrance, and productivity — all without the long wait.

Indoor Plant Stand Ideas for Stylish Corners

Indoor Plant Stand Ideas for Stylish Corners

Indoor plants are more than just greenery — they’re living décor that brings life, texture, and freshness into a space. But while most plant lovers know how to choose the right species, many overlook how to display them. A plant stand can transform an ordinary corner into a striking, functional, and stylish focal point.

The right plant stand elevates not only the plant itself but also the overall mood of the room. Whether you’re aiming for a minimalist, rustic, industrial, or bohemian aesthetic, there’s a plant stand style to match.

This article will guide you through the importance of plant stands, creative corner placement ideas, and design inspirations so you can create a stylish plant-filled corner in your home.


Why Plant Stands Matter in Interior Design

Plant stands do more than just hold pots:

  1. Enhance Plant Visibility – Elevates plants to eye level for maximum visual impact.
  2. Protect Plants from Damage – Keeps them away from pets, children, or floor moisture.
  3. Improve Room Aesthetics – Adds height variation and balance in room décor.
  4. Optimize Space – Perfect for corners that otherwise remain unused.
  5. Help with Light Access – Allows plants to be placed closer to windows or light sources.

How to Choose the Right Plant Stand for a Corner

Before diving into ideas, it’s important to choose the right stand:

  • Height & Size – Taller stands work for low-light plants that need to be closer to a window, while shorter stands are better for larger pots.
  • Material – Wood for warmth, metal for a modern look, bamboo for eco-friendliness.
  • Shape – Round, square, tiered, or ladder-style to suit your space.
  • Color – Neutral tones blend in, bold colors make a statement.
  • Weight Capacity – Ensure the stand can support your plant pot’s weight.

Indoor Plant Stand Ideas for Stylish Corners

Here are practical and stylish corner plant stand ideas to suit every interior style:


1. Tiered Corner Plant Stands

  • Best for: Small apartments or plant collectors.
  • Design Concept: Multi-level stands that hold several plants at varying heights.
  • Why It Works: Adds dimension and makes the most of vertical space.
  • Style Tip: Mix trailing plants (like pothos) on top tiers with upright plants (like snake plants) below.

2. Ladder-Style Plant Stands

  • Best for: Modern or Scandinavian interiors.
  • Design Concept: Resembles a leaning ladder with shelves for plants.
  • Why It Works: Gives a casual yet organized look and fits snugly in corners.
  • Style Tip: Use matching white ceramic pots for a clean, uniform aesthetic.

3. Floating Corner Shelves

  • Best for: Minimalist spaces.
  • Design Concept: Mounted directly on walls to display small pots.
  • Why It Works: Saves floor space and keeps the corner airy.
  • Style Tip: Stagger the shelves for an asymmetrical, artsy vibe.

4. Wooden Crate Stands

  • Best for: Rustic or farmhouse interiors.
  • Design Concept: Stacked or arranged crates holding plant pots.
  • Why It Works: Inexpensive, customizable, and adds charm.
  • Style Tip: Stain or paint crates to match your interior palette.

5. Metal Geometric Stands

  • Best for: Industrial or contemporary homes.
  • Design Concept: Sleek, angular metal frames in black, gold, or chrome.
  • Why It Works: Adds structure and contrast to soft, organic plants.
  • Style Tip: Pair with bold-leaf plants like monstera or fiddle leaf figs.

6. Hanging Corner Plant Stands

  • Best for: Bohemian and artistic spaces.
  • Design Concept: Corner brackets or ceiling hooks for macramé plant hangers.
  • Why It Works: Uses ceiling space and keeps the floor uncluttered.
  • Style Tip: Combine with fairy lights for a cozy effect.

7. Rotating or Adjustable Plant Stands

  • Best for: Plant enthusiasts with varied light needs.
  • Design Concept: Stands with rotating tops or adjustable heights.
  • Why It Works: Makes it easy to turn plants for even growth.
  • Style Tip: Great for sun-loving plants like succulents or herbs.

8. Glass and Acrylic Stands

  • Best for: Modern luxury interiors.
  • Design Concept: Transparent stands that let plants be the star.
  • Why It Works: Creates a floating effect and blends with any décor.
  • Style Tip: Pair with minimalist white pots for a gallery-like display.

9. Rattan and Wicker Stands

  • Best for: Coastal or tropical styles.
  • Design Concept: Natural woven stands with earthy textures.
  • Why It Works: Brings warmth and an organic feel to the corner.
  • Style Tip: Use with lush ferns or palms for a jungle vibe.

10. DIY Cement Plant Stands

  • Best for: Industrial-chic or modern DIY lovers.
  • Design Concept: Hand-poured concrete bases with metal or wooden legs.
  • Why It Works: Durable, minimalist, and customizable.
  • Style Tip: Paint the legs gold or black for a trendy finish.

Arranging Plants for Maximum Style Impact

Even with the perfect stand, arrangement matters. Here’s how to style your plant stand for a corner that turns heads:

  1. Play with Heights – Mix tall, medium, and short plants for depth.
  2. Mix Textures – Pair smooth-leaf plants (like ZZ plants) with fuzzy-leaf ones (like African violets).
  3. Color Harmony – Use pots in shades that complement your room.
  4. Balance Symmetry and Asymmetry – While balance is pleasing, slight asymmetry feels more natural.
  5. Layering with Decor – Add books, candles, or small sculptures alongside plants.

Lighting Considerations for Corner Plants

Corners often have less natural light. Here’s how to ensure your plants thrive:

  • Bright Corners: Great for succulents, fiddle leaf figs, and bird of paradise.
  • Low-Light Corners: Ideal for snake plants, pothos, and peace lilies.
  • No Natural Light: Use LED grow lights mounted above or around your stand.

Caring for Plants in Stands

  • Rotate Plants: Every week for even growth.
  • Water Carefully: Avoid dripping water onto floors or furniture; use saucers.
  • Dust Leaves: Corners can collect dust, reducing photosynthesis.
  • Check Stability: Especially for tall stands in homes with pets or kids.

Environmental Benefits of Using Indoor Plant Stands

Beyond aesthetics, plant stands have practical and eco-friendly benefits:

  • Prevents Root Rot – Elevating plants improves airflow and drainage.
  • Extends Plant Lifespan – Keeps plants away from floor-level cold drafts.
  • Reduces Pest Infestation – Less contact with floor pests.
  • Encourages Indoor Greening – Making plants more visible promotes plant care.

Conclusion

Indoor plant stands are not just accessories — they are design tools that can transform empty, forgotten corners into lush, stylish, and functional spaces. Whether you choose a tiered bamboo stand for your kitchen herbs, a sleek metal frame for your living room monstera, or a hanging rattan basket for a boho reading nook, the right stand can make your plants shine.

When planning your corner plant display, balance beauty with practicality. Consider plant needs, available light, and room style, then choose a stand that complements them. In the end, your stylish plant corner will be more than just décor — it will be a living, breathing piece of art.

How to Grow Mint in Water at Home — Easy Steps

How to Grow Mint in Water at Home — Easy Steps

Mint is one of the most refreshing and versatile herbs you can grow. Known for its cool aroma, medicinal value, and culinary uses, mint (Mentha spp.) is a favorite among gardeners and home cooks alike. The best part? You don’t need a sprawling garden or expensive equipment to grow it. You can grow mint in water right at home — no soil, no mess, just healthy green leaves thriving in a glass jar.

This method is not only space-saving but also beginner-friendly, making it ideal for apartment dwellers, busy individuals, or anyone who loves fresh herbs without the hassle of traditional gardening.

In this guide, we’ll explore the step-by-step process, the science behind water-grown mint, tips for keeping it healthy, and some creative uses for your homegrown herb.


Why Grow Mint in Water?

Growing mint in water — also called hydroponic propagation — offers several benefits:

  1. No Soil Mess – Perfect for kitchens and indoor spaces.
  2. Cost-Effective – No need for pots, soil, or fertilizers (in most cases).
  3. Faster Root Growth – Mint roots develop quickly in water.
  4. Space-Saving – All you need is a jar or glass.
  5. Pest-Free – Fewer soil-borne pests and diseases.
  6. Decorative – A jar of fresh mint doubles as a green centerpiece.

Choosing the Right Mint Variety

Mint has many varieties, each with its own aroma and flavor profile. The most common ones for home water-growing include:

  • Spearmint (Mentha spicata) – Sweet, mild flavor; great for drinks and salads.
  • Peppermint (Mentha × piperita) – Strong, cooling flavor; ideal for teas and desserts.
  • Apple Mint (Mentha suaveolens) – Fruity aroma; perfect for garnishing.
  • Chocolate Mint – Subtle cocoa scent; great for desserts.

For water propagation, spearmint and peppermint are the most popular due to their rapid growth and versatility.


Step-by-Step Guide to Growing Mint in Water

Step 1: Select Healthy Mint Cuttings

  • Start with fresh, healthy stems about 4–6 inches long.
  • Choose a plant that is pest-free and has vibrant green leaves.
  • You can cut stems from your own mint plant or buy a bunch from the market.

Tip: If buying from the store, choose organic mint to avoid stems treated with growth inhibitors.


Step 2: Prepare the Stems

  • Remove the leaves from the bottom 2 inches of the stem.
  • This prevents rotting when submerged in water.
  • Leave several sets of leaves at the top for photosynthesis.

Step 3: Choose the Right Container

  • Use a clear glass jar, cup, or vase.
  • A transparent container allows you to monitor root growth.
  • Wash the container thoroughly to prevent bacterial growth.

Step 4: Add Clean Water

  • Fill the jar with room-temperature, filtered water.
  • Avoid chlorinated tap water, as chlorine can damage delicate roots. If tap water is your only option, let it sit uncovered for 24 hours to allow chlorine to evaporate.

Step 5: Place the Cuttings in Water

  • Position the stems so the cut ends are submerged but leaves are above water.
  • Ensure no leaves touch the water to prevent decay.

Step 6: Provide Proper Light

  • Place the jar near a bright, indirect sunlight source, such as a windowsill.
  • Avoid direct harsh sunlight, which can overheat the water and damage the stems.
  • If natural light is insufficient, use an LED grow light for 6–8 hours daily.

Step 7: Change the Water Regularly

  • Change the water every 2–3 days to keep it oxygen-rich and algae-free.
  • Each time you change the water, rinse the stems and container to prevent bacterial buildup.

Step 8: Watch for Root Growth

  • Roots usually appear in 7–14 days.
  • Once the roots are 2 inches or longer, your mint plant is ready for long-term water growing or transferring to soil (optional).

Long-Term Care for Mint in Water

Mint can grow indefinitely in water if cared for properly. Here’s how to keep it healthy:

Feeding

  • After 3–4 weeks, add a few drops of liquid hydroponic fertilizer or diluted all-purpose plant food every 2–3 weeks to provide nutrients.
  • Without fertilizer, leaves may become pale over time due to nutrient depletion.

Pruning

  • Regularly trim the stems to encourage bushier growth.
  • Use the trimmings for cooking or making tea.

Water Quality

  • If water turns cloudy, change it immediately.
  • Use filtered or dechlorinated water for best results.

Common Problems and Solutions

  1. Yellowing Leaves – Often due to nutrient deficiency; add fertilizer.
  2. Slime on Stems – Caused by bacteria; clean stems and change water more frequently.
  3. Algae Growth in Jar – Keep container away from direct sunlight or use an opaque vase.

Science Behind Growing Mint in Water

Mint adapts well to water because it’s a fast-growing perennial herb with flexible root systems. In water, stems produce adventitious roots — roots that grow from non-root tissues, like stems and nodes.

Water provides a constant moisture supply, preventing the stress that sometimes occurs in soil when it dries out. However, because water lacks natural nutrients found in soil, supplementation is necessary for long-term survival.


Creative Ways to Display Water-Grown Mint

  • Mason Jar Herb Garden – Grow multiple jars of herbs for a rustic kitchen look.
  • Hanging Glass Globes – Suspend jars in front of windows for a green curtain effect.
  • Colored Glass Bottles – Use tinted bottles for a decorative and functional touch.
  • Herb Centerpiece – A jar of mint on the dining table is both attractive and functional.

Using Your Fresh Mint

Once your mint is growing strong, the possibilities are endless:

  • Beverages – Add fresh mint leaves to teas, mojitos, lemonades, or infused water.
  • Cooking – Use in salads, chutneys, sauces, and desserts.
  • Medicinal Uses – Brew into tea for digestive relief or cold symptoms.
  • Aromatherapy – Crush leaves for a refreshing, uplifting scent.
  • Natural Air Freshener – Place jars around the house for a cool, clean aroma.

Environmental Benefits of Growing Mint in Water

  • Reduces Food Waste – Instead of discarding leftover mint from the market, you can regrow it.
  • No Soil Erosion – Eliminates soil use, which is beneficial in areas with poor-quality soil.
  • Water Efficiency – Small jars require minimal water compared to traditional gardening.

Conclusion

Growing mint in water at home is a simple, rewarding, and space-efficient way to enjoy fresh herbs year-round. Whether you’re a beginner or an experienced gardener, this method combines practicality with beauty, turning your kitchen into a mini indoor garden.

By following the easy steps — selecting healthy cuttings, providing clean water, ensuring proper light, and changing the water regularly — you’ll have a thriving mint plant that’s ready to enhance your recipes, freshen your home, and brighten your space.

With just a jar, some water, and a little patience, you can transform a humble mint cutting into a lush, aromatic herb supply.

Mint truly proves that great things can grow from the simplest beginnings — even a glass of water.

Which Country Is the Largest Chrysanthemum Producer?

Which Country Is the Largest Chrysanthemum Producer?

Chrysanthemums—often called mums—are among the most beloved ornamental flowers in the world. From dazzling floral arrangements to traditional herbal teas, these blooms are more than just pretty faces; they are cultural icons, economic assets, and symbols of celebration.

But behind their global popularity lies a fascinating question: which country produces the most chrysanthemums? The answer leads us to the heart of Asia, where flower fields stretch for miles, and chrysanthemums are not just plants—they’re part of history.


Global Overview of Chrysanthemum Production

The chrysanthemum is cultivated worldwide, but production is heavily concentrated in a handful of countries. According to global floriculture data, total chrysanthemum production exceeds 3 million tonnes annually, and China alone accounts for more than 80% of that volume.

Asia dominates both in terms of cultivation area and production volume, while countries like the Netherlands and Colombia stand out in the global cut-flower trade, supplying millions of stems to markets in Europe, North America, and beyond.


China: The Undisputed Leader

Scale of Production

China is by far the world’s largest chrysanthemum producer. With over four-fifths of the global output, the country grows chrysanthemums on a massive scale—both for domestic use and export. The major growing regions include:

  • Yunnan Province – Known for its ideal climate and vast flower farms.
  • Zhejiang Province – Famous for traditional medicinal chrysanthemums.
  • Shanghai, Guangdong, and Beijing – Important hubs for cut-flower production.

In many Chinese markets, chrysanthemums are available year-round, but production peaks in autumn when they naturally bloom.


Cultural and Historical Significance

Chrysanthemums have been cultivated in China for over 1,500 years. They hold deep symbolic meaning—associated with longevity, nobility, and purity. They are celebrated during the Double Ninth Festival, where people drink chrysanthemum wine and admire the flowers.

China’s chrysanthemum heritage isn’t just ornamental; certain varieties are dried and brewed into a floral tea believed to have cooling and detoxifying effects.


Economic Impact

The chrysanthemum industry in China supports thousands of farmers, wholesalers, and exporters. While much of the production serves domestic demand—particularly for religious offerings, decorations, and tea—China also exports large volumes of cut flowers to neighboring Asian markets and beyond.


Other Major Producers

While China dominates production, several other countries play important roles in the global chrysanthemum scene.


India

India has the largest area under chrysanthemum cultivation in the world, with over 20,000 hectares devoted to the crop. Chrysanthemums are especially popular in Karnataka, Tamil Nadu, and Maharashtra.

Most of India’s production is consumed domestically for festivals, weddings, and garland-making. Unlike China, India’s export of chrysanthemums is relatively small, but its internal demand keeps production high.


Colombia

Colombia is the largest exporter of chrysanthemums to North America, producing over 1.4 billion stems annually. The country’s year-round favorable climate and proximity to the U.S. give it a competitive edge in the export market. Colombian chrysanthemums are prized for their quality and long vase life.


Netherlands

The Netherlands is the floriculture capital of Europe, producing over 1.2 billion stems annually. Dutch growers lead in innovation, greenhouse technology, and breeding of new chrysanthemum varieties. Through the famous Aalsmeer Flower Auction, the Netherlands supplies chrysanthemums to almost every European country.


Malaysia & Vietnam

Both countries are strong regional players, producing hundreds of millions of stems annually. Malaysia exports mainly to Japan and Australia, while Vietnam supplies domestic markets and neighboring Southeast Asian countries.


Italy

Italy focuses largely on supplying the European market, with chrysanthemums being especially popular during All Saints’ Day when the flowers are used to honor the dead.


Production Data Snapshot

CountryAnnual Output (Approx.)Key Strength
China2.5+ million tonnesLargest volume producer, rich tradition
India189,000 tonnes (loose flowers)Largest area under cultivation
Colombia1.4 billion stemsMajor U.S. market supplier
Netherlands1.2 billion stemsEuropean export hub
Malaysia400 million stemsAsian regional trade
Vietnam300 million stemsGrowing regional supplier
Italy200 million stemsEuropean market focus

Why China Leads the World

Several factors explain why China is the largest chrysanthemum producer:

  1. Historical Cultivation – Centuries of cultivation have made chrysanthemum farming a deep-rooted tradition.
  2. Climate Diversity – Multiple provinces offer ideal growing conditions year-round.
  3. Domestic Demand – Festivals, traditional medicine, and decorative use create massive internal consumption.
  4. Government Support – Agricultural policies encourage floriculture as a profitable farming sector.
  5. Export Capacity – While not as export-dominant as Colombia or the Netherlands, China’s scale still makes it a significant global supplier.

Production vs. Export Leadership

It’s important to distinguish between largest producer and largest exporter:

  • Largest Producer – China (by tonnage and cultivated area).
  • Largest Exporters – Colombia (to the Americas) and the Netherlands (to Europe and beyond).

This difference exists because many large producers focus primarily on satisfying domestic demand, while others specialize in international trade.


Trends in the Chrysanthemum Industry

  • Innovation in Breeding – The Netherlands leads in developing new colors and longer-lasting blooms.
  • Rising Demand in Asia – Economic growth in Southeast Asia is increasing the demand for ornamental flowers.
  • Sustainable Production – Growers are adopting eco-friendly farming practices to meet consumer preferences.
  • Market Seasonality – Global demand spikes around specific festivals and memorial days, influencing production schedules.

Conclusion

If the question is “Which country is the largest chrysanthemum producer?”, the answer is crystal clear: China. With over 80% of global output, unmatched cultivation area, and centuries of expertise, China’s dominance in chrysanthemum production is both historical and contemporary.

However, the global chrysanthemum industry is not just about sheer volume. Export leaders like Colombia and the Netherlands demonstrate that smaller producers can still wield enormous influence through quality, innovation, and strategic market access.

In essence, the chrysanthemum’s journey from field to vase is a story of both tradition and technology, and while China holds the production crown, the global stage is shared by many talented growers worldwide.

Which Country is the Largest Persimmon Exporter?

Which Country is the Largest Persimmon Exporter?

Persimmons—those bright, amber-orange fruits with a honeyed sweetness—have been part of human diets for centuries. Native to China but cultivated in many corners of the globe, this autumn fruit has found its way into salads, desserts, dried snacks, and even savory dishes. But when it comes to international trade, one nation reigns supreme in supplying persimmons to the world market.

This article dives deep into which country is the largest persimmon exporter, why it dominates, how the global trade landscape looks, and what trends could shape the future.


1. The Global Persimmon Landscape

Persimmons grow best in temperate and subtropical climates with warm summers and mild winters. The two main types are:

  • Astringent varieties (like Hachiya), which must be fully ripe to be eaten.
  • Non-astringent varieties (like Fuyu and Spain’s famous Rojo Brillante), which can be eaten while still firm.

The global persimmon market has grown steadily over the past two decades, with increased consumer awareness about its health benefits—rich in vitamin A, antioxidants, and fiber—driving demand. According to recent UN Comtrade and FAO data, Asia produces most of the persimmons, but Europe leads in export value.


2. Spain: The Undisputed Leader

When discussing persimmon exports, one name comes up again and again: Spain.

Export Statistics

  • In 2023, Spain exported persimmons worth about USD 243 million, accounting for roughly 43% of the global persimmon export value.
  • In terms of volume, Spain shipped over 210,000 metric tons in peak seasons, with most exports going to other European Union countries.

Why Spain Dominates

a. Perfect Growing Conditions
The Spanish region of Valencia, particularly the Ribera del Xúquer area, has an ideal Mediterranean climate for persimmons—plenty of sun, mild winters, and fertile soil.

b. The Rojo Brillante Advantage
Spain’s flagship variety, Rojo Brillante, is seedless, large, brightly colored, and has a sweet flavor that appeals to European palates. It also travels well, an essential trait for international shipping.

c. Advanced Post-Harvest Technology
Spain pioneered CO₂ de-astringency treatments, allowing persimmons to be harvested while firm yet sweet and ready for immediate consumption.

d. Protected Designation of Origin (PDO)
The D.O. Ribera del Xúquer label assures consumers of authenticity, origin, and quality—boosting Spain’s brand power in the EU market.

e. Logistics and Market Access
As an EU member, Spain enjoys tariff-free trade within the bloc and short transport distances to key markets such as Germany, Italy, France, and the UK.


3. Top Destinations for Spanish Persimmons

  • Germany – Largest importer; accounts for about 28% of Spanish exports.
  • Italy – Around 12% of exports; high demand during autumn and winter.
  • France – Similar market share to Italy; driven by gourmet and retail demand.
  • Other EU Countries – Belgium, the Netherlands, and Eastern Europe are growing markets.

4. Other Major Exporters

While Spain leads, several other countries contribute significantly to the global persimmon trade.

Azerbaijan

  • 2nd in global export value (~USD 127 million in 2023).
  • Strong trade links with Russia, Ukraine, and other CIS markets.
  • Focuses mostly on astringent varieties, often sold ripe.

China

  • World’s largest producer (over 70% of global output).
  • Export value ~USD 91.6 million in 2023.
  • Exports mainly to East Asia, Southeast Asia, and Russia, but keeps most of its production for domestic consumption.

Uzbekistan

  • Export value around USD 8–9 million but rising rapidly.
  • Supplied over 84,000 tons in the 2022–2023 season.
  • Targets nearby markets like Kazakhstan, Kyrgyzstan, and Turkmenistan.

Others

Italy, Israel, Poland, and South Korea also appear in export statistics, but each contributes a small share compared to Spain.


5. Market Trends and Trade Dynamics

a. Concentration of Exports

The top 5 exporters—Spain, Azerbaijan, China, Uzbekistan, and Italy—account for over 80% of global persimmon export value.

b. Growing European Demand

Europe’s appetite for exotic fruits continues to grow, and persimmons fit the trend for nutrient-rich, low-fat snacks.

c. Rising Non-EU Players

Central Asian exporters like Uzbekistan are scaling up production thanks to improved cold-chain logistics and investments in orchard modernization.

d. Variety Innovation

Countries are experimenting with crossbreeding to produce varieties with better shelf life, less astringency, and resistance to pests.


6. Why Spain Will Likely Keep Its Crown

Despite competition, Spain’s combination of quality, branding, and infrastructure gives it a significant advantage:

  • Reliability – Stable annual yields and professional export standards.
  • Brand Reputation – PDO certifications boost consumer trust.
  • EU Market Integration – No trade barriers within its largest customer base.

Even if countries like China or Azerbaijan grow exports, Spain’s grip on the European market remains solid.


7. Future Outlook

With rising health awareness, global demand for persimmons is expected to grow at around 3–4% annually over the next decade. New markets in North America, the Middle East, and Southeast Asia may emerge as targets for Spanish exporters.

Sustainability may also shape trade patterns. Spanish growers are increasingly adopting:

  • Drip irrigation to save water.
  • Integrated pest management to reduce chemical use.
  • Eco-friendly packaging to meet EU environmental regulations.

8. Summary Table – Top Persimmon Exporters by Value (2023)

RankCountryExport Value (USD M)Share of Global Value
1Spain24343%
2Azerbaijan12722.5%
3China91.616.2%
4Uzbekistan8.81.6%
5Italy~7~1%

9. Conclusion

The answer to the question “Which country is the largest persimmon exporter?” is clear: Spain—and by a comfortable margin. Its strategic advantages in climate, variety quality, post-harvest technology, branding, and market access have secured its dominance.

While Azerbaijan, China, and Uzbekistan are notable contenders, none yet combine scale, quality, and logistics as effectively as Spain. As the world’s taste for persimmons grows, Spain’s golden-orange fruits will likely continue to fill supermarket shelves from Berlin to Brussels and beyond.

Beautiful Container Planting Ideas for Every Season

Beautiful Container Planting Ideas for Every Season

Container gardening is a versatile and rewarding way to enjoy greenery, flowers, and even edible plants, no matter the size of your space. Whether you have a small balcony, a patio, or just a windowsill, container planting allows you to add color, texture, and charm to your surroundings all year round. Unlike traditional garden beds, containers give you the flexibility to rearrange, mix plants, and create seasonal displays that reflect your personal style.

This guide will explore beautiful container planting ideas for every season, including plant choices, design tips, and care techniques to keep your containers vibrant and healthy throughout the year.


1. Why Container Gardening Works All Year

Container planting is ideal for seasonal gardening because it allows you to:

  • Rotate plants seasonally: Easily swap summer flowers for fall foliage or spring bulbs.
  • Control soil and moisture: Customize soil type for each plant, improving growth.
  • Create focal points: Use containers to enhance patios, doorways, or indoor corners.
  • Protect plants from harsh weather: Move containers indoors during frost or extreme heat.

By choosing plants suited to each season, you can ensure that your container garden is always lively, colorful, and thriving.


2. Spring Container Planting Ideas

Spring is all about rejuvenation and fresh blooms. Containers can showcase early flowering plants, adding vibrancy and fragrance to your space.

A. Tulips and Daffodils

  • Benefits: Bright, cheerful colors that bloom early in the season.
  • Care Tips: Use well-draining soil; plant bulbs in clusters for impact; water moderately.

B. Hyacinths

  • Benefits: Highly fragrant flowers that attract pollinators.
  • Care Tips: Place in full sun or partial shade; keep soil moist but not soggy.

C. Pansies and Violas

  • Benefits: Hardy annuals that tolerate cool weather; available in vibrant colors.
  • Care Tips: Deadhead spent flowers to prolong blooming; fertilize every 2–3 weeks.

Design Tip: Combine bulbs and pansies in large containers with decorative stones or moss for a layered, textured look.


3. Summer Container Planting Ideas

Summer is a time for bold, vibrant colors and lush greenery. Heat-tolerant plants thrive in containers during this season.

A. Petunias

  • Benefits: Bright, cascading flowers that add a cheerful look to containers.
  • Care Tips: Provide full sun and water regularly; use well-draining soil.

B. Geraniums

  • Benefits: Long-lasting blooms that are resistant to heat.
  • Care Tips: Fertilize every 3–4 weeks; remove faded flowers to encourage new blooms.

C. Herbs for Functionality

  • Examples: Basil, rosemary, thyme, and mint.
  • Benefits: Adds greenery and fragrance while offering fresh ingredients for cooking.
  • Care Tips: Ensure containers have drainage; place in full sun; harvest regularly to encourage new growth.

Design Tip: Mix colorful flowers with aromatic herbs for a functional and aesthetic summer display. Consider cascading plants over the edges to soften container lines.


4. Fall Container Planting Ideas

Fall is a season of rich colors, textures, and harvest themes. Containers can reflect autumn’s warm palette with a mix of flowering plants and foliage.

A. Chrysanthemums

  • Benefits: Vibrant flowers in red, yellow, orange, and purple; perfect for autumn.
  • Care Tips: Plant in fertile, well-draining soil; water regularly; provide full sun.

B. Ornamental Kale and Cabbage

  • Benefits: Unique textures and colors that intensify in cool weather.
  • Care Tips: Keep soil moist; avoid frost by moving containers indoors if necessary.

C. Heuchera (Coral Bells)

  • Benefits: Beautiful foliage in shades of red, orange, and bronze.
  • Care Tips: Partial shade; water consistently; trim old leaves to maintain appearance.

Design Tip: Combine chrysanthemums with ornamental cabbage and heuchera for a vibrant, layered autumn container. Add pumpkins or gourds for seasonal decoration.


5. Winter Container Planting Ideas

Winter container planting can be challenging, but hardy plants and evergreens can create a striking display even in cold months.

A. Pansies and Violas

  • Benefits: Cold-tolerant and colorful, even in frosty weather.
  • Care Tips: Plant in nutrient-rich soil; water carefully to avoid freezing.

B. Evergreen Shrubs

  • Examples: Boxwood, dwarf conifers, holly.
  • Benefits: Provides structure and greenery year-round.
  • Care Tips: Use frost-resistant containers; protect roots from extreme cold.

C. Ornamental Grasses

  • Benefits: Adds texture and movement; remains attractive when dormant.
  • Care Tips: Plant in well-draining soil; trim old stems in early spring.

Design Tip: Combine evergreens with winter pansies and ornamental grasses. Use decorative pots or containers in metallic or dark hues to reflect winter tones.


6. Choosing the Right Containers

The container itself is as important as the plants. Consider these factors:

  • Size: Ensure containers are large enough to accommodate root growth.
  • Material: Terracotta, ceramic, plastic, and wood all have pros and cons. Terracotta is porous and allows air circulation; plastic retains moisture longer.
  • Drainage: Always use containers with drainage holes to prevent root rot.
  • Mobility: For seasonal changes, lightweight or wheeled containers are ideal.

Tip: Group containers of different heights and shapes to create visual interest and layers in your garden or balcony.


7. Soil and Fertilization

Healthy soil is key to thriving container plants:

  • Potting Mix: Use high-quality, well-draining potting soil. Avoid garden soil, which can compact in containers.
  • Fertilizer: Feed container plants with slow-release fertilizers or liquid fertilizers appropriate for the plant type.
  • Mulch: Add a thin layer of organic mulch to retain moisture and regulate soil temperature.

8. Watering and Maintenance

Container plants require consistent care to flourish:

  • Watering: Containers dry out faster than garden beds. Check soil moisture daily during hot weather.
  • Deadheading and Pruning: Remove dead flowers and trim leggy stems to encourage bushier growth and prolonged flowering.
  • Pest Control: Monitor for aphids, spider mites, and other pests. Use natural remedies or mild insecticidal soaps when necessary.

9. Seasonal Container Combinations

Here’s a quick reference for designing containers with maximum seasonal impact:

SeasonFlowering PlantsFoliage / Accent PlantsExtras / Decor
SpringTulips, Daffodils, HyacinthsFerns, IvyDecorative stones, moss
SummerPetunias, GeraniumsBasil, RosemaryHanging baskets, trellises
FallChrysanthemums, AstersHeuchera, Ornamental KalePumpkins, gourds
WinterPansies, ViolasBoxwood, Dwarf ConifersPinecones, fairy lights

Using seasonal combinations ensures your containers remain fresh, interesting, and eye-catching throughout the year.


10. Conclusion

Beautiful container planting is an art and science that allows gardeners to enjoy color, texture, and greenery in every season. By selecting the right plants for each season, pairing them with complementary foliage, choosing suitable containers, and maintaining proper care, you can create a vibrant, year-round display.

Whether it’s spring tulips on your balcony, summer herbs and flowers for cooking and decor, autumn chrysanthemums paired with ornamental cabbage, or winter evergreens with pops of color, container gardening lets you transform small spaces into lush, inviting havens. With creativity, planning, and consistent care, your container gardens will delight the senses and enhance your outdoor or indoor spaces all year round.

How to Support and Trellis Your Dragon Fruit Plant for More Yield

How to Support and Trellis Your Dragon Fruit Plant for More Yield

Dragon fruit (Hylocereus spp.), also known as pitaya, is a striking tropical cactus known for its vibrant, pink-skinned fruit and unique climbing growth habit. Its succulent stems and stunning flowers make it a popular choice among gardeners and commercial growers alike. While dragon fruit is relatively easy to grow in warm climates, achieving maximum yield requires proper support and trellising. Without the right structure, the plant can flop over, become stressed, and produce fewer fruits.

This guide will walk you through everything you need to know to support and trellis your dragon fruit plant, from choosing the right support system to proper training techniques and care tips that promote healthy growth and abundant harvests.


1. Understanding the Growth Habit of Dragon Fruit

Dragon fruit is a climbing cactus, meaning it naturally grows upward, wrapping its stems around nearby structures for support. Its stems can reach up to 20 feet in length under optimal conditions. Because it is not self-supporting, a trellis or support system is essential for:

  • Keeping the plant upright.
  • Preventing stem breakage.
  • Allowing better air circulation and sunlight exposure.
  • Facilitating easier harvesting and pruning.

Understanding its growth habit helps you choose the right type of trellis and plan the layout for maximum efficiency.


2. Types of Support Structures for Dragon Fruit

There are several ways to support dragon fruit plants, each with advantages and limitations. Choosing the right structure depends on your space, budget, and aesthetic preferences.

A. Concrete or Wooden Pillars

  • Pros: Extremely sturdy, durable, and can last many years.
  • Cons: Higher initial cost; not movable.
  • Setup: Plant your dragon fruit at the base of a pillar and tie the stems loosely as they climb. Ideal for commercial setups.

B. Steel or Iron Posts

  • Pros: Strong, can be used to create multiple plant rows.
  • Cons: May require welding and maintenance to prevent rust.
  • Setup: Use posts with horizontal crossbars to create a “T” or “H” structure for the cactus to climb.

C. Wooden Trellises

  • Pros: Affordable, easy to assemble, visually appealing.
  • Cons: Wood may rot over time if not treated.
  • Setup: Build vertical frames or lattice structures and attach stems with soft ties.

D. Fence or Wall Support

  • Pros: Space-saving, perfect for small gardens.
  • Cons: Limited mobility; may require frequent pruning.
  • Setup: Plant the dragon fruit close to the wall and tie stems gently as they grow upward.

3. Preparing the Plant for Trellising

Before attaching your dragon fruit to a trellis, ensure your plant is healthy:

  1. Planting: Use well-draining soil and a slightly elevated mound to prevent waterlogging.
  2. Initial Growth: Allow the plant to establish for 6–12 months before heavy training or trellising.
  3. Pruning: Remove weak or damaged stems to focus energy on strong, productive branches.

Tip: Dragon fruit stems are sensitive; always handle them with care to avoid bruising, which can invite pests and diseases.


4. How to Train Dragon Fruit on a Trellis

Proper training ensures stems grow in the desired direction, maximizing light exposure and air circulation.

Step 1: Select Main Stems

Identify the healthiest 2–3 main stems to become the primary supports. These will form the backbone of your trellis system.

Step 2: Attach to the Support

  • Use soft ties, cloth strips, or garden twine to secure stems to the trellis.
  • Avoid tight binding; stems need space to expand.
  • Position the stem so it grows upward and spreads evenly on the trellis.

Step 3: Encourage Lateral Growth

  • Allow secondary stems to grow outward horizontally.
  • This maximizes flowering sites and fruit production.
  • Use additional soft ties or clips to train lateral branches along the horizontal crossbars.

Step 4: Maintain Airflow

  • Space stems to avoid overcrowding.
  • Good airflow reduces the risk of fungal infections and encourages strong growth.

5. Pruning for Higher Yield

Pruning is essential to increase fruit production and maintain plant health:

  • Remove weak or damaged stems: Directs energy toward stronger branches.
  • Thin out crowded areas: Prevents disease and allows sunlight to reach all stems.
  • Cut old stems after fruiting: Encourages new growth, which is more productive.

Tip: Prune after flowering and fruiting cycles to maintain a continuous production cycle.


6. Supporting Heavy Fruits

Dragon fruit flowers are large and produce heavy fruits. Proper support prevents stem breakage:

  • Tie fruiting stems gently to the trellis.
  • Use netting or slings for very heavy fruits.
  • Avoid letting fruits touch the ground, which can cause rot or pest damage.

This not only protects the plant but also improves fruit quality and appearance.


7. Watering and Fertilizing While Trellising

Proper nutrition is crucial for supported dragon fruit plants:

  • Watering: Deep watering every 2–3 days during the growing season. Ensure soil drains well to prevent root rot.
  • Fertilizing: Use balanced fertilizers (NPK 10:10:10) or compost every 2–3 months. Reduce nitrogen during flowering to promote fruit set.
  • Mulching: Apply organic mulch around the base to retain moisture and suppress weeds.

Tip: Avoid wetting stems excessively to reduce the risk of fungal diseases on the trellis.


8. Pest and Disease Management

Trellising can actually reduce disease by improving airflow, but vigilance is still required:

  • Common pests: Mealybugs, aphids, and ants.
  • Common diseases: Stem rot and fungal infections.
  • Control measures: Inspect plants regularly, prune infected stems, and use organic insecticides if necessary.

9. Maximizing Fruit Production

A properly trellised dragon fruit plant can produce 2–3 times more fruit than an unsupported one. Key practices include:

  • Multiple main stems: Train 2–3 stems for maximum flowering potential.
  • Regular pruning: Stimulates new growth and flowering.
  • Balanced fertilization: Provides nutrients for both vegetative growth and fruit development.
  • Proper sunlight: Ensure all stems receive at least 6 hours of sunlight daily.

10. Advantages of Proper Trellising

  1. Structural Support: Prevents flopping and breakage.
  2. Ease of Harvesting: Fruits are easier to reach.
  3. Disease Prevention: Improved airflow reduces fungal growth.
  4. Higher Yield: More stems and better-trained branches increase flowering and fruiting.
  5. Aesthetic Appeal: A trellised dragon fruit is visually striking and adds beauty to gardens and patios.

11. Conclusion

Supporting and trellising your dragon fruit plant is essential for achieving healthy growth, abundant flowers, and maximum fruit yield. By selecting the right support system, training your stems carefully, pruning strategically, and maintaining proper care, you can transform your dragon fruit into a productive and visually stunning centerpiece of your garden.

A well-tended trellised dragon fruit not only produces more fruit but also requires less maintenance in the long run. With patience and consistent care, your dragon fruit plant can thrive for many years, providing both nutritious fruits and ornamental beauty.

The Best Fast-Growing Plants to Protect Your Garden Naturally

The Best Fast-Growing Plants to Protect Your Garden Naturally

Gardening is a rewarding hobby, but keeping your plants safe from pests, harsh weather, and soil erosion can be challenging. One of the most effective and eco-friendly solutions is to use fast-growing plants as natural protectors. These plants not only create a living barrier, provide shade, and improve soil health, but they can also repel harmful insects and animals without the use of chemicals.

This guide will explore the best fast-growing plants to protect your garden naturally, including their benefits, care tips, and how to strategically plant them for maximum impact.


1. Why Use Fast-Growing Plants for Garden Protection?

Fast-growing plants are more than just fillers; they play multiple roles in keeping your garden healthy:

  • Soil Stabilization: Plants like grasses or legumes prevent erosion by holding soil with their roots.
  • Wind and Sun Protection: Tall, dense plants shield delicate crops from strong winds and harsh sunlight.
  • Pest Deterrence: Certain aromatic herbs and flowers repel insects naturally.
  • Privacy and Safety: Fast-growing shrubs and hedges provide a living fence to keep animals out and add security.
  • Biodiversity: These plants attract pollinators and beneficial insects, creating a balanced garden ecosystem.

Using fast-growing plants strategically creates a natural defense system, reducing the need for chemical fertilizers or pesticides.


2. Top Fast-Growing Plants to Protect Your Garden

1. Sunflower (Helianthus annuus)

Benefits:
Sunflowers grow rapidly, often reaching 6–10 feet in a single season. Their tall stalks create a natural windbreak and provide shade for smaller, delicate plants beneath. Sunflowers also attract pollinators and beneficial insects, which improve overall garden health.

Care Tips:

  • Soil: Well-drained, nutrient-rich soil.
  • Watering: Regular watering during dry periods.
  • Sunlight: Full sun exposure is essential.

2. Marigold (Tagetes spp.)

Benefits:
Marigolds are not only colorful additions to your garden but also excellent natural pest deterrents. Their strong scent repels nematodes, aphids, and whiteflies. Planting marigolds around vegetables can help keep pests away naturally.

Care Tips:

  • Soil: Well-drained soil, moderately fertile.
  • Watering: Water regularly but avoid waterlogging.
  • Sunlight: Full sun to partial shade.

3. Bamboo

Benefits:
Bamboo is one of the fastest-growing plants in the world, making it perfect for creating privacy screens and windbreaks quickly. Its dense foliage also deters animals from entering the garden.

Care Tips:

  • Soil: Moist, well-draining soil.
  • Watering: Keep soil consistently moist.
  • Sunlight: Partial to full sun.

Tip: Choose clumping bamboo over running bamboo to prevent uncontrolled spread.


4. Nasturtium (Tropaeolum majus)

Benefits:
Nasturtiums are fast-growing annuals that act as a trap crop for aphids, attracting pests away from valuable vegetables. They also provide ground cover, preventing soil erosion and moisture loss.

Care Tips:

  • Soil: Poor to average soil is sufficient.
  • Watering: Water moderately, allowing soil to dry slightly between watering.
  • Sunlight: Full sun for best growth.

5. Clover (Trifolium spp.)

Benefits:
Clover grows quickly and improves soil fertility by fixing nitrogen naturally. It also provides a soft ground cover, protecting the soil from erosion and suppressing weeds. Certain clover varieties attract pollinators, boosting overall garden productivity.

Care Tips:

  • Soil: Adaptable to most soil types.
  • Watering: Water during dry spells.
  • Sunlight: Full sun to partial shade.

6. Lemon Balm (Melissa officinalis)

Benefits:
Lemon balm grows fast and has a strong lemony aroma that repels mosquitoes and some garden pests. Its dense growth also acts as a living mulch, retaining soil moisture and protecting smaller plants.

Care Tips:

  • Soil: Well-drained, fertile soil.
  • Watering: Keep soil moist but not soggy.
  • Sunlight: Partial shade to full sun.

7. Corn (Zea mays)

Benefits:
Corn grows tall and quickly, making it an excellent windbreak for smaller crops. Its dense stalks can also serve as a natural trellis for climbing plants like beans.

Care Tips:

  • Soil: Rich, fertile soil.
  • Watering: Needs consistent watering during dry periods.
  • Sunlight: Full sun exposure is crucial.

3. Companion Planting for Natural Protection

Fast-growing plants are most effective when combined strategically with other crops. This practice is known as companion planting, which maximizes their protective abilities:

  • Sunflowers + Cucumbers/Beans: Tall sunflowers provide shade for climbing plants.
  • Marigolds + Tomatoes: Marigolds repel nematodes that affect tomato roots.
  • Clover + Vegetables: Clover enriches the soil, benefiting all nearby crops.
  • Nasturtiums + Lettuce: Nasturtiums lure aphids away from tender greens.

By planning your garden layout carefully, you can use these plants to protect each other naturally, reducing the need for artificial interventions.


4. Additional Tips for Maximizing Protection

  • Mulching: Combine fast-growing plants with organic mulch to retain soil moisture and suppress weeds.
  • Regular Pruning: Trim plants like bamboo or lemon balm to prevent overgrowth and maintain airflow.
  • Rotating Crops: Plant annual fast-growing species in different areas each year to improve soil fertility and prevent disease buildup.
  • Water Management: Use drip irrigation to keep soil evenly moist without overwatering, reducing disease risk.

5. Benefits Beyond Protection

Using fast-growing plants in your garden doesn’t just protect your crops; it also provides other advantages:

  • Improved Pollination: Attracts bees, butterflies, and other beneficial insects.
  • Soil Health: Nitrogen-fixing and organic matter-rich plants enrich the soil naturally.
  • Aesthetic Appeal: Adds color, height, and texture to the garden.
  • Climate Moderation: Tall and dense plants provide shade, reduce wind stress, and create microclimates for delicate crops.

6. Conclusion

Creating a natural defense system for your garden doesn’t require chemicals, fencing, or expensive solutions. Fast-growing plants offer an eco-friendly, multifunctional, and beautiful way to protect your garden while enhancing its health and biodiversity. From the tall sunflowers that shield delicate seedlings to marigolds and nasturtiums that repel pests, incorporating these plants ensures your garden thrives naturally.

By understanding each plant’s needs and benefits, and strategically planting them in your garden, you can enjoy a sustainable, flourishing space that is both protected and productive. Not only will your crops grow better, but your garden will also become a vibrant, self-sustaining ecosystem—a true testament to the power of natural gardening.

DIY Cherry Tree Growing Guide — From Seed to Sapling

DIY Cherry Tree Growing Guide — From Seed to Sapling

Cherry trees are one of the most beautiful and rewarding plants to grow at home, producing gorgeous blossoms in spring and delicious fruits in summer. While many gardeners buy young cherry saplings from nurseries, growing one from seed is a truly fulfilling process. It’s an affordable, educational, and rewarding journey that allows you to nurture your tree from the very beginning.

In this step-by-step guide, you’ll learn everything from preparing your seeds to caring for your young sapling, ensuring your cherry tree grows healthy and strong.


1. Choosing the Right Cherry Seeds

Before you begin, you need to select the type of cherry tree you want to grow. Cherries generally fall into two categories:

  • Sweet Cherries (Prunus avium) — Best for fresh eating; varieties like Bing, Rainier, and Lambert.
  • Sour Cherries (Prunus cerasus) — Perfect for baking and preserves; varieties like Montmorency and Morello.

Tip: If you plan to grow cherries outdoors, check your local climate. Sweet cherries thrive in USDA zones 5–7, while sour cherries can tolerate cooler climates.

You can either purchase cherry seeds from a trusted supplier or save pits from fresh cherries you’ve eaten. If using store-bought cherries, choose organic ones, as non-organic varieties may have reduced germination rates due to chemical treatments.


2. Preparing and Cleaning the Seeds

Fresh cherry pits need to be properly cleaned before planting. This step removes fruit residue that can cause mold or rot.

Steps:

  1. Eat or remove the fruit flesh from the cherry.
  2. Rinse the pits thoroughly under running water.
  3. Soak the pits in warm water for 10–15 minutes to loosen any remaining fruit.
  4. Use a soft brush or cloth to clean them completely.
  5. Allow the pits to dry on a paper towel for at least 24 hours.

3. The Importance of Stratification

Cherry seeds require cold stratification to break their dormancy. In nature, this happens during winter when seeds rest in cold soil before sprouting in spring.

Artificial Stratification Method:

  1. Wrap cleaned seeds in a moist paper towel or sphagnum moss.
  2. Place them inside a resealable plastic bag.
  3. Store the bag in your refrigerator (not freezer) at around 1–5°C (34–41°F).
  4. Keep them in the fridge for 10–12 weeks. Check periodically to ensure the towel remains slightly damp, not soggy.
  5. After this period, some seeds may start showing tiny roots — a sign they’re ready for planting.

4. Planting Cherry Seeds Indoors

After stratification, it’s time to plant your seeds in pots so they can begin growing in a controlled environment.

Materials Needed:

  • Small pots or seed trays
  • Good-quality potting mix (loamy and well-draining)
  • Watering can or spray bottle

Steps:

  1. Fill pots with potting mix, leaving about an inch from the top.
  2. Plant seeds about 1–2 inches deep.
  3. Lightly water the soil until it’s evenly moist.
  4. Place pots in a warm, sunny location or under grow lights.
  5. Maintain soil moisture but avoid waterlogging, which can cause rot.

5. Transferring Seedlings Outdoors

When your seedlings reach about 8–12 inches tall and the outdoor temperature is consistently above 50°F (10°C), you can start acclimating them to outside conditions.

Hardening Off Process:

  • Begin by placing seedlings outdoors for a few hours each day in a shaded area.
  • Gradually increase sun exposure over 7–10 days.
  • After this period, you can transplant them into the ground.

Transplanting Steps:

  1. Choose a sunny spot with well-draining soil.
  2. Dig a hole twice as wide as the root ball and the same depth.
  3. Place the seedling in the hole and fill with soil, gently pressing around the base.
  4. Water well to help roots settle.

6. Caring for Your Young Cherry Tree

Proper care in the early years determines the tree’s future health and productivity.

Watering

  • Keep the soil evenly moist during the first growing season.
  • Reduce watering once the tree is established, as cherries dislike waterlogged conditions.

Mulching

  • Apply a 2–3 inch layer of organic mulch around the base, leaving a few inches around the trunk clear to prevent rot.
  • Mulch helps retain moisture and control weeds.

Pruning

  • Prune during late winter or early spring before new growth starts.
  • Remove dead, damaged, or crossing branches.
  • Shape the tree to promote good airflow, reducing disease risk.

7. Common Pests and Diseases

Cherry trees can face a variety of threats. Being proactive will help keep them healthy.

  • Aphids — Tiny insects that suck sap from leaves; control with neem oil or insecticidal soap.
  • Birds — They love ripe cherries; use bird netting to protect fruit.
  • Brown Rot — A fungal disease causing fruit rot; prevent by pruning for airflow and removing infected fruit.
  • Powdery Mildew — White powdery growth on leaves; treat with sulfur spray or a baking soda solution.

8. Patience and Fruiting

Cherry trees grown from seed take longer to bear fruit than grafted nursery saplings. On average:

  • Sweet cherries: 7–10 years to fruit.
  • Sour cherries: 4–6 years to fruit.

Even if you need to wait, the journey of watching your tree grow from a tiny seed to a fruit-bearing beauty is incredibly rewarding.


9. Advantages of Growing Cherry Trees from Seed

  • Cost-effective — Seeds are cheaper than buying saplings.
  • Educational — Great way to learn about plant life cycles.
  • Satisfying — Nurturing a tree from the ground up is a special experience.
  • Unique Trees — Seed-grown trees can have slightly different traits from their parents, making each tree unique.

10. Tips for Long-Term Success

  1. Choose the right location — Full sun and good drainage are essential.
  2. Protect from frost — Young trees are sensitive to late frosts; cover them if needed.
  3. Fertilize sparingly — Use a balanced fertilizer in early spring, avoiding excessive nitrogen which can encourage leafy growth over fruit production.
  4. Be patient — Trees from seed take time, but healthy growth in the early years sets the foundation for abundant harvests later.

Conclusion

Growing a cherry tree from seed is more than just a gardening project — it’s a commitment, a lesson in patience, and a way to connect with nature on a deeper level. From choosing the right variety to nurturing your young sapling, each step brings you closer to the joy of seeing those first blossoms and, eventually, the delicious cherries that follow.

With the right care, dedication, and love, your seed will transform into a strong, fruit-bearing tree that will provide beauty, shade, and sweet rewards for decades to come.

How to Take Care of a Money Tree for Luck and Prosperity

How to Take Care of a Money Tree for Luck and Prosperity

The Money Tree (Pachira aquatica) has long been cherished as a symbol of good fortune, wealth, and positive energy. Popular in Feng Shui practices, this elegant indoor plant features braided trunks and lush, green leaves that not only beautify your home but also bring a touch of nature’s charm indoors. Many believe that placing a Money Tree in the right location can invite prosperity and harmony. However, beyond its symbolism, the plant is also quite hardy, making it an excellent choice for beginners.

If you want your Money Tree to thrive and keep bringing luck into your life, you need to provide the right care. This guide will walk you through everything you need to know about growing and maintaining a healthy Money Tree, from choosing the perfect location to watering and feeding it the right way.


1. Choosing the Right Location for Your Money Tree

The first step to a healthy Money Tree is finding the right spot in your home.

  • Light Needs: Money Trees prefer bright, indirect sunlight. Placing them near an east-facing or south-facing window is ideal, but make sure the sunlight is filtered through a sheer curtain. Too much direct sunlight can scorch the leaves, while too little light may cause slow growth.
  • Feng Shui Placement: If you’re following Feng Shui principles, place your Money Tree in the wealth corner of your home, which is typically the southeast area of your living space.
  • Avoid Drafts: Keep the plant away from cold drafts, air conditioners, and heaters, as sudden temperature changes can stress it.

Pro Tip: If natural light is limited, use a full-spectrum grow light to keep your plant healthy.


2. Ideal Temperature and Humidity

Money Trees thrive in warm, humid environments—similar to their native tropical habitat in Central and South America.

  • Temperature Range: Keep your Money Tree in a temperature range of 65°F to 80°F (18°C to 27°C).
  • Humidity: They enjoy moderate to high humidity. If your home’s air is dry, especially in winter, place a humidifier nearby or set the pot on a tray filled with water and pebbles to increase moisture around the plant.
  • Avoid Extremes: Never let your plant experience temperatures below 50°F (10°C), as it can damage the leaves and stunt growth.

3. Watering Your Money Tree Correctly

Overwatering is the most common mistake new plant parents make with Money Trees.

  • Watering Schedule: Water your plant thoroughly once the top 2–4 inches of soil feel dry. On average, this is about once every 1–2 weeks, but it depends on your indoor climate.
  • Drainage: Always ensure the pot has drainage holes. Waterlogged soil can lead to root rot, which is deadly for Money Trees.
  • Seasonal Adjustment: During the active growing season (spring and summer), you might need to water more frequently. In fall and winter, reduce watering as growth slows.
  • Water Type: Use room-temperature filtered water or let tap water sit overnight to remove chlorine before watering.

Pro Tip: If you notice yellow leaves, it might be a sign of overwatering. Brown, crispy leaves often mean underwatering.


4. Soil and Pot Requirements

Healthy soil is essential for a strong Money Tree root system.

  • Soil Type: Use a well-draining potting mix—a blend designed for cacti or succulents works well. You can also make your own by mixing regular potting soil with sand and perlite.
  • Pot Choice: Choose a pot that is 1–2 inches larger than the root ball and has drainage holes. Terracotta pots are a great option because they allow excess moisture to evaporate.
  • Repotting: Repot your Money Tree every 2–3 years or when roots start growing out of the drainage holes. This refreshes the soil and gives the plant more space to grow.

5. Fertilizing for Growth and Prosperity

Just like any plant, a Money Tree needs nutrients to thrive.

  • Fertilizer Type: Use a balanced, water-soluble fertilizer (10-10-10 or 20-20-20) every 4–6 weeks during the growing season (spring and summer).
  • Winter Care: Skip fertilizing during the dormant months (fall and winter) to avoid stressing the plant.
  • Natural Fertilizers: You can also use diluted compost tea or banana peel water as an organic alternative.

6. Pruning and Braiding the Trunk

Pruning keeps your Money Tree looking beautiful and encourages healthy growth.

  • When to Prune: Trim away yellow or damaged leaves anytime you see them. For shaping, prune during spring or summer when the plant is actively growing.
  • How to Prune: Use clean, sharp scissors to cut just above a leaf node.
  • Braiding Tips: If you want to braid your Money Tree’s trunk, start when the plant is young and flexible. Gently weave the stems together, securing them loosely with soft plant ties.

7. Common Problems and How to Fix Them

Even a lucky plant can face challenges. Here’s how to handle them:

  • Yellow Leaves: Usually caused by overwatering. Let the soil dry out before watering again.
  • Brown Leaf Edges: Indicates low humidity or underwatering. Mist the leaves or increase humidity.
  • Leaf Drop: Can happen if the plant is moved suddenly, exposed to drafts, or overwatered.
  • Pests: Watch for spider mites, mealybugs, and aphids. Remove them by wiping leaves with a solution of mild soap and water.

8. Propagating Your Money Tree

If you want more Money Trees or wish to gift one to a friend, propagation is easy.

  • Stem Cuttings: Cut a healthy stem with at least two leaf nodes. Place it in water until roots form, then plant it in soil.
  • Air Layering: Wrap a section of the stem with moist moss, cover it with plastic wrap, and wait for roots to develop before cutting and planting.

9. Symbolism and Feng Shui Benefits

In Feng Shui, the Money Tree is more than just a decorative plant—it’s believed to attract wealth, luck, and positive energy.

  • Five Leaves: Each stalk typically has five leaves, symbolizing the five elements—wood, water, earth, fire, and metal.
  • Gift of Good Fortune: It’s a popular housewarming or business-opening gift in Asian cultures.
  • Wealth Corner Placement: Placing the plant in the southeast corner of your home or office is believed to activate prosperity energy.

10. Seasonal Care Tips

Your Money Tree’s needs change with the seasons.

  • Spring and Summer: This is the active growth period. Water regularly, fertilize monthly, and prune as needed.
  • Fall and Winter: Growth slows, so reduce watering, stop fertilizing, and keep the plant warm.
  • Holiday Decor: You can gently decorate your Money Tree with ribbons or charms to enhance its lucky energy during festivals.

Conclusion

Caring for a Money Tree is a rewarding experience—both for its beauty and the symbolism it brings into your life. By providing the right amount of light, water, nutrients, and love, your Money Tree will stay healthy and lush for years. Whether you grow it for its Feng Shui benefits or simply as a stunning indoor plant, the Money Tree is sure to bring a sense of peace, prosperity, and joy into your home.

Remember: A thriving plant equals thriving energy. Treat your Money Tree well, and it just might return the favor by bringing a little extra luck your way.