How to Care for a Jade Plant in Any Climate

How to Care for a Jade Plant in Any Climate

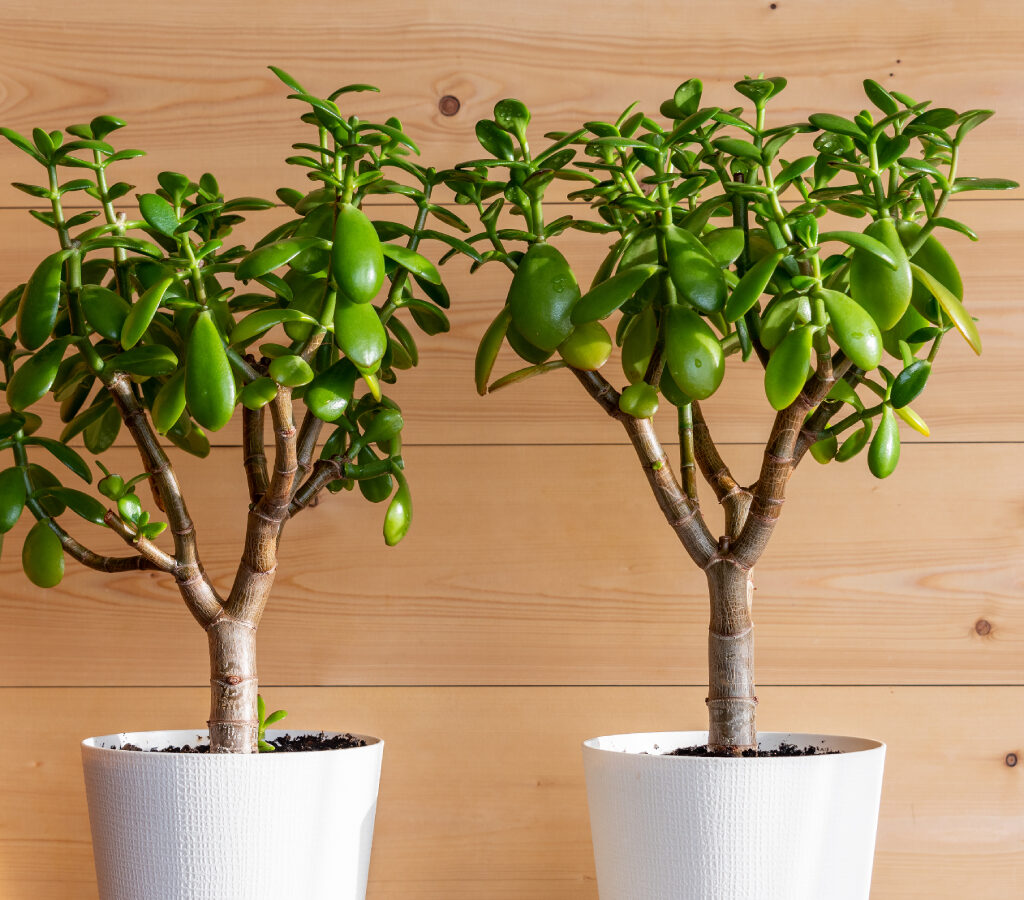
Jade plants (Crassula ovata) are beloved houseplants known for their thick, glossy, green leaves and tree-like appearance. Often associated with good luck, prosperity, and positive energy, jade plants are also hardy, long-lived, and surprisingly easy to care for — even for beginners. While they naturally thrive in warm, dry climates, with a little know-how, you can successfully grow a healthy, vibrant jade plant in virtually any environment.

Whether you live in a humid tropical region, a dry desert area, or a cold northern climate, this comprehensive guide will teach you exactly how to care for a jade plant in any climate. From watering and lighting to dealing with temperature changes and seasonal adjustments, we’ve got you covered.


Why Jade Plants Make Excellent Houseplants

Before we dive into care techniques, let’s look at why jade plants are such a popular choice for indoor gardeners:

  • Low maintenance: These succulents are forgiving and drought-tolerant.
  • Long-lived: Some jade plants can live for decades with proper care.
  • Symbolic: Often called the “money plant” or “friendship tree,” jade plants are said to bring prosperity and positive energy.
  • Versatile: Suitable for small pots on a desk or larger container gardens.

Now, let’s learn how to help your jade plant thrive, no matter where you live.


Understanding Jade Plant Basics

Scientific Name: Crassula ovata
Family: Crassulaceae
Type: Succulent
Native Range: South Africa and Mozambique

As succulents, jade plants store water in their leaves, stems, and roots, making them naturally drought-resistant. However, like all plants, they have specific needs regarding light, water, soil, and temperature — and these needs can vary by climate.


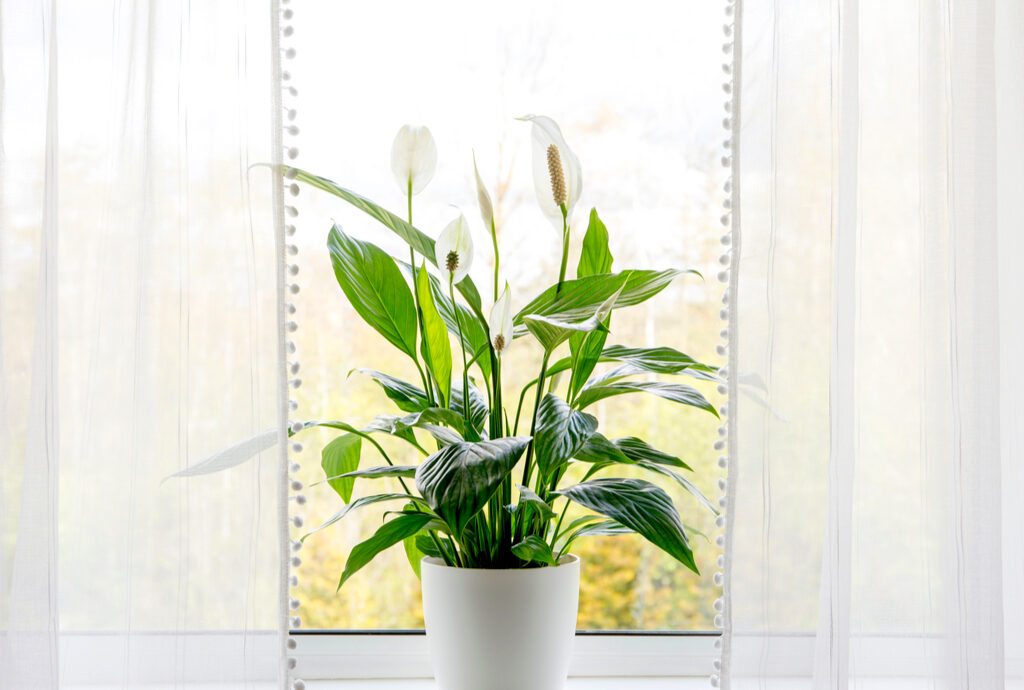
Light Requirements: Bright but Indirect

Jade plants crave light, and providing the right amount is crucial for their growth:

  • Ideal exposure: 4–6 hours of bright, indirect sunlight daily.
  • Indoor placement: South or west-facing windows are ideal. In extremely hot climates, protect the plant from intense, direct afternoon sun to avoid leaf scorch.
  • Low-light adjustments: In cloudy or northern regions, consider using a full-spectrum grow light to supplement natural light.

Tip: Rotate your plant every few weeks to ensure even growth and prevent leaning toward the light source.


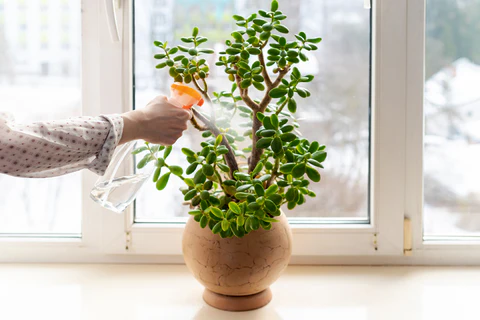
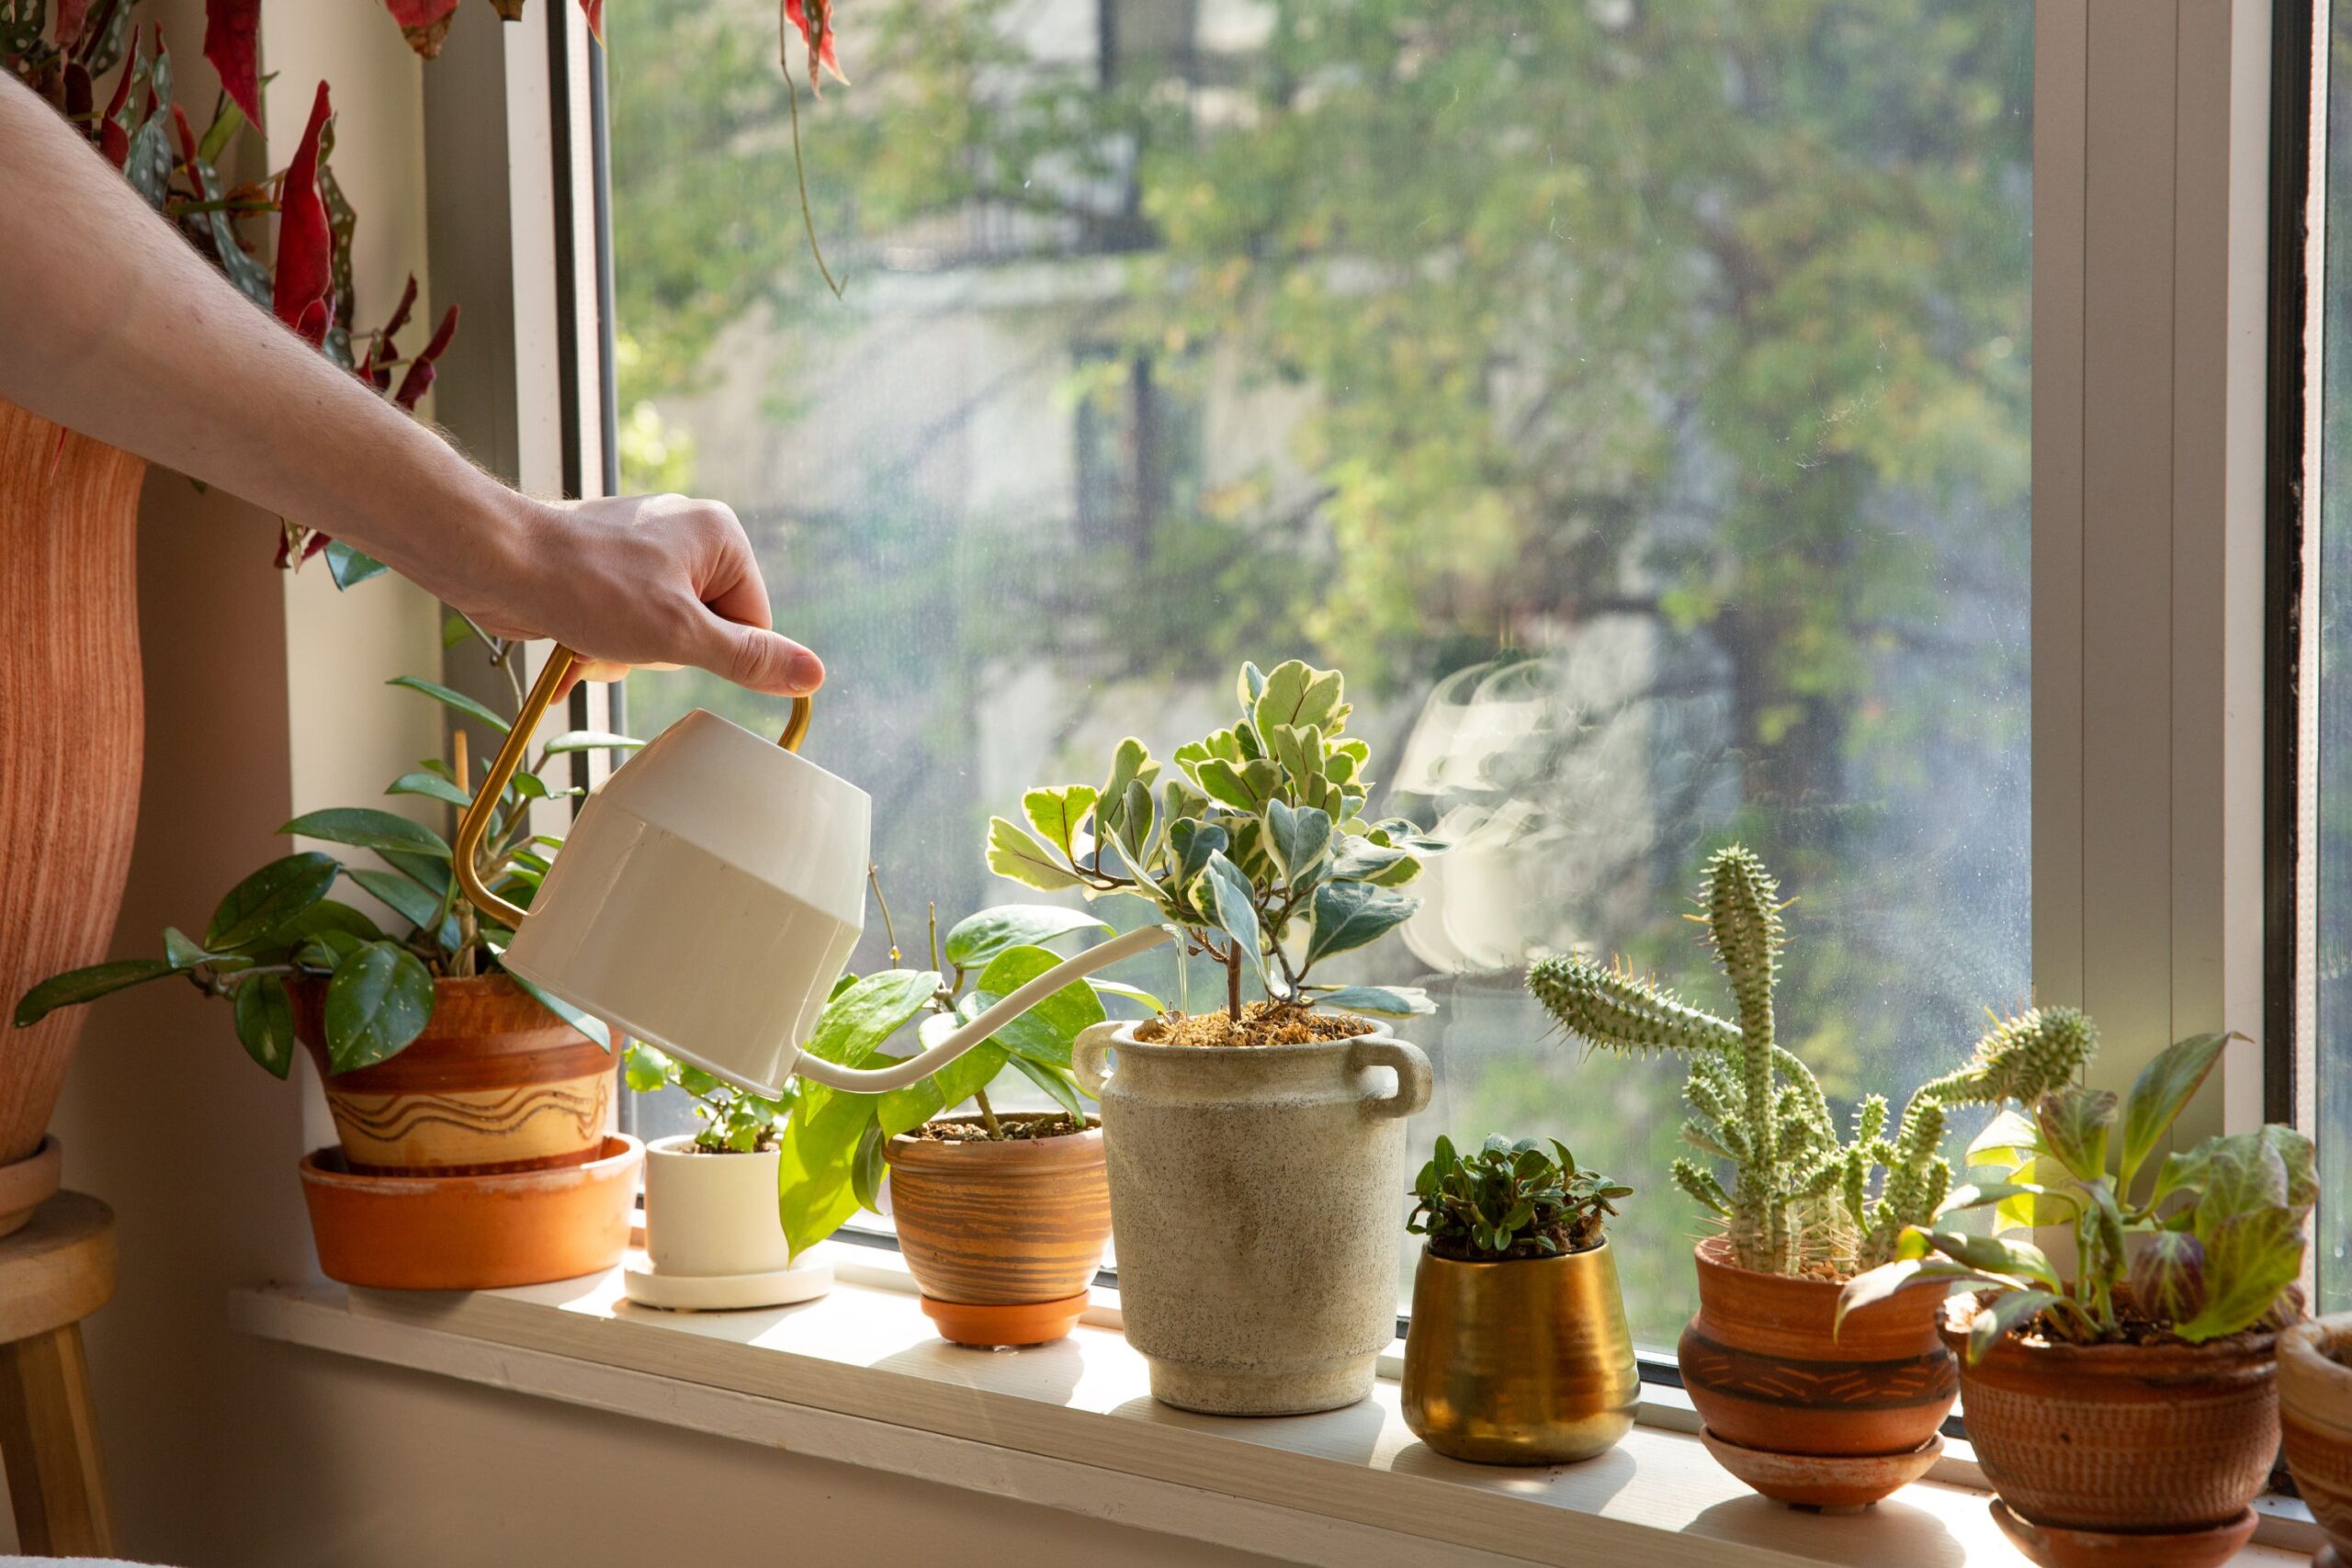
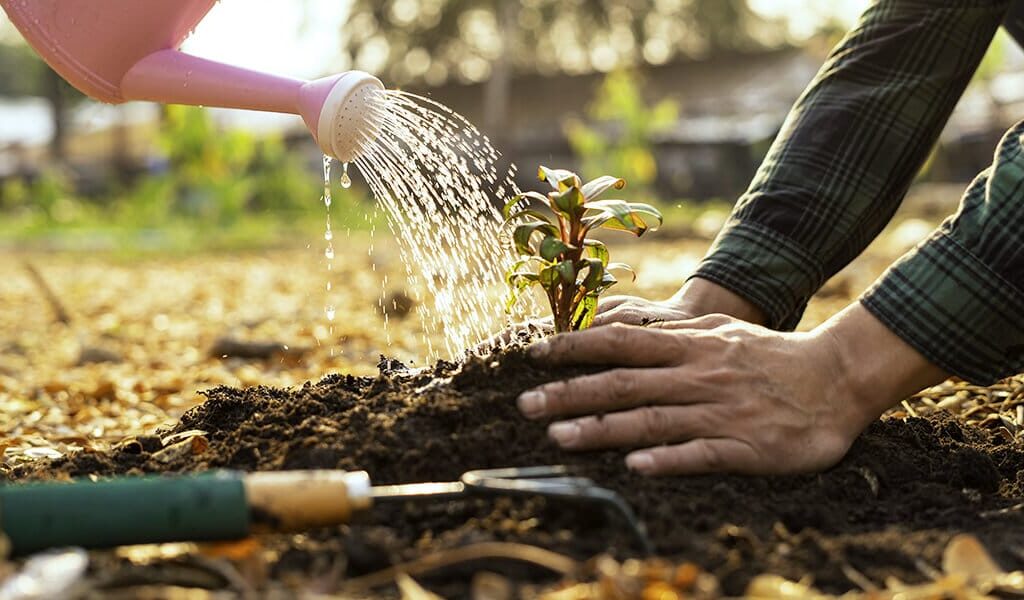
Watering Your Jade Plant: Less Is More

Overwatering is the most common mistake jade plant owners make. Because jade plants store water in their leaves, they prefer dry conditions.

How Often to Water:

  • Warm, dry climates: Every 2–3 weeks.
  • Humid or cooler regions: Every 3–4 weeks.
  • Winter months: Reduce watering frequency as the plant goes semi-dormant.

Watering Method:

  • Water deeply until it drains from the bottom of the pot.
  • Always let the soil dry out completely before watering again.
  • Avoid letting the plant sit in standing water, as this causes root rot.

Tip: If leaves become shriveled or soft, it may be time to water.


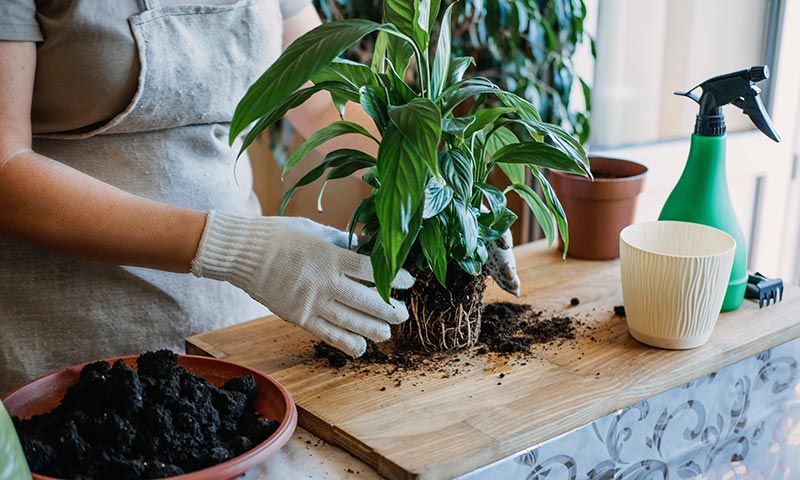
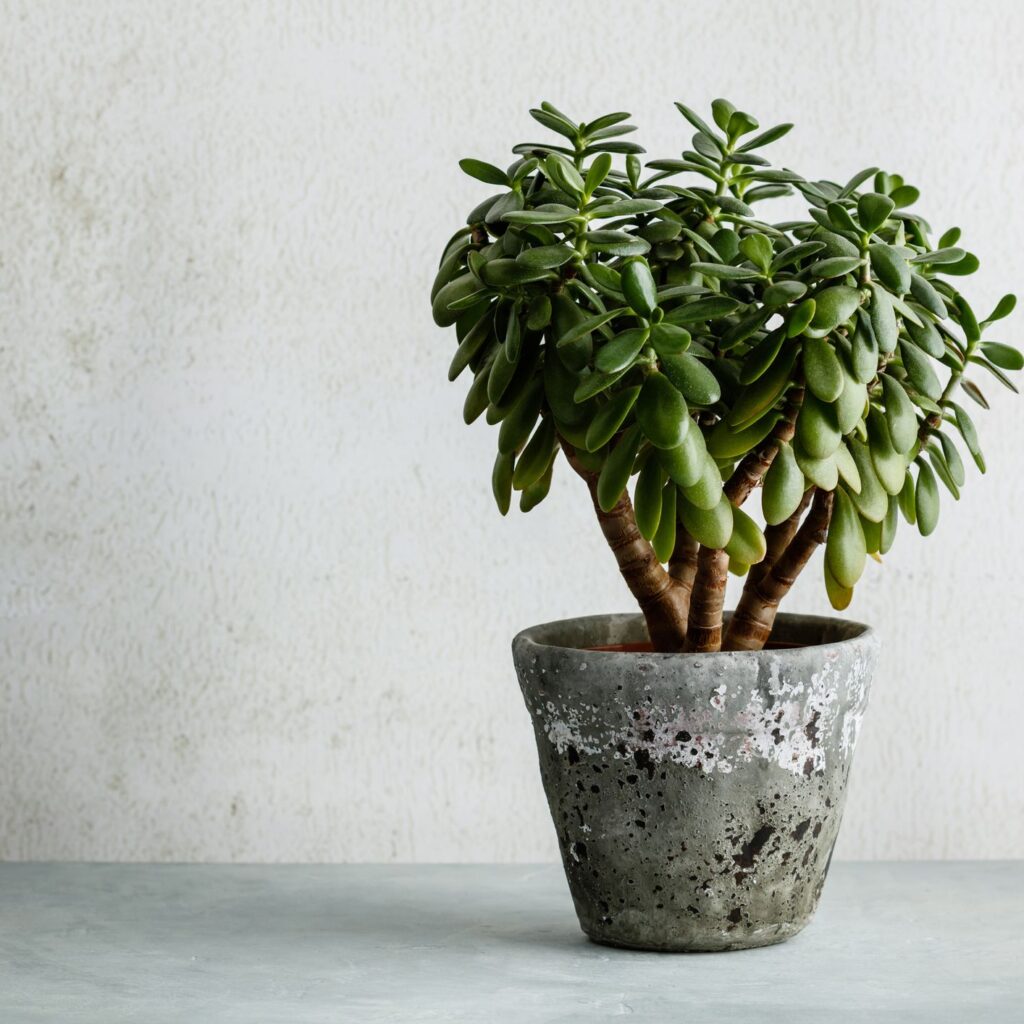
Soil and Potting: Well-Draining Is Key

Jade plants need soil that mimics their natural environment — sandy and fast-draining.

Best Potting Mix:

  • Use a succulent or cactus potting mix.
  • Or make your own mix:
    2 parts potting soil + 1 part coarse sand + 1 part perlite or pumice.

Pot Selection:

  • Choose a pot with drainage holes.
  • Terra cotta pots are excellent, as they allow soil to dry faster.

Repot every 2–3 years or when roots outgrow the container.


Temperature and Climate Adjustments

Jade plants are adaptable but prefer certain temperature ranges.

Ideal Temperature:

  • 65°F to 75°F (18°C to 24°C) during the day.
  • Can tolerate nighttime lows of 50°F (10°C).

Hot Climates:

  • Provide morning sun and afternoon shade.
  • Avoid placing near hot windows in summer.

Cold Climates:

  • Bring plants indoors when temperatures drop below 50°F (10°C).
  • Place near a sunny window but away from cold drafts and heating vents.

Humid Regions:

  • Ensure good air circulation to prevent fungal issues.
  • Use a fast-draining soil mix to avoid water retention.

Fertilizing for Growth

Jade plants don’t need frequent feeding but benefit from occasional fertilization during the growing season (spring and summer).

How to Fertilize:

  • Use a balanced liquid fertilizer (10-10-10 or 20-20-20) diluted to half strength.
  • Feed once a month during the growing season.
  • Avoid fertilizing in fall and winter when the plant’s growth slows.
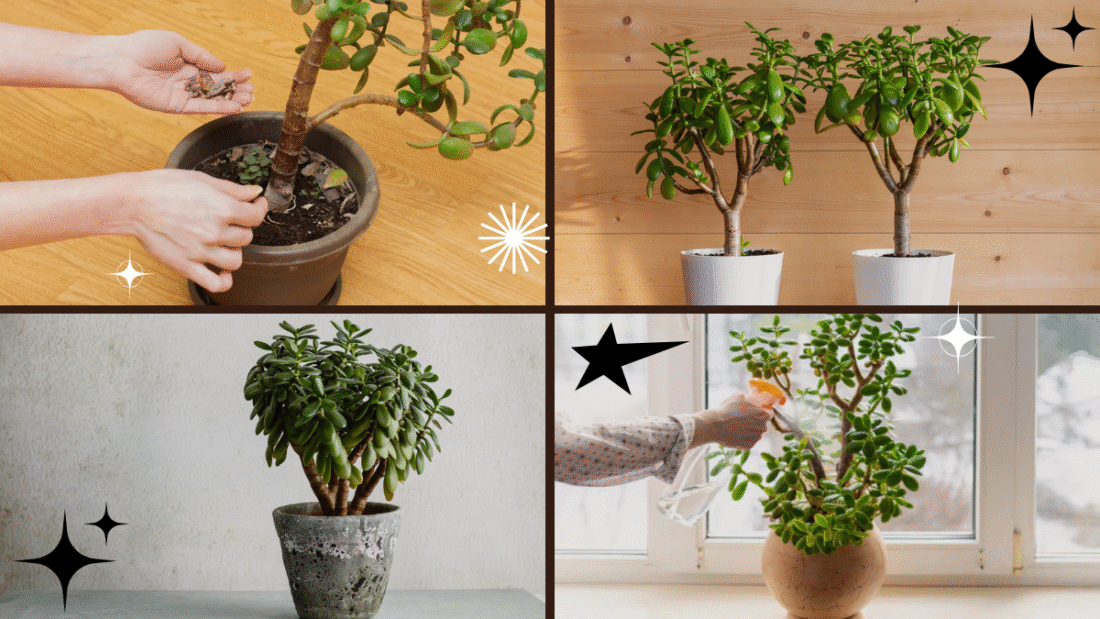
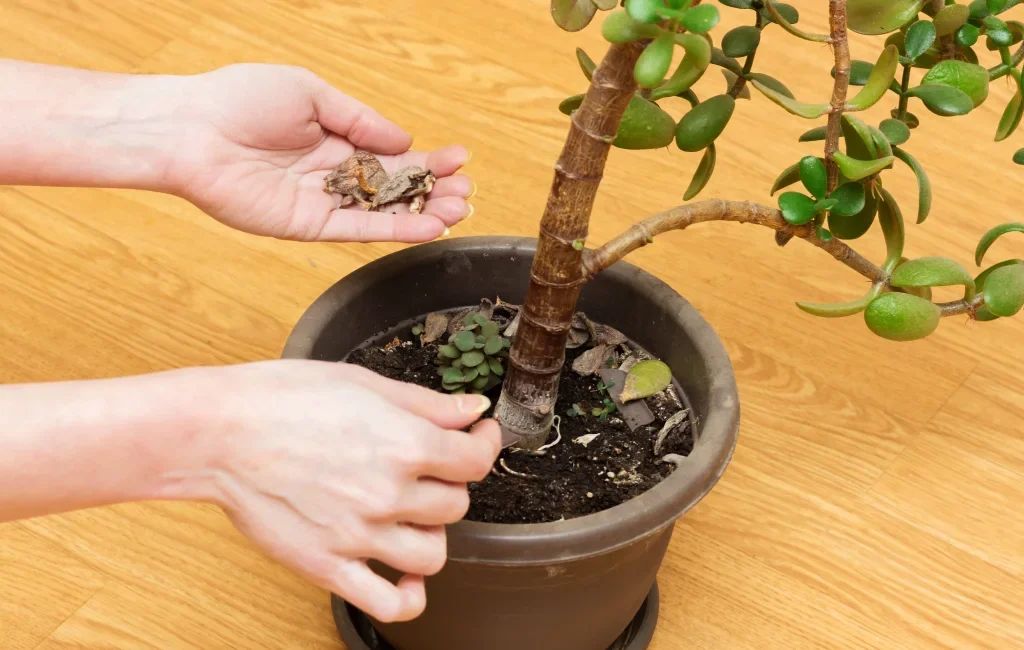
Pruning and Shaping

Regular pruning encourages bushier growth and removes leggy or damaged stems.

How to Prune:

  • Use sharp, sterilized scissors or pruning shears.
  • Remove dead or shriveled leaves.
  • Trim back overgrown branches to maintain shape.
  • Pinch new growth tips to encourage branching.

Tip: Pruned cuttings can be propagated easily.


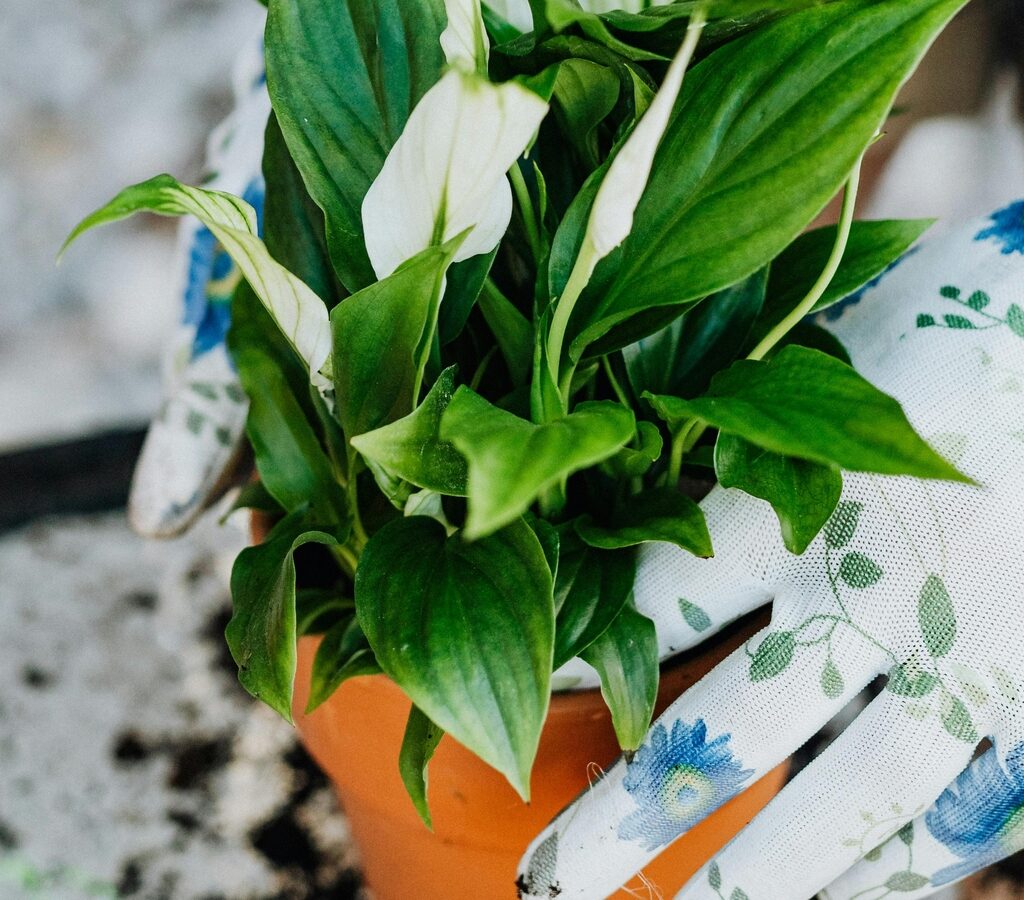
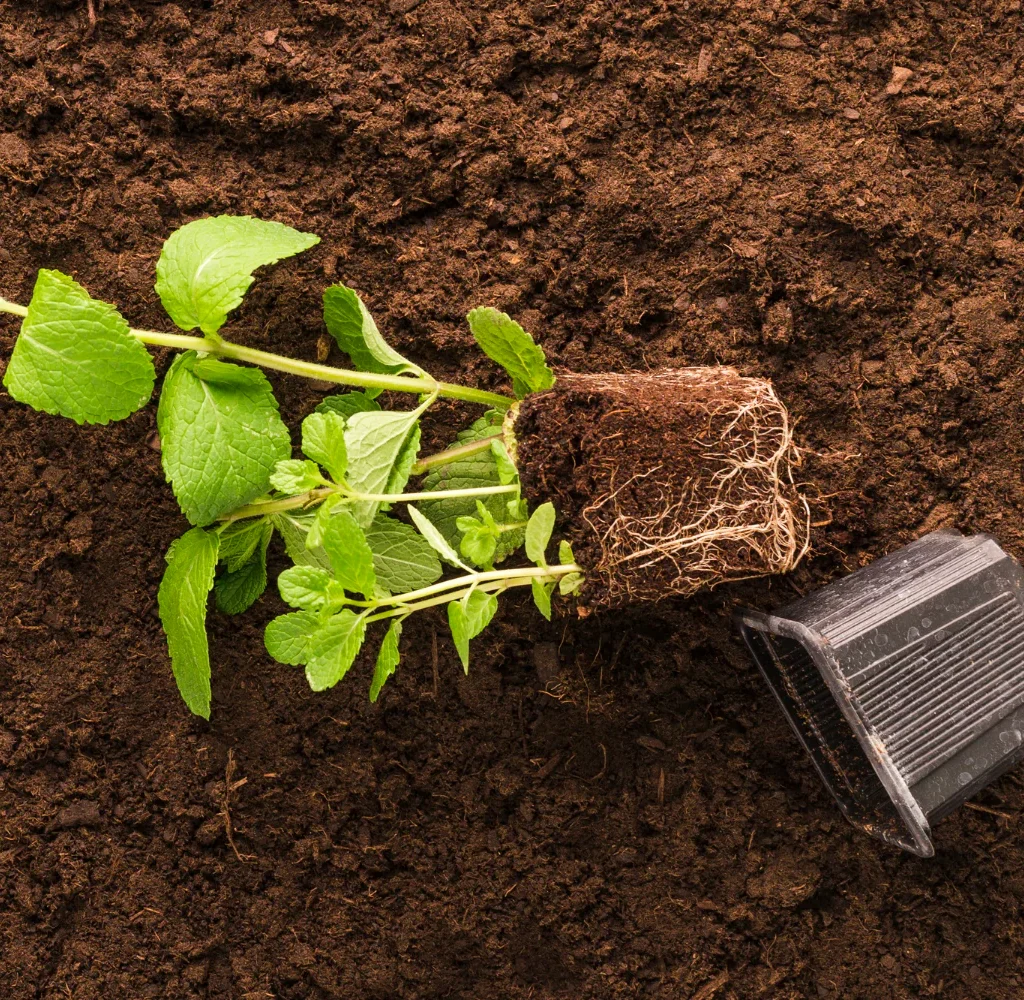
Propagation: Growing New Jade Plants

Jade plants are wonderfully easy to propagate from stem or leaf cuttings.

Propagation Steps:

  1. Snip a healthy stem or leaf.
  2. Let the cutting dry for 1–2 days to callous.
  3. Plant in well-draining soil.
  4. Water sparingly until new growth appears.

This is a great way to expand your collection or gift a plant to a friend.


Common Problems and Solutions

ProblemCauseSolution
Yellow, mushy leavesOverwateringReduce watering, check for root rot
Wrinkled, soft leavesUnderwateringWater thoroughly and adjust frequency
Leaf dropSudden temperature changes or draftsStabilize temperature, avoid cold drafts
Stunted growthLow light, lack of nutrientsMove to brighter location, fertilize as needed
White powdery residueMealybugs or fungal issuesWipe with rubbing alcohol or insecticidal soap

Seasonal Care Tips

Spring/Summer:

  • Increase watering and fertilizing.
  • Prune and propagate.
  • Move outdoors in mild climates (avoiding intense midday sun).

Fall/Winter:

  • Reduce watering.
  • Stop fertilizing.
  • Bring indoors if temperatures drop below 50°F (10°C).

Conclusion: A Resilient, Rewarding Plant for Any Home

With its rich symbolism, easy care routine, and charming appearance, the jade plant is a fantastic choice for indoor gardeners everywhere. Whether you live in a hot, dry climate or a chilly, humid region, understanding your jade plant’s basic needs and adjusting your care routine to your local environment ensures that it will remain healthy, lush, and vibrant for years — perhaps even decades.

Key reminders:

  • Bright, indirect light is ideal.
  • Water deeply but infrequently.
  • Use well-draining soil.
  • Adjust care seasonally and based on climate.
  • Enjoy the simple, enduring beauty of this good-luck plant!
How to Care for an Orchid Plant Indoors Properly

How to Care for an Orchid Plant Indoors Properly

Orchids are among the most beautiful and exotic flowering plants you can grow indoors. Their delicate blossoms, intricate patterns, and variety of colors add elegance and charm to any home. However, many people find orchids intimidating because of their reputation for being finicky or difficult to care for. The truth is, with the right knowledge and care, orchids can thrive indoors and bloom year after year.

If you’re ready to master the art of orchid care, this guide will walk you through everything you need to know about how to care for an orchid plant indoors properly — from choosing the right variety to watering, lighting, fertilizing, and troubleshooting common problems. Let’s get started!


Understanding Orchids: The Basics

Orchids belong to the family Orchidaceae, one of the largest and most diverse families of flowering plants. The most common orchid found indoors is the Phalaenopsis, also known as the moth orchid, prized for its long-lasting blooms and relative ease of care.

Orchids are epiphytes in their natural habitat, meaning they grow on trees rather than in soil. This affects how you care for them indoors, especially when it comes to potting and watering.


Choosing the Right Orchid for Indoor Growing

For beginners, the Phalaenopsis orchid is highly recommended. It’s widely available, blooms beautifully, and adapts well to indoor environments. Other popular indoor orchids include:

  • Cattleya: Known for fragrant and large flowers.
  • Dendrobium: Produces multiple flower spikes.
  • Oncidium: “Dancing lady” orchids with small, vibrant flowers.

Selecting a healthy orchid from a reputable nursery is crucial for success. Look for plants with firm, green leaves and healthy roots visible through the pot or transparent plastic container.


Ideal Environment for Indoor Orchids

1. Lighting

Orchids need bright, indirect light to bloom and grow well.

  • Place your orchid near an east or west-facing window.
  • Avoid direct midday sun, which can scorch the leaves.
  • If natural light is limited, consider using a grow light designed for flowering plants.

Signs of inadequate light: Dark green leaves with no blooms.
Signs of too much light: Yellowish or scorched leaves.


2. Temperature

Orchids thrive in temperatures between 65°F to 75°F (18°C to 24°C) during the day and slightly cooler at night.

  • Avoid placing your orchid near drafts, air conditioners, or heaters.
  • Some orchids need a temperature drop at night to stimulate blooming—this mimics their natural environment.

3. Humidity

Orchids prefer moderate to high humidity — ideally between 50% to 70%.

  • Indoor environments, especially with heating or air conditioning, can be dry.
  • Increase humidity by placing the orchid pot on a tray filled with water and pebbles (ensure the pot doesn’t sit directly in water).
  • Use a humidifier or mist the leaves lightly, but avoid excess moisture that can promote fungal diseases.

How to Water Your Orchid Properly

Watering is one of the most crucial and misunderstood parts of orchid care.

  • Frequency: Water approximately once a week during the growing season; reduce in winter.
  • Method: Water thoroughly, allowing water to flow through the potting media and drain out the bottom. Avoid letting your orchid sit in standing water.
  • Potting media: Orchids are usually potted in bark or sphagnum moss, which dries out faster than soil.
  • Check moisture: Stick your finger into the potting media or lift the pot to judge weight—if it feels light, it’s time to water.

Tip: Overwatering causes root rot, while underwatering can cause shriveled roots and drooping leaves.


Proper Potting and Repotting

Orchids require special potting media to mimic their natural epiphytic conditions.

  • Use orchid bark mix or sphagnum moss, which provides aeration and drainage.
  • Repot your orchid every 1-2 years or when the potting media breaks down.
  • Best time to repot is right after blooming or when new roots appear.
  • Choose a transparent pot with drainage holes to monitor root health and allow light to reach the roots.

Fertilizing Orchids for Optimal Growth

Feeding your orchid helps promote healthy leaves and vibrant blooms.

  • Use a balanced orchid fertilizer (20-20-20) or one specially formulated for orchids.
  • Fertilize every 2 weeks during the growing season with diluted fertilizer (half strength).
  • Reduce fertilizing frequency to once a month during winter.
  • Flush the potting media with plain water every month to avoid salt buildup.

Encouraging Orchids to Bloom

Getting your orchid to bloom indoors requires patience and proper care.

  • Provide adequate light and maintain consistent temperature.
  • Some orchids need a cooling period (temperature drop at night) to trigger flowering.
  • Remove spent flower spikes after blooming to redirect energy.
  • Avoid moving your orchid frequently as they don’t respond well to stress.

Common Orchid Problems and How to Fix Them

ProblemCauseSolution
Yellowing leavesOverwatering, poor drainageAdjust watering, repot in fresh media
Drooping or wrinkled leavesUnderwatering or root damageWater thoroughly, check roots
No bloomsInsufficient light or nutritionIncrease light, fertilize properly
Root rotOverwatering, poor drainageRemove damaged roots, repot immediately
Pests (mealybugs, scale)Poor air circulation, dry leavesWipe with insecticidal soap, improve airflow

Additional Tips for Orchid Care Success

  • Clean leaves: Dust can block light; gently wipe leaves with a damp cloth.
  • Avoid drafts: Sudden temperature changes cause stress.
  • Rotate your orchid: For even growth, rotate the pot every week.
  • Be patient: Orchids can take several months to bloom after care adjustments.

Conclusion

Caring for an orchid indoors may seem challenging at first, but with the right environment and consistent attention, your orchid can thrive beautifully. Remember to provide bright, indirect light, maintain moderate humidity, water correctly, and feed regularly. Watch your orchid closely and respond to its needs to enjoy stunning blooms and lush foliage year-round.

Orchids are not only a symbol of elegance and luxury but also a rewarding hobby that connects you with nature. Start your orchid journey today with confidence, and enjoy the beauty and tranquility this exquisite plant brings to your home.

How to Care for a Rubber Plant for Beginners

How to Care for a Rubber Plant for Beginners

If you’re looking for a houseplant that’s both elegant and easy to care for, the Rubber Plant might just be your perfect pick. With its broad, glossy leaves and upright growth habit, the Rubber Plant adds a touch of tropical charm to any room. And the best part? It’s surprisingly beginner-friendly.

In this detailed guide, we’ll cover everything you need to know about how to care for a Rubber Plant, from lighting and watering to pruning and troubleshooting. Whether you’re new to plant parenting or simply adding to your indoor jungle, this guide will help you keep your Rubber Plant happy and thriving.


What Is a Rubber Plant?

The Rubber Plant (scientific name Ficus elastica) is a popular houseplant native to Southeast Asia. It belongs to the fig family (Moraceae) and is known for its thick, leathery leaves that can range in color from deep green to burgundy, depending on the variety.

In its natural habitat, the Rubber Plant can grow up to 100 feet tall. Indoors, however, it usually stays between 3 to 10 feet, making it a striking statement plant for homes and offices.

Popular Rubber Plant varieties include:

  • Ficus elastica ‘Robusta’ – Classic deep green, glossy leaves.
  • Ficus elastica ‘Burgundy’ – Dark purple-green leaves with a reddish tint.
  • Ficus elastica ‘Tineke’ – Cream and green variegated foliage.
  • Ficus elastica ‘Ruby’ – Pink-tinted variegated leaves.

Why Choose a Rubber Plant?

There are plenty of reasons why Rubber Plants are a favorite among plant enthusiasts:

  • Low-maintenance: Easy for beginners with basic care.
  • Air-purifying: Helps remove indoor toxins like formaldehyde.
  • Visually bold: Its large, shiny leaves instantly elevate any space.
  • Adaptable: Can thrive in different lighting and humidity conditions.
  • Fast-growing: With the right care, it can grow several inches per year.

How to Care for a Rubber Plant for Beginners

Though relatively fuss-free, Rubber Plants do have some preferences. Here’s a complete, beginner-friendly care guide to help your Rubber Plant thrive indoors.


1. Light Requirements

Rubber Plants love light but prefer it bright and indirect.

  • Ideal placement: Near an east-facing or south-facing window with filtered sunlight.
  • Too much direct sun: Can scorch the leaves, causing browning.
  • Low light: Will slow growth and cause leaves to drop.

Tip: If your Rubber Plant’s leaves look dull or if it leans towards the window, it might need more light.


2. Watering Routine

Rubber Plants like to dry out slightly between waterings.

  • When to water: Allow the top 1-2 inches of soil to dry before watering again.
  • Water thoroughly: Water until it drains out of the pot’s bottom, then discard excess water.
  • In winter: Reduce watering frequency as the plant’s growth slows.

Signs of overwatering: Yellowing leaves, mushy stems, or root rot.
Signs of underwatering: Drooping or dry, crispy leaves.

Pro tip: Use room-temperature, filtered, or rainwater to avoid chemical sensitivity.


3. Temperature and Humidity Needs

Rubber Plants thrive in warm, humid environments.

  • Ideal temperature: Between 65°F to 80°F (18°C to 27°C).
  • Avoid cold drafts, heaters, or AC vents that can cause leaf drop.
  • Humidity: Prefers moderate humidity but tolerates normal indoor levels.

How to boost humidity:

  • Mist the leaves occasionally.
  • Use a pebble tray with water beneath the pot.
  • Group it with other humidity-loving plants.
  • Run a small humidifier nearby if your air is very dry.

4. Soil and Potting Tips

Rubber Plants need well-draining, slightly acidic soil.

  • Best soil mix: Use an indoor potting mix combined with perlite or coarse sand for better drainage.
  • Pot selection: Always choose a pot with drainage holes to prevent root rot.

Repot every 2-3 years or when roots become cramped. Spring is the best time for repotting.


5. Fertilizing for Growth

Feed your Rubber Plant regularly during its active growing months.

  • When to fertilize: Every 4-6 weeks in spring and summer.
  • Fertilizer type: Use a balanced, water-soluble houseplant fertilizer diluted to half strength.
  • In fall and winter: Pause fertilizing as the plant rests.

Tip: Over-fertilizing can damage roots. If unsure, it’s better to underfeed than overfeed.


6. Pruning and Maintenance

Pruning helps control the size of your Rubber Plant and encourages fuller growth.

  • When to prune: Late spring or early summer.
  • How to prune: Use sterilized scissors to trim stems just above a leaf node.
  • Remove yellowing or damaged leaves as needed.

Bonus tip: Pruning cuttings can be propagated to grow new plants.

Warning: Rubber Plants release a milky sap when cut. It can irritate skin, so wear gloves and wash your hands after pruning.


7. Propagation Methods

Want to multiply your Rubber Plant? Propagation is easy, even for beginners.

Steps for stem cutting propagation:

  1. Cut a healthy stem just below a leaf node.
  2. Remove lower leaves, leaving 1-2 at the top.
  3. Dip the cut end in rooting hormone (optional).
  4. Plant the cutting in moist soil or place it in water.
  5. Keep in a warm, bright spot and maintain humidity.

Roots usually develop within 3-6 weeks.


8. Common Rubber Plant Problems and Solutions

ProblemCauseSolution
Yellowing leavesOverwateringCheck soil moisture, reduce watering
Drooping leavesUnderwatering, draft exposureWater properly, move away from drafts
Leaf dropSudden temperature changesKeep in stable, warm conditions
Brown leaf tips/edgesLow humidity or underwateringIncrease humidity, mist leaves
Pests (spider mites, scale)Dry air, poor airflowWipe leaves with insecticidal soap

Styling Ideas for Your Rubber Plant

Thanks to its striking foliage, the Rubber Plant makes a perfect décor accent.

  • Corner statement: Tall varieties look stunning in living room or bedroom corners.
  • Desk or tabletop: Young plants in decorative pots add character to workspaces.
  • Bathroom greenery: Loves the humidity of bathrooms, provided there’s enough light.
  • Paired with baskets: Place the pot in a woven basket for a chic, natural look.

Fun Facts About Rubber Plants

  • In the wild, Rubber Plants can grow aerial roots that support their massive trunks.
  • The latex sap was once used to make rubber, though it’s not the primary source today.
  • NASA listed Rubber Plants among its top air-purifying indoor plants.

Final Thoughts

The Rubber Plant is a fantastic choice for beginners looking for a low-maintenance, visually appealing houseplant. With its dramatic, glossy leaves and forgiving nature, it quickly becomes a favorite in any indoor garden.

By providing the right balance of light, water, warmth, and occasional pruning, you’ll enjoy a healthy, vibrant Rubber Plant that can grow for years — even decades. Whether you’re starting your first houseplant collection or expanding your green space, the Rubber Plant is a reliable, easy-care companion you won’t regret bringing home.

Ready to add one to your space? Follow this care guide, and your Rubber Plant will reward you with beauty, cleaner air, and plenty of compliments from guests.

How to Care for a Prayer Plant Indoors

How to Care for a Prayer Plant Indoors

Indoor houseplants have a unique way of bringing life, beauty, and tranquility into your living space. Among the most enchanting of them is the Prayer Plant. Known for its striking, patterned leaves and fascinating behavior of folding its leaves at night — as if in prayer — this plant has charmed plant enthusiasts around the world.

If you’re thinking about adding one of these beauties to your collection, or you already have one and want to learn how to help it thrive, this detailed care guide will walk you through everything you need to know about how to care for a Prayer Plant indoors.


What Is a Prayer Plant?

The Prayer Plant (scientific name Maranta leuconeura) is native to the tropical rainforests of Brazil. It belongs to the Marantaceae family, known for its eye-catching foliage. The plant’s name comes from its remarkable behavior: at dusk, its leaves lift upward as if in a praying posture, and then lower again in the morning.

Prayer Plants are cherished for their:

  • Bold leaf patterns: Featuring shades of green, red, and cream with vein-like designs.
  • Unique movement: Leaves fold up at night and unfold during the day.
  • Compact size: Making them ideal for small spaces, shelves, and tabletops.

Popular varieties include:

  • Maranta leuconeura ‘Erythroneura’ (Red Prayer Plant) with dark green leaves and red veins.
  • Maranta leuconeura ‘Kerchoveana’ (Green Prayer Plant) with green leaves spotted with darker green patches.

Benefits of Growing a Prayer Plant Indoors

Besides being visually stunning, Prayer Plants offer several indoor benefits:

  • Air purification: Helps remove common indoor toxins.
  • Compact growth habit: Perfect for apartments, offices, or smaller homes.
  • Conversation starter: Its leaf movements captivate guests and plant lovers alike.
  • Pet-friendly: Non-toxic to cats and dogs.

How to Care for a Prayer Plant Indoors

While Prayer Plants are considered moderately easy to care for, they do have a few specific preferences you’ll need to meet to help them flourish.


1. Lighting Requirements

Prayer Plants prefer bright, indirect light. They thrive in areas with filtered sunlight but can tolerate lower light conditions better than some other tropical plants.

  • Ideal light: A north- or east-facing window where it gets plenty of indirect light.
  • Too much direct sun: Can scorch the leaves, causing browning and faded patterns.
  • Low light: Will slow growth and may reduce leaf color vibrancy.

Tip: If you notice the leaves fading or curling, try moving your plant to a brighter, indirect light spot.


2. Watering Schedule

Prayer Plants love consistent moisture but dislike soggy soil. Getting the watering routine right is crucial:

  • Water when the top inch of soil feels dry.
  • Use room-temperature, filtered, or rainwater if possible, as they can be sensitive to fluoride and chlorine.
  • Water thoroughly until excess drains out, but always empty the saucer to avoid root rot.
  • In winter: Reduce watering frequency as growth naturally slows.

Signs of overwatering: Yellowing leaves, mushy stems, or black root tips.
Signs of underwatering: Crisp, brown leaf edges and wilting leaves.


3. Temperature and Humidity Needs

Since Prayer Plants originate from tropical rainforests, they prefer warm and humid conditions.

  • Ideal temperature: Between 65°F to 80°F (18°C to 27°C). Avoid placing it near cold drafts, air conditioners, or heaters.
  • Humidity: High humidity levels are key. Aim for 50% or higher.

How to increase humidity:

  • Mist leaves regularly with water.
  • Place the plant on a pebble tray with water.
  • Use a humidifier nearby.
  • Group plants together to naturally raise humidity.

4. Best Soil and Potting

Prayer Plants thrive in well-draining, slightly acidic soil that retains some moisture but doesn’t stay soggy.

  • Soil mix suggestion: Combine potting soil with perlite, orchid bark, and a bit of peat moss or coco coir for moisture retention and good drainage.
  • Pot selection: Use a pot with drainage holes to avoid water accumulation at the roots.

Repot every 2–3 years or when the roots outgrow the container.


5. Fertilizing for Healthy Growth

Like most houseplants, Prayer Plants benefit from regular feeding during their growing season.

  • When to feed: Every 4 weeks from spring through early fall.
  • Fertilizer type: Use a balanced, water-soluble houseplant fertilizer diluted to half strength.
  • Avoid over-fertilizing: Excess fertilizer can burn the roots and leaves.

Tip: Skip fertilizing in winter as the plant’s growth naturally slows.


6. Pruning and Maintenance

Regular pruning encourages bushier, fuller growth and keeps your plant looking tidy.

  • When to prune: Anytime you notice leggy stems or damaged leaves.
  • How to prune: Use clean, sharp scissors to trim just above a leaf node.
  • Remove yellow, brown, or dead leaves promptly.

Bonus tip: You can propagate the healthy cuttings in water to grow new plants!


7. Propagation Tips

Propagation is a fun way to multiply your Prayer Plants and share them with friends.

Steps for water propagation:

  1. Cut a healthy stem just below a node (where the leaf and stem join).
  2. Remove the lower leaves, leaving a couple at the top.
  3. Place the cutting in a jar of filtered water, ensuring the node is submerged.
  4. Keep in a warm, bright spot, changing water every few days.
  5. Once roots are a couple of inches long, plant it in soil.

Soil propagation: You can also plant cuttings directly into moist soil, covering the node, and keep humidity high until roots establish.


8. Common Prayer Plant Problems and Solutions

ProblemCauseSolution
Brown leaf tipsLow humidity, underwateringIncrease humidity, check watering schedule
Yellowing leavesOverwateringAllow soil to dry slightly between watering
Faded or curling leavesToo much direct sunlightMove to a bright, indirect light spot
Spider mites or mealybugsDry air and poor airflowWipe leaves with insecticidal soap or neem oil

Styling Ideas for Your Prayer Plant

Prayer Plants aren’t just pretty — they’re also incredibly versatile when it comes to indoor decor.

  • Hanging planters: Let their leaves drape down for a cascading effect.
  • Tabletop display: Their bold patterns make them perfect for accent tables or desks.
  • Bathroom greenery: With higher humidity, bathrooms can be a great spot.
  • Shelf display: Add them to plant shelves or mix with other tropical plants for a lush look.

Final Thoughts

Caring for a Prayer Plant indoors is a deeply rewarding experience. With its vibrant leaves, captivating nighttime movements, and relatively easy care needs, it’s the perfect choice for both novice and seasoned plant enthusiasts.

By offering the right balance of light, moisture, warmth, and humidity — along with occasional pruning and feeding — you’ll be rewarded with a thriving, beautiful plant that not only enhances your space but also connects you to nature’s gentle rhythms.

Ready to bring home a Prayer Plant? With a little love and attention, you’ll quickly see why this tropical gem remains a favorite in indoor gardens everywhere.

How to Care for a Pothos Plant for Growth

How to Care for a Pothos Plant for Growth

If you’re looking for a beautiful, low-maintenance houseplant that adds lush greenery to your home, the Pothos plant is an excellent choice. Known for its trailing vines and heart-shaped leaves, Pothos (Epipremnum aureum) is not only easy to care for but also one of the best plants for beginners. Whether you’re a seasoned indoor gardener or a newcomer to plant care, this guide will walk you through everything you need to know about how to care for a Pothos plant and encourage healthy, vibrant growth.


What Is a Pothos Plant?

Pothos, also known as Devil’s Ivy, is a tropical vine native to Southeast Asia. It’s loved for its hardy nature and its ability to thrive in a variety of indoor conditions. With its glossy green leaves, often variegated with yellow, white, or pale green streaks, it adds a fresh, natural touch to any room.

Varieties of Pothos include:

  • Golden Pothos: Classic green leaves with golden-yellow streaks.
  • Marble Queen: White and green marbled foliage.
  • Neon Pothos: Bright, chartreuse-green leaves.
  • Jade Pothos: Solid deep green leaves.
  • Pearls and Jade: Creamy white and green variegation.

Benefits of Growing Pothos Indoors

Before diving into care tips, it’s worth noting why so many plant lovers swear by Pothos:

  • Air purification: Pothos can help remove indoor air pollutants like formaldehyde, benzene, and xylene.
  • Versatile decor plant: It thrives in hanging baskets, on shelves, or as a climbing plant.
  • Easy propagation: New plants can be easily grown from cuttings.
  • Low-maintenance: It’s forgiving if you forget to water now and then.

How to Care for a Pothos Plant for Growth

Let’s break down the essential care requirements to keep your Pothos thriving:

1. Lighting Needs

Pothos plants are incredibly adaptable, but their growth depends significantly on lighting conditions:

  • Ideal light: Bright, indirect light is perfect for healthy, vigorous growth.
  • Tolerates low light: It can survive in low-light rooms, but growth may slow, and variegation might fade.
  • Avoid direct sunlight: Too much direct sun can scorch the leaves and cause browning.

Tip: If your plant’s leaves start looking pale or yellowish and growth slows down, it might need a brighter spot.


2. Watering Routine

Overwatering is one of the most common mistakes with Pothos care. Here’s how to water it right:

  • Check soil moisture: Stick your finger an inch into the soil — water when it feels dry.
  • Water thoroughly: When watering, let water run through the drainage holes, and discard excess from the saucer.
  • Reduce watering in winter: The plant’s growth slows during colder months, so cut back on watering frequency.

Signs of overwatering: Yellowing leaves, wilting despite moist soil, root rot.
Signs of underwatering: Dry, drooping, or curling leaves.


3. Ideal Temperature and Humidity

Pothos prefers warm, humid conditions similar to its native tropical habitat:

  • Temperature: Best between 65°F and 85°F (18°C to 29°C). Avoid placing it near cold drafts or heating vents.
  • Humidity: Though it tolerates average indoor humidity, it thrives with slightly higher humidity levels.

Tip: In dry winter months, place a pebble tray with water or a small humidifier nearby to boost humidity.


4. Soil and Potting

Pothos isn’t picky about soil, but well-draining potting mix is crucial:

  • Recommended soil: A standard indoor potting mix with good aeration works well.
  • Pot selection: Choose a pot with drainage holes to prevent waterlogging and root rot.

You can even add perlite or orchid bark to the mix for enhanced drainage.


5. Fertilizing for Growth

While Pothos can grow without much feeding, regular fertilization encourages lush, vibrant growth:

  • Frequency: Feed once a month during spring and summer (the active growing season).
  • Type: Use a balanced, water-soluble houseplant fertilizer diluted to half strength.
  • Avoid winter feeding: Growth slows down in winter, and fertilizing is unnecessary.

6. Pruning and Maintenance

Regular pruning keeps your Pothos bushy, healthy, and prevents legginess:

  • When to prune: Anytime when the vines get too long or leggy.
  • How to prune: Use clean, sharp scissors to cut just above a leaf node.
  • Remove yellow leaves: Trim off any yellow, damaged, or diseased leaves to encourage new growth.

Tip: You can propagate the cuttings easily in water or soil to create new plants!


7. Propagation Tips

One of the joys of owning a Pothos is how effortlessly it propagates:

  • Cut a healthy vine: Make sure the cutting has at least 4–6 inches of stem with 2–3 leaves.
  • Remove the lower leaves: Leave the top leaves and strip the bottom ones.
  • Place in water: Submerge the nodes (the little bumps where leaves and roots grow) in a jar of water.
  • Wait for roots: In about 2–4 weeks, roots will develop. Then, plant it in soil.

Tip: Change the water every few days to keep it fresh and prevent bacterial buildup.


8. Common Problems and Solutions

Despite being hardy, Pothos can encounter a few issues:

ProblemCauseSolution
Yellowing leavesOverwatering or underwateringAdjust watering schedule
Brown leaf tipsLow humidity or over-fertilizingIncrease humidity or reduce feeding
Leggy growthInsufficient lightMove to a brighter spot
Pests (mealybugs, spider mites)Dry conditions or poor airflowWipe leaves with insecticidal soap

Styling Ideas for Your Pothos

Get creative with how you display your Pothos:

  • Hanging baskets: Let the vines cascade down for a dramatic look.
  • Shelf decor: Place on a high shelf and allow vines to trail elegantly.
  • Climbing trellis: Encourage it to climb a moss pole or wall-mounted trellis.
  • Bathroom buddy: With its love for humidity, it thrives beautifully in bathrooms.

Final Thoughts

Caring for a Pothos plant is one of the easiest and most rewarding ways to bring life and greenery into your home. With its forgiving nature and adaptable care needs, it’s perfect for both plant beginners and experienced indoor gardeners. By providing the right balance of light, water, and occasional feeding — and a little pruning now and then — you’ll have a thriving, beautiful plant that adds lush charm to any space.

So why not bring one home today? With a bit of love and care, your Pothos plant will reward you with years of growth and natural beauty.

How to Care for a Peace Lily Plant Effectively

How to Care for a Peace Lily Plant Effectively

If you’re searching for a houseplant that’s both beautiful and beginner-friendly, look no further than the Peace Lily (Spathiphyllum). Known for its graceful white blooms, lush green leaves, and air-purifying qualities, the Peace Lily is a classic indoor plant choice loved by gardeners and home decorators alike.

Though it’s often labeled as “easy-care,” a Peace Lily does have a few specific needs to thrive indoors. In this detailed care guide, we’ll cover everything you need to know about how to care for a Peace Lily plant effectively — from watering and lighting tips to common problems and propagation.


About the Peace Lily

Native to the tropical rainforests of Central and South America, the Peace Lily isn’t a true lily but belongs to the Araceae family. Its scientific name, Spathiphyllum, comes from Greek words meaning “spathe leaf,” referencing the plant’s distinctive white spathes (the flower-like bracts) that cradle a central spadix, resembling a delicate white sail.

Not only is the Peace Lily visually striking, but it’s also known for its ability to improve indoor air quality by removing toxins like formaldehyde, benzene, and carbon monoxide — a feature highlighted by NASA’s Clean Air Study.


Ideal Location and Lighting

The Peace Lily thrives in bright, indirect light but can also tolerate lower light conditions, making it perfect for homes and offices with less natural sunlight.

Lighting Guidelines:

  • Bright, indirect light is ideal. A north- or east-facing window works beautifully.
  • Avoid direct sunlight, as it can scorch the leaves and cause yellowing.
  • In low light, the plant may produce fewer flowers but will still maintain lush foliage.

Signs of Poor Lighting:

  • Too much light: Leaves turn pale, develop brown spots, or get scorched.
  • Too little light: Slow growth and fewer or no blooms.

Tip: Rotate your plant occasionally to encourage even growth on all sides.


Watering Your Peace Lily

Proper watering is the cornerstone of Peace Lily care. These plants prefer consistently moist soil but are sensitive to overwatering.

Watering Guidelines:

  • Water when the top 1–2 inches of soil feel dry to the touch.
  • Use room-temperature, filtered water if possible, as Peace Lilies can be sensitive to chlorine and fluoride in tap water.
  • Reduce watering in the cooler months when the plant’s growth slows.

How Often to Water:

  • Typically once a week during spring and summer.
  • Every 10–14 days during fall and winter.

Signs of Overwatering:

  • Yellow leaves
  • Wilting despite wet soil
  • Root rot (indicated by a musty smell)

Signs of Underwatering:

  • Drooping leaves
  • Dry, crispy leaf tips
  • Brown edges

Pro tip: The Peace Lily is excellent at communicating its thirst. When leaves start to droop, it’s time to water.


Soil and Potting Needs

A light, well-draining potting mix is essential to keep the Peace Lily’s roots healthy and prevent waterlogged soil.

Best Soil Mix:

  • Use a high-quality peat-based potting mix with added perlite or orchid bark for improved aeration.
  • The soil should retain moisture without becoming soggy.

Pot Selection:

  • Choose a pot with drainage holes.
  • Consider using a decorative cachepot, but ensure you remove the inner pot for watering and allow it to drain properly.

Repotting Tips:

  • Repot every 1–2 years, preferably in early spring.
  • Move to a slightly larger pot when roots start circling the bottom.

Humidity and Temperature Requirements

As a tropical plant, the Peace Lily loves warm and humid conditions.

Ideal Temperature:

  • Between 65°F and 80°F (18°C to 27°C).
  • Avoid cold drafts and sudden temperature drops.

Humidity Needs:

  • Prefers humidity levels of 50% or higher.
  • Mist leaves regularly, use a pebble tray, or place a humidifier nearby, especially in winter when indoor air tends to be drier.

Tip: Browning leaf tips are often a sign of dry air or chlorine sensitivity.


Fertilizing Your Peace Lily

Though not heavy feeders, Peace Lilies benefit from occasional fertilizing during their growing season.

Fertilizing Schedule:

  • Apply a balanced, water-soluble houseplant fertilizer every 6–8 weeks during spring and summer.
  • Dilute the fertilizer to half the recommended strength to avoid over-fertilizing, which can cause brown leaf tips.

Avoid fertilizing in fall and winter when the plant is not actively growing.

Signs of Over-Fertilizing:

  • Brown, scorched leaf tips
  • Crusty white deposits on the soil surface

Pruning and Grooming

Regular maintenance keeps your Peace Lily looking its best and promotes healthy growth.

Pruning Guidelines:

  • Remove yellow or brown leaves at the base of the stem with clean, sharp scissors.
  • Cut spent flowers at the base once they fade.

Grooming Tips:

  • Wipe leaves occasionally with a damp cloth to remove dust and improve photosynthesis.
  • This also helps prevent pests like spider mites and mealybugs.

Propagation

Propagating a Peace Lily is straightforward through division.

How to Propagate by Division:

  1. Remove the plant from its pot and gently shake off excess soil.
  2. Locate natural divisions in the root clump, each with a few leaves and healthy roots.
  3. Use clean, sharp scissors to separate the sections.
  4. Plant each section in fresh, moist potting soil.
  5. Water lightly and place in a warm, shaded area for a few days to recover.

Best Time to Propagate:
Spring or early summer when the plant is actively growing.


Common Problems and How to Fix Them

1. Yellow Leaves:
Usually caused by overwatering or poor drainage. Check soil moisture and drainage holes.

2. Brown Leaf Tips:
Can be due to dry air, underwatering, or chlorine sensitivity. Increase humidity and use filtered water.

3. Drooping Leaves:
A natural response to thirst or overwatering. Check the soil before watering.

4. No Blooms:
Often a result of insufficient light or lack of nutrients. Move to a brighter location and consider a diluted fertilizer.

5. Pests:
Occasionally affected by spider mites, aphids, or mealybugs. Wipe leaves with insecticidal soap or neem oil.


Benefits of Having a Peace Lily

✔ Air Purification:
Removes common indoor pollutants, improving air quality.

✔ Easy to Care For:
Forgiving and communicative, making it perfect for beginners.

✔ Beautiful Blooms:
Adds elegance and freshness to any space.

✔ Symbol of Peace and Purity:
Often gifted during times of remembrance or housewarming.


Final Thoughts

The Peace Lily is a timeless houseplant favorite for good reason. With its lush foliage, delicate white blooms, and air-cleansing abilities, it brings tranquility and beauty to any room. By following these effective care tips — providing the right light, moisture, temperature, and occasional grooming — your Peace Lily will thrive and reward you with year-round greenery and occasional blooms.

So, whether you’re new to indoor gardening or a seasoned plant parent, the Peace Lily is a wonderful, low-maintenance companion for your home.

How to Care for a Monstera Plant Indoors

How to Care for a Monstera Plant Indoors

The Monstera plant, often called the “Swiss Cheese Plant” because of its iconic split and holey leaves, has become a staple in modern homes. Its lush, tropical vibe and striking foliage instantly elevate any space, making it one of the most popular houseplants around. But while Monstera plants are known for being relatively low-maintenance, they do have specific care needs to thrive indoors.

In this guide, we’ll dive into everything you need to know about how to care for a Monstera plant indoors — from choosing the right spot to watering, feeding, pruning, and dealing with common issues. Whether you’re a first-time plant parent or a seasoned indoor gardener, these tips will help you keep your Monstera happy and healthy.


About the Monstera Plant

The Monstera deliciosa is native to the rainforests of Central America, where it thrives under the forest canopy. In its natural habitat, this climbing evergreen vine uses aerial roots to attach itself to trees and grows up toward the sunlight. Its iconic split leaves are not just beautiful — they help the plant withstand strong winds and heavy rainfall.

Monstera plants can grow quite large indoors, with leaves reaching up to three feet in width if conditions are right. They also occasionally produce edible fruit in their natural habitat, though this is rare indoors.


Choosing the Right Location

Light is one of the most important factors when it comes to caring for a Monstera indoors.

Ideal Lighting Conditions:

  • Bright, indirect light is best. A spot near an east-facing window or a few feet away from a bright south or west-facing window works wonderfully.
  • Direct sunlight can scorch the leaves, while too little light may cause slow growth and small, unsplit leaves.

Signs of Improper Lighting:

  • Too much light: Brown, crispy edges on the leaves.
  • Too little light: Pale leaves, leggy growth, or no new leaf splits.

Pro tip: If your home lacks natural light, Monsteras adapt well to grow lights — choose a full-spectrum LED grow light to mimic natural sunlight.


Watering Your Monstera

Monsteras prefer consistently moist (but never soggy) soil. Overwatering is one of the most common mistakes new plant owners make.

Watering Guidelines:

  • Water your Monstera when the top 2–3 inches of soil feel dry.
  • Use room-temperature, filtered water if possible.
  • Make sure the pot has drainage holes to prevent root rot.

How Often to Water:

  • Typically, water every 1–2 weeks, adjusting based on the season and your home’s humidity.

Signs of Overwatering:

  • Yellowing leaves
  • Mushy stems
  • Foul-smelling soil

Signs of Underwatering:

  • Drooping leaves
  • Crispy brown edges
  • Slow or stunted growth

Humidity and Temperature Needs

Since Monstera plants are native to tropical rainforests, they love warm, humid conditions.

Ideal Temperature:

  • Between 65°F and 85°F (18°C to 29°C).
  • Avoid exposing your Monstera to cold drafts or sudden temperature changes.

Humidity Requirements:

  • Prefers humidity levels of 60% or higher.
  • Mist the leaves regularly, place a humidifier nearby, or use a pebble tray with water to boost local humidity.

Leaf tip browning can be a sign of low humidity, especially during winter when indoor air tends to be drier.


Choosing the Right Soil and Pot

A well-draining, aerated potting mix is essential for keeping your Monstera’s roots healthy.

Best Soil Mix:

  • A mixture of peat-based potting soil, orchid bark, and perlite or pumice works beautifully.
  • The soil should hold some moisture but allow excess water to drain away easily.

Pot Selection:

  • Choose a pot with drainage holes.
  • Terracotta pots help wick away excess moisture, while plastic pots retain more water.

Repotting Tips:

  • Repot every 1–2 years or when roots start growing out of the drainage holes.
  • Spring or early summer is the best time to repot.

Fertilizing Your Monstera

To encourage lush, vigorous growth, Monsteras benefit from regular feeding during the growing season.

Fertilizing Schedule:

  • Feed every 4–6 weeks from spring through early fall.
  • Use a balanced, water-soluble houseplant fertilizer diluted to half strength.

Avoid fertilizing in winter, as the plant’s growth naturally slows down during this period.

Signs Your Plant Needs Fertilizer:

  • Pale leaves
  • Slow growth
  • Smaller new leaves without splits

Pruning and Training

Monsteras are natural climbers, and with the right support, they can grow tall and sprawling indoors.

Pruning Tips:

  • Regularly remove yellow, damaged, or old leaves.
  • Prune leggy stems to encourage bushier growth.
  • Always use clean, sharp scissors or pruning shears.

Training Your Monstera:

  • Use a moss pole or trellis to support vertical growth.
  • Secure the stems with soft plant ties or twine.

Bonus Tip: Wipe the leaves occasionally with a damp cloth to remove dust and keep them shiny.


Propagating a Monstera

One of the joys of owning a Monstera is how easy it is to propagate and share with friends.

Propagation by Stem Cutting:

  1. Choose a healthy stem with at least one node (a bump where a leaf and aerial root emerge).
  2. Cut just below the node.
  3. Place the cutting in water or moist soil.
  4. Keep in a warm, bright location.
  5. Roots should develop within 2–4 weeks.

Once roots are a few inches long, you can transplant the cutting into a pot with soil.


Common Monstera Problems (and How to Fix Them)

1. Yellowing Leaves:
Usually a sign of overwatering. Check soil moisture and drainage.

2. Brown, Crispy Edges:
Often caused by low humidity or underwatering. Increase humidity and check watering frequency.

3. Small, Unsplitted Leaves:
Likely due to insufficient light. Move to a brighter location or add a grow light.

4. Drooping Leaves:
Could mean either underwatering or overwatering. Check soil moisture before watering.


Final Thoughts

Caring for a Monstera indoors is a rewarding and relatively easy experience, making it a perfect addition to any home — whether you’re a beginner plant parent or an experienced plant lover. By providing the right balance of light, water, humidity, and nutrients, your Monstera will thrive and grace your space with its stunning, sculptural leaves for years to come.

If you’ve been dreaming of creating a lush indoor jungle, starting with a Monstera is a great first step!

How to Care for a Kalanchoe Plant at Home: A Complete Guide for Healthy, Beautiful Blooms

How to Care for a Kalanchoe Plant at Home: A Complete Guide for Healthy, Beautiful Blooms

Looking to add a splash of color and tropical charm to your indoor garden? The Kalanchoe plant is the perfect pick! Known for its long-lasting, vibrant blooms and easy-going nature, this succulent is a favorite among houseplant enthusiasts and beginners alike.

Whether you’ve just brought one home or you’re hoping to revive an existing plant, this guide will walk you through everything you need to know about how to care for a Kalanchoe plant at home — from light, water, and soil preferences to pruning, fertilizing, and troubleshooting common problems.


What Is a Kalanchoe Plant?

Kalanchoe is a genus of flowering succulents native to Madagascar and tropical regions of Africa. With over 200 species, these plants are adored for their thick, waxy leaves and vibrant, small cluster flowers that bloom in shades of red, pink, orange, yellow, and white.

The most popular variety for indoor care is Kalanchoe blossfeldiana, often seen in grocery stores and nurseries, especially around winter holidays and spring.


Why Choose Kalanchoe for Your Home?

  • Bright, long-lasting blooms
  • Low-maintenance succulent care
  • Drought-tolerant
  • Compact and space-friendly
  • Air-purifying properties

This plant makes a cheerful windowsill accent, desk companion, or kitchen table centerpiece with minimal effort.


How to Care for a Kalanchoe Plant at Home

Here’s a detailed, step-by-step guide to keeping your Kalanchoe healthy and thriving indoors:


1. Light Requirements

Kalanchoe loves bright, indirect sunlight. Place your plant near a sunny, east- or west-facing window where it can soak in plenty of light without being scorched by direct midday sun.

Ideal Conditions:

  • 6-8 hours of bright, indirect light daily
  • Morning or late afternoon sun is best
  • Avoid dimly lit rooms or constant shade, as this will result in leggy growth and poor flowering.

Tip: If natural light is limited, supplement with a grow light during fall and winter.


2. Watering Your Kalanchoe

Since it’s a succulent, Kalanchoe stores water in its leaves and prefers to dry out between waterings.

Watering Guidelines:

  • Water thoroughly when the top 1-2 inches of soil are dry.
  • Discard any excess water from the saucer to prevent root rot.
  • In winter, reduce watering as plant growth slows.

Warning: Overwatering is the most common cause of Kalanchoe problems. Always check soil moisture before watering.


3. Best Soil for Kalanchoe

Kalanchoe thrives in well-draining, loose, and airy soil. Regular potting soil tends to retain too much moisture, so it’s best to amend it or use a cactus/succulent mix.

Ideal Soil Mix:

  • 50% potting soil
  • 50% perlite, coarse sand, or cactus mix

This combination ensures proper drainage and reduces the risk of root rot.


4. Choosing the Right Pot

Always plant your Kalanchoe in a pot with drainage holes. Terracotta or clay pots are excellent choices because they allow moisture to evaporate from the soil more quickly.

Tip: Avoid overly large pots — these plants prefer to be slightly root-bound.


5. Temperature and Humidity

Kalanchoe prefers moderate indoor temperatures.

Ideal Temperature Range:

  • 60°F to 85°F (16°C to 29°C)
  • Keep away from cold drafts, heating vents, and air conditioners.

These succulents don’t require high humidity and actually prefer dry indoor air — making them perfect for typical home environments.


6. Fertilizing for Healthy Growth

To promote lush leaves and vibrant blooms, feed your Kalanchoe during its active growing season (spring and summer).

Fertilizer Recommendations:

  • Use a balanced, water-soluble fertilizer (20-20-20 or 10-10-10) diluted to half strength.
  • Fertilize once a month during spring and summer.
  • Avoid fertilizing during fall and winter dormancy.

7. Pruning and Deadheading

Pruning keeps your plant compact, tidy, and encourages repeat blooming.

How to Prune:

  • Remove faded flowers by pinching them off just above the first set of leaves.
  • Trim any leggy or overgrown stems with sterilized scissors.
  • Cut back excessive growth after flowering to maintain the plant’s shape.

Tip: Don’t throw away healthy stem cuttings — you can easily propagate them!


8. How to Propagate Kalanchoe

One of the joys of owning a Kalanchoe is how easy it is to multiply!

Propagation Method:

  • Take a 3-5 inch cutting from a healthy stem.
  • Allow the cutting to dry and callous over for 24-48 hours.
  • Plant it in a small pot filled with cactus mix.
  • Water sparingly until roots develop (about 2-3 weeks).

Soon, you’ll have a brand-new plant to share or add to your collection.


9. Common Problems and Solutions

While Kalanchoe is relatively easygoing, here are a few common issues and how to handle them:

Drooping or Mushy Leaves

Cause: Overwatering
Solution: Allow soil to dry completely and reduce watering frequency.

Yellowing Leaves

Cause: Poor drainage or root rot
Solution: Repot in fresh, well-draining soil and trim away damaged roots.

Leggy Growth

Cause: Insufficient light
Solution: Move to a brighter location or use a grow light.

No Blooms

Cause: Too little light or lack of dormancy period
Solution: Provide at least 6 hours of bright light daily and reduce watering/fertilizing in winter to encourage blooming.


Bonus: How to Rebloom Your Kalanchoe

After its first show of flowers fades, you can encourage a Kalanchoe to bloom again with the right care.

Steps to Rebloom:

  1. After flowering, trim dead blooms and reduce watering.
  2. For 6 weeks, give the plant 12-14 hours of darkness each night and bright light during the day.
  3. Resume normal care after buds appear.

Tip: Place the plant in a dark closet or cover it with a light-blocking box during evening hours to initiate bud formation.


Final Thoughts

The Kalanchoe plant is an ideal addition to any indoor plant collection. Its cheerful, colorful blooms and low-maintenance care routine make it perfect for both novice and experienced plant lovers.

By following this complete care guide — from lighting and watering to pruning and propagation — you’ll enjoy a healthy, thriving Kalanchoe that brightens your home year-round.

How to Build Planter Boxes for Your Garden: A Complete DIY Guide

How to Build Planter Boxes for Your Garden: A Complete DIY Guide

Adding planter boxes to your garden is one of the easiest and most rewarding ways to elevate your outdoor space. Whether you have a sprawling backyard, a cozy patio, or a compact balcony, planter boxes bring structure, beauty, and versatility to your plant arrangements. Even better — building them yourself is simpler than you might think!

In this comprehensive guide, we’ll show you how to build planter boxes for your garden from scratch, covering everything from materials and tools to step-by-step building instructions, design ideas, and maintenance tips.


Why Build Your Own Planter Boxes?

Before we dive into the how-to, let’s take a moment to appreciate why homemade planter boxes are a fantastic addition to any garden:

Customize to Fit Your Space

Design planter boxes in any size, shape, and style to perfectly suit your garden layout and planting needs.

Better Soil Control

Planter boxes allow you to control the soil type and drainage, which is ideal for plants that require specific growing conditions.

Reduce Weeds and Pests

Elevated planter boxes minimize weed growth and deter certain pests, like slugs and snails.

Easier Gardening

Planter boxes reduce the need to bend or kneel, making planting and harvesting more accessible and ergonomic.

Aesthetic Appeal

They add structure, color, and texture to your garden design, and can be stained or painted to match your outdoor decor.


What You’ll Need: Materials and Tools

Before you start building, gather these basic supplies:

Materials:

  • Wood boards (cedar, redwood, or pressure-treated pine work well)
  • Wood screws or galvanized nails
  • Weed barrier fabric or landscaping fabric (optional)
  • Sandpaper
  • Wood stain, paint, or sealant (optional)

Recommended wood sizes:

  • 1” x 6” or 2” x 6” for the sides
  • 2” x 2” or 2” x 4” for corner supports

Tools:

  • Tape measure
  • Saw (hand saw, circular saw, or miter saw)
  • Cordless drill or screwdriver
  • Hammer (if using nails)
  • Clamps (optional but helpful)
  • Paintbrush (if staining or sealing)

How to Build Planter Boxes for Your Garden: Step-by-Step

Let’s get building! Below is a simple method for creating a classic rectangular wooden planter box. You can adjust measurements based on your space and plant needs.


Step 1: Plan Your Dimensions

Decide how large you want your planter box to be. A common and versatile size is 4 feet long, 2 feet wide, and 1 foot tall, but feel free to modify this.

Tip: Keep width under 4 feet so you can easily reach the center from either side.


Step 2: Cut the Wood

Using your saw, cut the wood to your desired dimensions:

  • 2 long side panels (e.g. 48 inches)
  • 2 short end panels (e.g. 24 inches)
  • 4 corner supports (e.g. 12 inches tall)

Optional: Cut a bottom panel if you want a completely enclosed box.


Step 3: Sand the Edges

Smooth all cut edges with sandpaper to prevent splinters and create a polished finish.


Step 4: Assemble the Frame

Attach the side panels to the corner supports using wood screws or nails:

  • Start by attaching a short end panel to a corner support.
  • Repeat for the other three corners.
  • Connect the long side panels to complete the rectangular frame.

Tip: Use clamps to hold pieces in place for easier alignment while fastening.


Step 5: Add a Bottom (Optional)

If you’d like your planter box to be portable or sit on a patio, attach slats or a solid piece of wood for the bottom, leaving small gaps for drainage.

Note: For garden bed use, you can skip the bottom and place the box directly on the ground.


Step 6: Line the Interior (Optional)

To extend the life of your planter box, line the interior with a weed barrier fabric or landscape fabric before adding soil. This prevents soil erosion and wood rot while still allowing water drainage.


Step 7: Finish with Paint or Stain

Protect your planter box from the elements by applying a coat of exterior wood stain, sealant, or weather-resistant paint. This step isn’t mandatory, but it can dramatically increase the lifespan and appearance of your planter box.


Step 8: Add Soil and Plant

Once your box is dry and ready, fill it with high-quality garden soil suited to your plants. Add your chosen flowers, vegetables, or herbs — and enjoy your new garden feature!


Creative Planter Box Design Ideas

Want to get even more creative with your planter boxes? Here are a few inspiring ideas:

Tiered Planter Box

Build multiple stacked planter boxes at different heights for a cascading, space-saving garden.

Corner Planter

Construct a planter box that fits neatly into a garden corner or patio for efficient use of space.

Vertical Wall Planter

Attach small planter boxes to a wooden pallet or trellis for a vertical herb or flower garden.

Raised Planter with Legs

Elevate your planter box on legs to create a waist-high garden, perfect for patios or accessibility.

Reclaimed Wood Planters

Use old pallets, fence boards, or barn wood for a rustic, eco-friendly planter box with character.


Tips for Maintaining Your Planter Boxes

To keep your planter boxes looking great and functioning well, follow these care tips:

  • Reapply stain or sealant every year to protect the wood from weathering.
  • Check for loose screws or nails and tighten or replace them as needed.
  • If using a bottom panel, ensure drainage holes stay clear to prevent waterlogging.
  • Replace or refresh soil annually for the healthiest plants.
  • Avoid placing planter boxes directly on grass or soil if they’re not treated for ground contact.

Best Plants to Grow in Planter Boxes

Planter boxes are incredibly versatile and can accommodate a variety of plants, including:

Vegetables:

  • Lettuce
  • Carrots
  • Radishes
  • Peppers
  • Tomatoes (with staking or cages)

Flowers:

  • Petunias
  • Marigolds
  • Pansies
  • Geraniums
  • Begonias

Herbs:

  • Basil
  • Parsley
  • Mint (keep contained!)
  • Thyme
  • Oregano

Final Thoughts

Building your own planter boxes is a fun, affordable, and rewarding way to add beauty, function, and personality to your garden. Whether you opt for a simple rectangular frame or a custom vertical herb wall, planter boxes give you creative control over your garden’s layout and design.

By following this detailed guide, you’ll be able to create durable, attractive planter boxes that suit your space, protect your plants, and make gardening more enjoyable than ever.

How to Bottom Water Plants for Healthier Roots: A Complete Grower’s Guide

How to Bottom Water Plants for Healthier Roots: A Complete Grower’s Guide

If you’re looking to give your plants a healthier, stronger root system while reducing the risk of overwatering, it’s time to explore bottom watering. This simple yet highly effective watering technique ensures plants receive moisture right where they need it most — at their roots. But what exactly is bottom watering, how does it work, and which plants benefit most from it?

In this detailed guide, we’ll explain everything you need to know about bottom watering, including the benefits, step-by-step instructions, common mistakes to avoid, and expert tips to keep your plants thriving.


What is Bottom Watering?

Bottom watering is a method of watering plants by placing the plant’s container in a tray or shallow basin filled with water. Instead of pouring water on the soil surface, the plant absorbs moisture from the bottom up through the drainage holes in the pot.

This allows the roots to draw up exactly as much water as they need, promoting healthier and deeper root systems while preventing problems like surface mold, fungus gnats, and root rot.


Why Bottom Watering is Good for Your Plants

Bottom watering has gained popularity among houseplant lovers, seed starters, and even vegetable gardeners — and for good reason. Here’s why it works so well:

Promotes Stronger Root Development

When water is absorbed from the bottom, plant roots grow deeper as they chase moisture. This leads to a more resilient, well-established root system.

Prevents Overwatering

Since the plant takes up water at its own pace, it dramatically reduces the risk of waterlogging or drowning your roots — a common cause of root rot.

Reduces Soil Surface Issues

Surface watering can lead to compacted soil, mold growth, and fungus gnat infestations. Bottom watering keeps the soil surface drier and cleaner.

Ensures Even Moisture Distribution

Water is absorbed evenly throughout the root zone, avoiding dry pockets or water pooling on the surface.

Great for Seedlings and Delicate Plants

Seedlings and sensitive plants benefit from gentler watering from the bottom, as it prevents soil displacement and stem damage.


Which Plants Benefit Most from Bottom Watering?

While nearly any container plant can benefit from bottom watering, it’s especially helpful for:

  • Indoor houseplants (like pothos, snake plants, and African violets)
  • Succulents and cacti
  • Seedlings and young plants
  • Orchids
  • Herbs in containers
  • Plants prone to root rot

Note: Plants in large, heavy pots may be harder to bottom water due to size and weight, though it’s still possible with deep trays or buckets.


How to Bottom Water Plants: Step-by-Step Instructions

Ready to give it a try? Here’s exactly how to bottom water your plants:


What You’ll Need:

  • A plant in a pot with drainage holes
  • A tray, basin, or sink large enough to hold the pot
  • Fresh, clean water (preferably room temperature and chlorine-free)
  • A timer (optional)

Step 1: Check Soil Moisture

Before watering, check if your plant actually needs water. Stick your finger about an inch into the soil — if it feels dry, it’s time to water.


Step 2: Prepare the Water

Fill a shallow tray, basin, or sink with a few inches of water — usually about 1-2 inches deep depending on your pot size. Use filtered or dechlorinated water if possible, especially for sensitive plants.


Step 3: Place the Pot in the Tray

Set the potted plant into the tray of water, ensuring the pot’s drainage holes are fully submerged.


Step 4: Let It Soak

Allow the plant to soak up water for 10–30 minutes, depending on the size of the pot and how dry the soil is. You’ll notice the top of the soil becoming moist as water wicks upward.


Step 5: Test for Saturation

After about 10 minutes, gently press the top of the soil to feel if it’s evenly moist. If not, leave the plant in the tray a bit longer. Avoid letting it sit too long (over 30 minutes) to prevent over-saturation.


Step 6: Remove and Drain

Once the soil feels evenly moist, lift the pot out of the tray and let it drain thoroughly. You can place it on a saucer or towel for a few minutes to remove excess water.


Step 7: Return to Its Spot

Place your freshly watered plant back in its usual spot, and you’re done!


How Often Should You Bottom Water Plants?

The frequency of bottom watering depends on several factors, including:

  • Plant type
  • Pot size and material
  • Season and climate
  • Indoor humidity and temperature

In general:

  • Succulents and cacti: Every 2–3 weeks
  • Tropical houseplants: Every 7–10 days
  • Seedlings: As soon as the topsoil feels dry

Tip: Always check the soil moisture before watering to avoid overwatering.


Common Mistakes to Avoid

Even though bottom watering is beginner-friendly, there are a few pitfalls to watch out for:

Leaving Plants in Water Too Long

Soaking for over 30 minutes can lead to waterlogged soil and root rot. Always drain excess water afterward.

Using Dirty or Stagnant Water

Change the water in your tray or basin for each use to avoid bacteria and algae buildup.

Forgetting to Occasionally Top Water

Bottom watering doesn’t flush salts and mineral buildup from the soil surface. Every 4–6 weeks, give your plant a gentle top watering to rinse excess minerals.

Using Pots Without Drainage Holes

Bottom watering only works if water can be absorbed through the bottom. Avoid closed pots unless you’re using a double-pot system.


Bottom Watering vs. Top Watering: Which is Better?

Both watering methods have their place. Here’s a quick comparison:

Bottom WateringTop Watering
Promotes deeper, healthier rootsFaster and easier
Prevents fungus gnats and moldFlushed out salts and debris
Reduces risk of overwateringCan compact soil if done poorly
Requires drainage holesSuitable for all pots

Ideal approach:
Use bottom watering as your primary method and incorporate occasional top watering to keep soil fresh and balanced.


Expert Tips for Successful Bottom Watering

  • Use terra cotta pots — they breathe and help regulate soil moisture.
  • Add a layer of pebbles or stones to your tray to prevent the pot’s base from sitting in stagnant water.
  • Combine bottom watering with self-watering pots for hassle-free moisture management.
  • Avoid bottom watering plants that prefer drier conditions at their roots (like some orchids or air plants).

Final Thoughts

Bottom watering is a smart, gentle, and efficient technique that benefits your plants by promoting healthier roots, preventing overwatering, and keeping soil surfaces clean and pest-free. It’s especially useful for houseplants, succulents, seedlings, and plants prone to root rot.

By following the simple steps and tips shared in this guide, you’ll be well on your way to a happier, healthier indoor or container garden.