How to Plant Apple Trees – Start Your Orchard Dream!

How to Plant Apple Trees – Start Your Orchard Dream!

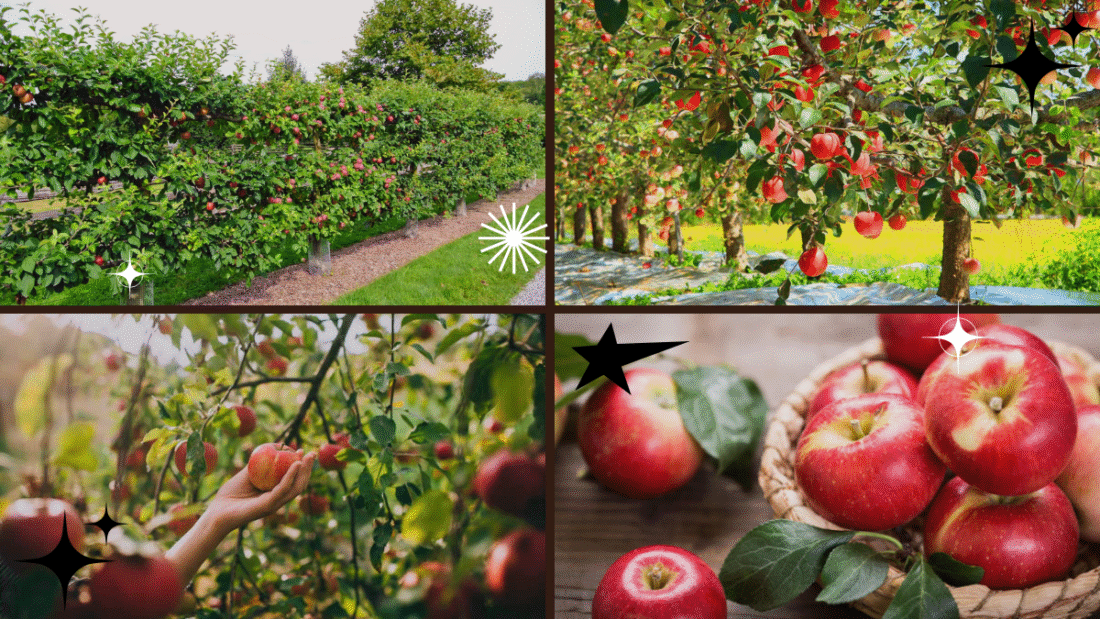
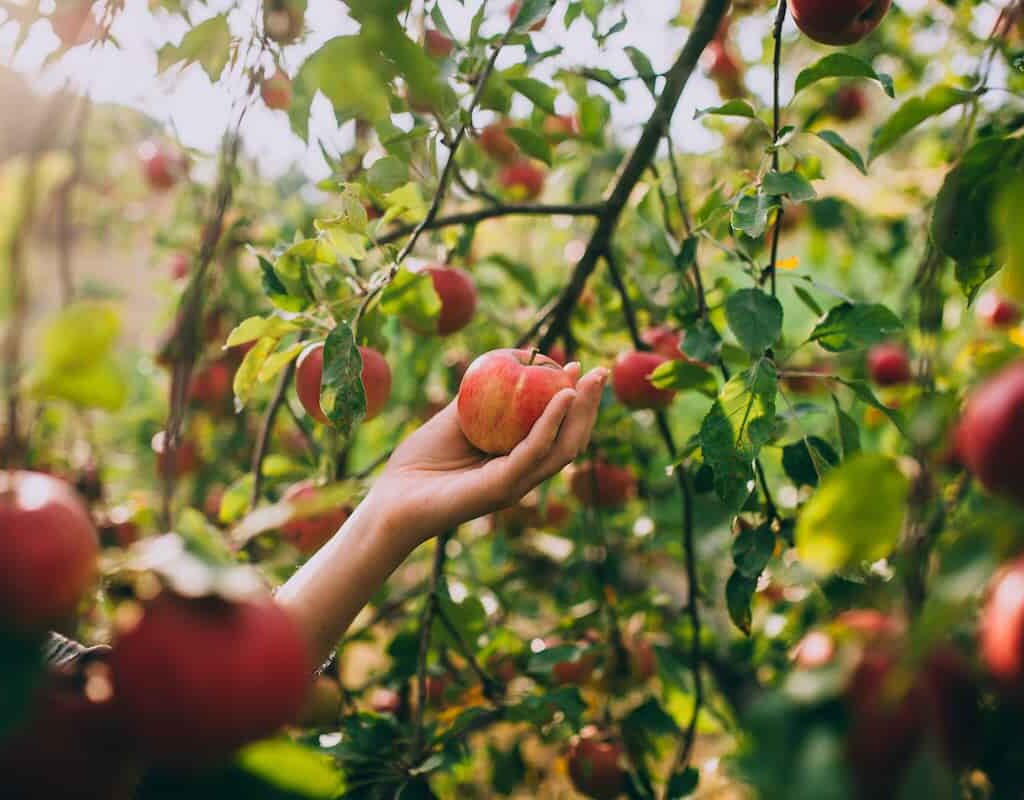
Imagine walking through your own backyard orchard, the branches of apple trees heavy with crisp, juicy fruits in shades of red, green, and gold. Not only do apple trees add beauty to your landscape, but they also provide fresh, delicious fruit for your kitchen — pies, jams, juices, and healthy snacks for years to come.

The best part? Growing apple trees isn’t as difficult as it might seem. With the right care and a little patience, you can easily start your own orchard dream, whether it’s a single tree or a grove of them. In this guide, we’ll walk you through everything you need to know to successfully plant and grow apple trees at home.


Why Plant Apple Trees?

Apple trees are one of the most popular and rewarding fruit trees to grow because:

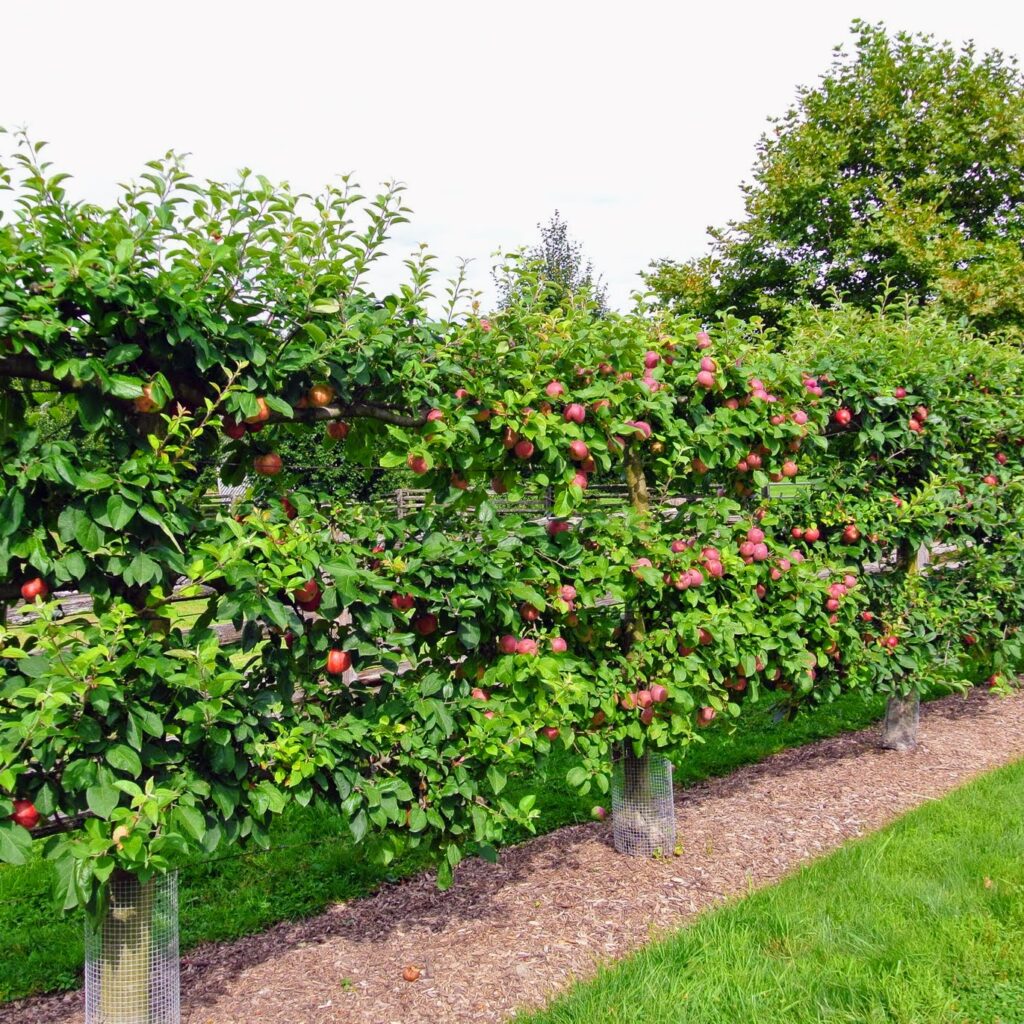
  • They’re beautiful landscape trees with spring blossoms and fall color.
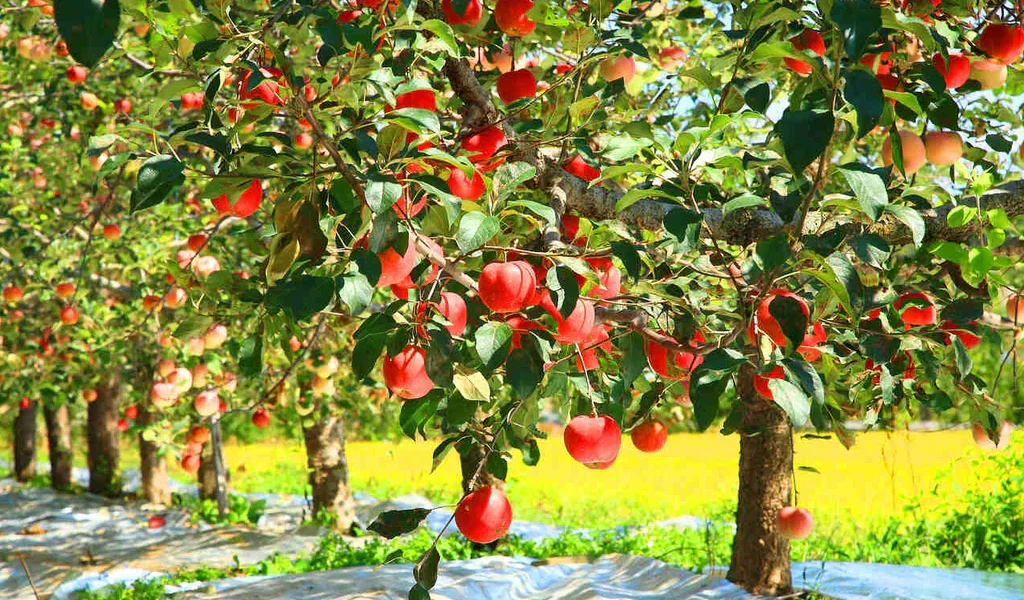
  • They offer a long harvest season from late summer to early winter, depending on the variety.
  • Homegrown apples are fresher and tastier than store-bought.
  • You can choose from dozens of apple varieties suited to your climate and taste preferences.
  • Once established, apple trees can live and produce fruit for decades.

Choosing the Right Apple Tree Varieties

Before you start digging, it’s important to pick the right variety for your climate, space, and tastes.

Consider:

  • Your USDA hardiness zone
  • How big the tree will grow (standard, semi-dwarf, or dwarf)
  • Pollination needs
  • Flavor preferences (sweet, tart, crisp)

Popular Varieties:

  • Honeycrisp – Juicy, crisp, sweet-tart; great for eating fresh.
  • Fuji – Super sweet and crunchy, stores well.
  • Granny Smith – Tart and firm, perfect for pies and sauces.
  • Gala – Sweet, aromatic, ideal for fresh eating and desserts.
  • McIntosh – Juicy and tangy, classic flavor.

Pro tip:
Most apple trees are not self-pollinating — meaning you’ll need at least two different compatible varieties nearby for good fruit production.


When and Where to Plant Apple Trees

Best Time to Plant:

  • Early spring (before buds break) is ideal in most areas.
  • In warmer regions, you can also plant in late fall when trees are dormant.

Ideal Planting Spot:

  • Full sun — at least 6–8 hours of direct sunlight daily.
  • Well-draining soil, loamy and fertile.
  • A location with good air circulation to prevent fungal diseases.
  • Avoid low-lying frost pockets.

Soil pH should be slightly acidic to neutral (6.0 to 7.0). Test your soil and amend as needed before planting.


How to Prepare the Planting Site

  1. Clear the area of weeds, grass, and debris.
  2. Dig a hole twice as wide as the tree’s root ball and as deep as its roots.
  3. Loosen the soil at the bottom and around the sides to help roots establish.
  4. Mix compost or well-rotted manure into the removed soil to improve fertility and drainage.

How to Plant Apple Trees (Step-by-Step)

Whether planting a bare-root or container-grown tree, the planting steps are similar.

1. Inspect the Tree

Remove any damaged roots or branches before planting.

2. Soak Bare-Root Trees

If you’re planting a bare-root tree, soak the roots in water for 1–2 hours before planting to hydrate them.

3. Position the Tree

  • Set the tree in the hole.
  • The graft union (a small bump where the tree was grafted onto its rootstock) should be 2–3 inches above the soil line.
  • Spread the roots outward in the hole.

4. Backfill the Hole

  • Fill the hole halfway with soil.
  • Gently tamp it down and water to settle air pockets.
  • Fill the rest of the hole with soil, forming a slight mound around the trunk.

5. Water Thoroughly

Water deeply after planting to help the soil settle around the roots.


Spacing Apple Trees

Spacing depends on the tree size:

  • Standard trees: 20–30 feet apart.
  • Semi-dwarf trees: 12–20 feet apart.
  • Dwarf trees: 6–10 feet apart.

Leave at least 10–20 feet between rows for air circulation and maintenance access.


Mulching and Staking

  • Apply a 2–4 inch layer of organic mulch (wood chips, straw, or compost) around the base, keeping it a few inches from the trunk.
  • Mulch conserves moisture, suppresses weeds, and protects the roots.
  • Stake young trees to keep them upright in windy areas until their roots are established.

Watering Apple Trees

  • Water deeply once a week during the growing season (more during hot, dry weather).
  • Avoid overwatering — apple trees dislike soggy roots.
  • Reduce watering in fall as the tree prepares for dormancy.

Fertilizing Apple Trees

Feed your apple trees to support healthy growth and good fruiting:

  • In early spring, apply a balanced fertilizer (10-10-10) around the drip line (not directly against the trunk).
  • Reapply according to label instructions, usually after the first flush of growth.
  • Avoid over-fertilizing, which encourages leafy growth over fruit production.

Pruning Apple Trees

Pruning keeps apple trees healthy, shapely, and productive:

  • Prune in late winter or early spring before new growth.
  • Remove any dead, diseased, or crossing branches.
  • Thin out the center to improve air circulation and sunlight penetration.
  • Aim for an open, vase-like shape or central leader structure.

Regular pruning encourages better harvests and reduces disease risks.


Protecting Apple Trees from Pests and Diseases

Common apple pests and problems include:

  • Codling moths
  • Aphids
  • Apple maggots
  • Fungal diseases (like apple scab and powdery mildew)

Natural control tips:

  • Attract beneficial insects (like ladybugs and lacewings).
  • Use organic sprays like neem oil.
  • Pick up fallen fruit and prune diseased branches.
  • Consider lightweight fruit tree netting to keep birds away from ripening apples.

When to Harvest Apples

Harvest times depend on the variety:

  • Early-season apples: July–August
  • Mid-season apples: September
  • Late-season apples: October–November

Signs your apples are ready:

  • They come off easily when gently twisted.
  • The color has fully developed.
  • The flesh tastes sweet, crisp, and juicy.

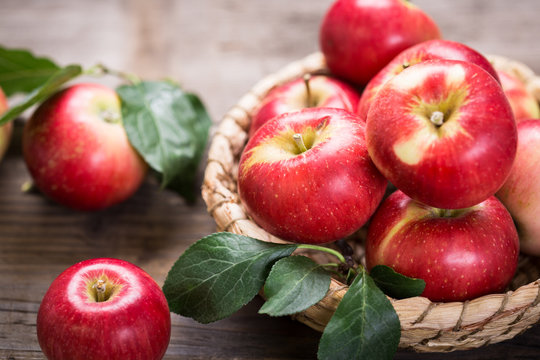
Storing Homegrown Apples

  • Keep apples cool and humid — 32°F to 40°F is ideal.
  • Store in perforated plastic bags or crates.
  • Regularly check for spoiled fruit and remove them.

Some apple varieties store for months in a cool basement or fridge.


Final Thoughts

Starting your orchard dream is easier than you think. With careful planning, the right apple tree varieties, and proper planting techniques, you can enjoy sweet, crisp apples fresh from your own garden for years to come.

Remember — apple trees are long-lived and rewarding investments in both your landscape and your pantry. The key is to give them a good start, provide consistent care, and practice a little patience while they grow into fruit-bearing beauties.

Now’s the perfect time to grab your shovel, choose your favorite apple variety, and start planting your future harvest!

How to Plant and Grow Asparagus – Savor Fresh Garden Goodness!

How to Plant and Grow Asparagus – Savor Fresh Garden Goodness!

Imagine stepping out into your backyard on a cool spring morning to harvest tender, sweet asparagus spears straight from your own garden. Fresh asparagus isn’t just tastier than the store-bought kind; it’s also one of the most satisfying and rewarding perennial vegetables you can grow.

With a little patience and proper care, your asparagus patch can produce for 15–20 years or more. Ready to savor fresh garden goodness? This detailed guide will walk you through everything you need to know about planting and growing asparagus successfully.


Why Grow Asparagus?

Asparagus is a prized vegetable for both its flavor and health benefits. It’s packed with vitamins A, C, E, K, and B6, as well as folate, fiber, and antioxidants. Plus, it’s low in calories and naturally supports digestion and heart health.

Better yet, once established, asparagus is a hardy perennial, meaning it comes back year after year with minimal effort — producing tender shoots each spring.


Choosing the Right Asparagus Varieties

There are two main types of asparagus you can grow:

  • Green asparagus – The most common, known for its crisp texture and fresh, slightly grassy flavor.
  • Purple asparagus – Sweeter and more tender, with striking purple spears that turn green when cooked.
  • White asparagus – Grown by covering the spears with soil to block sunlight, producing a pale, delicate-flavored harvest.

Popular Varieties to Try:

  • Jersey Giant – High-yielding, disease-resistant green variety.
  • Mary Washington – A classic heirloom type with dependable harvests.
  • Purple Passion – A stunning and sweet purple variety.

When and Where to Plant Asparagus

Timing is crucial for asparagus planting.

  • In cool climates, plant in early spring as soon as the soil can be worked.
  • In mild or warm climates, you can also plant in fall for a head start.

Best Planting Location:

  • Choose a sunny spot that gets 6–8 hours of direct sunlight daily.
  • The area should have well-draining, fertile soil with a pH between 6.5 and 7.5.
  • Avoid areas with standing water or poor drainage.

Pro tip: Since asparagus is a long-lived perennial, select a permanent spot where it can grow undisturbed for years.


Starting with Crowns vs. Seeds

You can grow asparagus from either seeds or crowns (1-year-old root systems).

  • Crowns are preferred by most gardeners because they establish faster and start producing harvestable spears within 2–3 years.
  • Seeds are cheaper but take an extra year or two to reach harvestable size.

How to Prepare the Planting Bed

Asparagus thrives in rich, loose soil. Follow these steps to prep your planting area:

  1. Clear the area of weeds, rocks, and debris.
  2. Loosen the soil to a depth of 12–18 inches.
  3. Work in organic compost or well-rotted manure to improve fertility and drainage.
  4. Test the soil pH if possible — add garden lime to raise pH or sulfur to lower it.

Step-by-Step: How to Plant Asparagus Crowns

1. Dig Planting Trenches

  • Dig a trench 12–18 inches wide and 6–8 inches deep.
  • Space multiple trenches about 3 feet apart.

2. Add Soil Amendments

  • Mix a little compost or bone meal into the bottom of the trench to enrich the soil.

3. Create Mounds

  • Make small mounds of soil about 18 inches apart along the trench.

4. Place the Crowns

  • Spread each asparagus crown over a mound, draping the roots evenly.
  • Cover with 2 inches of soil.

5. Gradually Backfill

  • As the spears grow, slowly fill in the trench with soil until it’s level with the garden bed by mid-season.

Watering and Mulching

  • Keep the soil consistently moist but not soggy, especially during establishment.
  • Water regularly in dry spells, providing about 1–2 inches per week.
  • Apply a 2–3 inch layer of organic mulch (like straw or shredded leaves) to retain moisture and suppress weeds.

Fertilizing Asparagus

Asparagus is a heavy feeder. Boost your harvest with these tips:

  • Apply a balanced fertilizer (10-10-10) in early spring as new growth begins.
  • Fertilize again after the last harvest to nourish the plant for next year.
  • Use organic compost or aged manure annually for long-term soil health.

When to Harvest Asparagus

Patience is key with asparagus:

  • Year 1: Do not harvest. Allow plants to grow and build strong root systems.
  • Year 2: Harvest lightly for 2–3 weeks once spears reach 6–8 inches tall.
  • Year 3 and beyond: Harvest freely for 6–8 weeks each spring.

How to harvest:
Cut or snap spears off at ground level when they’re about the thickness of your finger.

Stop harvesting when spears thin out to pencil width — this allows the plant to regenerate energy for next year’s growth.


Ongoing Care and Maintenance

After the harvest season:

  • Let remaining spears grow into tall, fern-like foliage.
  • Cut down dead fronds to the ground in late fall after frost.

Weed control:
Keep the asparagus bed clean and weed-free, as weeds compete for nutrients and water.

Pests and diseases:

  • Watch for asparagus beetles — handpick them or use organic insecticides.
  • Prevent fungal diseases by avoiding overhead watering and spacing plants well.

Growing Asparagus in Containers

While asparagus prefers open ground, you can grow it in large, deep containers if space is limited.

  • Use a container at least 18 inches deep and wide.
  • Choose a well-draining potting mix enriched with compost.
  • Crowns may not live quite as long in containers but can still produce for several years.

Fun Facts About Asparagus

  • Asparagus plants can live and produce for 20+ years.
  • The vegetable is a natural diuretic and has been valued since ancient Egypt and Greece.
  • White asparagus is grown by mounding soil over the spears to keep them from photosynthesizing.
  • Asparagus is one of the few perennial vegetables commonly grown in home gardens.

Final Thoughts

Growing asparagus takes a little patience upfront, but the long-term rewards are absolutely worth it. With a permanent asparagus bed, you’ll enjoy delicious, tender spears every spring for decades to come.

The key to success is choosing the right location, preparing the soil well, and giving the plants time to establish before harvesting heavily. Once established, this hardy perennial is relatively low-maintenance and a true garden treasure.


Ready to savor fresh garden goodness? Whether you’re starting with crowns or seeds, planting asparagus is a fulfilling, rewarding way to connect with nature — and your future harvests will be some of the sweetest, freshest veggies you’ll ever taste.

How to Plant and Grow Acorns – Create a Mighty Oak Tree!

How to Plant and Grow Acorns – Create a Mighty Oak Tree!

There’s something magical about planting an acorn and watching it grow into a towering, majestic oak tree. These ancient trees have long symbolized strength, wisdom, and endurance — and planting one from a tiny seed is a satisfying, eco-friendly way to leave a living legacy for future generations.

If you’ve ever wondered how to transform an acorn into a mighty oak tree, you’re in the right place. In this complete guide, you’ll learn how to plant and grow acorns successfully, from gathering the right seeds to caring for your young sapling.


Why Plant an Acorn?

Besides the joy of nurturing life from seed to tree, planting acorns offers several wonderful benefits:

  • Create natural shade in your garden or landscape
  • Provide habitat and food for wildlife (birds, squirrels, deer, insects)
  • Improve air quality and reduce carbon dioxide
  • Enhance soil stability and prevent erosion
  • Establish a living symbol of growth and longevity

And let’s not forget — it’s fun and surprisingly easy to do!


What You’ll Need

Before you start, gather these essentials:

  • Fresh, ripe acorns
  • Buckets or bowls for soaking
  • Potting soil or seed-starting mix
  • Small planting pots (4–6 inches deep) or nursery containers
  • Labels (optional)
  • Watering can
  • A suitable outdoor planting location or garden bed

Step 1: Collect Fresh, Healthy Acorns

The best time to gather acorns is during fall, typically September to November, when they naturally drop from oak trees.

How to Identify Viable Acorns:

  • Choose acorns that are brown, firm, and free from holes, cracks, or mold.
  • Avoid green, shriveled, or damaged acorns, as these are unlikely to germinate.
  • If possible, pick them directly from the tree or freshly fallen on the ground.

Pro tip: Collect more than you need, as not every acorn will sprout.


Step 2: Perform a Float Test

To separate the healthy seeds from the duds:

  1. Place the acorns in a bowl or bucket of water.
  2. Discard any that float to the surface — these are likely hollow or damaged.
  3. Keep the ones that sink — they have a solid, viable seed inside.

Step 3: Cold Stratification (If Needed)

In nature, acorns go through a cold, dormant period over winter before sprouting in spring. You can mimic this process to improve germination.

Species like white oaks can be planted immediately, while red oaks typically require cold stratification.

How to Cold Stratify:

  1. Place viable acorns in a resealable plastic bag filled with slightly moist peat moss, vermiculite, or sand.
  2. Seal the bag and refrigerate at 34°F–40°F (1°C–4°C) for 6–8 weeks.
  3. Check occasionally for mold and keep the medium damp but not soggy.
  4. Look for tiny root tips starting to emerge.

Step 4: Prepare Pots or Seed Trays

While you can plant acorns directly in the ground, starting them in pots offers better control over their early growth and protection from pests.

  • Use pots at least 4–6 inches deep to accommodate developing taproots.
  • Fill with a well-draining potting mix — a blend of compost, garden soil, and sand works well.
  • Water the soil lightly before planting.

Step 5: Plant the Acorns

Once your acorns are ready:

  1. Plant each acorn on its side or with the pointed end facing down about 1–2 inches deep.
  2. Cover with soil and gently firm it down.
  3. Label your pots with the oak species and planting date.

Pro tip: If root tips have started to emerge, plant with the root pointing downward.


Step 6: Water and Position the Pots

Keep the soil consistently moist but not waterlogged. Place the pots:

  • Outdoors in a protected, shaded area (like a cold frame, porch, or sheltered patio)
  • Or indoors in a cool, bright location away from direct heat sources

If planting outdoors during fall, the natural winter dormancy will take care of cold stratification.


Step 7: Watch for Germination

Acorns typically sprout within 2–8 weeks, depending on the species and growing conditions.

Look for:

  • Tiny green shoots breaking through the soil
  • Rapid root development beneath the surface

Once the saplings develop a few leaves and a healthy root system, you can prepare to transplant them.


Step 8: Transplanting Your Oak Seedling

When your oak sapling reaches 6–12 inches tall (usually within 4–6 months):

  1. Choose a sunny, open location with room for future growth (oak trees can live for centuries and reach 50–80 feet tall and wide).
  2. Dig a hole twice as wide and slightly deeper than the root ball.
  3. Remove the sapling from its pot, being careful not to damage the taproot.
  4. Place the sapling in the hole, ensuring the top of the root ball is level with the soil surface.
  5. Backfill with native soil and firm it gently.
  6. Water deeply.

Step 9: Care and Maintenance

Watering:
Keep young saplings well-watered, especially during dry spells, for the first 1–2 years.

Mulching:
Add a 2–3 inch layer of mulch around the base to conserve moisture and suppress weeds, but keep it away from the trunk.

Protection:
Use tree guards or mesh fencing to protect saplings from deer, rabbits, or lawn equipment damage.

Pruning:
Minimal pruning is needed early on — remove only dead or damaged branches.


Benefits of Growing Your Own Oak Tree

  • Environmental impact: Oaks absorb carbon dioxide, provide oxygen, and improve biodiversity.
  • Erosion control: Deep roots help stabilize soil and prevent erosion.
  • Wildlife habitat: Acorns and foliage support birds, squirrels, insects, and other local fauna.
  • A living legacy: Your oak tree may stand tall for hundreds of years!

Fun Facts About Oak Trees

  • There are over 600 species of oak trees worldwide.
  • Oak trees can live for 200–1,000+ years.
  • An average mature oak produces 2,000+ acorns per year, but only 1 in 10,000 grows into a tree.
  • Oaks are prized for their strong, durable wood in shipbuilding, flooring, and furniture.

Final Thoughts

Planting and growing acorns is a simple, rewarding project suitable for gardeners of all ages. Not only will you contribute to the environment and local ecosystem, but you’ll also witness the incredible transformation of a tiny seed into a mighty oak tree.

Whether you plant one in your backyard, a park, or gift it to a loved one, your oak will stand as a living reminder of your connection to nature and the future.

How to Plant an Okra – Harvest Healthy and Delicious Veggies!

How to Plant an Okra – Harvest Healthy and Delicious Veggies!

If you’re dreaming of growing a warm-season vegetable that’s both beautiful and incredibly productive, look no further than okra. Known for its edible green pods, okra is a staple in Southern cooking and is widely loved for its health benefits, unique texture, and rich flavor. The best part? It’s surprisingly easy to grow in your home garden, even if you’re a beginner!

In this comprehensive guide, you’ll learn how to plant an okra from seed to harvest, along with expert tips on care, troubleshooting, and using your fresh, homegrown harvest.


Why Grow Okra in Your Garden?

Okra, also called ladies’ fingers or gumbo, isn’t just a tasty veggie — it’s a powerhouse plant with numerous perks:

  • Fast-growing and high-yielding
  • Heat and drought-tolerant
  • Attracts pollinators with its gorgeous hibiscus-like flowers
  • Rich in fiber, antioxidants, vitamins C and K
  • Versatile in the kitchen — perfect for frying, stews, grilling, and pickling

Plus, few things are more satisfying than picking fresh okra pods from your own backyard.


Best Growing Conditions for Okra

Before diving in, it’s important to understand what okra loves:

  • USDA Hardiness Zones: 6–11 (as an annual)
  • Soil: Well-drained, fertile, and slightly acidic (pH 6.0–6.8)
  • Light: Full sun — at least 6–8 hours daily
  • Temperature: Thrives in warm weather, ideally 75°F–95°F (24°C–35°C)
  • Water: Moderate, with deep watering once or twice a week

When to Plant Okra

Okra is a heat-loving plant, so timing is key.

  • Outdoors: Plant seeds 2–3 weeks after your area’s last frost date when soil temperatures reach 65°F–70°F (18°C–21°C).
  • Indoors: In cooler climates, you can start seeds indoors 3–4 weeks before the last frost and transplant them after danger of frost has passed.

How to Plant an Okra: Step-by-Step Guide

What You’ll Need:

  • Okra seeds (popular varieties include Clemson Spineless, Burgundy, or Annie Oakley)
  • Garden bed or large containers (minimum 5-gallon size)
  • Organic compost or aged manure
  • Garden trowel
  • Mulch (optional)

Step 1: Choose the Right Location

Select a sunny, sheltered spot in your garden with good drainage. Avoid areas where standing water collects after rain, as okra dislikes soggy roots.

Pro tip: Okra grows tall (3–6 feet) — plant it along a garden border or the back of a bed so it won’t shade out smaller plants.


Step 2: Prepare the Soil

Okra loves rich, loose, and slightly acidic soil. To prep your garden bed:

  1. Remove weeds and debris.
  2. Loosen the soil to a depth of 12 inches using a garden fork or tiller.
  3. Mix in 2–3 inches of compost or aged manure to enrich the soil.

Check the soil’s pH with a tester kit if possible, adjusting with garden lime (to raise pH) or sulfur (to lower pH) as needed.


Step 3: Soak the Seeds

Okra seeds have a hard outer coating, so to encourage faster germination:

  • Soak them in warm water overnight (12–24 hours) before planting.

This softens the seed coat and improves sprouting success.


Step 4: Plant the Seeds

  1. Plant seeds 1 inch deep and about 12–18 inches apart in rows spaced 3 feet apart.
  2. In containers, plant one seed per pot.
  3. Cover with soil and gently firm it down.
  4. Water thoroughly.

Pro tip: For continuous harvest, plant okra in successive batches every 2–3 weeks during the growing season.


Step 5: Water and Mulch

Keep the soil evenly moist until seeds germinate (typically 7–10 days). Once established, okra prefers deep, infrequent watering.

Add a layer of organic mulch (like straw or shredded leaves) around plants to retain moisture, suppress weeds, and regulate soil temperature.


How to Care for Okra Plants

Light:
Ensure your plants receive at least 6–8 hours of direct sunlight daily.

Watering:
Water deeply once a week or more in dry spells. Avoid frequent, shallow watering, as okra roots prefer depth.

Fertilizing:
Feed your plants with a balanced, slow-release fertilizer (10-10-10) at planting time and again when the plants start to flower.

Pruning:
Remove lower leaves and damaged foliage to improve air circulation and reduce disease risk.

Staking (if necessary):
Tall varieties may need staking to prevent wind damage.


Common Pests and Problems

  • Aphids: Spray with soapy water or neem oil.
  • Caterpillars: Hand-pick or use organic BT spray.
  • Fungal diseases (like powdery mildew): Avoid overhead watering and ensure good air circulation.
  • Root rot: Prevent by planting in well-drained soil and avoiding overwatering.

When and How to Harvest Okra

Harvesting is one of the best parts of growing okra!

  • Pods are ready 50–60 days after planting.
  • Pick when pods are 2–4 inches long, tender, and bright green.
  • Use garden shears or snap them off by hand.
  • Harvest every 1–2 days during peak season, as pods mature quickly and can become tough if left too long.

Pro tip:
Wear gloves or long sleeves if you have sensitive skin, as okra plants can be a little prickly.


Uses for Fresh Okra

Homegrown okra is a kitchen gem. Here’s how to enjoy it:

  • Fried okra: A classic Southern favorite
  • Okra gumbo: Thickens soups and stews naturally
  • Pickled okra: Crunchy, tangy snack
  • Grilled okra: Lightly charred with olive oil and spices
  • Okra curry: Popular in Indian and Caribbean dishes

Plus, it’s packed with vitamins A, C, K, and folate, as well as dietary fiber and antioxidants.


Fun Facts About Okra

  • Okra originated in Africa and was brought to the Americas in the 17th century.
  • Its seeds were once used as a coffee substitute during the American Civil War.
  • In some cultures, okra is called “lady’s finger” because of its slender, finger-like pods.
  • Okra flowers are edible and resemble hibiscus blooms.

Final Thoughts

Growing your own okra is a simple, rewarding way to fill your table with healthy, delicious vegetables all summer long. With just a bit of sunlight, warmth, and regular care, you’ll be rewarded with an abundant harvest of tender, tasty pods perfect for everything from stews to pickles.

Whether you have a sprawling backyard garden or a sunny balcony container, planting okra can turn your green thumb dreams into a delicious reality.

How to Plant Aloe Vera Plant – Cultivate Nature’s Healer!

How to Plant Aloe Vera Plant – Cultivate Nature’s Healer!

Aloe vera, with its plump, sword-shaped leaves and soothing gel, is one of the most versatile and popular plants in the world. Beyond its ornamental charm, this succulent is famous for its medicinal, skincare, and air-purifying benefits. The best part? Aloe vera is incredibly easy to grow at home, whether in a sun-drenched kitchen window or a backyard container.

If you’ve ever wanted to enjoy this healing plant right at your fingertips, this detailed guide will walk you through how to plant an aloe vera plant, care for it, and harvest its natural goodness.


Why Grow Aloe Vera at Home?

Growing aloe vera offers several practical and aesthetic benefits:

  • Natural healer: Its gel soothes burns, cuts, acne, and dry skin.
  • Low-maintenance: Requires minimal watering and thrives on neglect.
  • Air purifier: Aloe vera helps remove toxins from the air.
  • Stylish décor: Its bold leaves add a fresh, modern look to any room or garden.
  • Multi-purpose: The gel can be used in skincare, haircare, and even natural remedies.

Best Conditions for Planting Aloe Vera

Before you start planting, it’s essential to understand what aloe vera loves:

  • USDA Zones: 8–11 outdoors; indoors anywhere with ample sunlight.
  • Light: Prefers bright, indirect sunlight or partial shade outdoors.
  • Soil: Well-draining, sandy or cactus potting mix.
  • Water: Minimal — it thrives in dry conditions.
  • Temperature: 55°F–80°F (13°C–27°C); protect from frost.

How to Plant an Aloe Vera Plant: Step-by-Step

What You’ll Need:

  • Healthy aloe vera plant or pup (baby offset)
  • Terra-cotta or clay pot with drainage holes
  • Cactus or succulent potting mix (or make your own)
  • Small garden trowel
  • Pebbles or gravel (optional, for better drainage)

Step 1: Choose the Right Aloe Vera Plant

You can start with either a nursery-bought aloe vera plant or propagate from an existing plant’s pup — small offshoots that grow around the mother plant’s base.

Pro tip:
Choose a plant with firm, green leaves free of spots, wilting, or disease.


Step 2: Pick the Perfect Pot

Aloe vera doesn’t like soggy roots, so select a terra-cotta or clay pot with a drainage hole. These materials allow the soil to dry out faster, preventing root rot.

Size:
The pot should be slightly larger than the root ball, with about 1–2 inches of extra space around it.


Step 3: Prepare the Soil

Use a well-draining succulent or cactus mix. You can also mix your own:

  • 1 part potting soil
  • 1 part perlite or coarse sand
  • 1 part small pebbles or gravel

This ensures the roots stay dry and healthy.


Step 4: Remove and Prepare the Aloe Vera Plant

If using a pup:

  1. Gently loosen the soil around the pup.
  2. Separate it from the mother plant using a clean, sharp knife if necessary.
  3. Let the pup sit in a dry, shaded area for 24–48 hours.
    This allows the cut or broken roots to form a protective callus, reducing the risk of rot.

If using a store-bought plant:

  • Remove it from the nursery container and gently shake off excess soil.
  • Trim off any dead or damaged roots.

Step 5: Plant the Aloe Vera

  1. Place a layer of small pebbles or gravel at the bottom of the pot (optional).
  2. Fill the pot about two-thirds full with the potting mix.
  3. Position the plant in the center.
  4. Backfill with soil, leaving about ½ inch of space from the top of the pot.
  5. Gently press the soil down around the base.

Step 6: Water Lightly

After planting, wait 1–2 days before watering to let the roots settle and calluses heal.

When you do water:

  • Drench the soil thoroughly, then let all excess water drain out.
  • Allow the soil to dry out completely before watering again.

How to Care for Aloe Vera Plant

Light:
Place your aloe vera where it receives 6–8 hours of bright, indirect sunlight daily. If indoors, a south- or west-facing window is perfect.

Watering:
Water every 2–3 weeks in warmer months, less in winter. Overwatering is the most common way to harm aloe plants.

Fertilizing:
Feed once in spring and summer with a diluted, balanced fertilizer (10-40-10) or a cactus-specific fertilizer.

Temperature:
Ideal range is 55°F–80°F (13°C–27°C). Bring potted plants indoors when nighttime temperatures drop below 50°F.

Repotting:
Aloe vera grows slowly, but you’ll need to repot every 2–3 years or when it outgrows its pot.

Pest Control:
Watch for common pests like mealybugs or aphids. Wipe leaves with a damp cloth or spray with diluted neem oil.


How to Harvest Aloe Vera Gel

Once your aloe vera plant has matured (at least a year old), you can harvest its healing gel.

Here’s how:

  1. Choose a thick, healthy outer leaf.
  2. Cut it close to the base with a clean, sharp knife.
  3. Stand the leaf upright in a cup for 10 minutes to drain the yellow latex (aloin), which can be irritating.
  4. Slice off the spiky edges.
  5. Peel away the green skin on one side.
  6. Scoop out the clear gel with a spoon.

Store the gel:
Keep fresh aloe vera gel in an airtight container in the refrigerator for up to 7 days.


Uses for Aloe Vera

  • Sunburn relief: Apply gel directly to burned skin.
  • Moisturizer: Hydrate dry skin without greasiness.
  • Hair conditioner: Mix with coconut oil for a nourishing hair mask.
  • First-aid remedy: Soothe minor cuts, rashes, and insect bites.
  • Juice ingredient: Add a small amount (after removing the latex) to smoothies for digestive benefits.

Common Aloe Vera Plant Problems (And Fixes)

1. Brown Tips:
Caused by underwatering, low humidity, or sunburn. Trim the tips and adjust care.

2. Mushy Leaves:
Result of overwatering. Let soil dry completely and reduce watering frequency.

3. Stunted Growth:
May indicate rootbound conditions or lack of sunlight. Repot and move to a sunnier spot.


Fun Aloe Vera Facts

  • Aloe vera belongs to the Asphodelaceae family.
  • Ancient Egyptians called it the “Plant of Immortality”.
  • Cleopatra is believed to have used aloe vera in her beauty rituals.
  • There are over 500 aloe species, but Aloe barbadensis miller is the most medicinal.

Final Thoughts

Aloe vera is more than just a houseplant — it’s a resilient, healing companion you’ll want nearby for its soothing gel and sleek, tropical look. Whether you’re an experienced gardener or a curious beginner, planting aloe vera is a simple, satisfying project with plenty of payoffs.

With minimal effort, you can enjoy the benefits of nature’s healer right at your fingertips. So grab a pot, find a sunny window, and let your aloe vera thrive!

How to Plant an Avocado Pit – Grow Your Own Guacamole!

How to Plant an Avocado Pit – Grow Your Own Guacamole!

There’s something wonderfully satisfying about growing your own food — and when it comes to avocados, the journey starts with a simple pit. Yes, that big, round seed you usually toss out after making guacamole can actually become a beautiful avocado plant right in your home!

Whether you dream of harvesting your own avocados one day or simply want a lush, tropical houseplant to brighten up your space, growing an avocado from a pit is a fun, easy, and educational project for plant lovers of all ages.

In this guide, we’ll walk you through everything you need to know — from prepping the pit to planting it in soil and caring for your budding avocado tree. Let’s get growing!


Why Grow an Avocado from a Pit?

Besides being a fun indoor gardening experiment, growing an avocado plant comes with several perks:

  • It’s cost-effective: No need to buy a plant — just save the pit from your next avocado.
  • It’s rewarding: Watching a tree grow from a seed you sprouted yourself feels surprisingly magical.
  • It’s a great learning experience: Perfect for kids, gardening beginners, and anyone curious about plant propagation.
  • It adds greenery to your home: Even if it never fruits, an avocado plant makes a beautiful, leafy houseplant.

Will Your Avocado Tree Produce Fruit?

It’s important to set expectations upfront. An avocado grown from a pit:

  • May take 5-13 years to bear fruit (if it ever does).
  • Might produce fruit different from its parent avocado.
  • Needs warm, tropical conditions and plenty of sunlight to thrive outdoors.
  • Can still make a beautiful, lush ornamental plant indoors.

So, while growing your own guacamole ingredients is possible, most people plant avocado pits for the joy of growing something from scratch.


What You’ll Need

To start growing your avocado plant, gather these simple supplies:

  • 1 ripe avocado pit
  • 4 toothpicks
  • A glass or jar
  • Water
  • A sunny windowsill
  • Potting soil and a plant pot (for later)

Optional: A small plant saucer for the pot once it’s transplanted.


How to Grow an Avocado Pit: Step-by-Step Guide

Step 1: Remove and Clean the Pit

After enjoying your avocado, gently remove the pit without cutting or damaging it. Rinse it under lukewarm water, carefully scrubbing away any leftover flesh. Avoid using soap — just your fingers and a gentle rinse will do.

Tip: Soaking the pit in water for a few minutes can help loosen stubborn bits of avocado.


Step 2: Identify the Top and Bottom

Avocado pits have a top and bottom, which is important for proper sprouting.

  • The bottom (wider, flatter end) is where the roots will emerge.
  • The top (narrower, slightly pointier end) is where the stem will sprout.

Make sure you plant or suspend your pit with the correct orientation!


Step 3: Insert the Toothpicks

Insert four toothpicks into the middle section of the pit at a slight downward angle. These toothpicks act as a support to balance the pit on the rim of your glass or jar.

Space them evenly around the pit to create a stable hold.


Step 4: Place the Pit in Water

Fill your glass or jar with water. Rest the pit on the rim using the toothpicks, ensuring the bottom half of the pit is submerged in water while the top half remains exposed to air.

Pro Tip: Use filtered or distilled water if your tap water contains chlorine or other chemicals.


Step 5: Set in a Sunny Spot and Wait

Place the glass on a sunny windowsill or bright, warm spot indoors. Change the water every 2-3 days to keep it fresh and prevent mold.

Now comes the hardest part — waiting!


Step 6: Watch for Sprouting

Within 2 to 8 weeks, your avocado pit should begin to sprout. Here’s what to look for:

  1. The pit’s skin will dry out and crack.
  2. The crack will widen, and a root will emerge from the bottom.
  3. A shoot will begin to sprout from the top.

Note: If nothing happens after 8 weeks, try another pit. Not every seed is viable.


Transplanting Your Avocado Seedling

Once the stem reaches about 6 inches tall, it’s time to transplant your sprouted pit into soil.

Step 1: Prepare a Pot

Choose a 6-8 inch pot with drainage holes and fill it with a well-draining potting mix. A mix of potting soil, sand, and compost works well.


Step 2: Plant the Pit

Remove the toothpicks and place the pit in the soil, leaving the top half exposed. The root should be buried, and the sprout should remain above the surface.

Water thoroughly until it drains out of the bottom.


Step 3: Care for Your Avocado Plant

Light: Avocado plants love sunlight — aim for 6+ hours of bright, indirect light daily. A south- or west-facing window is ideal.

Water: Keep the soil consistently moist but not soggy. Water when the top inch of soil feels dry.

Temperature: Avocados prefer warm temperatures (between 60-85°F). Protect from drafts and avoid cold spots.

Fertilizer: Feed with a balanced, water-soluble fertilizer once a month during the growing season (spring and summer).

Pruning: Pinch back the top leaves when the stem reaches about 12 inches tall to encourage branching and a bushier plant.


Common Problems and How to Fix Them

Yellow leaves? Likely overwatering — let the soil dry out a bit before the next watering.

Drooping plant? Check for root rot from standing water or poor drainage.

Slow growth? Make sure your plant is getting enough sunlight and warmth.

Brown leaf tips? Could be from dry air — mist the leaves occasionally or use a humidity tray.


Fun Ways to Display Your Avocado Plant

  • Place it in a decorative ceramic or terracotta pot.
  • Use a macrame plant hanger to showcase your new green friend.
  • Group it with other houseplants for a lush, indoor garden corner.
  • Set it on your kitchen windowsill as a nod to its guacamole roots.

Final Thoughts

Growing an avocado pit is a wonderfully simple and rewarding project. It’s a great way to reduce kitchen waste, add greenery to your home, and perhaps — with a little patience — even enjoy homegrown avocados in the future.

Whether you’re a plant lover, a gardening novice, or someone just looking for a fun DIY project, planting an avocado pit is a great way to connect with nature and watch something thrive under your care.

So next time you make guacamole or slice up an avocado for toast, save that pit — and grow your very own leafy, tropical beauty. Who knows? It might just become the centerpiece of your indoor garden.

Happy planting!

How to Keep Cats Out of Plants – Protect Your Greenery!

How to Keep Cats Out of Plants – Protect Your Greenery!

If you’re both a plant lover and a cat parent, you already know the struggle. You spend time nurturing your beautiful indoor jungle or outdoor garden, only to find mischievous paws digging in the soil, munching on leaves, or knocking over your favorite potted plants. It’s a classic battle: plant parent vs. curious kitty.

The good news? You don’t have to choose between your leafy greens and your feline friends. With a little strategy and a few clever tricks, you can protect your greenery while keeping your cat happy and safe.

In this comprehensive guide, we’ll explore how to keep cats out of plants — both indoors and outdoors — using safe, effective, and humane methods. Let’s get started!


Why Do Cats Love Plants?

Before you tackle the problem, it’s helpful to understand why your cat is so interested in your plants in the first place:

  • Curiosity — Cats are naturally inquisitive and love to explore new textures and scents.
  • Boredom — A bored cat might dig or chew on plants for entertainment.
  • Nutritional needs — Some cats chew on greenery for fiber or to help with digestion.
  • Comfortable soil — Soft, cool potting soil makes an appealing litter substitute.
  • Playfulness — Dangling leaves and stems can trigger your cat’s hunting instincts.

Identifying the motivation behind your cat’s plant obsession can help you choose the most effective deterrent.


Are Plants Dangerous to Cats?

Yes — and this is important. Many common houseplants and garden plants are toxic to cats, including:

  • Lilies
  • Pothos
  • Aloe vera
  • Dieffenbachia
  • Philodendron
  • Sago palm
  • Azaleas

If you have a plant-happy cat, make sure to research each plant before bringing it home. Better yet, stock up on pet-safe greenery like spider plants, cat grass, or Boston ferns.


How to Keep Cats Out of Indoor Plants

Let’s dive into simple, humane strategies to protect your houseplants:

Create Physical Barriers

If your cat can’t reach the plant, they can’t damage it.

  • Place plants on high shelves or hanging planters.
  • Use macramé plant hangers, wall-mounted shelves, or tall plant stands.
  • For large floor plants, consider a decorative plant cage or mesh screen.

Use Repellent Scents

Cats are famously picky about smells. You can safely deter them with natural scents they dislike:

  • Citrus peels (orange, lemon, lime) — place them on the soil surface.
  • Essential oils (diluted lemon, lavender, eucalyptus) — spray around the plant, not directly on leaves.
  • Cinnamon sticks or peppermint oil around pots can also work wonders.

Important: Avoid strong essential oil use if your cat has respiratory issues.

Add Uncomfortable Textures

Cats dislike walking on certain surfaces. Make the soil less inviting:

  • Cover the soil with pinecones, stones, or decorative pebbles.
  • Use aluminum foil or double-sided tape around the plant base.
  • Try a plastic carpet runner (spiky side up) near the plant.

Provide Alternative Entertainment

If boredom is the issue, give your cat something better to do:

  • Set up a window perch or cat tree nearby.
  • Rotate interactive toys and playtime to burn off energy.
  • Grow cat grass (wheatgrass, barley) as a safe plant your kitty can nibble.

Use Motion-Activated Deterrents

Devices like motion-sensing air sprayers or ultrasonic deterrents can startle cats gently, teaching them to avoid specific areas over time.


How to Keep Cats Out of Outdoor Plants and Gardens

If your feline (or the neighbor’s cat) is turning your garden into their playground, try these techniques:

Citrus and Natural Repellents

Scatter citrus peels, coffee grounds, or sprinkle cayenne pepper around your flower beds. Cats generally dislike these scents and textures.

Garden Barriers and Netting

  • Install low chicken wire fencing or garden mesh around sensitive areas.
  • Place bird netting or lattice horizontally over soil to block digging while allowing plant growth.

Prickly Deterrents

Cats avoid uncomfortable textures. Spread pinecones, rough stones, or holly cuttings around plants.

Motion-Activated Sprinklers

A quick, harmless spray of water will usually send any curious kitty running. Devices like ScareCrow Motion-Activated Sprinklers are highly effective and safe for wildlife.

Designate a Cat-Friendly Area

If the cat belongs to you, consider planting a separate patch of catnip, cat thyme, or valerian in a sunny spot to lure them away from your prized plants.


Training Your Cat to Leave Plants Alone

Believe it or not, you can teach a cat to stop bothering your plants — it just takes patience and consistency.

Tips for Positive Training:

  • Use a firm “No” or a clap when you catch them in the act.
  • Redirect their attention to a toy or scratching post.
  • Reward them with treats and praise for ignoring plants.
  • Avoid punishment-based methods, which can damage trust.

Common Mistakes to Avoid

When protecting plants from cats, steer clear of these harmful or ineffective practices:

  • Don’t use mothballs — they’re toxic to cats and other animals.
  • Skip harmful chemicals or store-bought deterrents not labeled pet-safe.
  • Avoid sharp objects (like toothpicks or skewers) in soil — they pose injury risks.
  • Don’t rely solely on scolding — cats respond better to positive redirection.

Pet-Safe Plants for Cat Lovers

If you’re a cat parent, consider filling your home with plants that are beautiful and harmless to felines:

  • Spider Plant
  • Areca Palm
  • Calathea
  • Parlor Palm
  • Boston Fern
  • Polka Dot Plant
  • Cat Grass
  • Bamboo Palm

They’re lush, decorative, and completely cat-friendly!


Final Thoughts

You don’t have to give up your indoor jungle or your love of plants to keep your feline happy. With a thoughtful mix of physical barriers, natural deterrents, alternative entertainment, and positive training, you can enjoy a beautiful, plant-filled home without constantly battling sneaky paws and chewed leaves.

Remember, every cat is different — what works for one might not work for another. Be patient, try a combination of these tips, and soon enough, your plants will thrive in peace while your cat stays content and safe.

How to Grow Raspberry Plants – Sweet Treats in Your Backyard!

How to Grow Raspberry Plants – Sweet Treats in Your Backyard!

There’s something incredibly satisfying about stepping outside and picking fresh, juicy raspberries right from your backyard. These sun-ripened, ruby-red berries aren’t just delicious — they’re packed with nutrients and antioxidants, making them one of the healthiest treats you can grow at home.

Whether you’re a beginner gardener or a seasoned green thumb, growing raspberry plants is surprisingly simple and rewarding. In this comprehensive guide, we’ll cover everything you need to know about how to grow raspberries — from choosing the right variety to planting, care, and harvesting your own sweet treats.


Why Grow Raspberries?

Before diving into the planting process, let’s explore why raspberries deserve a spot in your home garden:

  • Sweet, homegrown fruit — enjoy fresh berries in summer without a trip to the store.
  • High in vitamins — rich in vitamin C, fiber, and antioxidants.
  • Easy to grow — hardy plants that thrive in a variety of climates.
  • Perennial producers — once established, raspberry plants return every year.
  • Versatile uses — perfect for eating fresh, freezing, baking, jams, and smoothies.

Types of Raspberry Plants

There are two main types of raspberries, each with its own unique growing and fruiting habits:

Summer-bearing raspberries

  • Produce one large crop in early to mid-summer.
  • Ideal for gardeners who prefer a big harvest at once.
  • Popular varieties: ‘Heritage’, ‘Tulameen’, ‘Boyne’.

Ever-bearing (fall-bearing) raspberries

  • Produce two crops: one small crop in early summer and a larger one in early fall.
  • Perfect for extended harvests through the season.
  • Popular varieties: ‘Caroline’, ‘Autumn Bliss’, ‘Fall Gold’.

Choose the variety based on your preference for harvest timing and climate.


When to Plant Raspberries

The best time to plant raspberries is in early spring, after the last frost, when the soil has thawed and can be worked. In milder climates, you can also plant in late fall, allowing roots to establish before winter dormancy.


How to Choose the Right Spot

Raspberries love sunlight and good air circulation. Here’s what to look for when selecting a planting site:

  • Full sun — at least 6–8 hours of direct sunlight daily.
  • Well-draining soil — sandy loam is ideal; avoid heavy clay.
  • Slightly acidic soil — pH between 5.5 and 6.5.
  • Sheltered location — protect from strong winds, but avoid crowded or shaded spots.

Avoid planting raspberries where tomatoes, peppers, potatoes, or eggplants have grown recently, as these plants can harbor soil-borne diseases harmful to raspberries.


How to Plant Raspberry Plants

What You’ll Need:

  • Healthy raspberry canes or bare-root plants.
  • Organic compost or well-aged manure.
  • Mulch (straw or wood chips).

Step-by-Step Planting Guide:

  1. Prepare the soil
    Loosen the soil about 12–18 inches deep and mix in compost or aged manure for nutrient enrichment.
  2. Dig planting holes
    Space holes 18–24 inches apart for individual plants. If planting in rows, leave 6–8 feet between rows for air circulation and maintenance.
  3. Plant the canes
    Place each cane in a hole with the roots spread out, keeping the crown (where the roots meet the stem) 1–2 inches below soil level.
  4. Backfill and water well
    Fill in the hole, firm down the soil, and water thoroughly.
  5. Mulch around the base
    Apply a 2–3 inch layer of straw or wood chip mulch to retain moisture, suppress weeds, and regulate soil temperature.

Watering and Feeding Raspberries

Watering:

  • Consistent moisture is crucial, especially during flowering and fruiting.
  • Water deeply once or twice a week, providing 1–2 inches of water each time.
  • Avoid overhead watering to prevent leaf diseases — a soaker hose works well.

Fertilizing:

  • Feed with a balanced organic fertilizer or compost tea in early spring and again after the first harvest for ever-bearing types.
  • Avoid high-nitrogen fertilizers, as they encourage excessive leafy growth at the expense of fruit.

Pruning Raspberry Plants

Pruning is essential for healthy plants and bountiful harvests. Here’s how to handle each type:

For Summer-bearing Raspberries:

  • After fruiting, cut all canes that bore fruit down to the ground.
  • Thin out the remaining new canes, leaving 4–5 of the strongest per foot.

For Ever-bearing Raspberries:

  • In late fall or early spring, you can:
    • Cut all canes to the ground for one large fall crop.
    • Or selectively remove only the canes that fruited to get both a summer and fall harvest.

Pruning promotes better air circulation, reduces disease risk, and encourages new, vigorous growth.


Common Pests and Diseases (And How to Handle Them)

Pests:

  • Aphids — Spray with insecticidal soap or neem oil.
  • Japanese beetles — Hand-pick or use traps.
  • Spider mites — Use a strong spray of water to dislodge them and increase humidity.

Diseases:

  • Botrytis (gray mold) — Avoid overhead watering and overcrowding.
  • Cane blight — Prune out infected canes and disinfect tools.
  • Root rot — Ensure soil drains well and avoid planting in waterlogged areas.

Maintaining good airflow, proper spacing, and clean garden practices goes a long way in keeping raspberries healthy.


Harvesting Raspberries

Raspberries are typically ready to pick from early summer to fall, depending on the variety.

Signs of Ripeness:

  • Fully colored berries that easily pull off the plant.
  • Sweet aroma and plump texture.

Harvest every couple of days during peak season, and use a gentle hand to avoid crushing the delicate fruit.


Storing and Using Raspberries

  • Fresh raspberries last 2–3 days in the refrigerator.
  • Freeze by spreading them on a tray first, then transferring to freezer bags.
  • Use in smoothies, jams, pies, yogurt parfaits, and sauces — or enjoy straight from the garden.

Fun Raspberry Growing Tips

  • Train canes on a trellis or wire support to keep plants tidy and improve sun exposure.
  • Plant a mix of summer and fall-bearing varieties for an extended harvest.
  • Companion plant with marigolds or nasturtiums to deter pests naturally.
  • Remove wild raspberry plants nearby to minimize disease spread.

Final Thoughts

Growing raspberries is one of the most rewarding gardening experiences you can have. With a little care, attention, and patience, you’ll be enjoying juicy, sun-kissed berries straight from your backyard year after year.

By choosing the right varieties, providing a sunny location, maintaining consistent watering, and practicing good pruning and pest management, you’ll turn your garden into a raspberry paradise.

So grab some canes, dig in, and get ready to savor the sweetness of homegrown raspberries — because nothing tastes better than fruit you’ve grown yourself!

How to Grow Eucalyptus Plant – Refresh Your Air Naturally!

How to Grow Eucalyptus Plant – Refresh Your Air Naturally!

If you’re looking to add a refreshing, aromatic, and striking plant to your indoor or outdoor space, look no further than eucalyptus. Known for its soothing scent, fast growth, and attractive silvery-blue foliage, the eucalyptus plant is not just a feast for the eyes it also purifies the air and brings a touch of the Australian outback into your home.

Whether you’re a plant enthusiast, a beginner gardener, or someone who loves the idea of natural air fresheners, this comprehensive guide will show you how to grow a eucalyptus plant successfully and keep it thriving for years to come.


Why Grow Eucalyptus?

Before we get into the how-to, let’s explore why eucalyptus makes a wonderful addition to any home or garden:

  • Natural air purifier — releases aromatic oils that refresh and clean the air.
  • Medicinal benefits — used in teas, balms, and oils for congestion relief and relaxation.
  • Fast-growing — quickly transforms into a lush, green focal point.
  • Beautiful aesthetics — distinctive silver-green foliage enhances any space.
  • Pest-repellent — natural oils deter insects like mosquitoes and flies.

Whether grown in a pot indoors or as a statement tree in the garden, eucalyptus is both practical and beautiful.


Types of Eucalyptus for Home Growing

While there are over 700 species of eucalyptus, only a handful are suitable for home gardens or indoor containers:

  1. Eucalyptus gunnii (Cider gum) – Fast-growing and popular for its attractive foliage.
  2. Eucalyptus globulus (Blue gum) – Highly aromatic and known for medicinal oil production.
  3. Eucalyptus citriodora (Lemon-scented gum) – Releases a pleasant lemon fragrance.
  4. Eucalyptus pulverulenta (Baby blue eucalyptus) – Compact, with gorgeous silver-blue leaves perfect for arrangements.

Choose a variety based on your available space and preferred scent.


When to Plant Eucalyptus

Eucalyptus plants prefer warm temperatures and thrive in spring or early summer when there’s no risk of frost. In cooler climates, you can grow eucalyptus indoors year-round or move potted plants outside during warmer months.


How to Grow Eucalyptus from Seeds

Growing eucalyptus from seed is rewarding but requires a little patience.

Seed Preparation:

  • Use fresh, high-quality seeds from a reliable supplier.
  • Place seeds in a refrigerator for 4–6 weeks (cold stratification) to improve germination rates.

Sowing the Seeds:

  • Fill small pots or seed trays with a well-draining seed-starting mix.
  • Lightly press seeds onto the surface — they need light to germinate.
  • Mist gently with water.

Germination:

  • Cover the pots with a clear plastic lid or plastic wrap to maintain humidity.
  • Place in a warm, bright spot (70°F–75°F/21°C–24°C).
  • Seeds typically germinate within 14–21 days.

Planting Eucalyptus from Cuttings (Faster Method)

If you have access to a mature eucalyptus plant:

  • Take 4–6 inch cuttings from semi-hardwood stems.
  • Remove lower leaves, leaving a few at the top.
  • Dip the cut end in rooting hormone.
  • Plant cuttings in moist, well-draining soil.
  • Cover with a plastic bag to retain humidity.
  • Place in indirect sunlight until roots form in 4–6 weeks.

Best Soil for Eucalyptus

Eucalyptus prefers:

  • Well-draining soil — sandy or loamy soils are ideal.
  • pH 5.5–6.5 — slightly acidic to neutral.

If planting in a pot, use a mix of potting soil and sand or perlite for added drainage.


Light and Temperature Needs

Light:

  • Eucalyptus loves full sun. Aim for at least 6 hours of direct sunlight daily.
  • Indoors, place near a bright south-facing window.

Temperature:

  • Thrives in temperatures between 65°F–85°F (18°C–29°C).
  • Protect young plants from frost — bring potted plants indoors during cold months.

Watering Eucalyptus

Eucalyptus is drought-tolerant once established but needs regular watering while young.

  • Young plants: Keep soil consistently moist, but not soggy.
  • Mature plants: Water deeply once the top 1–2 inches of soil feel dry.
  • Avoid overwatering, especially in containers.

Fertilizing Eucalyptus

  • Use a balanced, slow-release fertilizer once a month during the growing season (spring and summer).
  • Avoid over-fertilizing, as eucalyptus prefers lean soil and can suffer from excessive nutrients.

Pruning and Maintenance

Regular pruning keeps eucalyptus plants attractive, manageable, and encourages bushier growth.

Pruning Tips:

  • Remove dead or damaged leaves and stems.
  • Prune in late winter or early spring before new growth begins.
  • For indoor plants, pinch back tips to encourage fuller foliage.
  • Thin out branches to improve airflow and light penetration.

Common Problems and Solutions

Though generally hardy, eucalyptus can face a few issues:

Pests:

  • Aphids, spider mites, and psyllids can infest eucalyptus.
  • Use neem oil or insecticidal soap to manage infestations naturally.

Yellowing Leaves:

  • Typically due to overwatering or poor drainage.
  • Adjust watering routine and ensure soil dries out between waterings.

Bolting (Early Flowering):

  • In indoor conditions, this may happen if plants experience stress.
  • Prune back flower buds to maintain foliage-focused growth.

Growing Eucalyptus in Pots

Eucalyptus can be grown indoors in containers, especially dwarf or smaller varieties like Eucalyptus gunnii ‘Azura’.

Pot Selection:

  • Choose a pot at least 12–18 inches deep with drainage holes.
  • Use a lightweight, well-draining soil mix.

Container Care:

  • Water regularly, but let the topsoil dry out between waterings.
  • Place in a sunny spot — a south-facing window is ideal.
  • Repot annually in spring to refresh the soil and encourage root growth.

Uses of Eucalyptus Leaves

Eucalyptus isn’t just a pretty face — its leaves offer a range of practical uses:

  • Natural air freshener — place cut branches in a vase or hang them in the shower.
  • Herbal remedies — leaves used in teas or steam inhalation for congestion relief.
  • Aromatherapy oils — distilled for stress and respiratory benefits.
  • Floral arrangements — adds texture and fragrance to bouquets.

Health Benefits of Eucalyptus

Adding eucalyptus to your home or garden offers several health perks:

  • Improves air quality with its natural oils.
  • Relieves respiratory issues like asthma, colds, and sinus infections.
  • Contains anti-inflammatory and antibacterial properties.
  • Promotes relaxation and reduces stress through its calming aroma.

Final Thoughts

Eucalyptus is a wonderful plant to grow, whether you’re after its refreshing scent, ornamental beauty, or air-purifying qualities. It’s fast-growing, relatively low-maintenance, and perfect for beginners or seasoned plant parents alike.

By following these simple tips — choosing the right variety, ensuring full sun exposure, providing well-draining soil, and pruning regularly — you’ll soon have a thriving eucalyptus plant that fills your home or garden with beauty and invigorating fragrance.

So why not bring a touch of the Australian wilderness into your space and let eucalyptus refresh your air naturally?

How to Grow Coriander Plant – Spice Up Your Recipes!

How to Grow Coriander Plant – Spice Up Your Recipes!

Coriander, also known as cilantro or Chinese parsley, is one of the world’s most versatile herbs. Whether you use its fresh leaves to garnish your favorite dishes or its seeds as a fragrant spice, coriander adds a burst of flavor that elevates your culinary creations. The best part? It’s surprisingly easy to grow at home — whether in a kitchen windowsill pot, a backyard herb bed, or a balcony garden.

In this comprehensive guide, we’ll walk you through how to grow coriander from seed to harvest, offering practical tips to keep your plants lush, healthy, and brimming with fresh leaves. Ready to spice up your kitchen garden? Let’s dive in!


Why Grow Coriander at Home?

Coriander is a favorite among home gardeners for several reasons:

  • Quick-growing herb — ready to harvest in just a few weeks.
  • Versatile usage — both the leaves (cilantro) and seeds (coriander spice) are edible.
  • Rich in health benefits — packed with antioxidants, vitamins A, C, and K.
  • Ideal for small spaces — grows well in containers and windowsills.
  • Delightfully aromatic — freshens up your kitchen and garden.

Plus, there’s nothing like the flavor of freshly picked coriander straight from your own plant!


Best Time to Plant Coriander

Coriander is a cool-weather herb. It prefers temperatures between 50°F–85°F (10°C–29°C).

  • In temperate regions: Early spring or fall are ideal planting times.
  • In warm or tropical climates: Grow it in shaded areas during cooler months.

Avoid the hottest summer weeks as coriander tends to “bolt” (flower and go to seed) quickly in high heat, which can make the leaves bitter.


Choosing the Right Variety

While most people are familiar with common coriander, there are several varieties you can grow:

  • Calypso — Slow to bolt, great for leaf harvest.
  • Leisure — Popular kitchen garden variety with full leaves.
  • Confetti — Finely cut, fern-like leaves, excellent for garnishes.
  • Santo — Another bolt-resistant variety ideal for warm climates.

Choose a slow-bolting variety if you live in a warmer region to enjoy prolonged harvests.


How to Grow Coriander from Seeds

Coriander is best grown from seed as it doesn’t transplant well due to its delicate taproot.

Seed Preparation:

  • Coriander seeds come in a round pod. For better germination, crush the pod gently to split it into two halves.
  • Soak the split seeds in water for 12–24 hours to speed up germination.

Soil Preparation:

  • Soil Type: Well-draining, fertile soil rich in organic matter.
  • pH Range: 6.2–6.8.
  • Sunlight: Full sun to partial shade.

Mix in compost or aged manure to improve soil texture and fertility.

Sowing the Seeds:

  • Sow seeds directly into pots, raised beds, or garden soil.
  • Plant them 1/4 inch deep and 6 inches apart.
  • Water gently and keep the soil consistently moist but not waterlogged.

Seeds typically germinate in 7–14 days.


Caring for Your Coriander Plant

Once your coriander seeds have sprouted, they need some basic care to thrive.

Light:

  • Full sun (4–6 hours daily) is ideal.
  • In very hot climates, provide light afternoon shade to prevent bolting.

Watering:

  • Keep soil consistently moist, especially during dry spells.
  • Avoid overwatering as coriander dislikes soggy roots.
  • Water early in the morning to prevent fungal diseases.

Fertilizer:

  • Coriander isn’t a heavy feeder.
  • Apply a balanced liquid fertilizer (like 10-10-10) once or twice during the growing season.
  • Top-dress with compost or organic mulch to retain moisture and add nutrients.

Harvesting Coriander

For Leaves (Cilantro):

  • Begin harvesting when plants are 6 inches tall (about 3–4 weeks after sowing).
  • Use scissors to snip off the outer leaves, leaving the inner stems to continue growing.
  • Regular harvesting encourages bushier growth.

For Seeds (Coriander Spice):

  • Allow the plant to flower and form seed heads.
  • Once the flowers dry and seeds turn light brown, cut the seed heads and place them in a paper bag.
  • Hang the bag in a dry, shaded spot for a week.
  • Shake the bag to release the seeds and store them in an airtight jar for cooking.

Propagating Coriander

Coriander primarily propagates by seed. To keep a continuous supply:

  • Succession sowing: Plant new seeds every 3 weeks for a steady harvest.
  • Save seeds from mature plants for future sowing.

Common Problems and Solutions

While coriander is generally easy to grow, it can occasionally face a few issues:

Bolting (Premature Flowering)

Cause: Hot weather, drought stress, or overcrowding.
Solution: Grow bolt-resistant varieties, keep soil moist, and plant in partial shade during hot months.

Aphids

Symptoms: Sticky leaves, stunted growth.
Control: Spray plants with a mixture of water and mild dish soap, or use neem oil.

Powdery Mildew

Symptoms: White, powdery coating on leaves.
Control: Improve air circulation, avoid overhead watering, and use organic fungicide if needed.


Growing Coriander in Pots

Coriander thrives in containers, making it perfect for patios, balconies, and kitchen windowsills.

Pot Selection:

  • Choose a 6–8 inch deep pot with good drainage.
  • Fill with light, well-draining potting mix.

Care Tips:

  • Water regularly to keep soil moist.
  • Position in a sunny window or a spot with partial shade in hot weather.
  • Harvest leaves regularly to encourage new growth.

Health Benefits of Coriander

Not only is coriander a culinary star, but it also boasts several health benefits:

  • Rich in antioxidants and essential vitamins.
  • Aids in digestion and appetite stimulation.
  • Known to help regulate blood sugar and cholesterol.
  • Contains natural anti-inflammatory properties.
  • Traditional uses in treating acne, nausea, and anxiety.

Adding homegrown coriander to your meals is a tasty way to boost your overall health!


Uses of Coriander in the Kitchen

Fresh coriander leaves are essential in:

  • Salsas and chutneys
  • Curries and soups
  • Salads and marinades
  • Garnishing tacos, noodles, or rice dishes

Coriander seeds are used in:

  • Pickling and spice blends
  • Curries and stews
  • Homemade herbal teas

Both parts of the plant offer distinct flavors — the leaves with a fresh citrusy punch and the seeds with warm, nutty notes.


Final Thoughts

Growing coriander is a simple, rewarding experience that adds fresh flavor and fragrance to your home and meals. With its quick growth, minimal care needs, and versatility in the kitchen, it’s a must-have for every home gardener.

By following these easy, natural growing tips, you’ll be snipping lush green leaves in no time and perhaps even harvesting your own coriander seeds for spice jars.

So grab a packet of seeds, find a sunny spot, and spice up your recipes with your very own coriander plant — a little green friend that keeps giving!