Growing Blueberries in Kentucky: A Complete Guide to Highbush Blueberries for Home Gardeners

Growing Blueberries in Kentucky: A Complete Guide to Highbush Blueberries for Home Gardeners

If you live in Kentucky and love fresh, homegrown fruit, blueberries are one of the best small fruits you can add to your garden. With their rich flavor, vibrant color, and incredible health benefits, blueberries are a favorite among both home gardeners and commercial growers. However, growing them successfully in Kentucky requires understanding your soil, climate, and proper care — especially when cultivating highbush blueberries, the most common type grown in this region.

In this complete guide, we’ll explore how to grow highbush blueberries in Kentucky — from choosing the right varieties and preparing the soil to planting, watering, and ensuring bountiful harvests year after year.


Why Grow Blueberries in Kentucky?

Kentucky’s climate, with its warm summers and cold winters, provides a suitable environment for growing many fruit crops, including blueberries. However, blueberries have one very specific requirement: acidic soil. Once you meet this condition, you’ll find that blueberries thrive beautifully in Kentucky.

Here are a few reasons why you should consider growing blueberries at home:

  • Nutrient-rich fruit: Blueberries are packed with antioxidants, vitamins C and K, and dietary fiber.
  • Low-maintenance: Once established, they require minimal care and can live for decades.
  • Productive plants: A mature highbush blueberry can yield 8–10 pounds of fruit each year.
  • Ornamental value: Blueberries offer spring blooms, summer berries, and stunning red foliage in fall.
  • Perfect for small gardens: They fit well in backyard gardens, raised beds, and even containers.

Understanding Highbush Blueberries

There are several types of blueberry plants, but highbush blueberries (Vaccinium corymbosum) are best suited for Kentucky’s climate. They are called “highbush” because of their tall stature — often reaching 5 to 8 feet in height — and their high yield compared to lowbush or rabbiteye varieties.

Highbush blueberries are divided into two main groups:

  1. Northern Highbush: Perfect for cooler areas, hardy to USDA Zone 4.
  2. Southern Highbush: Better for milder winters and warmer climates, hardy to Zone 6–9.

Kentucky, which falls primarily within USDA Zones 6–7, can successfully grow either type depending on your local conditions.


Best Blueberry Varieties for Kentucky

Choosing the right variety is crucial for success. Some of the best highbush blueberry varieties for Kentucky include:

  1. Bluecrop: Mid-season variety with excellent flavor and productivity.
  2. Duke: Early ripening, great for extending the harvest season.
  3. Elliott: Late-season variety that extends your harvest into late summer.
  4. Legacy: A reliable southern highbush with great taste and heat tolerance.
  5. Reka: Vigorous, early-bearing variety with high yields and adaptability.

Planting a mix of early, mid-, and late-season varieties ensures a continuous harvest from June through August.


Site Selection and Soil Preparation

Blueberries are particular about where they grow. For best results, you’ll need to provide a location and soil that mimic their natural forest-edge habitat.

1. Sunlight

Blueberries need at least 6–8 hours of direct sunlight daily. Too much shade will reduce fruit size and sweetness.

2. Soil Acidity

The biggest challenge in Kentucky is soil pH — most Kentucky soils are naturally too alkaline for blueberries.

  • Blueberries require acidic soil with a pH between 4.5 and 5.5.
  • You can acidify your soil by adding elemental sulfur, pine bark mulch, or peat moss before planting.
  • Test your soil with a pH meter or kit before planting, and amend accordingly.

3. Drainage

Blueberries hate “wet feet.” Choose a well-draining location or plant on raised beds or ridges. Standing water around roots can lead to root rot and plant death.

4. Organic Matter

Incorporate plenty of compost, pine bark, or peat moss into the planting area. Blueberries thrive in organic-rich, loose soil.


Planting Highbush Blueberries

When to Plant

The best time to plant blueberries in Kentucky is early spring (March–April), once the ground has thawed but before new growth starts. Fall planting is possible in warmer regions but less common.

How to Plant

  1. Dig holes about 18 inches wide and 12–15 inches deep.
  2. Mix the removed soil with peat moss, compost, and sulfur.
  3. Place the plant in the hole so that the top of the root ball is level with the ground.
  4. Backfill and gently firm the soil.
  5. Water thoroughly and apply 2–3 inches of mulch around the base.

Spacing

  • Space plants 4–5 feet apart in rows 8–10 feet apart.
  • This allows air circulation, sunlight penetration, and easy picking.

Watering and Mulching

Blueberries have shallow roots, so maintaining consistent moisture is key.

  • Water regularly, especially during the first two years. Aim for 1–2 inches of water per week.
  • Use drip irrigation or a soaker hose to avoid wetting the foliage.
  • Apply pine bark or pine needle mulch to conserve moisture and keep weeds down. Mulch also helps maintain soil acidity.

Fertilizing Your Blueberries

Blueberries are light feeders, and over-fertilizing can burn their roots.

  • In the first year, avoid fertilizing at planting time.
  • About 4–6 weeks after planting, apply a small amount of ammonium sulfate (not nitrate-based fertilizers).
  • In subsequent years, fertilize in early spring and again after harvest using an acid-forming fertilizer like one formulated for azaleas or rhododendrons.

Avoid high-nitrogen fertilizers — blueberries prefer slow, steady feeding.


Pruning and Maintenance

Pruning keeps your blueberry plants healthy, productive, and full of new growth.

1. First 2 Years:
Do minimal pruning — just remove weak or dead stems to let the plant establish.

2. After Year 3:

  • In late winter, remove old, unproductive canes at ground level.
  • Keep 6–8 strong canes per bush, balancing old and new growth.
  • Thin out crowded branches to allow light penetration and airflow.

Pruning encourages large, high-quality berries and reduces disease risk.


Pollination

Most highbush blueberry varieties are self-fertile, but planting two or more different varieties increases fruit set and yield due to better cross-pollination. Bees are the main pollinators, so avoid using pesticides during bloom.


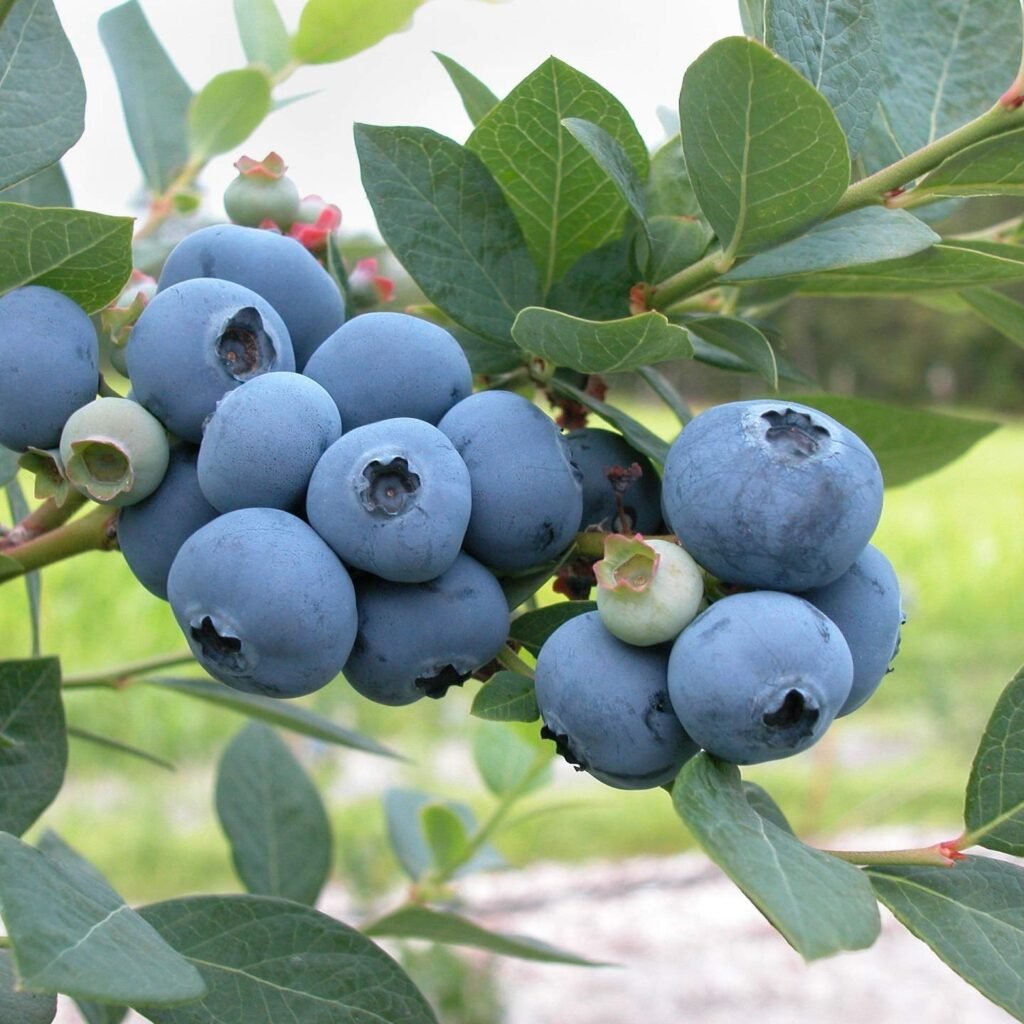
Harvesting Highbush Blueberries

Blueberry plants usually start producing fruit 2–3 years after planting, reaching full production around year 6.
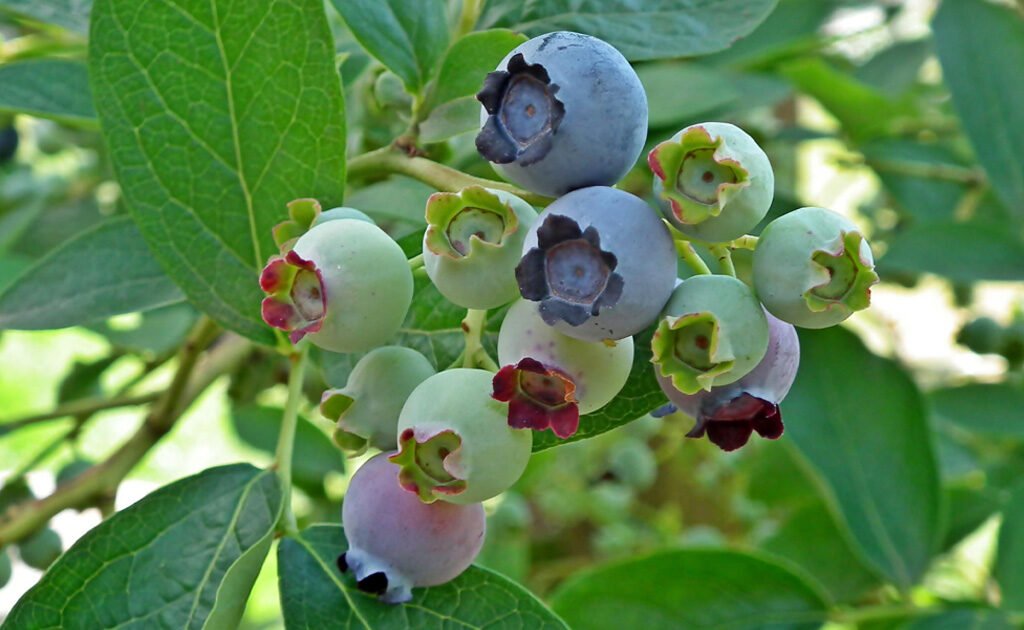
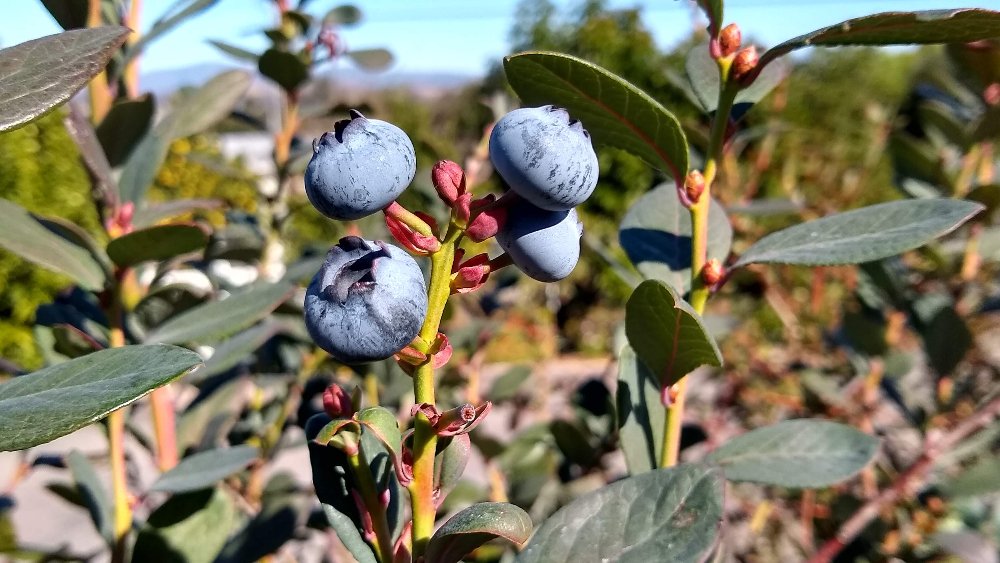
When to Harvest:

  • Blueberries turn from green to deep blue when ripe, but don’t rush to pick them.
  • Wait 3–5 days after they turn fully blue — this allows maximum sweetness and flavor.

How to Harvest:

  • Gently roll ripe berries off the cluster with your fingers.
  • Pick every few days during the ripening period (typically June through August in Kentucky).

After harvesting, store berries in a cool place or refrigerate them for up to two weeks. For long-term storage, freeze them in a single layer before bagging.


Pest and Disease Control

Blueberries are relatively low-maintenance, but Kentucky’s humid climate can invite pests and diseases.

Common Pests:

  • Birds: Use bird netting or reflective tape to protect ripening berries.
  • Japanese beetles and aphids: Handpick or spray with neem oil if necessary.

Common Diseases:

  • Root rot: Caused by poorly drained soil. Avoid overwatering.
  • Botrytis blight: A gray mold affecting flowers and fruit — improve airflow and remove infected parts.
  • Mummy berry: A fungal disease that shrivels berries; rake fallen debris and apply mulch to prevent spores.

Keeping your garden clean and maintaining proper spacing helps prevent most problems naturally.


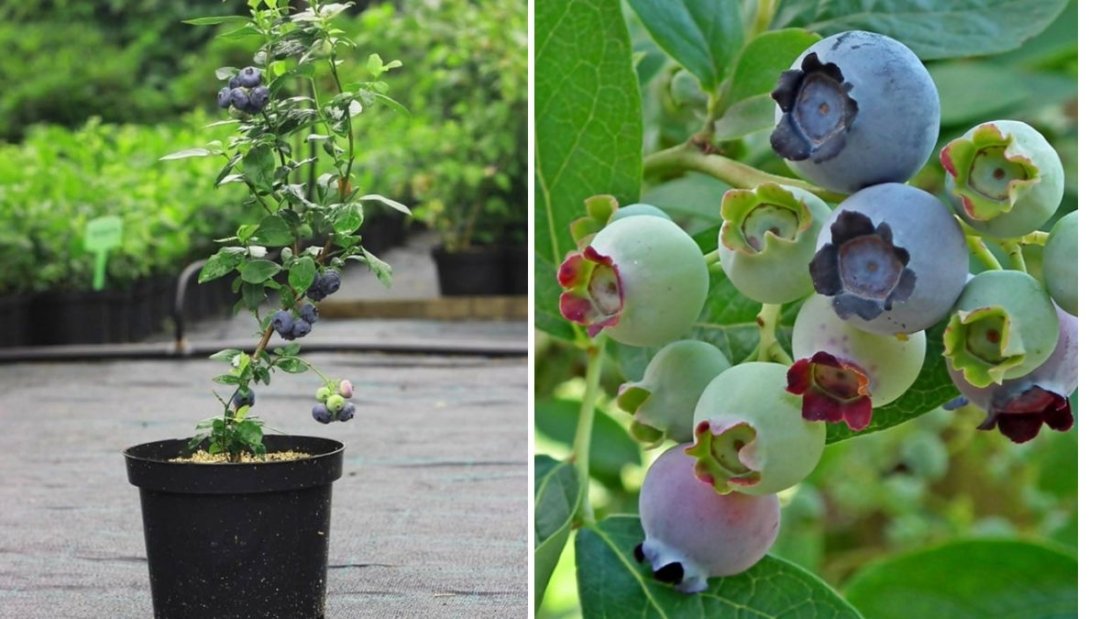
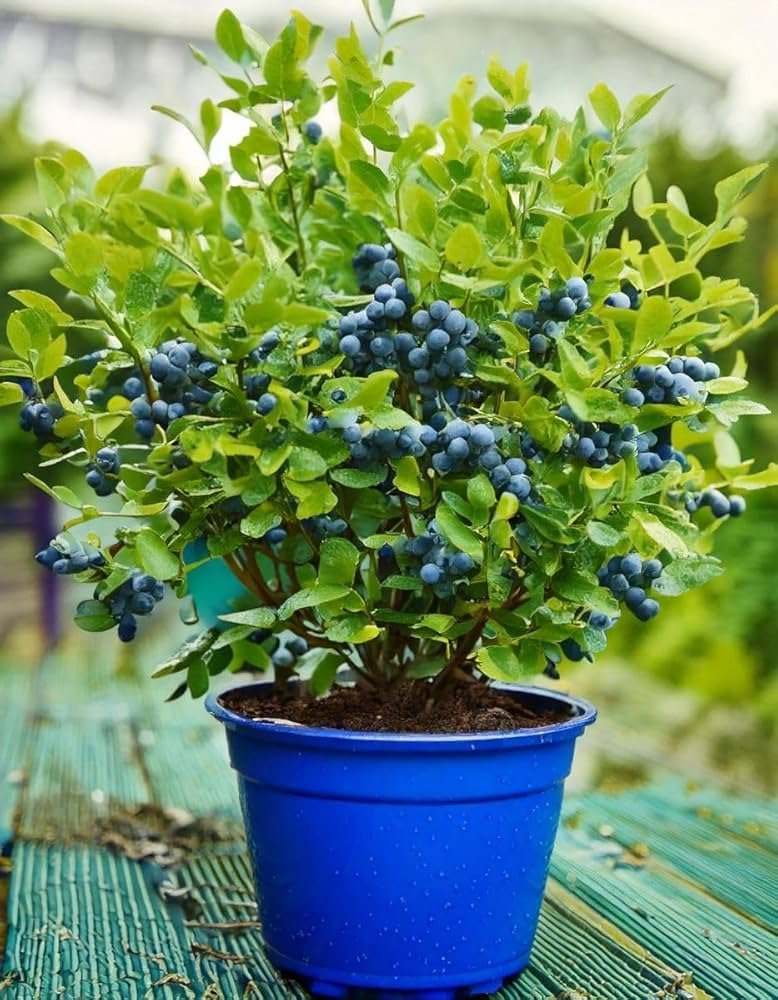
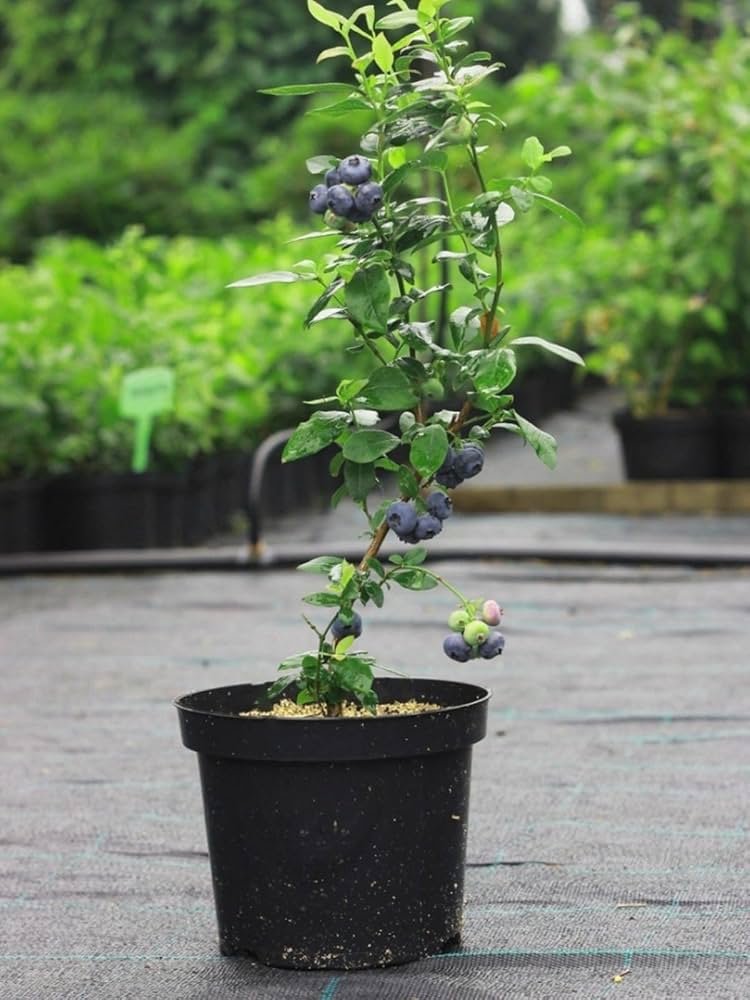
Growing Blueberries in Containers

If your soil isn’t naturally acidic, container gardening is an excellent solution.

Container Tips:

  • Use pots at least 16–20 inches in diameter with good drainage.
  • Fill with a mix of peat moss, pine bark, and perlite.
  • Water regularly, as containers dry out faster than ground soil.
  • Fertilize lightly with an acid-loving plant food.

Container blueberries are easy to manage, portable, and perfect for patios or small yards.


Winter Care

Kentucky winters can be harsh, especially in northern regions. Protect your blueberries by:

  • Adding an extra layer of mulch around the base for insulation.
  • Avoiding late-summer fertilizing to prevent tender new growth.
  • In containers, move pots to a sheltered area or wrap them with burlap for protection.

Final Thoughts

Growing highbush blueberries in Kentucky can be incredibly rewarding. Once established, these hardy shrubs provide years of sweet, antioxidant-rich berries that taste better than anything store-bought. With proper soil preparation, consistent watering, and occasional pruning, your blueberry patch will thrive for decades.

Whether you grow them in your backyard, raised beds, or containers, blueberries will reward your care with beautiful blooms, colorful foliage, and, of course, delicious fruit.

So get started this season — prepare your soil, plant a few highbush blueberry varieties, and enjoy your own slice of blueberry heaven in Kentucky!

How to Grow Wild Blackberries: Enjoy Great Fruit with Little Effort

How to Grow Wild Blackberries: Enjoy Great Fruit with Little Effort

There’s something undeniably special about wild blackberries — their rich, sweet-tart flavor, resilience in tough conditions, and the nostalgic charm of picking them straight from the bramble. Unlike cultivated varieties, wild blackberries (Rubus fruticosus) grow naturally in many regions and require very little care to produce abundant, flavorful fruit. If you’re looking for a hardy, low-maintenance plant that rewards you year after year, wild blackberries are a perfect choice.

This guide will show you exactly how to grow, care for, and harvest wild blackberries with minimal effort — from planting and soil preparation to pruning, pest control, and propagation.


Understanding Wild Blackberries

Wild blackberries are native to many parts of North America, Europe, and Asia. They grow naturally along roadsides, forest edges, and open fields, thriving in places where other plants might struggle. What makes them so appealing is their adaptability — they can handle poor soil, dry spells, and minimal care, yet still produce large crops of delicious berries.

Wild blackberries spread through rhizomes (underground stems) and seed dispersal, which allows them to form dense thickets over time. Each plant produces long canes that live for two years:

  • The first-year canes (primocanes) grow vigorously but don’t bear fruit.
  • The second-year canes (floricanes) produce flowers and fruit, then die back.

Understanding this growth cycle is key to keeping your patch productive year after year.


Why Grow Wild Blackberries?

Before diving into how to grow them, it’s worth understanding why wild blackberries are worth your time:

  1. Low Maintenance: They require little watering or fertilizing once established.
  2. Hardy and Resilient: Wild blackberries can survive in poor soils and varying climates.
  3. High Yield: A mature patch can produce gallons of berries each season.
  4. Nutrient-Rich: Packed with vitamins C and K, fiber, and antioxidants.
  5. Pollinator-Friendly: Their flowers attract bees and beneficial insects.
  6. Natural Beauty: Their arching canes and blossoms add a rustic charm to the landscape.

With so many benefits and little maintenance required, wild blackberries are one of the easiest and most rewarding fruits to grow.


Choosing the Right Location

Wild blackberries are not picky, but they do have preferences that will help you get the best harvest.

  • Sunlight: Full sun (6–8 hours daily) ensures maximum fruit production. They can tolerate partial shade but may produce fewer berries.
  • Soil: They thrive in well-drained, slightly acidic soil with a pH between 5.5 and 6.5.
  • Drainage: Avoid low-lying, soggy areas where water accumulates — standing water can cause root rot.
  • Space: Blackberries spread quickly, so choose an area where they can grow freely without crowding other plants. A border, fence line, or field edge is ideal.

If you don’t want them to take over, plant them in a contained area or use a root barrier to control spreading.


Planting Wild Blackberries

You can grow wild blackberries from root cuttings, young plants, or even transplants taken from existing wild patches.

1. When to Plant

Plant in early spring or late fall, when the soil is cool and moist. Spring planting allows roots to establish before the summer heat.

2. How to Plant

  1. Dig holes about 12 inches deep and 2–3 feet apart in rows spaced 6–8 feet apart.
  2. Mix compost or organic matter into the soil to boost nutrients.
  3. Place each plant in the hole with the crown level with the soil surface.
  4. Backfill and water thoroughly.
  5. Apply a 2–3 inch layer of mulch around each plant to conserve moisture and suppress weeds.

If transplanting wild blackberry shoots, dig up a section of root with a few buds attached, replant it, and water well.


Watering and Fertilizing

Wild blackberries don’t need constant pampering, but a little attention to water and nutrients goes a long way.

  • Watering: Keep the soil evenly moist during the first growing season. Once established, blackberries are drought-tolerant, but watering during dry periods helps boost fruit size and sweetness.
  • Fertilizing: Use a balanced organic fertilizer or compost in early spring. Avoid excessive nitrogen, which encourages leafy growth rather than berries.

A slow-release fertilizer once per year is usually sufficient for established plants.


Pruning for Better Growth

Pruning is one of the few maintenance tasks wild blackberries benefit from — it improves airflow, reduces disease risk, and boosts productivity.

1. During the First Year:

Let the new canes grow freely. In midsummer, you can tip-prune (cut off the top few inches) of long canes to encourage branching.

2. After Fruiting:

Once the floricanes have fruited, cut them back to the ground. They will not produce again.

3. Early Spring Pruning:

Remove any weak, dead, or damaged canes, leaving about 4–6 healthy canes per plant. Tie them to a simple wire or trellis system to keep them upright and organized.

Regular pruning keeps the patch manageable and ensures high-quality berries.


Dealing with Pests and Diseases

Wild blackberries are naturally hardy, but they can still face a few problems. Here’s how to prevent and manage them naturally:

Common Pests:

  • Aphids: Cause curling leaves; wash off with water or use neem oil.
  • Japanese Beetles: Handpick or use organic traps.
  • Spider Mites: Appear in hot, dry conditions; mist plants and introduce ladybugs.
  • Birds: Netting or reflective tape can protect ripening berries.

Common Diseases:

  • Anthracnose: Causes gray spots on canes; prune out infected parts and avoid overhead watering.
  • Botrytis (Gray Mold): Affects ripening berries in humid conditions; ensure good airflow.
  • Root Rot: Prevent by planting in well-drained soil.

Maintaining a clean garden, pruning regularly, and rotating locations every few years helps minimize issues naturally.


Harvesting Wild Blackberries

Harvest time is the most rewarding part of growing wild blackberries.

When to Harvest:

Berries are ready when they turn deep black, plump, and shiny. If they’re still red or purple, they’re not fully ripe. Fully ripe berries should pull away easily from the plant with a gentle tug.

How to Harvest:

  • Pick in the morning when temperatures are cool.
  • Handle gently to avoid bruising.
  • Collect in shallow containers to prevent crushing.

A mature patch can produce fruit from late spring through early summer, depending on your region.

Storage:

  • Store unwashed berries in the refrigerator for up to 3–5 days.
  • Freeze extra berries on a tray, then transfer them to a freezer bag for long-term storage.
  • Use in jams, pies, smoothies, or sauces.

Propagation: Expanding Your Patch

Wild blackberries spread naturally, but if you want to propagate them intentionally, it’s simple.

  1. Tip Layering: Bend a young cane down so the tip touches the soil. Cover it with a bit of soil, and roots will form within weeks. Cut it from the parent plant and transplant.
  2. Root Cuttings: In winter, dig up a root section about 6 inches long and replant it horizontally a few inches deep.
  3. Suckers: Dig up small shoots (suckers) that sprout near the base and replant them elsewhere.

With these methods, you can quickly expand your wild blackberry patch or share plants with friends.


Controlling Overgrowth

While their vigor is an advantage, wild blackberries can become invasive if not managed.

  • Install a root barrier (like buried metal or plastic edging) to prevent spreading.
  • Regularly mow or trim around the perimeter of your patch.
  • Remove unwanted suckers promptly.

With minimal maintenance, you can enjoy a healthy, controlled patch that continues to thrive year after year.


Health Benefits of Wild Blackberries

Beyond their amazing flavor, wild blackberries are incredibly nutritious. Each handful is packed with:

  • Antioxidants – Help fight inflammation and support overall health.
  • Vitamin C – Strengthens immunity and promotes skin health.
  • Fiber – Aids digestion and supports heart health.
  • Manganese & Vitamin K – Important for metabolism and bone strength.

Their nutrient density makes them one of nature’s best “superfruits.”


Final Thoughts

Growing wild blackberries is the perfect combination of ease, reward, and natural beauty. With little effort, you can create a thriving patch that yields baskets of juicy, flavorful fruit each season.

All you need is a sunny spot, a little patience, and a willingness to let nature do most of the work. In return, wild blackberries will reward you year after year with sweet, antioxidant-rich berries — perfect for snacking, baking, or preserving.

So, plant your patch, watch it flourish, and get ready to enjoy one of the simplest and most satisfying fruits you can grow — wild blackberries, great fruit with little effort.

Harvesting Chandler Strawberries in April in North Texas: A Sweet Start to Strawberry Season

Harvesting Chandler Strawberries in April in North Texas: A Sweet Start to Strawberry Season

As spring unfolds in North Texas, gardens burst into life with color, fragrance, and fresh growth. For many home gardeners, one of the most exciting parts of the season is harvesting the first strawberries of the year. Among all the varieties that thrive in this region, Chandler strawberries stand out as one of the best choices — renowned for their sweetness, large berries, and reliable yield.

Harvesting Chandler strawberries in April marks not only the beginning of the fruit season but also a celebration of careful planning, patient nurturing, and nature’s generosity. In this guide, we’ll take a closer look at the journey from planting to harvest, explore why Chandler strawberries perform so well in North Texas, and share tips to ensure a bountiful and flavorful crop each year.


Meet the Chandler Strawberry: The Star of Early Spring

Developed by the University of California in the 1980s, the Chandler strawberry quickly became a favorite among both commercial growers and home gardeners. It’s a June-bearing variety, which means it produces a single, large crop of berries in the spring — perfect timing for an April harvest in North Texas.

Here’s why Chandler strawberries are loved by gardeners across warm regions:

  • Large, sweet, and juicy fruits with a beautiful red color.
  • High yields — one of the most productive varieties available.
  • Excellent flavor — a perfect balance of sweetness and acidity.
  • Adaptability to mild winters and warm springs.
  • Strong plants that perform well in garden beds, raised beds, and containers.

These traits make Chandler strawberries ideal for the variable climate of North Texas, where spring temperatures fluctuate between cool mornings and warm afternoons.


Understanding the North Texas Strawberry Season

In North Texas, the strawberry-growing season typically begins in late fall or early winter, when gardeners plant dormant strawberry crowns. The cool months allow the plants to establish strong roots before spring arrives.

By March and April, temperatures warm up, and the plants burst into bloom. Soon after, bees and pollinators help set the fruit, and by mid to late April, it’s harvest time — one of the most rewarding moments of the gardening year.

The Chandler variety fits this timeline perfectly, producing its delicious harvest just as the weather turns pleasantly warm but before the intense heat of summer.


Preparing for a Successful Strawberry Harvest

If you want to experience an abundant April harvest like North Texas growers, preparation starts months before.

1. Choosing the Right Planting Site

Strawberries need full sun, at least 6–8 hours daily, to develop their signature sweetness. Choose a sunny, well-draining spot in your garden or raised bed. Avoid areas where water collects after rain, as strawberries dislike “wet feet.”

The soil should be rich in organic matter and slightly acidic (pH between 5.5 and 6.5). If your soil is heavy clay — common in North Texas — amend it with compost, sand, or peat moss to improve drainage.

2. Planting Time and Method

The ideal time to plant Chandler strawberries in North Texas is November through early January. This allows enough time for root development before spring fruiting.

When planting:

  • Space plants about 12–18 inches apart in rows 2 feet apart.
  • Set the crown (the point where leaves meet the roots) at soil level — not too deep or too shallow.
  • Water thoroughly after planting and mulch to protect from cold snaps.

Caring for Chandler Strawberries Through the Season

Once planted, proper care ensures that your strawberry patch thrives and rewards you with a generous spring harvest.

Watering

Consistent moisture is essential for fruit development. Water deeply once or twice a week, depending on rainfall. During dry spells, keep the soil evenly moist but never soggy. Drip irrigation or soaker hoses work best to prevent leaf diseases.

Fertilizing

In early spring, as new growth begins, feed your plants with a balanced organic fertilizer or compost tea. Avoid over-fertilizing with nitrogen — this can lead to excessive leaf growth at the expense of fruit.

Mulching

Apply straw mulch or pine needles around plants to:

  • Keep fruit clean and off the soil.
  • Maintain soil moisture.
  • Suppress weeds.
  • Regulate soil temperature during fluctuating spring weather.

Mulching also helps prevent soil-borne diseases and adds a classic “strawberry patch” look to your garden.


The Joy of April Harvest in North Texas

By early to mid-April, the excitement builds as the first red berries begin to appear. The Chandler variety produces large, heart-shaped strawberries that ripen evenly to a deep red.

Signs Your Strawberries Are Ready:

  • Fully red color from tip to cap.
  • Glossy sheen and plump appearance.
  • Easy to pull from the stem with a gentle tug.

Avoid picking strawberries that are still partially white or green — they won’t ripen after harvest.

Harvest your berries early in the morning, when temperatures are cool, to preserve their flavor and texture. Use scissors or snip the stem instead of pulling the berry, as the delicate skin bruises easily.


Post-Harvest Care: Keeping Plants Productive

After your first Chandler strawberry harvest, your plants will still need attention to stay healthy for future seasons.

  1. Remove spent flower stalks after fruiting to direct energy into the roots.
  2. Trim old leaves to improve airflow and reduce disease risk.
  3. Fertilize lightly with compost to help plants recover after fruiting.
  4. Water regularly during dry months to keep plants alive through summer.

While Chandler strawberries are primarily spring producers, with proper care, the plants can continue to yield smaller flushes of fruit later in the season or set runners for next year’s plants.


Managing Pests and Diseases

The North Texas climate can sometimes encourage pests and diseases, especially during humid or rainy spells. Here’s how to protect your plants naturally:

  • Birds: Use lightweight bird netting to keep them from snatching ripe berries.
  • Aphids and spider mites: Spray with neem oil or a gentle insecticidal soap.
  • Slugs and snails: Place copper tape or diatomaceous earth around plants to deter them.
  • Fungal issues (like gray mold): Ensure good air circulation and avoid overhead watering.

Healthy, well-spaced plants and proper mulching go a long way toward preventing most problems.


Preserving and Enjoying Chandler Strawberries

Once harvested, Chandler strawberries don’t store as long as grocery-store varieties — but that’s because they’re bred for flavor, not shipping. Enjoy them fresh whenever possible.

If you find yourself with an abundance of berries (a common “problem” for successful gardeners!), here are some delicious ways to use them:

  • Blend them into smoothies or milkshakes.
  • Make homemade strawberry jam or preserves.
  • Use them in pies, cakes, or tarts.
  • Slice and freeze for later desserts or sauces.

To freeze strawberries: wash gently, remove the caps, and pat dry. Arrange in a single layer on a tray, freeze until solid, then transfer to freezer bags.


Why Chandler Strawberries Shine in North Texas

North Texas offers the ideal conditions for Chandler strawberries: mild winters, sunny springs, and moderate humidity. The plants appreciate cool weather for root growth followed by the long, bright days of spring that bring out the berries’ full sweetness.

Because Chandler strawberries are June-bearing, they focus their energy on one large, concentrated harvest — which often aligns perfectly with April or early May in this region. That means gardeners can enjoy an impressive yield of plump, aromatic fruit before summer’s heat sets in.

For those who love the taste of classic, juicy strawberries, the Chandler variety remains a timeless favorite and a reliable performer year after year.


Tips for a Bigger and Better Harvest Next Year

After harvesting, it’s the perfect time to think ahead:

  • Propagate from runners: Chandler strawberries send out runners after fruiting. Peg them down into the soil to create new plants for next season.
  • Rotate your beds: Avoid planting strawberries in the same spot year after year to prevent soil-borne diseases.
  • Replenish mulch and compost: Feed your soil to keep it fertile and ready for next planting.
  • Protect from summer heat: Use light shade or row covers to help plants survive Texas summers.

By caring for your strawberry patch even after harvest, you’ll set yourself up for another successful and even sweeter season next year.


Final Thoughts

Harvesting Chandler strawberries in April is one of the purest joys of gardening in North Texas. After months of preparation, watching your plants flower and finally seeing those bright red fruits ripen is deeply satisfying. The taste — sweet, slightly tangy, and bursting with freshness — makes every effort worthwhile.

Chandler strawberries embody everything a home gardener could want: beauty, productivity, and incredible flavor. With a bit of planning, proper care, and patience, you can enjoy your own early-spring strawberry harvests year after year.

So as April arrives, grab your basket, head to your garden, and savor the rewards of your work — your first Chandler strawberry harvest of the season, a taste of spring’s sweetness straight from the soil of North Texas.

How OSU Student Farm Grows Seedless Watermelons: A Complete Guide to Sweet Success

How OSU Student Farm Grows Seedless Watermelons: A Complete Guide to Sweet Success

Seedless watermelons are the summertime favorite that everyone loves — crisp, juicy, and refreshingly sweet, all without the hassle of spitting out seeds. But have you ever wondered how seedless watermelons are grown? At the OSU Student Farm, students and researchers have mastered the art and science of producing these delicious fruits through sustainable methods and innovative growing techniques.

In this comprehensive guide, we’ll explore how seedless watermelons are cultivated — from seed selection and soil preparation to pollination, growth, and harvest. Whether you’re a home gardener or a farming enthusiast, the OSU Student Farm approach offers practical insights into growing your own seedless watermelons successfully.


The Science Behind Seedless Watermelons

Before diving into the growing process, let’s clear up the most common question: If seedless watermelons don’t have seeds, how do they grow?

The answer lies in plant genetics. Seedless watermelons are not genetically modified but are the result of natural hybridization.

Here’s how it works:

  • A seedless watermelon is a triploid hybrid — it has three sets of chromosomes instead of the usual two.
  • It’s created by crossing a tetraploid (4 sets of chromosomes) parent plant with a diploid (2 sets of chromosomes) parent plant.
  • The offspring, having three sets, can grow and produce fruit, but the seeds are sterile — meaning they don’t develop fully, giving you that seedless texture.

However, because seedless plants are sterile, they still need help with pollination. That’s why growers, like those at OSU Student Farm, plant pollinator varieties (seeded watermelons) nearby to ensure proper fruit set.


Seed Selection: The Foundation of Quality

Growing seedless watermelons begins with selecting the right seeds. OSU Student Farm uses triploid hybrid seeds sourced from trusted agricultural suppliers. These seeds are more expensive than regular ones, but they guarantee high-quality, seedless fruit.

Common varieties include:

  • ‘Crimson Sweet Seedless’ – known for its deep red flesh and crisp texture.
  • ‘Sugar Baby Triploid’ – small and early-maturing, perfect for limited spaces.
  • ‘Millionaire’ – a high-yielding hybrid with uniform fruits.

When starting your own patch, make sure to also purchase a diploid (seeded) variety such as ‘Charleston Gray’ or ‘Allsweet’ to serve as a pollinator. The ratio should be about one seeded plant for every three seedless plants.


Preparing the Soil

Watermelons thrive in well-drained, sandy loam soil with a pH between 6.0 and 6.8. Good soil preparation is crucial for vigorous growth and sweet, juicy fruit.

At OSU Student Farm, students begin by enriching the soil with organic compost and well-rotted manure, ensuring it’s rich in nutrients but not overly compacted.

Steps for preparing your soil:

  1. Test your soil for pH and nutrient levels. Adjust as needed with lime (to raise pH) or sulfur (to lower pH).
  2. Till the soil 8–10 inches deep to improve drainage and aeration.
  3. Incorporate compost or organic matter — about 2–3 inches per square foot.
  4. Form raised beds or mounds, as watermelons dislike soggy roots.

Proper soil preparation sets the stage for healthy vines and larger fruits.


Planting the Seedless Watermelon

Timing and temperature are everything when it comes to watermelons. These are warm-weather crops that need consistent heat and sunlight to thrive.

When to Plant

Wait until all danger of frost has passed and the soil temperature is at least 70°F (21°C). For most regions, this means late spring to early summer.

How to Plant

  1. Start Indoors: Seedless watermelon seeds are slow to germinate. OSU students often start them in a greenhouse 3–4 weeks before transplanting outdoors.
  2. Transplant Carefully: Seedless seedlings are delicate. Transplant them when they have 2–3 true leaves, avoiding root disturbance.
  3. Spacing:
    • Space plants 3–4 feet apart in rows 6–8 feet apart to allow vines room to spread.
    • Interplant pollinator (seeded) varieties among the seedless ones — for every three seedless, include one seeded plant.
  4. Mulch: Apply black plastic mulch or straw to retain moisture, suppress weeds, and warm the soil.

At OSU, biodegradable mulches are often used to promote sustainability while enhancing soil health.


Watering and Fertilizing

Watermelons need consistent moisture, especially during fruit set and growth, but they don’t like “wet feet.” The goal is to keep the soil moist but not waterlogged.

Watering Tips:

  • Use drip irrigation to deliver water directly to the roots.
  • Water deeply once or twice per week (about 1–2 inches each time).
  • Reduce watering slightly once fruits begin to mature — this concentrates the sugars and improves sweetness.

Fertilizing Tips:

  • Apply a balanced fertilizer (10-10-10) when planting.
  • After vines start running, side-dress with nitrogen fertilizer or compost tea.
  • Avoid over-fertilizing with nitrogen, which leads to excessive vine growth and fewer fruits.

At the OSU Student Farm, organic compost and natural fertilizers are preferred to maintain soil fertility without chemicals.


Pollination: The Secret to Fruit Formation

Even though seedless watermelons can’t produce seeds, they still need pollination to set fruit. Bees play a crucial role in transferring pollen from the seeded (diploid) plants to the seedless (triploid) flowers.

To encourage successful pollination:

  1. Plant pollinators in alternating rows or groups.
  2. Attract bees by planting pollinator-friendly flowers nearby.
  3. Avoid using pesticides during blooming, as they can harm pollinators.

If pollination is poor, fruits may be small or misshapen. At OSU, maintaining a healthy bee population on the farm ensures excellent pollination rates and high-quality fruit.


Growth and Maintenance

As the vines spread, regular maintenance ensures the plants stay healthy and productive.

Weed Control:

Use mulch to suppress weeds naturally. Avoid tilling near the roots once plants are established, as watermelon roots spread widely.

Pest Management:

Common pests include:

  • Cucumber beetles – control with row covers or neem oil.
  • Aphids – wash off with water or apply insecticidal soap.
  • Squash bugs – handpick and remove eggs from leaves.

At OSU Student Farm, integrated pest management (IPM) techniques are used — combining biological controls, crop rotation, and habitat diversity to minimize pest impact.

Disease Prevention:

Watermelons can be prone to fungal diseases like powdery mildew or anthracnose. Ensure good airflow, avoid overhead watering, and remove infected leaves promptly.


Harvesting Seedless Watermelons

Knowing when your watermelon is ripe is both an art and a science. Harvest too early, and the flavor won’t develop; wait too long, and it may become overripe.

At OSU, students use several indicators to determine ripeness:

  1. Color of the Tendril: The small curly tendril nearest the fruit turns brown and dries when the melon is ready.
  2. Ground Spot: The part of the fruit resting on the soil changes from white to creamy yellow.
  3. Sound Test: A ripe watermelon gives a deep, hollow sound when tapped.
  4. Days to Maturity: Most seedless varieties take 85–100 days from transplanting.

Once harvested, handle the melons carefully to avoid bruising. Store them in a cool, dry place — they’ll last up to two weeks uncut, or several days once sliced and refrigerated.


Post-Harvest Care and Sustainability

At the OSU Student Farm, sustainability is as important as production. After harvest, leftover vines and plant material are composted and returned to the soil, completing a natural nutrient cycle. Cover crops like clover or rye are planted in the off-season to enrich the soil and prevent erosion.

For home growers, adopting similar sustainable practices not only benefits the environment but also improves soil health and long-term productivity.


Tips for Growing Perfect Seedless Watermelons at Home

  1. Start Early Indoors – Triploid seeds need warmth to germinate. Use a heat mat if necessary.
  2. Keep Soil Warm – Watermelons love heat; use black mulch to trap warmth.
  3. Control Weeds Early – Once vines spread, it’s difficult to remove weeds without damaging the plants.
  4. Encourage Bees – Avoid pesticide use during flowering; bees are your best allies.
  5. Harvest at Peak Ripeness – Watch for the dry tendril and yellow belly — the classic signs of a perfect melon.

Final Thoughts

The work being done at the OSU Student Farm showcases how modern agriculture can balance productivity, sustainability, and education. Their approach to growing seedless watermelons — combining scientific understanding with hands-on learning — is both inspiring and practical.

For gardeners and small-scale growers, the lessons are clear: with the right seeds, warm soil, good pollination, and sustainable care, you can enjoy your own harvest of sweet, crisp, seedless watermelons every summer.

How to Grow Yellow Flesh Watermelons: A Summer Garden Favorite for Sweet, Vibrant Harvests

How to Grow Yellow Flesh Watermelons: A Summer Garden Favorite for Sweet, Vibrant Harvests

Yellow flesh watermelons are a refreshing twist on the classic red variety, bringing both visual appeal and a distinct honey-like sweetness to your summer garden. Known for their bright yellow interior and smooth texture, these melons thrive in warm conditions and reward gardeners with bountiful, juicy fruit by mid to late summer. Inspired by the topic “Planting New Yellow Flesh Watermelon Seeds | June Garden Tour,” this article walks you through everything you need to know to grow these golden beauties—from seed starting and care to harvesting and enjoying the fruits of your labor.


1. What Makes Yellow Flesh Watermelons So Special?

Unlike traditional red watermelons, yellow flesh watermelons owe their color to a natural pigment called beta-carotene—the same nutrient found in carrots and sweet potatoes. They tend to be sweeter, with a subtle honey or apricot undertone. Many gardeners love them for their striking appearance in fruit salads, their crisp texture, and the fact that they’re rich in antioxidants and vitamin A.

Popular yellow varieties include:

  • Yellow Crimson – Similar in shape and size to the classic Crimson Sweet but with golden flesh.
  • Yellow Doll – A small, early-maturing variety ideal for small gardens or containers.
  • Desert King – Known for drought tolerance and excellent flavor.
  • Buttercup – Offers a deep yellow, almost orange flesh and a very sweet taste.

2. Choosing the Right Time to Plant

Timing is everything with watermelons. Since they are warm-season crops, planting is best done when soil temperatures reach at least 70°F (21°C) and nighttime temperatures consistently stay above 60°F (16°C). In most regions, this means late spring through early summer—perfectly aligned with the June garden tour theme.

If you live in a cooler area, start seeds indoors about 3–4 weeks before your last frost date. Transplant seedlings outdoors once the soil is warm and all danger of frost has passed.


3. Preparing the Perfect Garden Bed

Yellow flesh watermelons demand sunlight, space, and well-draining soil. Here’s how to prepare the ideal growing spot:

  • Sunlight: Choose a location that receives 8–10 hours of full sun daily.
  • Soil Type: Watermelons thrive in sandy loam soil that’s rich in organic matter.
  • pH Level: Aim for a slightly acidic to neutral pH between 6.0 and 6.8.
  • Soil Preparation: Before planting, mix in well-rotted compost or aged manure to improve fertility and water retention.
  • Raised Beds or Hills: Many gardeners plant watermelon seeds on mounds (about 12 inches high and 2–3 feet wide) to ensure good drainage and warmth around the roots.

4. Planting Yellow Flesh Watermelon Seeds

Once your soil is warm and ready, it’s time to plant.

  1. Spacing: Plant 3–4 seeds per hill, spacing each hill 4–6 feet apart.
  2. Depth: Sow seeds about 1 inch deep.
  3. Thinning: Once seedlings emerge, thin to the strongest one or two plants per hill.
  4. Watering: Keep the soil consistently moist but not soggy. Overwatering can lead to root rot or fungal diseases.

Pro Tip: Mulch around the base of plants with straw or compost to retain soil moisture and prevent weeds.


5. Caring for Young Watermelon Plants

Yellow flesh watermelons grow vigorously once established, sending out long vines that can stretch several feet. Here’s how to keep them thriving:

  • Watering: Water deeply once or twice per week, providing about 1–2 inches of water each time. Avoid wetting the leaves to reduce fungal issues.
  • Fertilizing: Apply a balanced fertilizer (10-10-10) when vines begin to run, then switch to a phosphorus- and potassium-rich fertilizer when flowers appear.
  • Weed Control: Keep weeds at bay with light hoeing or mulching.
  • Pollination: Watermelons rely on bees for pollination. Encourage pollinators by planting nearby flowers like marigolds, borage, or lavender.

6. Managing Common Pests and Diseases

Like most melons, yellow flesh watermelons can attract unwanted visitors. Watch for these common problems:

  • Aphids: Tiny insects that suck plant sap. Control them with neem oil or insecticidal soap.
  • Cucumber Beetles: They can transmit bacterial wilt. Use row covers early in the season.
  • Powdery Mildew: Appears as white powdery spots on leaves. Provide good air circulation and avoid overhead watering.
  • Fusarium Wilt: A soil-borne disease; crop rotation every 2–3 years helps prevent it.

Maintaining proper spacing, sunlight, and moisture balance is the best way to prevent most diseases naturally.


7. Flowering and Fruit Development

Watermelon plants produce both male and female flowers. Male flowers appear first, followed by female blooms a week or so later (you can identify females by the tiny fruit swelling at their base). Bees transfer pollen from male to female flowers, initiating fruit development.

Once pollinated, small fruits start growing rapidly. Ensure consistent watering during this stage—fluctuations can lead to misshapen or split melons.


8. Harvesting Your Yellow Watermelons

The waiting game begins once the fruits reach maturity, typically 70–90 days after planting, depending on the variety. Knowing when to harvest is key for perfect sweetness.

Signs your yellow watermelon is ready:

  • The tendril nearest the fruit stem turns brown and dries up.
  • The underside (where it rests on the soil) changes to a creamy yellow color.
  • A deep, hollow sound when you thump the fruit.
  • The rind loses some of its gloss and appears duller.

Cut the melon from the vine with a sharp knife, leaving about 2 inches of stem attached. Handle gently to avoid bruising.


9. Storing and Enjoying the Harvest

Freshly harvested yellow flesh watermelons taste best when enjoyed immediately, but they can also be stored for short periods.

  • Whole Melons: Keep in a cool, dry area (50–60°F) for up to 2 weeks.
  • Cut Melons: Wrap in plastic or store in airtight containers in the refrigerator for up to 5 days.

Serving Ideas:

  • Add cubes of yellow watermelon to a summer fruit salad for a burst of color.
  • Blend into smoothies or juices for a naturally sweet drink.
  • Grill slices for a caramelized, smoky-sweet twist.
  • Pair with mint, feta, and balsamic glaze for a gourmet touch.

10. Pro Tips for Bigger and Better Yields

If your goal is to double your harvest, just like many gardeners showcase during their garden tours, try these expert techniques:

  • Prune side shoots early to direct energy into main vines and fruit development.
  • Hand-pollinate flowers if bee activity is low—use a small brush to transfer pollen.
  • Add black plastic mulch to warm soil and suppress weeds.
  • Rotate crops yearly to prevent soil-borne diseases.
  • Harvest regularly to encourage the plant to continue setting fruit.

11. Why You’ll Love Growing Yellow Watermelons

Growing yellow flesh watermelons isn’t just about producing food—it’s about cultivating beauty and flavor in your garden. Their golden hue adds a cheerful contrast to the lush green vines, and each slice offers a burst of summer sweetness that rivals any store-bought melon.

For home gardeners, this variety is rewarding, low-maintenance, and perfect for warm climates. Plus, sharing homegrown yellow watermelon at a summer gathering will surely spark curiosity and admiration.


Conclusion

From planting seeds in June to harvesting glowing golden fruits by late summer, growing yellow flesh watermelons is one of the most satisfying gardening adventures you can experience. With a bit of warmth, care, and patience, your garden will soon reward you with these sweet, sun-colored treasures—proof that nature’s palette is more diverse and delicious than we often realize.

So grab those seeds, prepare your soil, and let your next garden tour shine bright with the golden glow of ripe yellow watermelons!

How to Direct Sow Crimson Sweet Watermelons: Expert Tips for a Bountiful Summer Harvest

How to Direct Sow Crimson Sweet Watermelons: Expert Tips for a Bountiful Summer Harvest

Crimson Sweet watermelons are a garden favorite for good reason—they’re large, juicy, and delightfully sweet, with the perfect balance of sugar and crispness. Their bright red flesh and beautiful green-striped rind make them a showstopper both in the garden and on the table. Best of all, they’re easy to grow directly from seed right in your garden, making them ideal for both beginner and seasoned gardeners.

Inspired by the video “Tips and Ideas on How-to Direct Sow Crimson Sweet Watermelons in Your Garden,” this comprehensive guide walks you through everything you need to know to grow these delicious melons from seed to harvest—no transplanting required!


1. Why Choose Crimson Sweet Watermelons?

Crimson Sweet is one of the most popular watermelon varieties grown worldwide. Known for its deep red flesh, rich sweetness, and excellent texture, it’s the classic summer picnic melon. The fruits typically weigh 20–25 pounds, and each vine produces several large, round melons.

Beyond their flavor, Crimson Sweet watermelons are also disease-resistant, particularly against anthracnose and fusarium wilt, which makes them a reliable choice for home gardeners. Their strong vines and adaptability to different soil types make them an excellent candidate for direct sowing—a method that allows the seeds to germinate and grow in the same spot they’ll produce fruit.


2. Understanding Direct Sowing

Direct sowing means planting seeds straight into the soil outdoors rather than starting them indoors in trays or pots. For heat-loving crops like watermelon, this method can actually be more effective since these plants dislike having their roots disturbed during transplanting.

When you direct sow, the seedlings adapt immediately to outdoor conditions, leading to stronger, hardier plants. The key is to ensure your garden soil is warm, loose, and nutrient-rich before planting.


3. The Best Time to Plant Crimson Sweet Watermelons

Timing is critical for a successful watermelon crop. Crimson Sweet melons need warm soil (at least 70°F / 21°C) and a long growing season—about 85 to 95 days from seed to harvest.

Here’s when to plant:

  • In warm climates: You can sow seeds directly in late spring (April–May).
  • In cooler areas: Wait until early summer (June) when nighttime temperatures stay above 60°F (16°C).
  • Soil temperature check: If you’re unsure, use a soil thermometer—planting too early in cold soil can stunt growth or cause seeds to rot.

If you have a shorter growing season, you can warm the soil with black plastic mulch a week or two before planting.


4. Choosing and Preparing the Right Spot

Crimson Sweet watermelons need plenty of space and sunlight to thrive. Each plant spreads out widely, so careful site preparation is essential.

Here’s what they love:

  • Full Sun: At least 8–10 hours of direct sunlight daily.
  • Soil Type: Sandy loam soil that drains well yet retains enough moisture.
  • pH Level: Slightly acidic to neutral, between 6.0 and 6.8.
  • Spacing: Watermelons require room to stretch—allow 6–8 feet between rows and 3–4 feet between plants.

Before sowing, enrich your soil with:

  • Aged compost or manure (adds nutrients and improves structure)
  • Bone meal or organic fertilizer (promotes root and fruit growth)

Create raised hills or mounds about 12 inches high and 2–3 feet wide. These improve drainage and warm up faster—perfect for melon roots.


5. How to Direct Sow Crimson Sweet Watermelon Seeds

Once your soil is warm and ready, it’s time to plant! Follow these steps for successful germination and healthy growth:

  1. Form Hills: Shape your prepared soil into small mounds spaced about 4–6 feet apart.
  2. Planting Depth: Sow 3–4 seeds per hill, about 1 inch deep in the soil.
  3. Watering: Gently water after planting to moisten the soil, but avoid soaking it.
  4. Thinning: Once seedlings reach 3–4 inches tall, thin to the strongest 1 or 2 plants per hill.

Pro Tip: Cover the soil with a thin layer of mulch or straw after planting to keep moisture in and prevent weeds.


6. Watering and Fertilizing Your Watermelons

Watermelons love moisture, especially while they’re establishing roots and producing fruit. However, overwatering can cause the fruits to crack or lose sweetness.

Watering Tips:

  • Water deeply once or twice a week, providing about 1–2 inches of water.
  • Avoid wetting the leaves—focus on the base of the plant to prevent mildew and disease.
  • As the fruits mature, reduce watering slightly to concentrate sugars and improve flavor.

Fertilizing Schedule:

  • At planting: Mix in a balanced fertilizer like 10-10-10.
  • After vines start running: Feed with a nitrogen-rich fertilizer to promote vine growth.
  • At flowering and fruiting: Switch to a phosphorus- and potassium-heavy fertilizer (like 5-10-10) to encourage healthy fruit development.

7. Supporting Pollination for Maximum Fruit Set

Crimson Sweet watermelons rely on pollinators like bees to transfer pollen between male and female flowers. Poor pollination results in small or misshapen fruits.

To encourage pollination:

  • Plant bee-friendly flowers nearby, such as sunflowers, zinnias, or marigolds.
  • Avoid pesticides during blooming.
  • If bee activity is low, hand-pollinate by transferring pollen from male to female flowers using a soft brush or cotton swab.

You can identify female flowers by the tiny fruit at their base, while male flowers grow directly on the stem.


8. Common Problems and How to Prevent Them

Even healthy watermelons can face challenges. Stay proactive to keep your plants vigorous and productive.

Pests to Watch For:

  • Aphids: Suck sap from leaves. Control with neem oil or insecticidal soap.
  • Cucumber Beetles: Feed on leaves and transmit diseases. Use row covers early on.
  • Squash Bugs: Damage leaves and stems. Remove by hand or spray with organic insecticides.

Diseases:

  • Powdery Mildew: Appears as white spots—improve air circulation and avoid overhead watering.
  • Anthracnose & Fusarium Wilt: Rotate crops yearly and choose resistant varieties like Crimson Sweet.

Good garden hygiene, crop rotation, and mulching go a long way in preventing most issues.


9. Training and Pruning for Healthier Vines

Crimson Sweet vines can stretch more than 10 feet, so managing their growth ensures better airflow and healthier fruits.

  • Train vines to grow in a specific direction or up a low trellis if space is limited.
  • Prune side shoots sparingly—only remove excessive growth to redirect energy into fruiting.
  • Mulch around vines to keep soil temperatures steady and discourage weeds.

10. Harvesting Crimson Sweet Watermelons

After about 85–95 days, your hard work will pay off! But knowing exactly when to harvest is key to getting perfectly sweet fruit.

Signs of Ripeness:

  • The tendril nearest the fruit stem turns brown and dries up.
  • The underside (ground spot) changes from white to creamy yellow.
  • The rind loses its glossy shine and becomes duller.
  • A deep, hollow sound when tapped.

Use garden shears to cut the melon from the vine, leaving about 2 inches of stem. Handle carefully—once harvested, watermelons don’t continue to ripen.


11. Storing and Enjoying Your Harvest

Crimson Sweet watermelons taste best when freshly picked, but you can store them for later enjoyment.

  • Whole melons: Keep in a cool, dry place (50–60°F) for up to 2 weeks.
  • Cut melons: Store in the refrigerator for up to 5 days in airtight containers.

Serving Ideas:

  • Serve chilled slices as a refreshing snack.
  • Blend into watermelon juice or smoothies.
  • Combine with feta cheese and mint for a sweet-savory salad.
  • Freeze into popsicles or sorbet for a summer treat.

12. Pro Tips for Bigger and Sweeter Watermelons

If you want to elevate your watermelon game, try these gardener-approved tips:

  • Use black plastic mulch early in the season to warm the soil faster.
  • Avoid nitrogen-heavy fertilizers once fruits form—they’ll promote vines, not sweetness.
  • Rotate your watermelon patch yearly to keep soil healthy.
  • Limit each vine to 2–3 fruits to allow the plant to focus energy on growing large, flavorful melons.

13. The Joy of Growing Your Own Crimson Sweet Melons

There’s nothing quite like slicing open a homegrown Crimson Sweet watermelon—the burst of color, the sweet aroma, and that first juicy bite make all the effort worthwhile. Direct sowing these melons lets you experience the full cycle of nature right in your backyard, from tiny seed to sun-ripened fruit.

Whether you’re growing them for your family, for a summer picnic, or just for the joy of gardening, Crimson Sweet watermelons reward your patience with the ultimate taste of summer.


Conclusion

Direct sowing Crimson Sweet watermelons is simple, rewarding, and perfect for gardeners who love big results from little effort. With the right soil, warmth, and care, you can enjoy the satisfaction of harvesting enormous, sugar-sweet melons straight from your own garden.

So grab your seeds, prepare your sunny patch, and follow these easy steps—you’ll be enjoying the juiciest Crimson Sweet watermelons of your life before you know it!

How to Prevent Muskmelons from Cracking: Expert Tips for Healthy and Delicious Cantaloupe Harvests

How to Prevent Muskmelons from Cracking: Expert Tips for Healthy and Delicious Cantaloupe Harvests

Muskmelons, often known as cantaloupes, are among the most beloved summer fruits for home gardeners. Their sweet, fragrant flesh, refreshing texture, and rich vitamin content make them an irresistible addition to any garden. However, one of the most common frustrations growers face is fruit cracking—a problem that can ruin perfectly good melons just before harvest.

If you’ve ever watched your cantaloupes split open after a rain or while ripening, you’re not alone. Inspired by the video “How to Prevent Muskmelons from Cracking / Tips for Growing Cantaloupe / Cantaloupe Cultivation,” this comprehensive 1200-word guide will help you understand why melons crack and, more importantly, how to prevent it. You’ll also learn how to cultivate strong, healthy plants that produce beautiful, crack-free, sweet fruits every time.


1. Understanding Why Muskmelons Crack

Cracking in muskmelons occurs when there’s a sudden imbalance between water uptake and fruit expansion. Essentially, when the plant absorbs too much water too quickly—especially after a dry period—the fruit’s inner flesh swells faster than the outer rind can stretch, leading to splits.

Here are the main causes of cracking:

  • Irregular watering: Periods of drought followed by heavy watering or rain.
  • Sudden rainfall: Especially after dry conditions, soil moisture spikes rapidly.
  • Overripe fruit: If left too long on the vine, the rind weakens and becomes more prone to cracking.
  • Nutrient imbalance: Excess nitrogen and low calcium can make the rind thinner and weaker.
  • Temperature fluctuations: Rapid changes between hot days and cool nights affect fruit development.

Understanding these causes is the first step in preventing cracking and improving your overall cantaloupe yield.


2. Choosing the Right Variety

Before planting, start with a variety known for crack resistance. Some cantaloupes and muskmelon hybrids are bred to handle irregular watering and environmental stress better.

Recommended crack-resistant varieties include:

  • Hale’s Best Jumbo – Sweet, aromatic, and tolerant of inconsistent watering.
  • Ambrosia – Known for its thick rind and high sugar content.
  • Minnesota Midget – Small-fruited and resilient in variable weather.
  • Athena Hybrid – Great for humid areas, with strong rind structure.

Choosing the right type can make a huge difference in your results.


3. Ideal Growing Conditions for Cantaloupes

Muskmelons love warmth and sun. To ensure healthy plants and fruit, provide them with ideal conditions:

  • Sunlight: At least 8–10 hours of direct sunlight daily.
  • Soil Type: Well-draining, sandy loam enriched with organic matter.
  • pH Level: Between 6.0 and 6.8.
  • Temperature: Optimal growth occurs between 70°F–90°F (21°C–32°C).

Avoid waterlogged soil, as excess moisture encourages root rot and fruit cracking.


4. Soil Preparation and Planting

Proper soil preparation ensures balanced growth and moisture control.

  1. Amend the soil with compost or well-rotted manure before planting to improve drainage and fertility.
  2. Create raised beds or mounds about 12 inches high and 2–3 feet wide. Raised soil drains better and warms up quickly.
  3. Plant seeds directly into the ground once the soil temperature reaches 70°F (21°C).
  4. Sow 3–4 seeds per hill, spacing hills 3–4 feet apart, then thin to the two strongest seedlings.

If you’re transplanting seedlings, handle them gently—muskmelons dislike root disturbance.


5. Watering the Right Way

Water management is the most critical factor in preventing cracking. The goal is to keep soil moisture consistent throughout the growing season.

Watering tips for success:

  • Water deeply but infrequently—once or twice a week, depending on weather.
  • Aim for about 1–1.5 inches of water per week.
  • Avoid overhead watering to reduce disease; use drip irrigation or a soaker hose instead.
  • During fruit development, keep the soil evenly moist.
  • Cut back slightly on watering once fruits reach near maturity to prevent rapid swelling that causes cracks.

Avoid this common mistake: Letting the soil dry completely, then overwatering to “catch up.” That sudden surge of moisture is the main cause of splitting melons.


6. Mulching for Moisture Control

Mulch acts as your first line of defense against water stress and temperature fluctuations.

Apply organic mulch like straw, dried leaves, or compost around the plants. This will:

  • Regulate soil temperature.
  • Maintain consistent soil moisture.
  • Suppress weeds that compete for nutrients.
  • Prevent rain from splashing soil (and diseases) onto leaves and fruits.

Keep mulch a few inches away from the base of the stem to prevent rot.


7. Fertilizing for Strong, Crack-Resistant Fruits

Muskmelons are heavy feeders, but the right nutrient balance is key. Excess nitrogen promotes leafy growth at the expense of rind strength, while deficiencies in calcium and potassium can lead to weak, thin rinds prone to cracking.

Fertilization schedule:

  • Before planting: Mix compost or a balanced organic fertilizer (10-10-10) into the soil.
  • After vines begin to run: Apply a light nitrogen boost (fish emulsion or compost tea).
  • At flowering and fruiting: Switch to a low-nitrogen, high-potassium fertilizer (like 5-10-15).

You can also add gypsum or bone meal to boost calcium levels naturally.


8. Managing Rain and Moisture Fluctuations

While you can’t control the weather, you can minimize damage during heavy rain periods.

Strategies to reduce cracking risk after rainfall:

  • Use plastic mulch or row covers early in the season to shield soil from heavy rain.
  • After a storm, improve drainage by loosening compacted soil near the plants.
  • Harvest ripe or nearly ripe fruits before major rain events to prevent them from splitting.
  • If growing in containers or raised beds, ensure excellent drainage.

A few cracks won’t ruin the fruit’s flavor, but they can invite pests and rot—so prevention is always better.


9. Pollination and Fruit Development

Pollination also plays a vital role in producing evenly developed fruits. Poorly pollinated fruits may have weak spots, uneven growth, or malformed rinds that are more susceptible to cracking.

Encourage pollination by:

  • Planting flowers like marigolds, zinnias, or borage near your cantaloupe patch.
  • Avoiding pesticide sprays during bloom periods.
  • Hand-pollinating with a soft brush if bee activity is low.

Balanced pollination ensures fruits develop uniformly and reduces cracking risk.


10. Monitoring Fruit Ripening

Overripe muskmelons are soft and under tension, making them more likely to crack—especially if watered heavily or exposed to sudden moisture changes.

Signs your cantaloupe is ready to harvest:

  • The rind under the netting turns from green to a golden tan.
  • The fruit slips easily from the vine with a gentle twist.
  • The blossom end emits a sweet, musky aroma.

Harvest promptly once these signs appear. If a rainstorm is forecasted, it’s wise to pick ripe fruits early to avoid cracks.


11. Pest and Disease Prevention

Healthy plants are more resilient to environmental stress, including cracking. Keep pests and diseases under control for vigorous growth.

Common pests:

  • Aphids and whiteflies: Cause stunted growth. Control with neem oil or insecticidal soap.
  • Cucumber beetles: Can spread bacterial wilt. Use row covers early in the season.
  • Spider mites: Thrive in dry weather—mist the undersides of leaves lightly or use neem oil.

Diseases to watch for:

  • Powdery mildew: Appears as white spots; provide good air circulation.
  • Fusarium wilt: Avoid replanting melons in the same soil each year.
  • Downy mildew: Prevent with crop rotation and proper spacing.

Healthy vines ensure strong fruits less prone to splitting.


12. Pro Tips for Perfect, Crack-Free Cantaloupes

  • Use drip irrigation: Provides steady moisture without sudden fluctuations.
  • Avoid wet-dry cycles: Keep watering regular during fruiting.
  • Pick at peak ripeness: Don’t let melons overmature on the vine.
  • Shade fruits slightly: Use a few leaves or light cover to reduce heat stress.
  • Harvest before storms: Prevent water-induced splitting by picking early.

13. Enjoying Your Homegrown Muskmelons

Once harvested, let your cantaloupes rest at room temperature for a day to enhance their aroma and flavor. Then, store them in the refrigerator for up to 5–7 days.

Serve chilled slices on a summer afternoon, blend them into smoothies, or pair them with prosciutto for a gourmet twist. The satisfaction of growing your own crack-free, sun-ripened melons makes every bite even sweeter.


Conclusion

Cracking in muskmelons can be disheartening, but with a bit of attention to watering, nutrition, and timing, it’s completely preventable. By maintaining consistent moisture, choosing the right varieties, and keeping your plants healthy, you can enjoy perfectly shaped, sweet, and juicy cantaloupes straight from your garden.

So this season, take these tips to heart—manage your water wisely, pick at the right time, and grow your cantaloupes with care. Your garden will reward you with a harvest of fragrant, golden muskmelons that are as beautiful on the outside as they are delicious inside.

The Clever Insight into Companion Planting Beans with Corn for Natural Support in Garden Plots

The Clever Insight into Companion Planting Beans with Corn for Natural Support in Garden Plots

Companion planting is one of the oldest and most effective gardening strategies, built on the idea that certain plants grow better when paired together. Among the most iconic and productive combinations in traditional gardening is planting beans with corn. This age-old method, rooted deeply in indigenous agricultural wisdom, demonstrates how two different crops can work together to benefit each other naturally.

By understanding the science, method, and benefits behind companion planting beans with corn, you can boost your garden’s productivity, improve soil health, and reduce the need for synthetic supports or fertilizers—all while maintaining a more sustainable and self-reliant garden ecosystem.

Let’s explore how this clever pairing works and how you can apply it successfully in your own garden plots.


The Ancient Wisdom Behind the Beans and Corn Partnership

This partnership isn’t new—it dates back centuries. Native American tribes, such as the Iroquois, developed a system called the Three Sisters Garden, which involved growing corn, beans, and squash together. Each of the three plants played a vital role in supporting the others:

  • Corn provided a natural trellis for beans to climb.
  • Beans enriched the soil with nitrogen, a crucial nutrient for corn and other heavy feeders.
  • Squash spread along the ground, acting as a living mulch that conserved moisture and suppressed weeds.

While squash adds an extra dimension, the beans-and-corn duo remains a powerful and efficient combination for gardeners of all scales—even in small backyard plots or raised beds.


Why Corn and Beans Are Perfect Companions

The relationship between beans and corn goes beyond convenience. It’s a scientifically beneficial symbiosis that leads to stronger, healthier plants and a more balanced garden ecosystem.

1. Natural Structural Support

Corn plants grow tall and sturdy, providing the perfect natural support for climbing bean vines. Instead of using poles, trellises, or cages, gardeners can let the corn act as living scaffolding. The beans twine up the corn stalks, saving space and materials while making the most of vertical growth potential.

2. Nutrient Exchange and Soil Health

Beans are legumes, meaning they form a special relationship with nitrogen-fixing bacteria in their root nodules. These bacteria convert nitrogen from the air into forms plants can use. Corn, being a heavy nitrogen feeder, benefits immensely from this partnership. As beans add nitrogen to the soil, corn absorbs it to grow strong and produce large, healthy ears.

3. Pest and Disease Balance

Corn and beans also help each other by diversifying the ecosystem, making it harder for pests to take hold. The interplanting of crops confuses insect pests, reduces monoculture-related diseases, and encourages beneficial insects like ladybugs and pollinators.

4. Efficient Space Utilization

In modern garden plots where space is limited, vertical growth becomes an asset. The corn-bean pairing maximizes productivity per square foot. While corn reaches upward, beans climb it, allowing you to grow two crops in the same footprint.

5. Sustainability and Reduced Inputs

Since the system provides both structure and fertility, it minimizes the need for added fertilizers and support structures. This not only saves money but also promotes more eco-friendly and regenerative gardening practices.


Choosing the Right Corn and Bean Varieties

To make this partnership successful, choosing the right varieties for your climate and garden size is key.

Best Corn Varieties for Companion Planting

Look for tall, sturdy types that can handle the extra weight of climbing beans:

  • Golden Bantam (heirloom sweet corn)
  • Country Gentleman
  • Stowell’s Evergreen
  • Bloody Butcher (for ornamental and edible use)

Avoid dwarf or short corn varieties since they may not provide enough height or strength to support bean vines.

Best Bean Varieties for Companion Planting

Choose pole beans, not bush beans, since they need to climb. Good options include:

  • Kentucky Wonder
  • Blue Lake Pole Bean
  • Scarlet Runner Bean (adds ornamental beauty with red flowers)
  • Rattlesnake Pole Bean

These beans grow vigorously and can easily twine around corn stalks without causing harm.


How to Plant Corn and Beans Together

Here’s a step-by-step guide to create your own corn-bean partnership in the garden.

1. Prepare the Soil

Both corn and beans prefer well-drained, nutrient-rich soil. Before planting, amend your soil with compost or aged manure to improve fertility and texture.

2. Plant Corn First

Corn should always go into the ground before beans. Sow corn seeds directly into your garden bed about 2–3 weeks before you plan to plant beans. This allows the corn to establish sturdy stalks—usually 6–8 inches tall—before beans start climbing.

  • Spacing: Plant corn in blocks (not single rows) to ensure proper pollination. Space seeds about 10–12 inches apart, with rows 2–3 feet apart.

3. Add the Beans

Once the corn is about knee-high, plant bean seeds around the base of each stalk. Place 2–3 bean seeds around every corn plant, about 3 inches from the stem.

This spacing ensures that the beans can climb easily without overwhelming the corn.

4. Watering and Mulching

Keep the soil consistently moist but not soggy. Adding mulch—like straw or leaf compost—will help retain moisture and reduce weed growth.

5. Support and Maintenance

As the beans begin to climb, gently guide them toward the corn stalks if necessary. Avoid using fertilizers high in nitrogen, since the beans will supply plenty. A balanced organic fertilizer or compost tea works best for overall health.

6. Harvesting

  • Corn: Harvest when kernels are plump and milky when pierced.
  • Beans: Pick regularly to encourage more pod production.

Since the plants mature at slightly different times, you’ll enjoy multiple harvests through the season.


Pro Tips for a Successful Bean-and-Corn Garden

  • Don’t overcrowd. Too many beans can weigh down the corn stalks. Keep a 1:3 bean-to-corn ratio for balance.
  • Rotate crops yearly. Avoid planting corn and beans in the same spot season after season to prevent soil depletion and disease buildup.
  • Add a third companion (optional). You can include a low-growing squash or pumpkin to complete the Three Sisters trio. The large leaves shade the soil and suppress weeds.
  • Watch for pests. Corn earworms and bean beetles are common, but planting marigolds or basil nearby can help deter them naturally.
  • Use succession planting. For continuous harvests, plant new patches every 2–3 weeks during the growing season.

The Ecological Benefits of Companion Planting Corn and Beans

Beyond the obvious advantages of support and nutrition, this companion planting method also improves the overall ecosystem of your garden.

  • Soil Fertility: The natural nitrogen fixation from beans builds long-term fertility, reducing the need for synthetic fertilizers.
  • Carbon Footprint Reduction: Since fewer external inputs are required, your garden becomes more sustainable.
  • Pollinator Attraction: Flowering beans bring in bees and other beneficial insects, enhancing pollination for other crops nearby.
  • Biodiversity: This combination supports diverse microorganisms in the soil, which in turn create healthier, more resilient plant communities.

Common Mistakes to Avoid

Even though this method is beginner-friendly, some common errors can hinder success:

  • Planting beans too early: Wait until corn is tall enough to support them.
  • Using bush beans: They won’t climb the corn and will compete for space.
  • Over-fertilizing: Too much nitrogen will make corn grow lush leaves but fewer ears.
  • Poor watering: Inconsistent moisture can lead to stunted growth and reduced yield.

Avoiding these mistakes ensures that your companion planting setup thrives throughout the season.


Conclusion

Companion planting beans with corn is more than just a traditional gardening trick—it’s a demonstration of natural cooperation and ecological balance. By allowing each plant to support and nourish the other, you create a resilient, high-yield garden system that aligns perfectly with sustainable growing principles.

Whether you’re cultivating a small backyard bed or managing a larger homestead plot, this clever insight into pairing beans with corn can transform your garden into a thriving, self-sustaining ecosystem—one that honors ancient wisdom while embracing modern efficiency.

I Started Cleaning My Mirrors with Vinegar and Newspaper — And They’ve Never Looked Clearer

I Started Cleaning My Mirrors with Vinegar and Newspaper — And They’ve Never Looked Clearer

When it comes to cleaning mirrors, most of us have fallen victim to the streaky aftermath of commercial glass cleaners. No matter how carefully we wipe or how much product we use, those stubborn smudges and cloudy films often remain. I used to think that spotless mirrors required fancy sprays or microfiber cloths—until I stumbled upon a simple, old-fashioned method that completely changed the game.

It all started when I began cleaning my mirrors with vinegar and newspaper. It sounded odd at first—after all, vinegar is something I use for cooking, and newspaper felt like something that belonged in the recycling bin. But once I gave this DIY trick a try, I realized why it’s been a time-tested cleaning secret for generations. My mirrors have never looked clearer, and the best part? It’s cheap, natural, and surprisingly effective.

Let’s explore exactly how and why this works, plus how you can try it yourself for sparkling, streak-free mirrors every single time.


The Surprising Science Behind Vinegar and Newspaper

You might wonder why this simple combination works so well. The answer lies in chemistry and texture—two factors that commercial products often overcomplicate.

1. Vinegar’s Cleaning Power

Vinegar, especially white distilled vinegar, is a natural acid (acetic acid). This mild acid effectively breaks down:

  • Soap scum
  • Hard water spots
  • Fingerprint oils
  • Residual film from previous cleaning sprays

Unlike commercial cleaners loaded with ammonia or artificial fragrances, vinegar leaves no chemical residue behind. This means the mirror not only looks cleaner but also stays cleaner for longer because there’s nothing sticky for dust to cling to.

2. Why Newspaper Beats Paper Towels

Paper towels tend to shed lint and often contain softening agents that create streaks on glass. Newspaper, on the other hand, is made of dense fibers that don’t leave lint behind.

Plus, the ink used in modern newspapers is typically soy-based and non-toxic, giving it a mild polishing effect on glass surfaces. The combination of vinegar’s acidity and newspaper’s texture creates a perfect storm for crystal-clear, streak-free mirrors.


How to Clean Mirrors with Vinegar and Newspaper

If you’ve never tried this cleaning hack before, here’s a simple step-by-step guide to help you get started.

What You’ll Need

  • White distilled vinegar (½ cup)
  • Water (½ cup)
  • Spray bottle
  • Old newspaper sheets
  • A small bowl (optional)

Instructions

  1. Mix Your Cleaning Solution
    Combine equal parts of white vinegar and water in a spray bottle. Shake gently to mix. This 1:1 ratio works well for most mirrors. For heavily soiled mirrors, you can increase the vinegar slightly for extra cleaning power.
  2. Prepare the Newspaper
    Tear a few pages of newspaper into manageable pieces. Avoid glossy or colored pages since they can sometimes smudge.
  3. Spray and Wipe
    Lightly spray the mirror with the vinegar solution—don’t overdo it. Using too much liquid can cause dripping and make the cleaning process messier. Using your crumpled newspaper, wipe the mirror in a circular motion to loosen dirt and grime. Then, switch to vertical or horizontal strokes to polish the surface.
  4. Polish for a Streak-Free Finish
    Once you’ve wiped the entire surface, use a clean section of newspaper to buff the mirror until it shines. The result? A spotless, crystal-clear reflection without the usual haze or residue.

Why This Method Works Better Than Store-Bought Cleaners

At first, I was skeptical. Could something as basic as vinegar and newspaper really outperform the expensive blue sprays sitting in my cleaning cabinet? But after several tries, I found that this simple DIY cleaner not only matched but surpassed the results of store-bought options. Here’s why:

1. No Residue, No Streaks

Commercial cleaners often leave behind surfactants or silicone-based films that cause smearing when dry. Vinegar cuts through that buildup and leaves nothing behind but a spotless surface.

2. Non-Toxic and Eco-Friendly

Vinegar is biodegradable, non-toxic, and safe around kids and pets. It doesn’t release harsh fumes or require ventilation, unlike ammonia-based glass cleaners.

3. Budget-Friendly and Accessible

You probably already have vinegar in your kitchen and old newspapers lying around. Why spend money on specialized cleaning agents when this classic combination works just as well—if not better?

4. Versatile Use Around the Home

Once you see how well this combo works on mirrors, you’ll start using it on windows, glass tables, picture frames, and even shower doors. It’s an all-in-one solution that simplifies your cleaning routine.


Common Mistakes to Avoid

While the vinegar-and-newspaper method is straightforward, a few simple mistakes can affect your results. Here’s what to watch out for:

  1. Using Too Much Solution
    Excess moisture can cause streaks or drips that make the mirror look worse before it looks better. A light mist is all you need.
  2. Skipping the Pre-Clean Step for Heavily Soiled Mirrors
    If your mirror is covered with toothpaste splatter or sticky residue, wipe it first with a damp cloth. Then finish with vinegar and newspaper for the shine.
  3. Using Colored or Glossy Paper
    Always use black-and-white newspaper pages. Colored inks or glossy magazine paper can transfer dye or smudge onto the glass.
  4. Ignoring the Edges
    Mirror edges often collect dust and moisture, which can dull the reflection. Don’t forget to clean around the borders for a truly spotless finish.

The Eco-Friendly Bonus

One of the biggest benefits of cleaning with vinegar and newspaper is how sustainable it is. Many commercial cleaning products come in single-use plastic bottles, and the paper towels used with them end up in landfills.

By switching to vinegar and newspaper:

  • You reduce plastic waste by reusing a spray bottle.
  • You repurpose old newspapers, giving them a second life before recycling.
  • You avoid chemical runoff into waterways, keeping your cleaning routine environmentally responsible.

It’s a small change with a surprisingly big impact—both for your home and the planet.


Additional Tips for Sparkling Mirrors

Here are a few pro-level cleaning tips that can take your mirror game even further:

  • Clean on a cloudy day. Bright sunlight can cause your vinegar solution to dry too fast, leaving streaks.
  • Use distilled water. If you live in an area with hard water, minerals in tap water can cause spots. Distilled water eliminates that issue.
  • Add a few drops of essential oil. Vinegar has a strong smell that fades quickly, but if you prefer a fresh scent, add a few drops of lemon or lavender oil to your solution.
  • Don’t spray directly onto framed mirrors. Excess liquid can seep into the edges and damage the backing. Spray onto your newspaper instead.

Beyond Mirrors: Other Surfaces That Shine with Vinegar

Once you experience the magic of vinegar and newspaper on mirrors, you’ll want to try it on other surfaces too. Here are a few great uses:

  • Windows: Get crystal-clear glass without streaks or fog.
  • Glass shower doors: Removes soap scum and water spots with ease.
  • Car windows: Cuts through grime and eliminates streaking in sunlight.
  • Picture frames: Keeps glass surfaces dust-free and shiny.
  • Glass tables: Polishes to a high gloss while being safe for everyday use.

Just remember to test any painted or tinted surfaces first to ensure vinegar doesn’t cause discoloration.


Why Old Tricks Still Work Best

In today’s world filled with specialized cleaning sprays and expensive gadgets, it’s refreshing to rediscover simple, effective methods that stand the test of time. The vinegar-and-newspaper technique is a perfect example of how natural cleaning methods often outperform modern chemical formulas.

It’s proof that sometimes, the best solutions don’t come in sleek packaging or carry brand names—they’re sitting quietly in your pantry and recycling bin.


Final Thoughts

After switching to vinegar and newspaper, my mirror-cleaning routine has become faster, cheaper, and more satisfying. There’s something deeply rewarding about seeing a mirror so clear it feels invisible—no smears, no film, just pure reflection.

This old-school cleaning trick doesn’t just make mirrors sparkle; it’s a small act of sustainability, simplicity, and wisdom passed down through generations. It’s about embracing a mindful approach to home care—where you rely on natural ingredients, waste less, and enjoy more of the genuine results nature has to offer.

So next time you reach for that fancy glass cleaner, pause for a moment. Grab a bottle of vinegar and yesterday’s newspaper instead. You might be surprised at how effortlessly your mirrors shine—clearer than ever before.

Putting Baking Soda in My Fridge Seemed Silly — Until I Saw What It Did to the Smell

Putting Baking Soda in My Fridge Seemed Silly — Until I Saw What It Did to the Smell

For years, I thought the idea of putting a box of baking soda in the fridge was just one of those quirky old-fashioned tips that people repeated without really knowing why. I had seen it in my grandmother’s refrigerator growing up, sitting quietly in the corner of the top shelf, but I never gave it much thought. To me, it seemed like a silly habit—how could a box of white powder possibly make a difference in the smell of a refrigerator full of leftovers, vegetables, and occasional forgotten items?

But curiosity eventually got the best of me. After one too many battles with mysterious fridge odors, I decided to give this old trick a try. What happened next completely changed my perspective on baking soda and its surprising deodorizing power. Within just a day or two, the stale, sour smell that had been lingering in my fridge vanished—almost as if it had been absorbed into thin air.

Here’s the science, the method, and the incredible results behind why baking soda is the ultimate natural odor neutralizer—and why it absolutely deserves a permanent spot in your refrigerator.


The Science Behind Baking Soda’s Deodorizing Power

Baking soda, or sodium bicarbonate, is a simple compound with extraordinary abilities. What makes it so effective in eliminating odors is its chemical structure—it’s a mild alkaline substance that can neutralize both acids and bases, which are often the main causes of unpleasant smells.

Here’s how it works:

  • Most bad odors in your fridge come from acidic or basic compounds released by food as it spoils or breaks down.
  • Baking soda reacts with these molecules, turning them into neutral salts and water.
  • This reaction effectively removes the odor at its source rather than just masking it, as many air fresheners do.

In other words, baking soda doesn’t just cover up smells—it eliminates them chemically.


Why Fridges Get Smelly in the First Place

Even the cleanest, most organized fridge can develop a less-than-fresh odor over time. Here’s why:

  1. Food Spoilage: When leftovers go bad or produce starts to rot, they release volatile compounds like butyric acid (from dairy) or amines (from decaying proteins), which have strong, unpleasant smells.
  2. Moisture and Air Circulation: Fridges are cold and moist environments. Poor air circulation allows odors to linger and mix.
  3. Absorption by Other Foods: Some foods, like butter or cheese, easily absorb surrounding odors, making your fridge smell even worse.
  4. Spills and Residue: Tiny spills, even if invisible, can contribute to bacterial growth and persistent smells over time.

That’s where baking soda comes in—it acts like a natural odor sponge, trapping and neutralizing these unwanted scents before they take over your refrigerator.


How to Use Baking Soda in Your Fridge

After learning how it works, I decided to try it out properly—and the process couldn’t be easier. Here’s exactly how to do it:

1. Choose the Right Container

You can simply open a box of baking soda and place it in your fridge, but for the best results:

  • Use a small, shallow dish or a bowl to expose more surface area.
  • If you prefer convenience, there are special fridge deodorizer boxes with vents that increase air contact.

2. Find the Ideal Spot

Place the container on a middle or top shelf, where airflow is strongest. If your fridge is large, consider keeping a second container near the crisper drawers or freezer section.

3. Replace Regularly

Baking soda doesn’t last forever. Once it absorbs enough odors, its effectiveness decreases.

  • Replace it every 30 to 60 days for optimal performance.
  • Write the date on the box or container so you remember when it’s time to change it.

4. Bonus Tip: Clean Before You Deodorize

If your fridge already smells bad, start with a quick clean:

  • Mix 2 tablespoons of baking soda with 1 quart of warm water and wipe down shelves and drawers.
  • Then, place a fresh batch of baking soda inside.

The cleaning step amplifies the deodorizing effect and gives your fridge a clean slate.


The Results: What I Noticed

I was skeptical at first, but within 24 hours, the difference was undeniable. The faint musty odor that had been bothering me was completely gone. Even after opening the fridge door multiple times a day, it smelled clean and neutral—no perfumes, no artificial freshness, just the absence of bad smells.

Over the next few weeks, I noticed that my food—especially butter, cheese, and fruits—tasted fresher too. It turns out, baking soda helps prevent odor transfer, meaning strong-smelling foods like onions or leftovers don’t taint the more delicate items.

The best part? I didn’t have to buy any special deodorizer or cleaning spray. A simple, inexpensive ingredient from my kitchen had done what no store-bought product ever managed to do: make my fridge smell like nothing at all.


Why Baking Soda Beats Store-Bought Deodorizers

You might wonder: why not just buy a fridge freshener or odor eliminator from the store? There are plenty of those available, but baking soda remains unbeatable for several reasons.

1. 100% Natural and Safe

Baking soda is non-toxic, food-safe, and environmentally friendly. Unlike chemical deodorizers, it won’t release artificial fragrances or residues that could affect your food.

2. Inexpensive and Multi-Purpose

A box of baking soda costs less than a dollar and can be used for dozens of other cleaning purposes around your home. From scrubbing sinks to whitening laundry, it’s a true multitasker.

3. No Overpowering Scents

Commercial deodorizers often use strong perfumes to mask smells. Baking soda simply neutralizes them, leaving your fridge smelling genuinely clean—not artificially scented.

4. Proven by Generations

This isn’t just an internet trend. People have been using baking soda to clean and deodorize since the 1800s. It’s a method passed down through generations for one reason—it works.


Other Genius Uses for Baking Soda Around the Kitchen

Once I saw how well it worked in the fridge, I started experimenting with baking soda in other areas of my kitchen. Here are a few of the most effective ways to use it:

  • Deodorize Trash Cans: Sprinkle a handful at the bottom of your bin to absorb unpleasant odors.
  • Freshen the Sink Drain: Pour half a cup of baking soda followed by vinegar and hot water to clear odors and mild clogs.
  • Clean Cutting Boards: Make a paste of baking soda and water to gently scrub away stains and smells.
  • Microwave Cleaner: Mix water and baking soda in a bowl, heat for a minute, then wipe away softened food residue.
  • Carpet Refresher: Sprinkle on rugs or kitchen mats, let sit for 15 minutes, then vacuum for a fresh scent.

It’s amazing how one humble pantry item can replace half the cleaning products in your home.


Common Mistakes to Avoid

Even though baking soda is simple to use, a few small errors can make it less effective.

  1. Leaving It Too Long: If you forget to replace it, it will eventually stop absorbing odors. A two-month replacement schedule works best.
  2. Keeping It in a Closed Box: Don’t just keep the box sealed with a flap open—it limits air contact. Pour some out into a dish for better results.
  3. Using for Cleaning and Deodorizing at the Same Time: Once baking soda has absorbed odors, don’t reuse it for cleaning or cooking. Always replace it with a fresh batch.
  4. Ignoring the Freezer: Freezers can smell too! Add a separate container of baking soda to keep frozen food odors neutralized.

The Eco-Friendly Bonus

Beyond its cleaning power, baking soda is a zero-waste, eco-conscious choice for household maintenance. Using it helps you:

  • Cut down on plastic waste from chemical cleaners.
  • Avoid harsh chemicals that can harm waterways.
  • Reduce your carbon footprint, since baking soda production is simple and sustainable.

Switching to natural cleaning products like baking soda is one of those small steps that contribute to a greener home—and a healthier planet.


Final Thoughts

When I first placed a box of baking soda in my fridge, I didn’t expect much. It seemed too simple to be effective. But after experiencing the results firsthand, I’m now a firm believer in this old-school remedy. My refrigerator smells cleaner than it ever has, my food stays fresher longer, and I’ve replaced yet another chemical product with something natural, safe, and budget-friendly.

It’s funny how the simplest household hacks often turn out to be the most powerful. Baking soda might not look like much, but it’s quietly doing its job—absorbing odors, freshening your space, and proving that sometimes, the best solutions are the ones your grandmother swore by.

So if you’ve been skeptical like I was, give it a try. Open that box, place it in the fridge, and wait a day or two. You’ll be amazed at how fresh your kitchen starts to feel—and you might just start wondering what other old-fashioned tricks are worth rediscovering next.