How to Plant a Cherry Pit for Future Trees: A Complete Beginner’s Guide

How to Plant a Cherry Pit for Future Trees: A Complete Beginner’s Guide

There’s something deeply satisfying about growing a fruit tree from scratch, especially when it starts with something as simple as a cherry pit. While it takes patience and care, planting a cherry pit can one day reward you with a beautiful flowering tree that offers delicious fruit and adds ornamental charm to your garden.

In this comprehensive guide, you’ll learn step-by-step how to plant a cherry pit for future trees — from selecting the right seeds to caring for the young saplings. Whether you dream of juicy sweet cherries or tart varieties for pies and preserves, this guide has everything you need to get started.


Why Grow Cherry Trees from Pits?

Growing a cherry tree from a pit may seem like a long-term commitment, but it offers plenty of benefits:

  • Budget-friendly: No need to buy nursery saplings.
  • Satisfying process: Watching a tree grow from a tiny seed is rewarding.
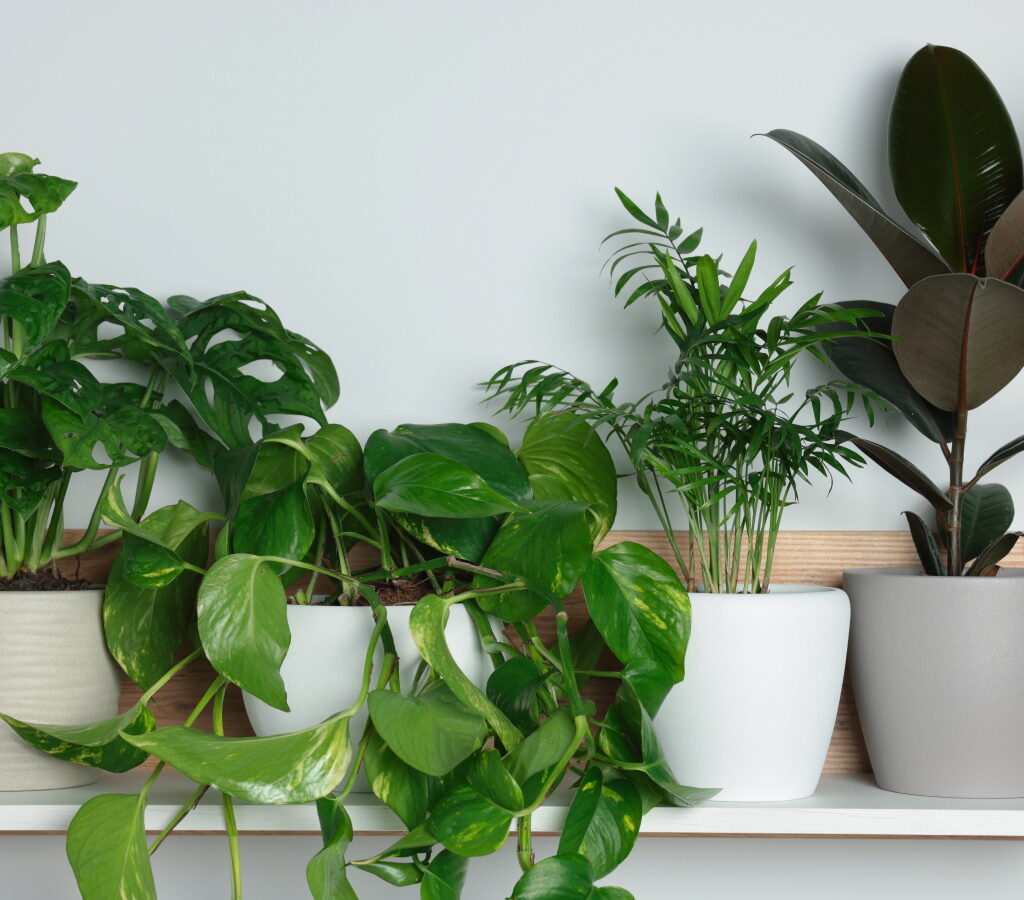
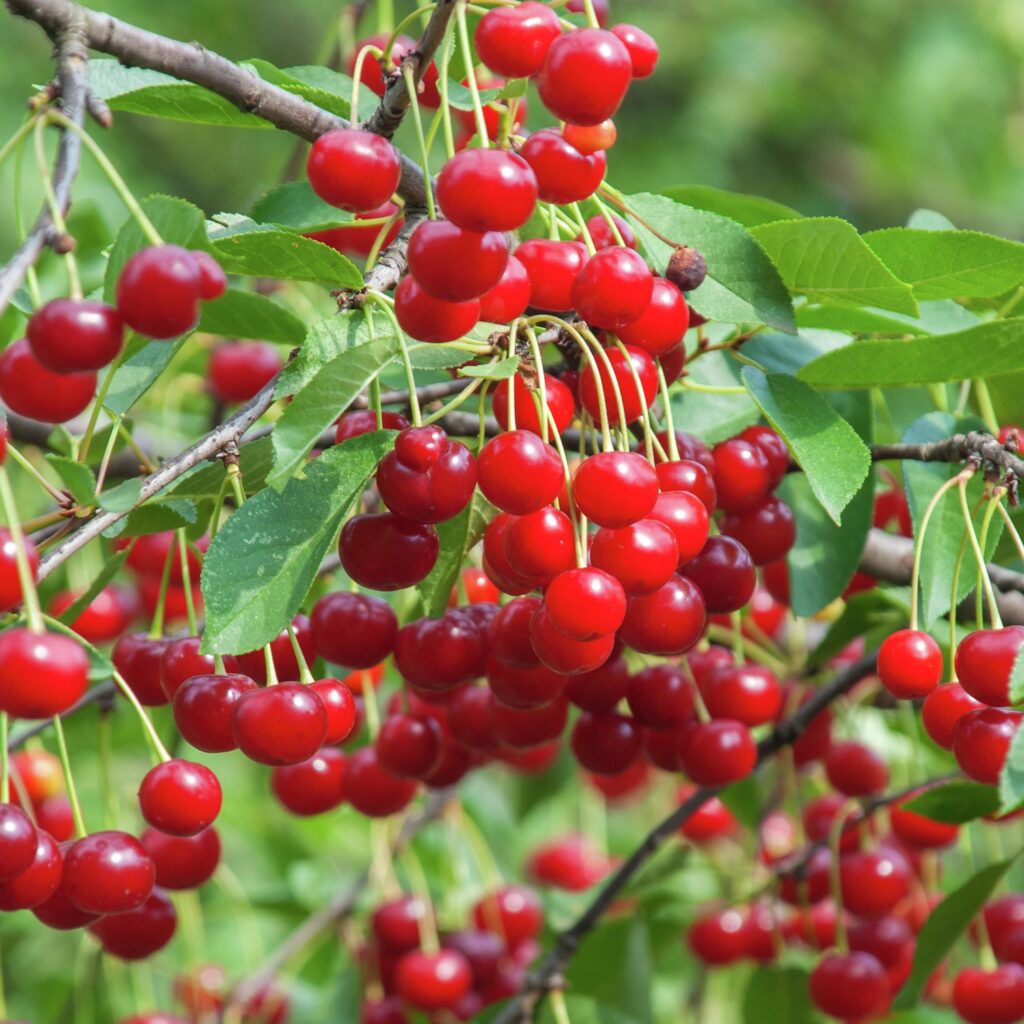
  • Beautiful landscape tree: Cherry trees are prized for their spring blossoms.
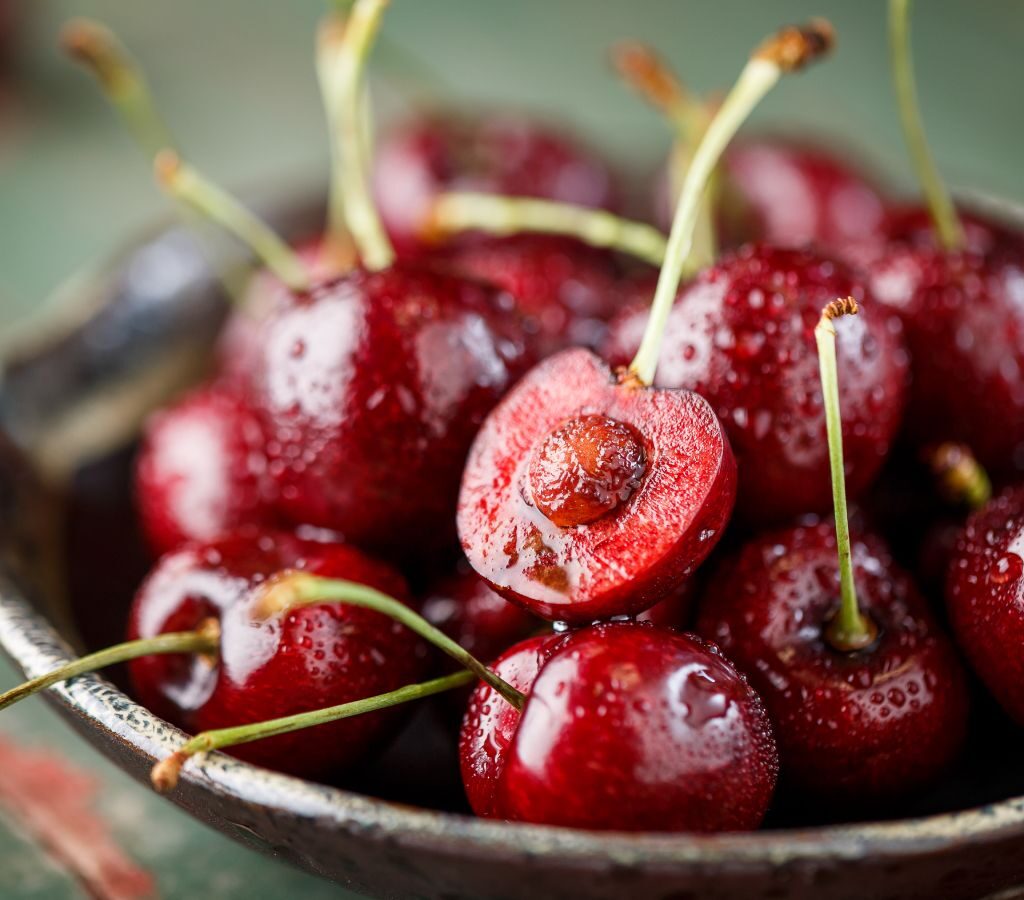
  • Potential for homegrown fruit: With time and care, you could harvest your own cherries.

Do note that cherry trees grown from pits may not produce fruit identical to the parent cherry, and it might take 5-10 years for fruit to appear. Still, it’s an enjoyable gardening adventure for those with patience.


Step 1: Choose the Right Cherries

The first step is selecting suitable cherries for planting. Ideally:

  • Use fresh, locally grown cherries — grocery store cherries may be treated to prevent sprouting.
  • Decide between sweet cherries (Prunus avium) or sour cherries (Prunus cerasus), depending on your climate and taste preferences.

Pro Tip: If you live in a colder region, sour cherries tend to be hardier and more reliable for fruiting.


Step 2: Clean and Prepare the Pits

After enjoying your cherries, save the pits and clean them thoroughly.

How to Clean Cherry Pits:

  1. Rinse the pits under cool water.
  2. Scrub off any remaining flesh with a soft brush or cloth.
  3. Let them air dry on a paper towel for a day or two.

Once dry, you can move on to stratifying them — a vital step to mimic natural winter conditions.


Step 3: Stratify the Cherry Pits

Cherry seeds require cold stratification to break dormancy and prepare them for sprouting.

How to Stratify Cherry Pits:

  1. Soak the pits in water for 24 hours.
  2. Drain and place them in a plastic bag filled with slightly moist peat moss, sand, or paper towel.
  3. Seal the bag and label it with the date.
  4. Place the bag in your refrigerator’s crisper drawer at about 33°F to 41°F (0.5°C to 5°C).
  5. Keep the pits in the fridge for 10-12 weeks.

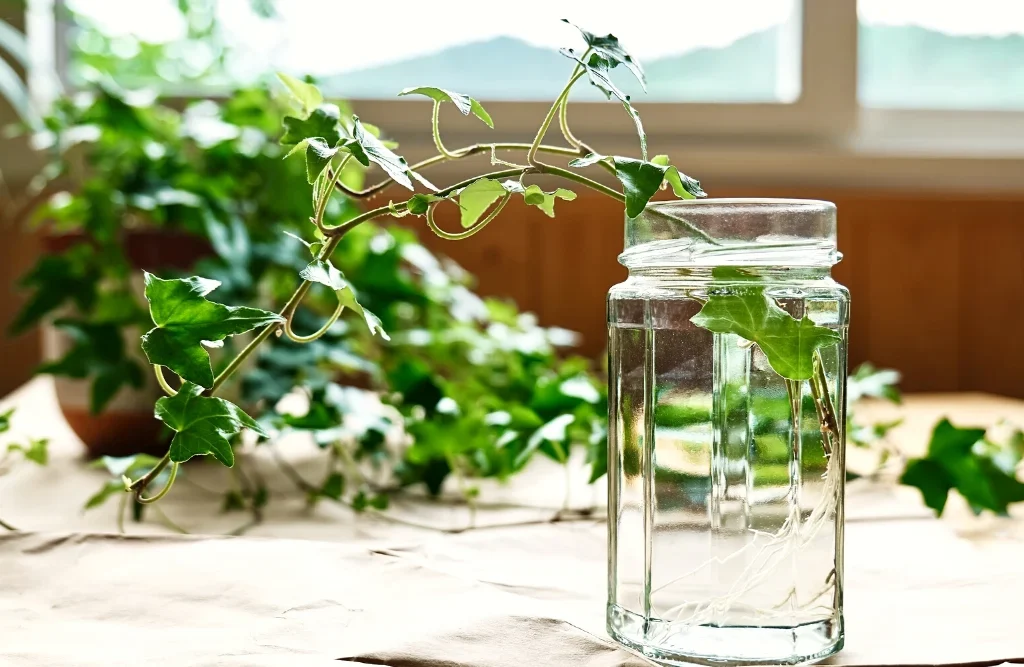
Check periodically to ensure the medium stays slightly moist but not wet. You might spot tiny root sprouts near the end of this period.


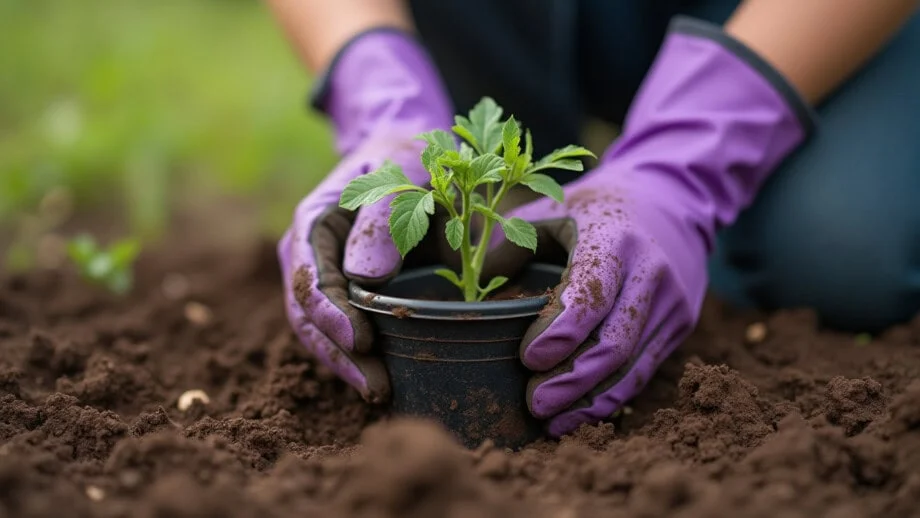
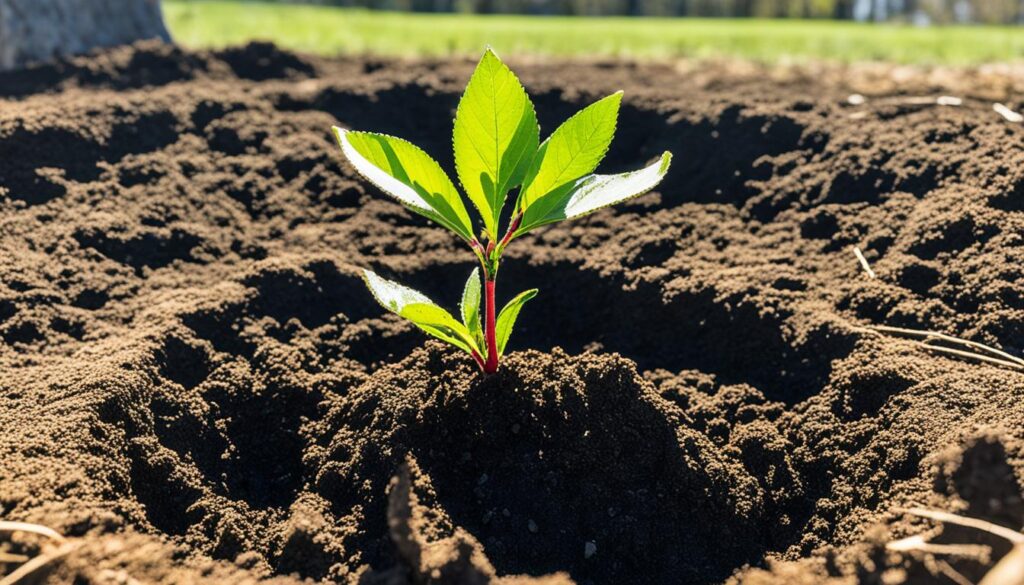
Step 4: Plant the Cherry Pits

After stratification, it’s time to plant your cherry pits either indoors in pots or directly outdoors if the weather is mild.
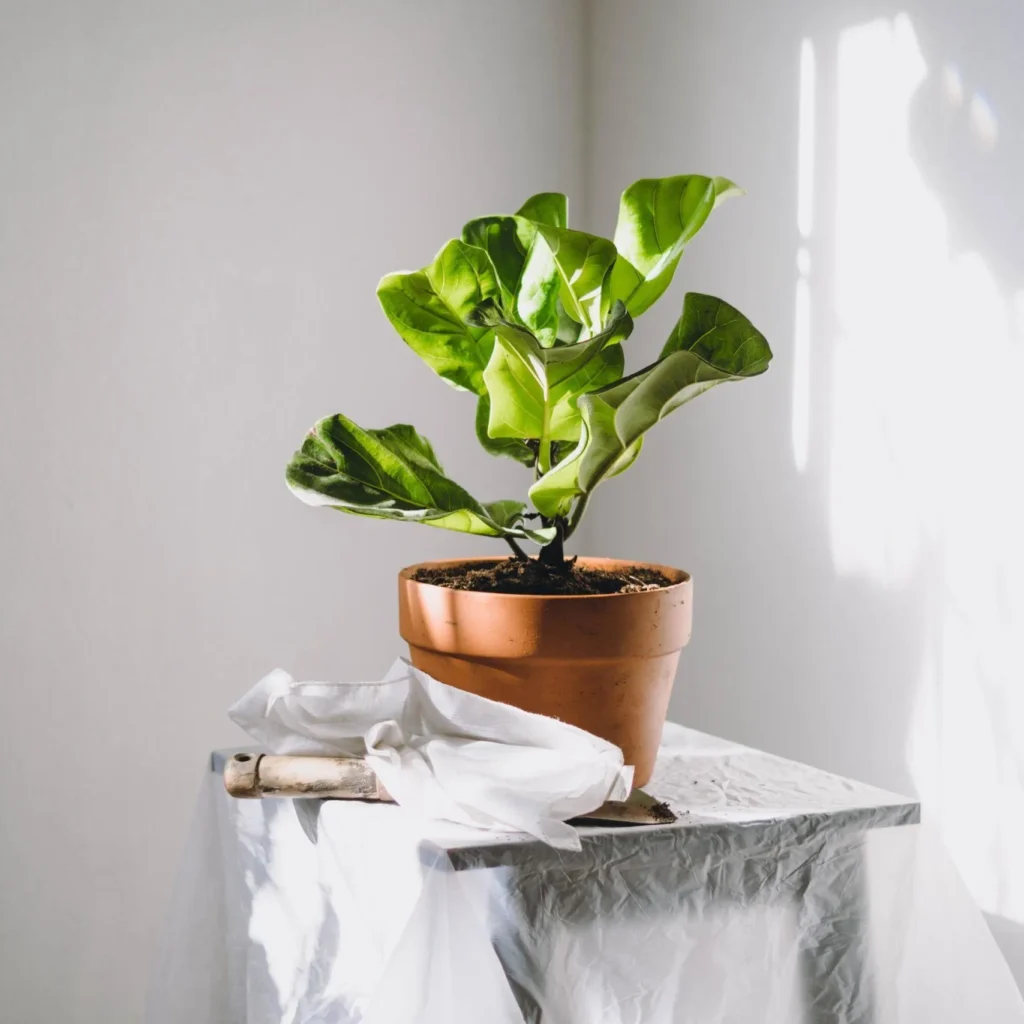
Indoor Planting:

  1. Use small pots filled with a high-quality seed-starting mix.
  2. Plant each pit about 1-2 inches deep.
  3. Water gently but thoroughly.
  4. Place pots in a sunny location or under grow lights.
  5. Keep the soil moist but not soggy.
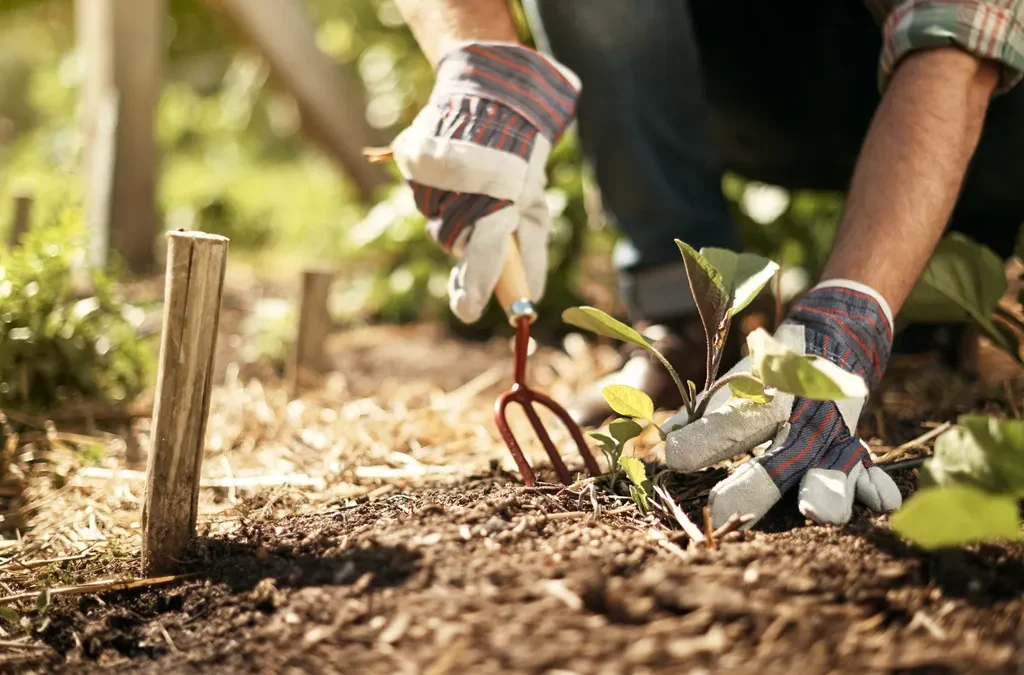
Outdoor Planting:

If planting directly in the ground:

  1. Choose a sunny, well-drained location.
  2. Plant pits 2 inches deep and about 3 feet apart.
  3. Mark the planting spot to remember their location.
  4. Protect with mulch to maintain moisture and warmth.

Step 5: Care for the Seedlings

Once the pits sprout, it’s time to shift focus to nurturing the young seedlings.

Light:

Cherry seedlings need at least 6-8 hours of full sun daily. If indoors, place them near a sunny window or use grow lights.

Water:

Keep the soil consistently moist but not overly wet. Water when the top inch feels dry to the touch.

Transplanting:

When seedlings are 4-6 inches tall and have several leaves, transplant them into larger pots or a prepared garden bed.

Spacing: If planting outdoors, space saplings 15-20 feet apart for sweet cherries or 8-10 feet apart for sour cherries.


Step 6: Support Growth in the First Year

Young cherry trees need extra care during their first year:

  • Protect against pests like rabbits and deer using wire mesh.
  • Water regularly, especially during dry spells.
  • Apply a light layer of mulch to retain moisture.
  • Avoid heavy fertilizing in the first year — overfeeding can cause leggy growth.

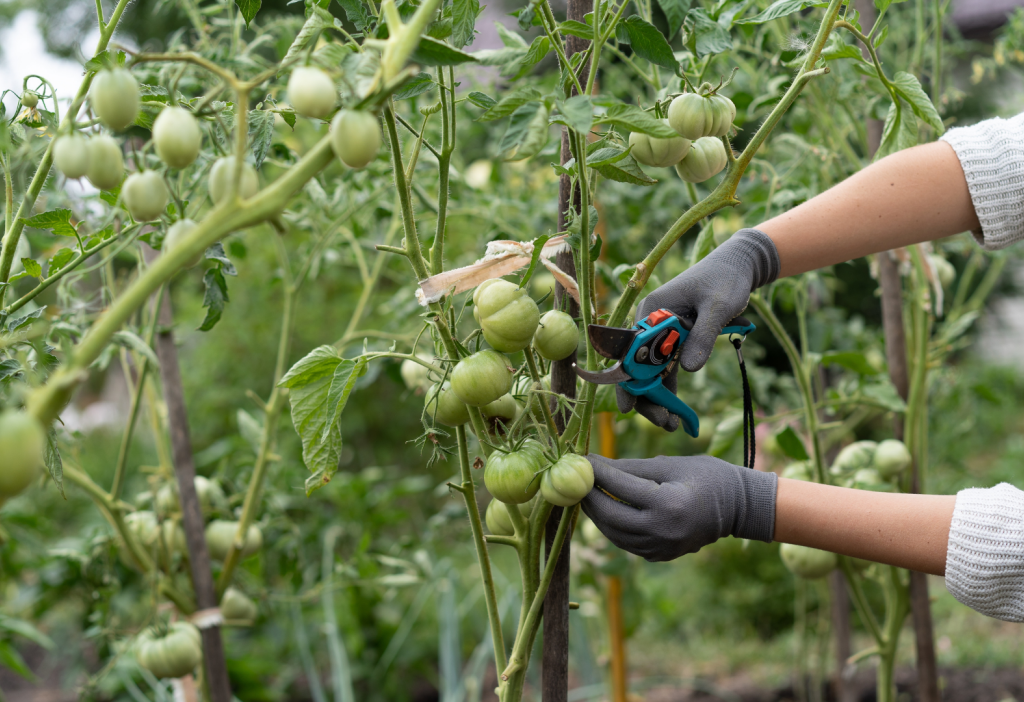
Step 7: Prune and Shape the Tree

Once your cherry tree reaches 2-3 feet tall, begin light pruning:

  • Remove weak, damaged, or crossing branches.
  • Maintain an open center shape to improve airflow.
  • Prune during dormancy (late winter to early spring) to avoid disease.

Step 8: Pollination Considerations

Some cherry trees are self-pollinating (like ‘Stella’ or ‘North Star’), but most need a compatible partner nearby for cross-pollination.

If you’re aiming for future fruit harvests:

  • Plant two or more compatible varieties.
  • Ensure they bloom around the same time for effective pollination.

Step 9: Watch for Pests and Diseases

Keep an eye out for common cherry tree issues:

  • Aphids, caterpillars, and Japanese beetles
  • Powdery mildew
  • Cherry leaf spot
  • Brown rot

Use organic pest control methods and proper spacing to improve airflow and reduce disease risks.


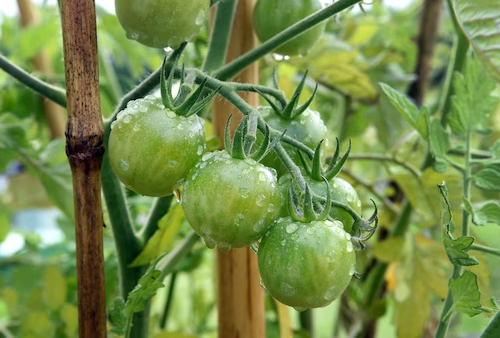
Step 10: Be Patient — and Enjoy the Journey

Growing a cherry tree from a pit is a long-term project that requires patience. It might take 5-10 years before you see your first cherries. Even if your tree never produces perfect fruit, it will reward you with lovely spring blossoms and elegant structure.


Final Thoughts

Planting a cherry pit for future trees is an enriching, eco-friendly gardening project that reconnects you with the natural growth process. While it demands patience and care, the reward of watching a tree rise from a tiny seed is worth the wait.

Whether you aim to harvest your own cherries or simply enjoy the ornamental beauty of cherry blossoms each spring, following these steps will give you a strong start in your fruit-growing journey.

How to Plant an Aloe Vera for Beginners: A Complete, Easy-to-Follow Guide

How to Plant an Aloe Vera for Beginners: A Complete, Easy-to-Follow Guide

If you’re new to gardening or looking for a hardy, beautiful plant with health benefits, look no further than the aloe vera plant. Known for its fleshy, spiked leaves filled with soothing gel, aloe vera is one of the easiest plants to grow — making it perfect for beginners. Plus, it doubles as a natural home remedy for burns, skin irritation, and even air purification.

In this detailed guide, we’ll walk you through everything you need to know about how to plant aloe vera — from choosing the right pot to ensuring your plant thrives indoors or outdoors. Let’s dig in!


Why Choose Aloe Vera?

Before we get into planting, let’s appreciate why aloe vera is such a fantastic choice for beginner gardeners:

  • Low Maintenance: Aloe vera is drought-tolerant and requires minimal care.
  • Air-Purifying: It improves indoor air quality by removing toxins like formaldehyde and benzene.
  • Healing Properties: Its gel soothes sunburn, minor cuts, insect bites, and skin irritation.
  • Decorative Appeal: With its spiky, modern aesthetic, it’s a favorite in minimalist and desert-style home décor.

If you’re looking for a plant that’s forgiving, easy to manage, and doubles as a natural remedy — aloe vera is it.


What You’ll Need to Plant Aloe Vera

Before you get started, gather these essentials:

Aloe Vera Plant or Pups: You can buy a small plant from a nursery or propagate baby offshoots (called pups) from a mature aloe.

Pot with Drainage Holes: Terracotta or ceramic pots work well because they allow soil to dry out quickly.

Well-Draining Potting Mix: Use a cactus or succulent mix, or make your own with equal parts potting soil, sand, and perlite.

Gloves (optional): Aloe vera leaves have sharp edges and can irritate sensitive skin.


Step-by-Step Guide to Planting Aloe Vera

1. Choose the Right Pot

Aloe vera doesn’t like “wet feet.” Standing water can cause root rot, so your pot must have drainage holes. Terracotta pots are ideal because they’re breathable and help prevent overwatering.

Tip: Pick a pot slightly larger than the root ball to allow space for growth, but avoid going too big.


2. Prepare the Potting Mix

Aloe vera thrives in loose, sandy, well-draining soil. You can:

  • Buy pre-mixed cactus or succulent soil
  • Or mix your own:
    • 1 part potting soil
    • 1 part coarse sand
    • 1 part perlite or pumice

This combination ensures excellent drainage and mimics the plant’s natural desert environment.


3. Plant the Aloe Vera

Whether you’re planting a nursery-bought plant or a pup (baby aloe):

  • Gently remove the aloe from its current container
  • Brush off excess soil from the roots
  • Trim any black or rotten roots with clean scissors
  • Fill your new pot one-third with soil
  • Position the aloe so the base of the leaves sits above the soil line
  • Fill in around the roots with more soil, pressing down lightly

Avoid burying the leaves as this can cause rot.


4. Let It Settle Before Watering

Unlike other plants, aloe vera prefers to rest a bit after planting. Wait 2-3 days before watering to allow any damaged roots to heal and prevent rot.


How to Care for Aloe Vera After Planting

Once your aloe is planted, here’s how to keep it happy and thriving:


Lighting Needs

  • Indoors: Place in a bright, sunny spot near a south- or west-facing window.
  • Outdoors: Choose a spot with partial shade to avoid leaf scorch in intense midday sun.

Aloe vera loves 6-8 hours of indirect sunlight daily.


Watering Tips

Aloe vera is a drought-tolerant plant that needs infrequent but deep watering.

  • Water when the top 2 inches of soil are dry
  • Water thoroughly until it runs out of the drainage holes
  • Discard any water collected in the saucer to avoid root rot
  • Reduce watering in winter to about once a month

Signs of Overwatering: Yellow, mushy leaves
Signs of Underwatering: Thin, curling, or brown leaf tips


Temperature & Humidity

  • Ideal Temperature: 55°F–80°F (13°C–27°C)
  • Protect from frost: Aloe vera isn’t frost-hardy and should be brought indoors if temperatures drop below 40°F (4°C).
  • Humidity: Prefers dry, arid environments and does not need misting.

Fertilizing

Aloe vera doesn’t require much feeding. Overfertilizing can harm its roots.

  • Use a balanced, water-soluble fertilizer diluted to half-strength
  • Feed once in spring and again in midsummer
  • Avoid fertilizing in fall and winter

Pruning and Cleaning

Occasionally:

  • Remove dead, dry, or damaged leaves
  • Wipe leaves with a damp cloth to remove dust, improving sunlight absorption

How to Propagate Aloe Vera

As your plant matures, it will produce pups — small offshoots that can grow into new plants.

Steps to Propagate:

  1. Gently remove the entire plant from its pot
  2. Separate pups from the mother plant, ensuring each has roots attached
  3. Let pups dry for a day to form a callous on the cut area
  4. Plant pups in individual pots using the same method as above
  5. Wait 2-3 days before watering

It’s a fun and cost-effective way to multiply your plant collection!


Common Problems and Solutions

Even though aloe vera is tough, beginners might encounter these issues:

  • Root Rot: Caused by overwatering or poor drainage. Repot in dry, well-draining soil.
  • Leaf Scorch: Brown or reddish spots from too much direct sun. Move to filtered sunlight.
  • Mealybugs/Aphids: Wipe with a cotton swab dipped in rubbing alcohol or use neem oil spray.

Fun Uses for Aloe Vera

Once your plant grows, you can use its gel for:

  • Soothing sunburn and insect bites
  • Treating minor cuts and skin irritations
  • Adding to homemade face masks
  • Hydrating dry skin

Simply cut a mature, outer leaf, slice it open, and scoop out the clear gel.

Note: Avoid ingesting raw aloe without expert guidance, as some parts of the plant can be toxic if consumed improperly.


Final Thoughts

Aloe vera is one of the best plants for beginner gardeners — it’s forgiving, fuss-free, and multifunctional. By choosing the right pot, using well-draining soil, providing plenty of bright light, and watering sparingly, you’ll have a thriving aloe plant that not only beautifies your space but also provides soothing, natural remedies right at home.

Once you master the basics of planting and caring for aloe vera, you might even start propagating pups and filling your home with these versatile, hardy plants.

How to Look After an Aloe Vera Plant Properly

How to Look After an Aloe Vera Plant Properly

Aloe vera is one of the most popular and versatile succulent plants worldwide, cherished for its easy care and remarkable healing properties. Whether you want to grow it for its medicinal gel, use it as a decorative houseplant, or simply enjoy its low-maintenance beauty, understanding how to look after an aloe vera plant properly is essential for its health and longevity.

In this comprehensive guide, we’ll cover everything you need to know about caring for aloe vera plants—from the best soil and light conditions to watering tips, pruning, repotting, pest control, and more. By the end, you’ll be fully equipped to nurture a thriving aloe vera that rewards you with vibrant leaves and soothing gel.


Why Aloe Vera Is a Great Plant to Have

Aloe vera is not just an attractive succulent with spiky, fleshy leaves; it’s also a powerhouse of natural benefits:

  • Medicinal Uses: The gel inside aloe leaves is known for soothing burns, cuts, and skin irritations.
  • Air Purification: Aloe vera improves indoor air quality by removing toxins.
  • Easy to Care For: It’s drought-tolerant and resilient, perfect for beginners.
  • Decorative Appeal: Its architectural shape fits well in modern, minimalist, and desert-themed décor.

Now, let’s dive into how to care for your aloe vera so it stays healthy and beautiful.


1. Choosing the Right Location and Light

Aloe vera plants thrive in bright, indirect sunlight. Here’s how to choose the perfect spot:

  • Ideal Lighting: Place your aloe vera near a south- or west-facing window where it can get 6-8 hours of indirect sunlight daily. Too much direct sun, especially in very hot climates, can cause leaf scorch (brown or reddish spots).
  • Avoid Low Light: Aloe vera will survive in low light but won’t thrive or grow well. Leaves may become leggy and pale.
  • Outdoor Growing: If you live in USDA hardiness zones 9-11 (warm climates), aloe vera can be grown outdoors in a sunny spot. Just be cautious of frost and protect the plant during cold spells.

2. Selecting the Right Soil

Good soil is crucial for healthy aloe vera because it prevents waterlogging and root rot.

  • Well-Draining Soil: Use a cactus or succulent potting mix that contains sand, perlite, or pumice to ensure excellent drainage.
  • Avoid Regular Potting Soil: Ordinary soil retains too much moisture and can cause roots to rot.
  • DIY Mix: You can mix 2 parts potting soil, 1 part perlite, and 1 part coarse sand to create your own well-draining medium.

3. Watering Your Aloe Vera Properly

One of the most common mistakes is overwatering aloe vera plants. These succulents store water in their leaves and prefer dry conditions.

  • Watering Frequency: Water your aloe vera deeply but infrequently. During the growing season (spring and summer), water every 2-3 weeks, allowing the soil to dry out completely between waterings.
  • Reduce in Winter: Aloe vera enters dormancy in the winter months and needs even less water—sometimes only once a month.
  • How to Water: Water the soil directly until it’s moist but never let water pool in the saucer. Avoid getting water on the leaves as this can cause rot.
  • Signs of Overwatering: Soft, mushy leaves and yellowing tips indicate too much water.
  • Signs of Underwatering: Thin, curled leaves mean your aloe is thirsty.

4. Temperature and Humidity Preferences

  • Temperature Range: Aloe vera grows best between 55°F and 80°F (13°C – 27°C). Avoid exposing it to temperatures below 40°F (4°C).
  • Humidity: Aloe vera prefers dry air and doesn’t need extra humidity. Avoid placing it in very humid areas like bathrooms.
  • Frost Sensitivity: If grown outdoors in cooler climates, bring your aloe inside before the first frost.

5. Fertilizing Aloe Vera

Though aloe vera is a low-maintenance plant, occasional feeding encourages healthy growth:

  • Type of Fertilizer: Use a balanced, water-soluble fertilizer diluted to half strength or a fertilizer formulated for succulents and cacti.
  • Feeding Schedule: Fertilize once in early spring and again in mid-summer. Avoid feeding in winter when the plant is dormant.
  • Avoid Overfertilizing: Excess fertilizer can cause brown leaf tips or burn the roots.

6. Potting and Repotting Your Aloe Vera

  • Choosing the Right Pot: Select a pot with drainage holes to prevent water accumulation. Terracotta pots are excellent because they allow moisture to evaporate.
  • Repotting Signs: Repot your aloe vera every 2-3 years or when it becomes root-bound (roots growing out of drainage holes).
  • How to Repot: Carefully remove the plant, shake off old soil, trim any dead roots, and place it in fresh, well-draining soil. Avoid deep pots because aloe roots prefer shallow spaces.

7. Pruning and Propagating Aloe Vera

  • Pruning: Remove any damaged, dead, or dried leaves by cutting them at the base with a sharp, clean knife.
  • Propagation: Aloe vera produces offsets or “pups” around the base of the plant that can be separated and potted individually.
    • Wait until pups are 3-4 inches tall.
    • Gently remove the pup, ensuring it has roots attached.
    • Plant it in a small pot with well-draining soil.
    • Water lightly and place in bright indirect light.

8. Managing Common Pests and Problems

Aloe vera is generally pest-resistant but can occasionally attract:

  • Mealybugs: Look for white cotton-like clusters on leaves and stems. Treat with rubbing alcohol on a cotton swab or insecticidal soap.
  • Aphids: Small green or black insects that cluster on new growth. Use insecticidal soap or neem oil spray.
  • Root Rot: Caused by overwatering; affected plants have mushy roots and leaves. Discard severely rotted plants or trim roots and repot in fresh soil.

9. Using Aloe Vera Gel Safely

One of the biggest perks of growing aloe vera is its gel’s soothing properties:

  • Harvesting Gel: Cut a mature leaf near the base, slice it open, and scoop out the clear gel.
  • Use on Skin: Apply directly to minor burns, sunburns, or dry skin.
  • Storage: Store leftover gel in a sealed container in the fridge for up to a week.
  • Avoid Oral Consumption: Do not ingest aloe vera gel without proper preparation and guidance, as some parts can be toxic.

10. Troubleshooting Common Aloe Vera Issues

  • Brown or Yellow Leaves: May indicate too much sun, overwatering, or poor drainage.
  • Leaf Curling or Shriveling: Usually a sign of underwatering.
  • Soft or Mushy Leaves: Root rot due to excess moisture.
  • Leggy Growth: Insufficient sunlight causing the plant to stretch.

Adjust light, watering, and soil conditions accordingly to fix these issues.


Final Thoughts

Looking after an aloe vera plant properly is straightforward when you know the basics of its needs. Bright light, well-draining soil, cautious watering, and the right temperature range will keep your plant healthy and happy. With minimal effort, your aloe vera will reward you with its natural beauty and useful gel.

Whether you’re a beginner or a seasoned plant lover, aloe vera is a wonderful addition to any home or garden. Follow these care tips, and you’ll enjoy a flourishing plant that’s as beneficial as it is beautiful.

How to Keep Squirrels Out of Potted Plants

How to Keep Squirrels Out of Potted Plants

Squirrels are adorable, energetic little creatures, but when it comes to your garden or indoor potted plants, their antics can quickly turn frustrating. These clever critters love digging in the soil, uprooting bulbs, and sometimes even nibbling on leaves and flowers. If you’ve noticed your potted plants disturbed, soil scattered everywhere, or damage to your carefully nurtured greenery, squirrels are likely the culprits.

The good news? There are numerous humane and effective ways to keep squirrels away from your potted plants without harming them. In this article, we’ll explore why squirrels invade your plants, the damage they can cause, and a range of strategies—both natural and practical—to safeguard your plants while keeping squirrels at bay.


Why Do Squirrels Dig in Potted Plants?

Before diving into solutions, understanding squirrel behavior helps tailor your approach.

  • Foraging and Food Storage: Squirrels often bury nuts and seeds in pots to store food. Sometimes, they dig up bulbs or soil in search of hidden snacks.
  • Nesting Material: They may uproot plants or dig soil to collect nesting materials.
  • Curiosity and Playfulness: Squirrels are naturally curious and playful, so the loose soil in pots makes an appealing digging playground.
  • Attraction to Moisture and Shelter: Potted plants can provide a cool, moist spot that attracts squirrels, especially in dry or hot weather.

Knowing these reasons allows you to tackle the root causes and protect your plants more effectively.


The Damage Squirrels Can Cause to Potted Plants

  • Uprooted Plants and Flowers: Digging disturbs roots and can kill delicate plants.
  • Soil Mess: Scattered soil can create a mess indoors or on patios.
  • Damaged Bulbs and Seeds: Squirrels often dig up bulbs and seeds you’ve planted.
  • Chewed Leaves and Stems: Some squirrels may nibble on softer plant parts.
  • Stress to Plants: Frequent disturbances can stress plants, making them prone to disease and poor growth.

Protecting your plants means preventing these disruptions while maintaining a squirrel-friendly environment elsewhere.


How to Keep Squirrels Out of Potted Plants: Practical and Humane Strategies

1. Physical Barriers

One of the most reliable methods to protect potted plants is by creating physical obstacles squirrels can’t bypass.

  • Wire Mesh or Hardware Cloth: Place a layer of fine wire mesh over the soil surface. This prevents squirrels from digging but still allows water and air to reach roots.
  • Chicken Wire or Garden Fencing: Wrap or surround your plants with chicken wire or fencing to keep squirrels away.
  • Plant Covers or Cloche: Use garden cloches, plastic domes, or decorative cages over plants.
  • Terracotta Pot Inversion: For small pots, place an inverted terracotta pot with holes punched in over the plant.

These barriers are effective without harming the animals, simply discouraging their access.


2. Repellent Scents

Squirrels have sensitive noses and dislike certain smells. You can use natural repellents safely around your plants:

  • Peppermint Oil: Soak cotton balls in peppermint oil and place them around your pots. Refresh weekly.
  • Garlic or Onion Spray: A homemade spray made with garlic or onion can deter squirrels.
  • Chili Powder or Cayenne Pepper: Sprinkle lightly on soil (avoid harming plants). The spicy scent repels squirrels.
  • Vinegar Solution: Spray diluted vinegar around plant areas. Reapply after rain.

Always avoid spraying directly on plants if you’re unsure of tolerance, and keep these repellents away from pets.


3. Noise and Movement Deterrents

Squirrels dislike sudden noises and motion. You can install:

  • Wind Chimes or Bells: Their movement and sound can startle squirrels.
  • Motion-Activated Sprinklers: These emit a quick burst of water when triggered, gently deterring squirrels.
  • Ultrasonic Repellents: Devices that emit high-frequency sounds uncomfortable for squirrels but inaudible to humans.

These methods work well in outdoor settings and keep squirrels wary of your pots.


4. Distraction Techniques

Sometimes the best way to protect your potted plants is to give squirrels something else to focus on.

  • Feeders and Nut Stations: Place a squirrel feeder away from your garden with nuts and seeds. If squirrels have an easy food source, they’re less likely to dig in your pots.
  • Provide Alternative Digging Areas: Create a dedicated digging sandbox or patch of soil with buried nuts to satisfy their natural behavior.

By meeting their needs elsewhere, you reduce the temptation to invade your plant pots.


5. Plant Squirrel-Repellent Plants

Certain plants naturally repel squirrels due to their scent or taste:

  • Daffodils: Toxic and unappealing to squirrels.
  • Alliums (Onions, Garlic): Strong scent keeps squirrels away.
  • Fritillaria: Their smell is disliked by rodents.
  • Rue: A traditional squirrel deterrent plant.

Interplanting these near your pots can discourage squirrels from lingering in the area.


6. Keep Your Area Clean

Squirrels are attracted to gardens and patios where food scraps or fallen nuts linger.

  • Regularly clean up fallen fruit, nuts, and birdseed.
  • Keep trash cans sealed.
  • Avoid leaving pet food outside overnight.

A tidy garden reduces squirrel attraction to your plant area.


7. Use Mulches that Deter Squirrels

Mulch can both protect plants and discourage digging:

  • Sharp Mulches: Pine cones, holly leaves, or nutshells create an uncomfortable digging surface.
  • Heavy Mulch: Larger bark chips or stones can make digging physically harder.

Avoid light, fluffy mulches that squirrels can easily move.


8. Training and Consistency

If you catch squirrels in the act, gentle discouragement helps:

  • Spray water with a garden hose when they dig to startle but not harm them.
  • Use noisemakers or clap hands to scare squirrels away.
  • Over time, they learn your pots are “off limits.”

What Not to Do: Avoid Harmful Methods

  • Avoid Poison or Traps: These are cruel and can harm other wildlife or pets.
  • Don’t Use Sticky Substances or Chemicals: These can injure squirrels and damage your plants.
  • Avoid Loud Explosives or Harmful Deterrents: They stress animals unnecessarily and may cause community issues.

Humane and environmentally safe methods keep your garden balanced and wildlife-friendly.


Bonus Tips: Caring for Your Potted Plants After Squirrel Visits

If squirrels have already disturbed your pots:

  • Replant Uprooted Plants Immediately: Press soil firmly around roots and water well.
  • Replace Missing Bulbs or Seeds: Replant quickly before squirrels try again.
  • Use Fresh Soil if Contaminated: If soil is heavily disturbed, replace the top layer.
  • Add Fertilizer: Help stressed plants recover faster.
  • Inspect for Damage: Remove damaged leaves or stems to prevent disease.

Healthy, well-cared-for plants recover faster and deter further squirrel interest.


Conclusion

Squirrels may be delightful to watch from a distance, but their enthusiasm for digging can wreak havoc on your potted plants. By understanding their behaviors and using a combination of physical barriers, natural repellents, distractions, and smart planting strategies, you can protect your plants effectively and humanely.

Remember, patience and consistency are key. It may take some trial and error to find the perfect mix of methods that work in your garden. But with these tips, you can enjoy thriving, beautiful potted plants — squirrel-free!

How to Keep Cats Away from Your Plants

How to Keep Cats Away from Your Plants

Cats are wonderful companions — independent, curious, and endlessly entertaining. But if you’re a plant lover too, you’ve likely faced the frustrating challenge of keeping your feline friend away from your precious greenery. Whether it’s a curious nibble, a toppled plant pot, or freshly dug-up soil, many cats can’t resist exploring your indoor jungle or backyard garden.

Luckily, there are smart, humane, and effective ways to deter cats from turning your plant collection into their personal playground. In this guide, we’ll share practical strategies, natural repellents, and cat-safe tips for protecting both your plants and your pets.


Why Do Cats Love Plants?

Before jumping into solutions, it’s helpful to understand why cats are so drawn to plants in the first place. Here are some common reasons:

  • Curiosity: Cats naturally explore their surroundings, especially if something is new or moving.
  • Texture and Scent: Certain leaves and soil textures are appealing to cats’ sensitive paws and noses.
  • Digging and Chewing: Some cats dig in soil to simulate hunting behavior, while others chew on leaves to aid digestion or relieve boredom.
  • Litter Box Confusion: Cats may mistake potted plant soil for a convenient indoor litter box.

Understanding these behaviors can help you pick the right deterrents tailored to your cat’s instincts.


The Importance of Keeping Cats Away from Plants

Not only is it frustrating to find your houseplants dug up or gnawed on, but it can also be dangerous for your cat. Many common houseplants and garden varieties are toxic to cats, including:

  • Lilies
  • Aloe vera
  • Dieffenbachia (Dumb Cane)
  • Pothos
  • Sago Palm
  • Peace Lily

Ingesting even a small amount of these plants can cause vomiting, diarrhea, lethargy, and more serious health issues. Keeping cats away from your plants is essential for their safety and your peace of mind.


Practical Ways to Keep Cats Away from Your Plants

1. Move Plants Out of Reach

The simplest method is to place your plants in areas your cat can’t access:

  • Use high shelves, plant hangers, or wall-mounted planters.
  • Create a dedicated plant room with a closed door.
  • Invest in hanging baskets for trailing or small potted plants.

This physical separation is often the most effective, especially for determined cats.


2. Use Natural Deterrent Scents

Cats have sensitive noses and tend to avoid strong or unpleasant scents. You can safely deter them by placing natural, cat-repellent items around your plants:

  • Citrus Peels: Scatter orange, lemon, or lime peels on the soil surface.
  • Vinegar Spray: Lightly mist diluted white vinegar (50/50 mix with water) around pots.
  • Essential Oils: Use cat-safe deterrent sprays with lavender, citronella, or eucalyptus oils (never apply oils directly to plants or your cat).
  • Coffee Grounds: Sprinkle used grounds around your plants — the smell is unappealing to cats and also benefits some plants as a fertilizer.

Note: Always test any spray on a small part of the plant to ensure it won’t damage the foliage.


3. Create Physical Barriers

Preventing cats from accessing soil or leaves makes plants less enticing:

  • Decorative Pebbles or Pinecones: Cover the soil surface with small stones or pinecones to deter digging.
  • Chicken Wire or Mesh: Cut and shape mesh to fit over the soil of larger planters.
  • Cloche Covers: Use decorative plant cages or glass cloches for fragile plants.

These options prevent cats from reaching the soil while adding a decorative touch to your plant displays.


4. Provide Alternatives for Your Cat

If your cat is drawn to your plants out of boredom, offer more appropriate entertainment:

  • Cat Grass (Wheatgrass or Oat Grass): Safe for nibbling, these grasses satisfy your cat’s need to chew on greenery.
  • Catnip Plants: Place a potted catnip plant away from your prized houseplants as a feline-friendly distraction.
  • Interactive Toys: Provide puzzle feeders, feather wands, and climbing trees to keep your cat mentally and physically stimulated.

A satisfied, entertained cat is far less likely to mess with your plants.


5. Train Your Cat Gently

Cats can be trained — with patience and consistency. Use gentle deterrents to teach them to stay away from plant areas:

  • Double-Sided Tape: Apply to plant stand edges or nearby furniture. Cats dislike sticky surfaces.
  • Aluminum Foil: Place around plant pots — the texture and crinkly sound deter most cats.
  • Motion-Activated Air Sprays: Devices like PetSafe SSSCAT emit a harmless burst of air when triggered by motion.

Always avoid using punishment like yelling or physical discipline, as it can damage your bond with your cat.


Outdoor Plant Protection Tips

If you have a backyard garden and neighborhood cats are a problem, these tactics can help:

  • Fencing: Install low, chicken wire fences around beds.
  • Scent Repellents: Use commercial cat repellents or sprinkle cayenne pepper or citrus peels around garden borders.
  • Ultrasonic Repellers: These devices emit high-pitched sounds that deter cats without harming them.
  • Plant Cat-Deterring Species: Include plants like lavender, rosemary, or rue in your garden — cats tend to avoid them.

Signs Your Cat Has Ingested a Toxic Plant

Despite your best efforts, accidents happen. Know the signs of plant poisoning in cats:

  • Drooling
  • Vomiting
  • Diarrhea
  • Loss of appetite
  • Lethargy
  • Difficulty breathing
  • Swollen mouth or gums

If you suspect your cat has ingested a toxic plant, contact your veterinarian immediately or call an emergency animal poison hotline.


Cat-Safe Houseplant Alternatives

If you’re a plant parent who loves having greenery indoors but wants to avoid risks entirely, choose cat-safe plants like:

  • Spider Plant
  • Boston Fern
  • Areca Palm
  • Calathea
  • Peperomia
  • Prayer Plant
  • Baby Rubber Plant

These plants are generally non-toxic and pet-friendly, offering peace of mind in a feline-filled home.


Conclusion

Keeping your cats away from your plants requires a mix of smart placement, natural deterrents, alternative entertainment, and gentle training. By understanding why cats are drawn to plants and addressing those instincts in a safe, humane way, you can protect both your cherished greenery and your curious companion.

Whether you hang your plants out of reach, cover the soil with pebbles, or grow a special patch of cat grass just for them, it’s entirely possible to have a beautiful home filled with plants and happy, healthy cats too.

How to Identify Poison Ivy Plants Safely

How to Identify Poison Ivy Plants Safely

If you love spending time outdoors — whether it’s hiking, gardening, or simply relaxing in your backyard — it’s important to know which plants can cause you harm. One of the most notorious plants to watch out for in North America is poison ivy. This sneaky plant can trigger itchy, blistering rashes upon contact with your skin, thanks to an oily resin called urushiol.

The good news? With a little knowledge and careful observation, you can learn to spot poison ivy before it gets too close for comfort. In this guide, we’ll teach you how to safely identify poison ivy in all its forms, understand its characteristics, and offer essential tips to protect yourself and your family.


Why You Should Learn to Identify Poison Ivy

Poison ivy (Toxicodendron radicans) is a widespread plant found throughout much of the United States and southern Canada. Contact with any part of the plant — leaves, stems, or roots — can lead to an allergic reaction. Since urushiol can linger on tools, clothing, or pet fur, knowing how to avoid the plant is key.

Recognizing poison ivy can:

  • Prevent painful skin reactions.
  • Help you teach children how to stay safe outdoors.
  • Allow you to manage or remove it from your property.
  • Make hiking and gardening more enjoyable and stress-free.

The Famous Rule: “Leaves of Three, Let It Be”

The classic rhyme “Leaves of three, let it be” is the easiest way to remember the basic identifying feature of poison ivy. But there’s a little more to it than just counting leaves.

What to Look For:

  • Each poison ivy leaf cluster consists of three leaflets.
  • The middle leaflet has a longer stem than the two side leaflets.
  • Leaf edges can be smooth, toothed, or slightly lobed, which sometimes causes confusion with other plants.
  • Leaves are generally green in spring and summer and can turn red, orange, or yellow in the fall.

Forms of Poison Ivy: How It Grows

Another important aspect of identifying poison ivy is recognizing the different ways it grows in the wild.

Three Common Growth Forms:

  1. As a Groundcover: Low-growing clusters of leafy stems spread across the ground.
  2. As a Shrub: Upright, bushy growth, typically 1-4 feet tall.
  3. As a Climbing Vine: Attaches to trees, fences, and walls with hairy aerial roots. Vines are often thick, rope-like, and can remain in place year-round.

Note: The climbing variety is especially common in wooded areas and along hiking trails.


Seasonal Changes in Poison Ivy’s Appearance

Like many plants, poison ivy changes its appearance with the seasons — another important factor to help you identify it safely.

Spring:

  • Bright green leaves emerge.
  • Leaflets are soft, sometimes reddish at the tips.
  • May have small greenish-white flowers.

Summer:

  • Mature, deep green leaves.
  • Leaf edges may appear glossy.
  • Clusters of white or cream-colored berries form.

Fall:

  • Leaves turn bright red, yellow, or orange.
  • Berries persist into winter.

Winter:

  • Leafless woody vines with hairy aerial roots.
  • Old vines on trees can still cause rashes.

How to Differentiate Poison Ivy from Look-Alike Plants

Several other harmless plants can be mistaken for poison ivy. Here’s how to tell them apart:

Boxelder (Acer negundo):

  • Leaves also grow in groups of three to five.
  • The middle leaflet is not on a longer stem.
  • Grows as a young tree or sapling.

Virginia Creeper (Parthenocissus quinquefolia):

  • Usually has five leaflets.
  • Vines can look similar but lack hairy aerial roots.

Raspberry/Blackberry Plants:

  • Have thorns.
  • Leaflets are usually toothed but noticeably rougher.
  • Stems are spiny.

Always use caution if you’re unsure, and avoid touching any suspect plant directly.


Safe Identification Techniques

If you’re exploring a new area or trying to clear your garden, follow these guidelines for safe identification:

Observe from a Distance:

  • Never touch a plant unless you’re certain of its identity.
  • Use your eyes and, if needed, a stick or long object to inspect growth patterns.

Wear Protective Clothing:

  • Long sleeves, gloves, and pants when working in wooded areas.
  • Wash clothes and gloves after use.

Use a Plant Identification App:

  • Several free and paid apps can help you identify poison ivy through photographs.
  • Double-check identification with reliable online plant databases.

Check for Telltale Signs:

  • Look for groups of three leaflets.
  • Inspect for climbing vines with hairy roots.
  • Note seasonal color changes or the presence of white berries.

What to Do If You Come Into Contact

Even with the best precautions, accidental contact with poison ivy can happen. Here’s what to do:

Immediate Steps:

  1. Wash the area with soap and cool water as soon as possible — ideally within 30 minutes.
  2. Avoid touching other parts of your body or personal items before washing.

Decontaminate Clothing and Gear:

  • Wash clothes, gloves, and tools in hot, soapy water.
  • Urushiol can remain active for months on surfaces.

Treating a Rash:

  • Use over-the-counter treatments like calamine lotion, hydrocortisone cream, or antihistamines.
  • Take cool oatmeal baths to ease itching.
  • See a doctor if the rash covers a large area, involves your face or eyes, or shows signs of infection.

How to Control or Remove Poison Ivy

If you discover poison ivy on your property, safe removal is essential.

Manual Removal:

  • Wear gloves, long sleeves, and eye protection.
  • Dig out the entire root system.
  • Bag plant parts securely for disposal — never burn them (inhaling the smoke can cause severe lung irritation).

Chemical Control:

  • Use herbicides containing glyphosate or triclopyr for spot treatment.
  • Follow label directions carefully.

Note: Removal is easiest in early spring or late fall.


Final Tips for Poison Ivy Awareness

  • Teach children the rhyme “Leaves of three, let it be” early on.
  • Don’t rely solely on leaf shape — learn to recognize growth patterns, berries, and seasonal changes.
  • Regularly inspect areas around your home, garden, and outdoor paths.
  • Keep pets out of areas where poison ivy is present — urushiol can transfer from their fur to your skin.

Conclusion

Learning how to safely identify poison ivy is one of the smartest skills any outdoor lover or gardener can develop. This tricky plant is adaptable and changes throughout the year, making it important to stay alert and informed. By recognizing its classic three-leaf clusters, understanding how it grows, and knowing its seasonal appearances, you can confidently avoid painful encounters and keep your outdoor spaces enjoyable for everyone.

The next time you’re out for a walk or working in your yard, take a moment to observe the plants around you — and see if you can spot poison ivy from a safe distance. With knowledge, caution, and preparation, you’ll be able to coexist safely with nature’s wilder side.

How to Hang Plants from the Ceiling for Better Space: A Complete Guide

How to Hang Plants from the Ceiling for Better Space: A Complete Guide

In today’s homes — whether it’s a cozy apartment, a trendy loft, or a modern house — maximizing space while adding natural beauty is a top priority for plant lovers. One of the most stylish and practical ways to do this is by hanging plants from the ceiling. Not only does this approach free up precious floor and shelf space, but it also creates a lush, floating indoor jungle vibe that’s hard to beat.

In this comprehensive guide, we’ll walk you through everything you need to know about how to hang plants from the ceiling for better space. From choosing the right plants and hardware to hanging methods and care tips, you’ll learn how to transform your space into a green sanctuary without clutter.


Why Hang Plants from the Ceiling?

Before we dive into the how-to, let’s explore why this trend has become so popular.

Benefits of Hanging Plants Indoors:

  • Maximizes vertical space in small homes, apartments, or tight corners.
  • Adds visual interest and height to your decor.
  • Improves air quality and reduces indoor pollutants.
  • Keeps plants out of reach from pets and small children.
  • Creates a tranquil, nature-inspired ambiance.

Whether you’re decorating a reading nook, sprucing up a bare wall, or creating a plant-filled living room, hanging plants offer a versatile and eye-catching solution.


Step 1: Choose the Right Plants for Hanging

Not every plant thrives when suspended from above. The best candidates are those that naturally trail, cascade, or stay compact.

Best Plants for Hanging Indoors:

  • Pothos (Devil’s Ivy): Hardy, fast-growing, and forgiving.
  • String of Pearls: Unique beaded foliage and drought-tolerant.
  • Spider Plant: Easy care with charming baby plantlets.
  • English Ivy: Classic cascading vine with air-purifying benefits.
  • Boston Fern: Adds lush, fluffy greenery but loves humidity.
  • Philodendron: Beautiful trailing stems and heart-shaped leaves.
  • String of Hearts: Delicate, heart-shaped leaves with a silver sheen.
  • Air Plants (Tillandsia): Require no soil and look stunning in hanging glass orbs.

Pro Tip: Choose plants based on the light conditions of your room — bright, indirect light is ideal for most hanging varieties.


Step 2: Pick the Right Hanging Method

There are various ways to hang plants from the ceiling, depending on your decor style, plant weight, and ceiling type.

Popular Hanging Methods:

  1. Ceiling Hooks:
    • Strong and reliable
    • Ideal for heavy pots
    • Available in screw-in or adhesive varieties (for lighter loads)
  2. Macrame Plant Hangers:
    • Adds a boho-chic touch
    • Holds pots of various shapes and sizes
    • Available in different materials and colors
  3. Hanging Baskets:
    • Perfect for larger, trailing plants
    • Can be lined with coconut coir or moss for a natural look
  4. Mounted Rods or Rails:
    • Great for hanging multiple plants in one area
    • Adjustable and stylish for modern homes
  5. Wall-Mounted Hooks or Brackets:
    • If ceiling hanging isn’t possible, these are a safe alternative
    • Works well for lightweight plants

Step 3: Install Your Ceiling Hooks or Hardware Safely

Safety is crucial when hanging anything from the ceiling — especially a plant that gets watered and grows heavier over time.

Tools You May Need:

  • Drill and drill bits
  • Stud finder (for drywall ceilings)
  • Heavy-duty ceiling hooks or toggle bolts
  • Measuring tape
  • Screwdriver
  • Ladder or sturdy step stool

Installation Tips:

  • Locate a ceiling joist using a stud finder; this is the safest and strongest spot for a hook.
  • If no joist is available, use toggle bolts or anchor hooks designed for ceiling use.
  • Pre-drill a hole slightly smaller than your hook.
  • Screw in the hook until secure and test with a light tug before adding the plant.

Pro Tip: Use S-hooks or carabiners for easy removal when watering or repotting.


Step 4: Choose the Right Planters

Your planter not only holds the plant but also contributes to your room’s decor.

Types of Hanging Planters:

  • Ceramic Pots: Classic and stylish but heavier — make sure your ceiling can support the weight.
  • Woven Baskets: Lightweight and eco-friendly, perfect for a natural look.
  • Glass Orbs: Beautiful for air plants or small succulents.
  • Metal or Wire Baskets: Durable and modern.
  • Plastic Pots: Lightweight and versatile, ideal for higher ceilings.

Ensure that your planters have proper drainage holes or an inner liner pot to avoid overwatering.


Step 5: Watering and Care Tips for Hanging Plants

Hanging plants need a slightly different care routine since they’re elevated and less accessible.

Watering Tips:

  • Check moisture levels with your finger or a moisture meter.
  • Water plants in place with a long-spout watering can or carefully take them down.
  • Allow excess water to drain completely to avoid drips.
  • Use saucers or inner pots with no-drainage setups for indoor safety.

Light and Temperature:

  • Most hanging plants love bright, indirect light.
  • Avoid placing them near heating vents or air conditioners.
  • Rotate plants occasionally to ensure even growth.

Pruning and Maintenance:

  • Regularly trim dead or yellowing leaves.
  • Prune trailing vines to maintain a tidy shape.
  • Fertilize every 4–6 weeks during the growing season with diluted liquid fertilizer.

Creative Hanging Plant Ideas for Every Room

Living Room:

  • Hang a cluster of three different plants at varying heights near a sunny window.
  • Use macrame hangers with trailing pothos or string of pearls.

Bedroom:

  • Suspend calming greenery like spider plants or English ivy above your headboard.
  • Use sleek metal hangers or floating glass orbs for a minimalist look.

Kitchen:

  • Hang aromatic herbs like thyme, oregano, or mint in small planters.
  • Use a mounted rod or hanging rack near the window.

Bathroom:

  • Ferns and air plants thrive in humidity — hang them near your shower for a spa-like atmosphere.

Common Mistakes to Avoid

  • Overloading the ceiling hook: Always check weight limits for your hooks and ceiling type.
  • Skipping drainage: Ensure your planters have adequate drainage or you’ll risk root rot.
  • Ignoring light requirements: Hanging in a dark corner won’t do your plant any favors.
  • Watering carelessly: Always watch for dripping water to avoid damage to floors and furniture.

Final Thoughts

Hanging plants from the ceiling is one of the smartest and most beautiful ways to bring nature into your home while saving valuable floor and surface space. With the right plants, secure hanging methods, and a little routine care, you can transform any room into a lush, airy, and stylish retreat.

Whether you prefer a modern minimalist look with hanging glass orbs or a boho-inspired cluster of macrame hangers, there’s a hanging plant arrangement to suit your style and space.

How to Grow Tomato Plants for Juicy Harvests: A Complete Guide

How to Grow Tomato Plants for Juicy Harvests: A Complete Guide

Is there anything better than a sun-ripened, juicy tomato plucked straight from the vine? Whether you love slicing them for summer salads, making homemade sauces, or enjoying them fresh off the plant, growing your own tomato plants can be one of the most rewarding and flavorful gardening projects you’ll ever take on.

Tomatoes are a warm-weather favorite for home gardeners, and with a little attention and care, you can enjoy baskets of fresh, juicy harvests all season long. In this article, we’ll cover everything you need to know about how to grow tomato plants for juicy harvests — from choosing the right varieties to planting, caring for, and harvesting them like a pro.


Why Grow Your Own Tomatoes?

Store-bought tomatoes often lack the rich flavor and texture that homegrown varieties offer. Growing your own ensures:

  • Fresher, better-tasting fruit
  • A wide range of varieties you won’t find at the grocery store
  • The satisfaction of harvesting produce from your own backyard
  • A natural, chemical-free food source for your family

Plus, tomatoes are relatively easy to grow, even for beginners!


Step 1: Choose the Right Tomato Variety

The first step toward a juicy harvest is selecting the right type of tomato for your climate, taste, and intended use.

Types of Tomatoes:

  1. Determinate (Bush) Tomatoes
    • Grow to a set height and produce fruit all at once
    • Great for sauces and canning
    • Examples: Roma, Celebrity, Marglobe
  2. Indeterminate (Vining) Tomatoes
    • Grow continuously and produce fruit throughout the season
    • Ideal for fresh eating and salads
    • Examples: Beefsteak, Brandywine, Sweet 100
  3. Cherry and Grape Tomatoes
    • Small, bite-sized, and perfect for snacking or salads
    • Examples: Sun Gold, Black Cherry, Sweet Million

Tip: Check seed packets or plant labels for notes on heat tolerance and disease resistance, especially if you live in a humid or hot climate.


Step 2: Start Seeds Indoors or Buy Transplants

If you live in a region with a short growing season, starting seeds indoors gives your plants a head start.

Starting from Seed:

  • Begin 6–8 weeks before your last expected frost date
  • Use seed starting trays and a light, well-draining seed-starting mix
  • Plant seeds 1/4 inch deep
  • Keep soil moist and provide a heat mat or sunny windowsill
  • Move seedlings under grow lights or outdoors on warm days for hardening off

OR

Purchase healthy, sturdy transplants from a local nursery if you prefer a head start without seed-starting work.


Step 3: Prepare the Planting Site

Tomatoes love sun, heat, and fertile soil.

Ideal Conditions:

  • Full sun: At least 6–8 hours daily
  • Well-drained, rich soil: Amend with compost or aged manure
  • Soil pH: Between 6.0 and 7.0
  • Avoid planting where tomatoes, peppers, eggplant, or potatoes grew in the past two years to reduce disease risk.

Tip: If space is limited, you can successfully grow tomatoes in containers at least 18 inches wide.


Step 4: Planting Tomato Plants

Once your seedlings or transplants are 6–10 inches tall and the soil temperature reaches 60°F (16°C), it’s time to plant.

How to Plant:

  1. Dig deep holes or trenches so you can bury two-thirds of the stem (including several sets of leaves).
  2. Remove lower leaves, leaving only the top 2–3 sets.
  3. Place the plant in the hole, burying it deep to encourage strong root growth.
  4. Backfill with soil, press gently, and water thoroughly.

Tip: Adding crushed eggshells, compost, or a handful of organic fertilizer into the hole can give your tomato plants a nutrient boost.


Step 5: Provide Proper Support

Tomatoes grow quickly and need support to keep fruit off the ground and prevent disease.

Support Options:

  • Tomato Cages: Great for bush types and small spaces.
  • Stakes: Tall wooden or metal stakes work well for indeterminate types.
  • Trellises: Ideal for vining tomatoes in raised beds or against walls.

Tie plants loosely with soft garden ties or twine as they grow.


Step 6: Watering and Mulching

Proper watering is critical for plump, juicy tomatoes.

Watering Tips:

  • Keep soil consistently moist but not soggy.
  • Water deeply at the base of the plant 2–3 times per week.
  • Avoid overhead watering to reduce fungal issues.
  • During hot spells, you may need to water daily.

Mulching with straw, shredded leaves, or compost helps retain moisture, suppress weeds, and regulate soil temperature.


Step 7: Fertilizing for Healthy Growth

Tomatoes are heavy feeders and benefit from regular fertilization.

Fertilizing Tips:

  • Start with a balanced fertilizer (10-10-10) at planting time.
  • Switch to a fertilizer lower in nitrogen and higher in phosphorus and potassium once flowers appear (like a 5-10-10 mix).
  • Avoid over-fertilizing with nitrogen, as it leads to lush foliage and few fruits.

Organic gardeners can use compost tea, fish emulsion, or seaweed extract.


Step 8: Pruning and Maintenance

Pruning encourages better airflow, reduces disease risk, and promotes larger fruit.

How to Prune:

  • Remove suckers (small shoots growing from the leaf axils) on indeterminate varieties.
  • Trim off yellowing or diseased leaves regularly.
  • Remove lower branches once fruit sets to improve air circulation.

Step 9: Watch for Pests and Problems

Tomatoes can be vulnerable to pests and diseases.

Common Issues:

  • Aphids: Spray with water or insecticidal soap.
  • Tomato Hornworms: Handpick these large green caterpillars.
  • Blight: Avoid overhead watering and remove infected leaves.
  • Blossom End Rot: Prevent with consistent watering and adequate calcium.

Using crop rotation, good sanitation, and organic pest controls will keep your plants healthy.


Step 10: Harvesting for Peak Flavor

Tomatoes are usually ready to harvest 60–85 days after planting (depending on the variety).

When to Pick:

  • Fruit should be fully colored (red, orange, yellow, or pink, depending on type).
  • The tomato should feel firm but slightly soft to the touch.
  • Pick by gently twisting the fruit or cutting with scissors.

Allowing tomatoes to ripen on the vine results in the best flavor.


Bonus Tips for Juicy Tomatoes:

  • Epsom Salt: Adding a tablespoon of Epsom salt around each plant mid-season can boost magnesium levels, improving fruit quality.
  • Companion Planting: Grow basil, marigolds, or nasturtiums nearby to deter pests and improve pollination.
  • Consistent Care: Fluctuating water levels can cause cracked or bland tomatoes — consistency is key.

Final Thoughts

With their rich flavor, versatility, and ease of growth, tomatoes remain a backyard garden staple. By following these detailed steps — from choosing the right variety and planting deeply to pruning, watering, and timely harvesting — you’ll be rewarded with basketfuls of juicy, sun-kissed tomatoes all season long.

Whether you have a spacious backyard or a sunny balcony, you can cultivate your own crop of delicious tomatoes and enjoy the satisfaction of homegrown flavor like never before.

How to Grow a Sunflower Plant from Seeds: A Complete Guide for Gardeners of All Levels

How to Grow a Sunflower Plant from Seeds: A Complete Guide for Gardeners of All Levels

Few plants capture the joy of summer quite like the cheerful, towering sunflower. With their bright yellow petals and impressive size, sunflowers are a favorite among both beginner and seasoned gardeners. Whether you want to grow them for their beauty, to attract pollinators, or for harvesting their nutrient-rich seeds, cultivating sunflowers from seeds is a simple, rewarding experience.

In this comprehensive guide, you’ll learn exactly how to grow a sunflower plant from seeds, from choosing the right variety to harvesting seeds at the end of the season.


Why Grow Sunflowers?

Before we dive into the how-to, let’s look at why sunflowers deserve a spot in your garden:

  • Bright, eye-catching blooms that bring cheer to any space
  • Attract beneficial pollinators like bees, butterflies, and birds
  • Fast-growing and beginner-friendly — perfect for kids and first-time gardeners
  • Edible seeds you can roast for snacks or leave for wildlife
  • Natural privacy screen when grown in rows

Sunflowers thrive in a variety of climates and are hardy annuals, meaning they complete their life cycle in one season, making them a perfect plant to start from seed.


Step 1: Choose the Right Sunflower Variety

There are over 70 varieties of sunflowers, each differing in height, bloom size, and color. Selecting the right type will depend on your garden space and preferences.

Popular Sunflower Varieties:

  • Mammoth Sunflower: Can reach 12–15 feet tall with giant 12-inch blooms — ideal for harvesting seeds.
  • Teddy Bear Sunflower: Compact (2–3 feet tall) with fluffy, double-petaled blooms — great for containers or borders.
  • Autumn Beauty: Multicolored petals in shades of yellow, orange, and red — grows 5–7 feet tall.
  • Sunspot Sunflower: Dwarf variety (2 feet tall) with large, bright flowers — perfect for small gardens.

Tip: Mammoth varieties are best for edible seeds, while dwarf varieties work well in pots and tight spaces.


Step 2: Choose the Best Spot

Sunflowers are aptly named — they love the sun! The right location is crucial for healthy, vigorous growth.

Ideal Growing Conditions:

  • Full sun: 6–8 hours of direct sunlight daily
  • Well-draining soil: Avoid heavy clay or soggy soil
  • Sheltered from strong winds: Especially for tall varieties

Since sunflowers can grow several feet tall, consider planting them at the back of garden beds or along fences.


Step 3: Prepare the Soil

Sunflowers aren’t overly fussy but thrive in fertile, loose soil with good drainage.

Soil Preparation Tips:

  1. Loosen soil to a depth of 12–18 inches to accommodate long taproots.
  2. Add organic matter like compost or well-rotted manure to improve fertility and texture.
  3. Test soil pH: Sunflowers prefer a neutral to slightly alkaline pH of 6.0–7.5.

If your soil is poor or compacted, consider growing sunflowers in raised beds or large containers.


Step 4: Plant the Seeds

Once the danger of frost has passed and soil temperatures reach about 50–60°F (10–15°C), you’re ready to plant.

Planting Steps:

  1. Dig holes 1–2 inches deep and space them 6 inches apart for small varieties, and 12–18 inches apart for large ones.
  2. Drop 1–2 seeds per hole.
  3. Cover lightly with soil and gently pat down.
  4. Water thoroughly after planting.

Tip: If planting multiple rows, leave about 2–3 feet between rows for ease of access and airflow.


Step 5: Care for Growing Seedlings

Sunflowers germinate quickly — usually within 7–10 days. During this time, keeping the soil consistently moist is important.

Watering:

  • Water deeply once or twice a week once established.
  • Avoid overwatering — sunflowers prefer slightly dry conditions between waterings.
  • Focus water at the base to prevent fungal diseases.

Thinning Seedlings:

Once seedlings reach about 6 inches tall, thin them out to the strongest plant per spot, giving ample space for growth.


Step 6: Fertilizing (Optional but Helpful)

While sunflowers can grow in average soil, a little boost can enhance their size and bloom quality.

Fertilizing Tips:

  • Use a balanced, slow-release fertilizer when plants are about a foot tall.
  • Avoid high-nitrogen fertilizers — they promote foliage at the expense of flowers.
  • For organic options, add compost tea or fish emulsion during the growing season.

Note: Over-fertilizing can cause tall plants to become leggy and prone to falling over.


Step 7: Provide Support for Tall Varieties

If growing Mammoth or other tall sunflowers, it’s wise to stake them to prevent bending or toppling.

  • Use bamboo stakes, wooden poles, or tomato cages.
  • Tie stems loosely with soft garden twine to avoid damaging the stalk.

Staking is especially important in windy areas or if soil is very loose.


Step 8: Watch for Pests and Problems

Sunflowers are generally hardy but can occasionally face issues.

Common Pests:

  • Aphids: Small green insects that cluster on stems and buds. Remove with a strong spray of water or insecticidal soap.
  • Caterpillars: Handpick or use organic Bacillus thuringiensis (Bt) treatments.
  • Birds and squirrels: Cover seed heads with mesh or cheesecloth if you’re saving seeds.

Diseases:

  • Powdery mildew: White powdery spots on leaves. Improve air circulation and avoid overhead watering.
  • Rust and fungal spots: Remove affected leaves and water at the base.

Step 9: Harvesting

For Cut Flowers:

  • Harvest blooms early in the morning when flowers just begin to open.
  • Cut stems at a 45° angle and immediately place them in water.

For Seeds:

  • Let the flower head turn brown and the back become dry and yellow.
  • Cover heads with cheesecloth to protect from birds.
  • Cut the head with about 12 inches of stem when fully dry.
  • Rub seeds off by hand or with a stiff brush.

Tip: Roast seeds at 300°F (150°C) for 20–30 minutes for a tasty snack.


Step 10: End-of-Season Care

At the end of the growing season:

  • Pull up dead plants and add them to your compost pile.
  • Leave some heads in place to provide food for birds through fall.
  • Save seeds from your best plants to sow next year.

Fun Facts About Sunflowers

  • Sunflowers follow the sun — a phenomenon called heliotropism (young plants track the sun’s movement).
  • The tallest sunflower on record reached over 30 feet tall!
  • A single sunflower head can contain up to 2,000 seeds.

Final Thoughts

Growing sunflowers from seeds is a gratifying, beginner-friendly gardening project that delivers big, beautiful results. With minimal effort, you’ll have towering blooms brightening your yard and attracting beneficial pollinators. Whether you plant a few in a flowerbed, line a fence, or fill a pot with dwarf varieties, these sunny giants are sure to bring joy to your garden.

So grab a pack of seeds this season and get growing — your sun-drenched patch of yellow awaits!

How to Grow a Plant Indoors with Minimal Effort: A Beginner’s Guide to Effortless Indoor Gardening

How to Grow a Plant Indoors with Minimal Effort: A Beginner’s Guide to Effortless Indoor Gardening

Bringing a bit of nature indoors can completely transform your home. Not only do plants purify the air and add a splash of greenery, but they also improve mood and reduce stress. The best part? You don’t have to be an expert gardener or dedicate hours each week to enjoy the beauty and benefits of indoor plants.

If you’re someone who loves the idea of houseplants but worries about the maintenance, you’re in luck. This guide will show you exactly how to grow a plant indoors with minimal effort, covering everything from choosing the right plant to easy care tips anyone can follow.


Why Grow Indoor Plants?

Before we dive into the how-to, let’s look at why adding a bit of green to your home is a great idea:

  • Improves air quality by filtering pollutants
  • Boosts mental well-being and reduces anxiety
  • Enhances decor with natural color and texture
  • Requires minimal space — perfect for apartments or small homes
  • Creates a calming, biophilic atmosphere

And contrary to popular belief, not all houseplants are fussy. Some thrive on neglect!


Step 1: Choose the Right Plant

The secret to effortless indoor gardening is picking low-maintenance plants that can tolerate a range of conditions. Here are some of the easiest, most beginner-friendly options:

Best Low-Maintenance Indoor Plants:

  • Snake Plant (Sansevieria): Tolerates low light and needs watering only every 2-3 weeks.
  • Pothos (Devil’s Ivy): Grows in almost any lighting and survives inconsistent watering.
  • ZZ Plant (Zamioculcas zamiifolia): Extremely drought-tolerant and thrives in low light.
  • Spider Plant: Resilient, fast-growing, and air-purifying.
  • Peace Lily: Low light tolerant and alerts you by drooping when it needs water.
  • Succulents & Cacti: Require bright light and infrequent watering.

Tip: If you’re unsure about your indoor conditions, Snake Plants and Pothos are nearly indestructible and perfect for first-timers.


Step 2: Pick the Right Spot

Plants have different light and space needs, so placement matters for minimal-effort care.

Light Requirements:

  • Bright, indirect light: Near east or north-facing windows (great for Peace Lilies, Spider Plants)
  • Low light: Hallways, bathrooms, or offices with little natural light (ZZ Plant, Snake Plant)
  • Direct sunlight: Sunny south or west-facing windows (Succulents, Cacti)

Quick Test: Place your hand in the spot where you plan to keep the plant.

  • If you see a distinct shadow, it’s bright light.
  • A blurry shadow means medium light.
  • No shadow means low light.

Avoid placing plants:

  • Near heat vents or air conditioners
  • In drafty windows
  • Next to radiators

Step 3: Choose the Right Pot and Soil

Proper drainage is key to healthy, low-maintenance plants.

Pot Selection:

  • Always use pots with drainage holes to prevent water buildup.
  • Use a saucer to catch excess water and protect surfaces.
  • Decorative pots without holes can work if you place a plastic nursery pot inside them.

Soil Type:

  • Use a well-draining potting mix suited for your plant.
    • Regular potting soil for leafy plants
    • Cactus/succulent mix for desert plants

Avoid using garden soil indoors as it retains too much moisture and may harbor pests.


Step 4: Water Wisely

Overwatering is the number one cause of houseplant failure. Luckily, most beginner-friendly plants prefer drying out between waterings.

General Watering Rules:

  • Check soil moisture by sticking your finger 1–2 inches into the soil. If it feels dry, it’s time to water.
  • Water thoroughly until it drains from the bottom, then empty the saucer.
  • Avoid a strict schedule — let the plant and soil dictate when it needs water.

Plant-Specific Frequency:

  • Snake Plant, ZZ Plant: Every 2–3 weeks
  • Pothos, Spider Plant: Weekly or when soil feels dry
  • Succulents, Cacti: Every 3–4 weeks

Tip: It’s better to underwater than overwater. Most plants bounce back from dryness but rot in soggy soil.


Step 5: Feed Occasionally

Indoor plants grow slower than outdoor ones, so they don’t need frequent fertilizing.

Easy Feeding Tips:

  • Use a balanced, water-soluble houseplant fertilizer
  • Apply during the growing season (spring and summer) every 4–6 weeks
  • Skip fertilizing in fall and winter when most plants go dormant

Succulents and cacti need even less — typically once or twice in spring and summer.


Step 6: Keep an Eye on Pests

Indoor plants are less prone to pests, but occasional issues like spider mites, fungus gnats, or aphids can appear.

Preventative Care:

  • Wipe leaves with a damp cloth once a month to remove dust and pests
  • Inspect new plants before bringing them indoors
  • Isolate infested plants until resolved

Natural Remedies:

  • Spray soapy water for aphids or mites
  • Use neem oil for stubborn infestations

Step 7: Prune and Repot Occasionally

While low-maintenance plants don’t demand much, a little occasional care keeps them looking great.

Pruning:

  • Trim yellow or dead leaves as needed
  • Pinch back leggy growth to encourage bushiness (Pothos, Spider Plants)

Repotting:

  • Every 2–3 years or when roots outgrow the pot
  • Move to a slightly larger container with fresh soil

Effortless Plant Care Hacks

Here are a few extra tricks to make indoor plant care even easier:

  • Self-watering planters: Great for forgetful gardeners
  • Group plants together: Increases humidity naturally
  • Use ice cubes for watering: Prevents overwatering for small pots
  • Place plants in the bathroom: Perfect for humidity-loving species

Common Mistakes to Avoid

MistakeWhy it’s a problemHow to fix it
OverwateringCauses root rotCheck soil before watering
Ignoring light needsLeads to leggy, weak growthChoose plants suited to your light
Using poor drainage potsTraps excess waterUse pots with drainage holes
Forgetting pest checksPests multiply quickly indoorsInspect leaves regularly
Too much fertilizerBurns roots and damages foliageFeed sparingly and only in growing season

Final Thoughts

You don’t need a green thumb, a sun-soaked greenhouse, or hours of spare time to enjoy the benefits of indoor plants. By choosing the right varieties and following these simple care steps, you can successfully grow a plant indoors with minimal effort.

Start with one hardy, forgiving plant like a Snake Plant or Pothos, and you might just find yourself hooked on the soothing, satisfying hobby of indoor gardening.

So, why wait? Pick up a beautiful houseplant on your next trip to the market and turn your living space into a fresh, calming, green retreat.