How Often Should You Water a Muskmelon Plant

How Often Should You Water a Muskmelon Plant

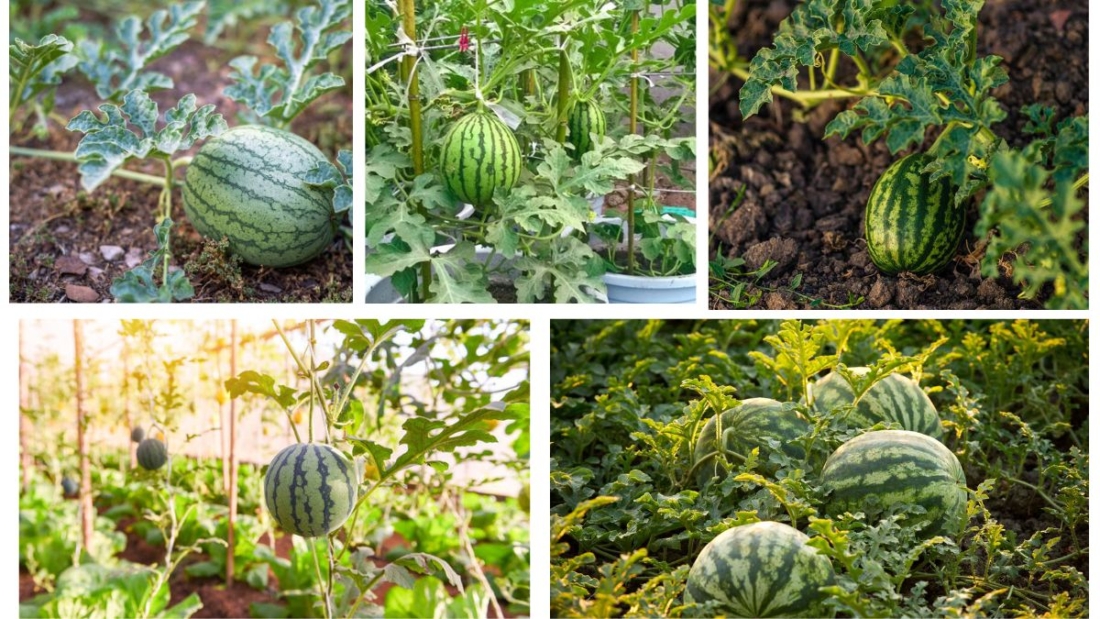
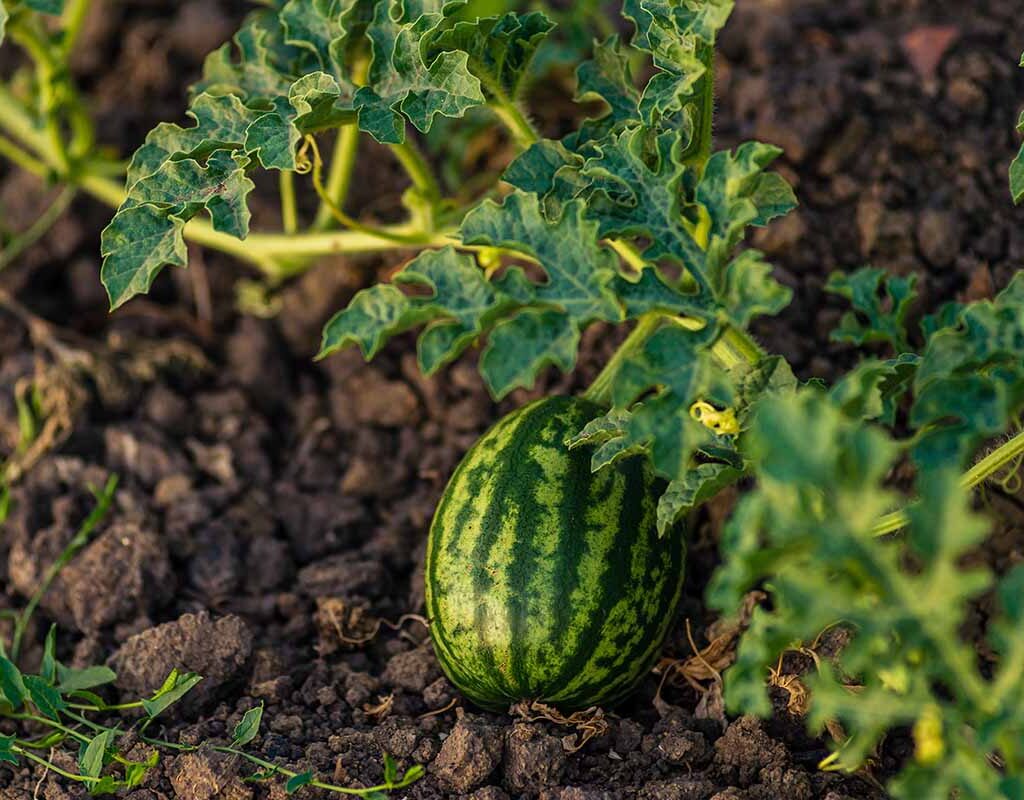
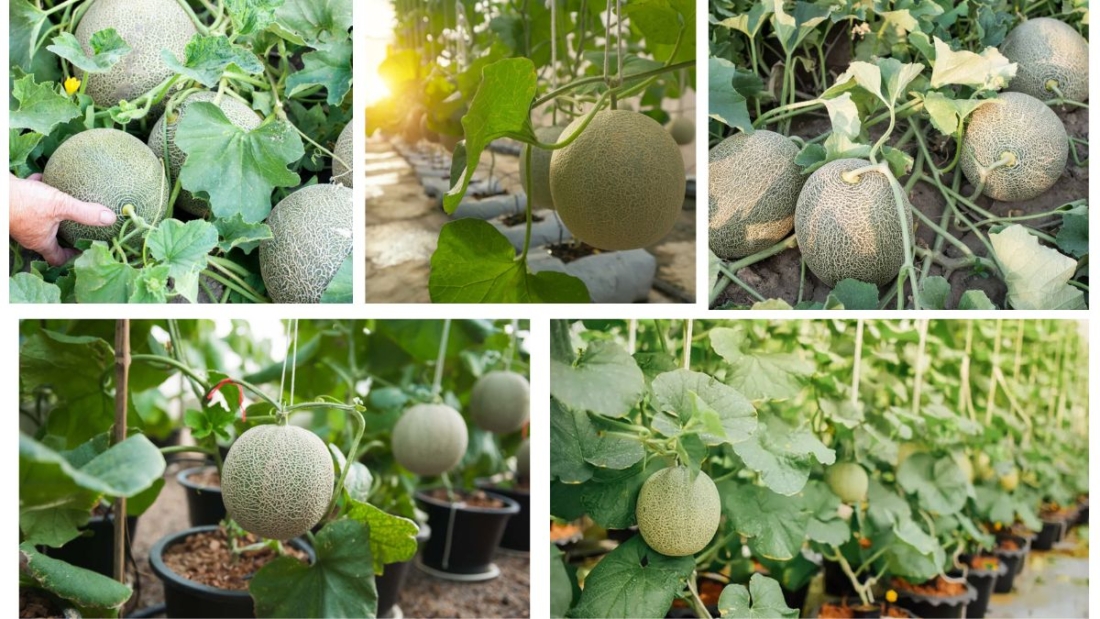
Muskmelons (Cucumis melo), commonly referred to as cantaloupes in many parts of the world, are sweet, aromatic fruits synonymous with summer gardens. Whether you grow them for their refreshing flesh, hydrating properties, or the satisfaction of harvesting your own sun-ripened melons, watering plays a critical role in ensuring healthy growth and quality fruit production.

Like all vining, fruiting plants, muskmelons have specific moisture needs at different stages of their lifecycle. Watering too little can cause stunted growth and dry, tasteless melons, while overwatering may lead to root rot and bland, watery fruit. In this detailed guide, we’ll explore how often you should water a muskmelon plant, taking into account the plant’s age, season, soil type, and climate, along with practical care tips to ensure an abundant and flavorful harvest.


Why Is Watering So Important for Muskmelon Plants?

Muskmelons are made up of about 90% water, so it’s no surprise that proper watering is essential for:

  • Germinating seeds
  • Supporting vigorous vine and leaf growth
  • Encouraging flower production and fruit set
  • Ensuring proper fruit development, size, and flavor
  • Preventing physiological issues like fruit splitting or blossom end rot

Because muskmelon plants have shallow root systems and large foliage, they’re especially sensitive to soil moisture levels. Balancing consistency and moderation in watering is the secret to success.


How Often Should You Water a Muskmelon Plant?

The frequency of watering your muskmelon plants depends on their growth stage, environmental conditions, and soil type. Here’s a general guideline to follow:

Growth StageWatering Frequency
Germination & Seedling (0–3 weeks)Every 2–3 days to keep soil consistently moist
Vegetative & Vine Growth (3–6 weeks)Every 3–5 days, depending on weather
Flowering & Fruit Setting (6–9 weeks)Every 2–3 days, increase during heatwaves
Fruit Maturing (final 7–10 days before harvest)Reduce to once a week or stop entirely

Seasonal Watering Requirements

Spring

  • As soil warms and seeds are sown, water lightly and frequently.
  • Maintain consistent moisture in the top 1–2 inches of soil for germination.
  • Water seedlings every 2–3 days until established.

Summer

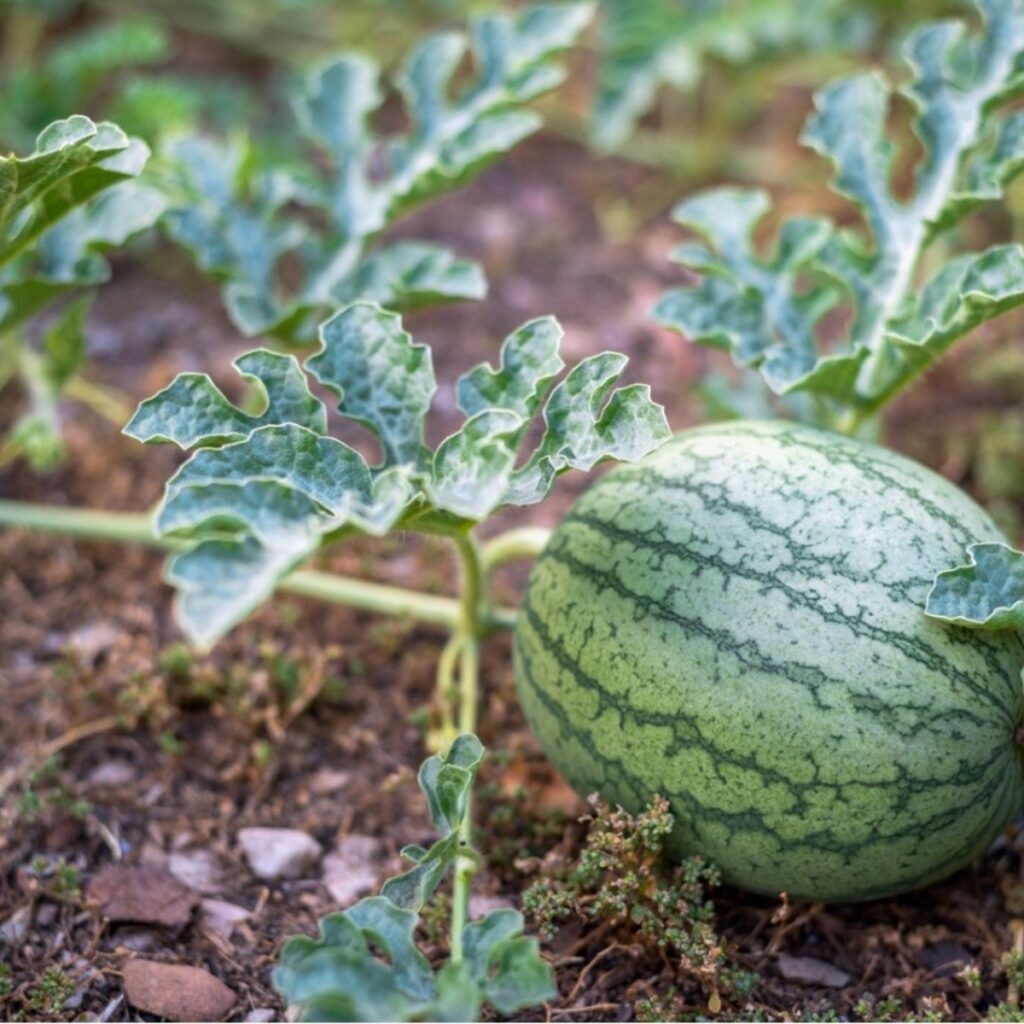
  • This is the peak growth and fruiting season for muskmelons.
  • Increase watering frequency as temperatures rise and vines spread.
  • Muskmelons need about 1–2 inches of water per week.
  • During hot spells, water every 1–2 days to prevent wilting and stress.
  • Once fruits start maturing, reduce watering to enhance sweetness and avoid watery melons.

How Much Water Does a Muskmelon Plant Need?

Deep, infrequent watering is preferable to shallow, frequent watering as it encourages deeper root growth and resilience against dry conditions.

General Guidelines:

  • Apply enough water to soak the soil to a depth of 6–8 inches.
  • In well-drained loamy soil, this equates to around 10–20 liters (2.5–5 gallons) per mature plant per week.
  • Adjust according to soil type — sandy soils require more frequent watering.

Pro Tip: Avoid overhead watering on foliage to reduce the risk of fungal diseases. Use a soaker hose or drip irrigation system for best results.


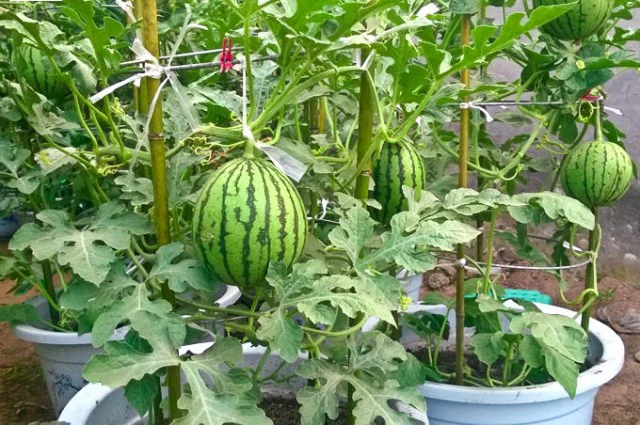
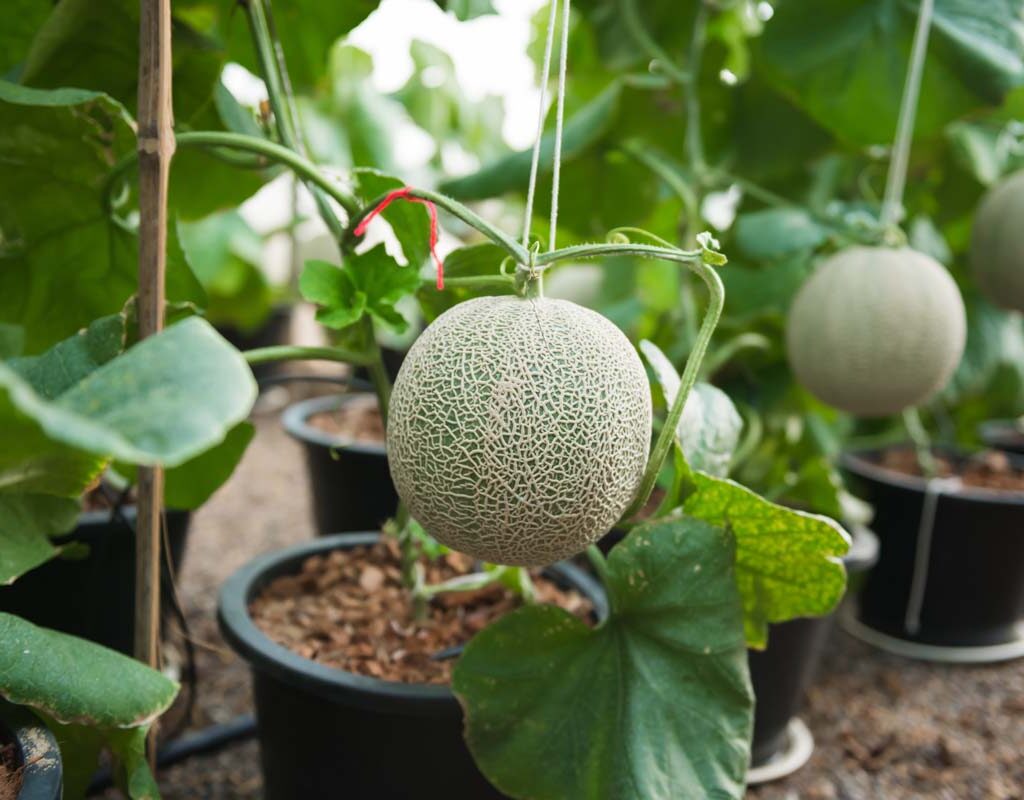
Watering Container-Grown Muskmelons

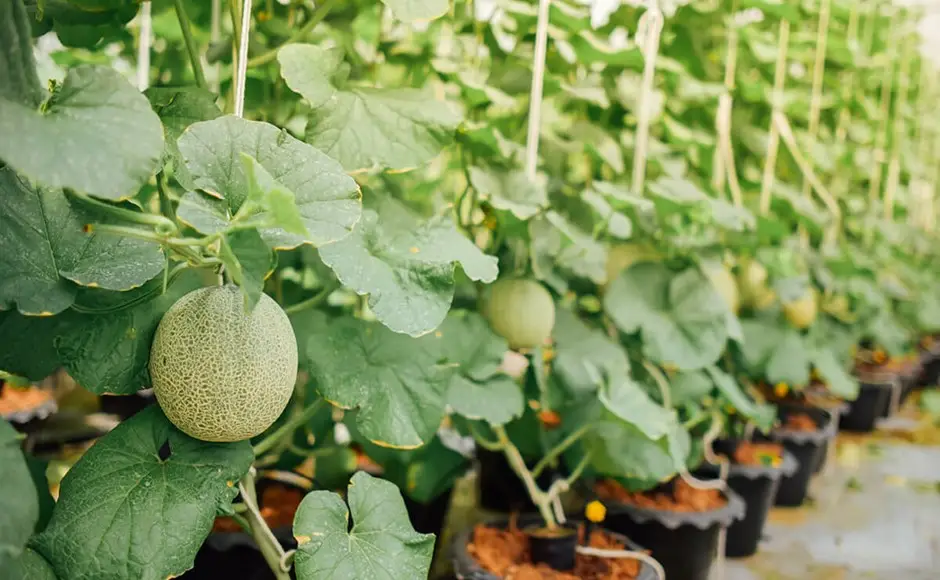
Growing muskmelons in containers is possible with compact varieties and large planters. These need more attentive watering due to quicker soil drying.

Tips:

  • Check soil moisture daily.
  • Water when the top 1–2 inches feel dry.
  • In hot weather, containers may need daily or twice-daily watering.
  • Ensure pots have proper drainage holes.

Soil Type and Watering Frequency

The type of soil in your garden or containers directly impacts how often you’ll need to water.

Soil TypeWatering Frequency
Sandy soilsFast-draining, water more frequently
Loamy soilsHold moisture well, ideal for melons
Clay soilsRetain water longer, water less often

To optimize soil, amend sandy or clay soils with organic compost for improved moisture retention and drainage.


Climate and Weather Considerations

In hot, arid, or windy climates:

  • Increase watering frequency during heatwaves or dry spells.
  • Water early morning to reduce evaporation.

In humid or rainy areas:

  • Decrease watering frequency to prevent over-saturation.
  • Ensure good drainage to prevent water-logging and fungal diseases.

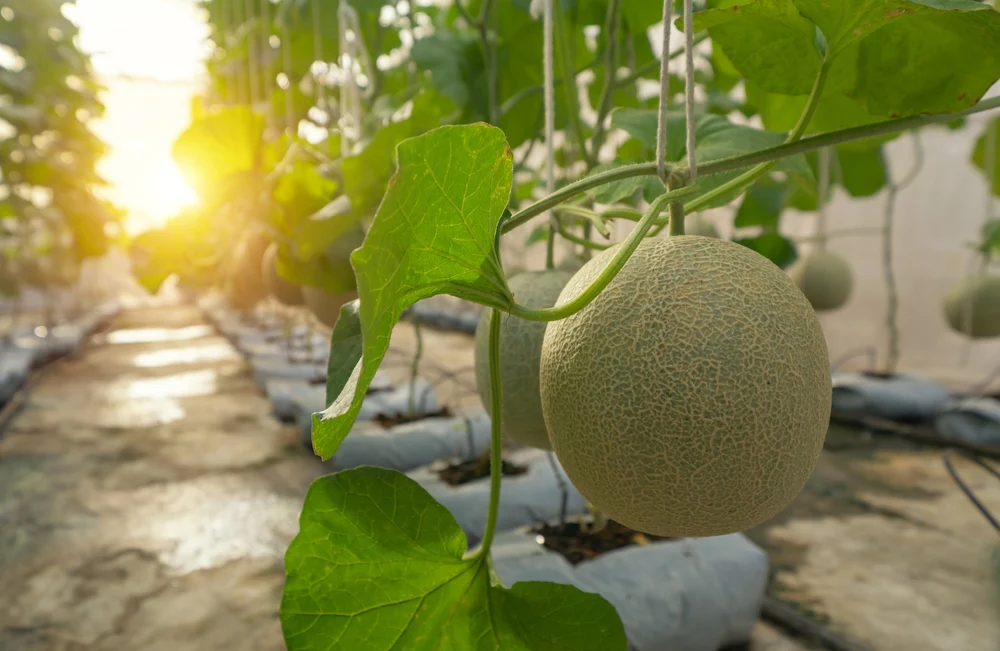
Best Time of Day to Water Muskmelon Plants

The most effective times to water muskmelons are:

  • Early morning: Reduces evaporation loss and ensures moisture is available during the hottest part of the day.
  • Late afternoon: A backup option if morning watering isn’t possible, but avoid watering too late to prevent overnight leaf wetness, which encourages fungal infections.

Mulching to Conserve Moisture

Applying mulch around muskmelon plants helps:

  • Retain soil moisture.
  • Regulate soil temperature.
  • Suppress weed competition.
  • Protect fruits from direct soil contact, reducing the risk of rot.

Recommended mulches:

  • Straw
  • Grass clippings
  • Sugarcane mulch
  • Dried leaves

Apply a 2–3 inch layer, keeping it a few inches away from the base of the plant.


Signs of Water Stress in Muskmelon Plants

Signs of Underwatering:

  • Wilting leaves, especially in the heat of the day.
  • Dry, dusty soil.
  • Fruits growing small, hard, or cracking.
  • Premature fruit drop.

Signs of Overwatering:

  • Yellowing leaves starting from the bottom.
  • Wilting despite wet soil.
  • Stunted growth.
  • Root rot or fungal diseases like powdery mildew.

Pro Tip: Before watering, check soil moisture 3–4 inches deep. Only water if it feels dry at this depth.


Common Watering Mistakes to Avoid

MistakeEffectSolution
Shallow, frequent wateringPromotes weak, surface-level rootsDeep, infrequent watering
Overwatering during fruit ripeningCauses bland, watery fruitReduce watering 7–10 days before harvest
Watering during midday heatIncreased evaporation and leaf scorchWater early morning
Ignoring soil and weather conditionsIrregular moisture levelsAdjust watering as per local conditions

When to Stop Watering Muskmelons

An essential but often overlooked practice is reducing or stopping watering about 7–10 days before harvesting. This encourages:

  • Enhanced fruit sweetness.
  • Improved firmness.
  • Better shelf life.
  • Prevention of watery, flavorless melons.

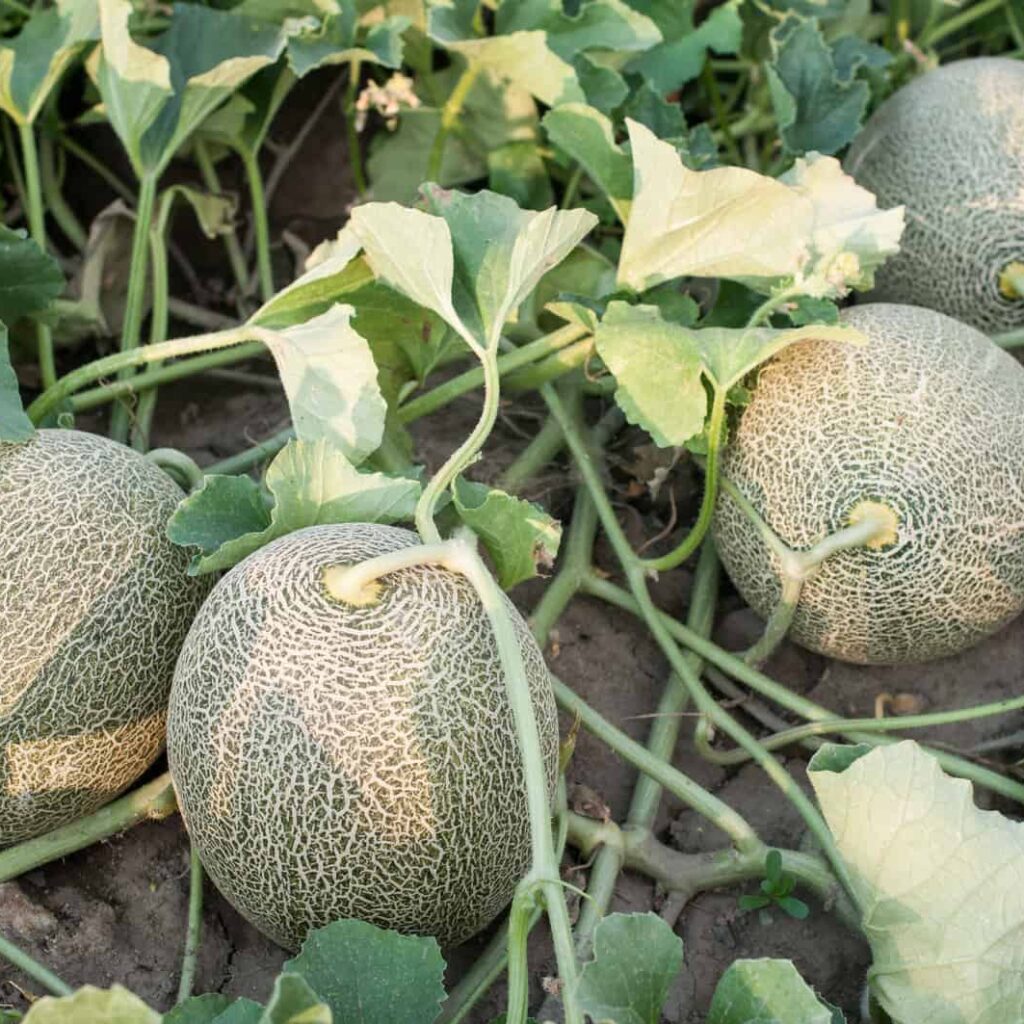
Signs of ripeness include:

  • The stem tendril nearest the fruit dries and turns brown.
  • A rich, sweet aroma near the fruit’s blossom end.
  • Yellowish ground spot where the fruit rested on the soil.

Conclusion

Consistent and thoughtful watering is the key to healthy, vigorous muskmelon plants and a plentiful harvest of sweet, juicy fruits. While young plants and vines require regular, deep watering, mature plants need adjustments based on the weather, soil type, and growth stage.

By following the best practices — such as deep, infrequent watering, early morning schedules, soil-specific adjustments, and proper mulching — you can minimize water stress and optimize fruit quality. Don’t forget to reduce watering before harvest to concentrate flavors and improve your melons’ texture.

With this guide as your reference, you’ll be well-equipped to grow luscious muskmelons that capture the true essence of summer.

How Often Should You Water a Watermelon Plant

How Often Should You Water a Watermelon Plant

Watermelon (Citrullus lanatus) is one of the most refreshing and beloved fruits of summer, known for its juicy, sweet flesh and hydrating properties. Native to Africa, watermelon thrives in warm climates with plenty of sun, and like most fruiting plants, its success depends heavily on proper watering practices. Too little water leads to small, dry fruits, while too much can cause poor fruit set, bland flavor, or even disease.

So — how often should you water a watermelon plant? The answer depends on various factors including plant age, weather conditions, soil type, and whether it’s grown in-ground or in containers. In this comprehensive guide, we’ll explore everything you need to know about watering watermelon plants for healthy growth and delicious harvests.


Why Is Watering Important for Watermelon Plants?

Watermelon plants are composed of about 92% water, and their fruits, being so large and moisture-rich, require consistent water throughout the growing season. Proper watering is essential for:

  • Germination of seeds
  • Strong root development
  • Healthy vine and leaf growth
  • Optimal flowering and fruit set
  • Juicy, sweet, and properly sized fruits

Inconsistent watering, especially during fruit development, can lead to problems such as fruit splitting, poor sweetness, or blossom end rot.


How Often Should You Water a Watermelon Plant?

The frequency of watering watermelon plants varies based on their growth stage:

Growth StageWatering Frequency
Seedling (0–3 weeks after sowing)Every 2–3 days to keep soil evenly moist
Vine and foliage growth (3–6 weeks)Every 3–5 days depending on weather
Flowering and fruit setting (6–10 weeks)Every 2–3 days, more during hot dry spells
Fruit maturing (final 1–2 weeks before harvest)Reduce to once a week or stop completely

Seasonal Watering Needs

Spring

  • Keep soil consistently moist for seed germination.
  • Water young seedlings every 2–3 days.
  • Avoid waterlogging, as young roots are sensitive.

Summer

  • This is the most critical watering period as vines grow rapidly and fruits develop.
  • Watermelon plants require about 1–2 inches of water per week.
  • In hot, dry weather, increase watering frequency to every 2–3 days.
  • Reduce water slightly once fruits near maturity to concentrate sugars for better flavor.

How Much Water Does a Watermelon Plant Need?

Watermelon plants require deep watering to encourage roots to grow downwards, improving drought tolerance and overall plant health.

General Guidelines:

  • Provide 1–2 inches of water per week.
  • In sandy soils, you may need to water more often.
  • Ensure each watering session soaks the soil at least 6–8 inches deep.

Pro tip: Avoid frequent, shallow watering as it promotes weak, surface-level root systems.


Watering Container-Grown Watermelons

Growing watermelons in containers is possible with compact or dwarf varieties. Containers dry out faster than garden soil, requiring more attentive watering.

Tips:

  • Check soil moisture daily.
  • Water when the top 2–3 inches of soil feel dry.
  • During hot weather, you may need to water daily or twice a day.
  • Use large, deep containers with excellent drainage.

Soil Type and Its Effect on Watering

Different soil types retain and drain water at different rates:

Soil TypeWatering Frequency
Sandy soilsDrain quickly; water more frequently
Loamy soilsRetain moisture well; ideal for melons
Clay soilsHold water longer; water less often but ensure good drainage

If you have clay or sandy soil, amend it with compost to improve moisture retention and drainage.


Climate and Weather Considerations

In hot, arid, or windy regions:

  • Increase watering frequency to every 1–2 days during heatwaves.
  • Water early morning or late afternoon to minimize evaporation.
  • Use mulch to conserve soil moisture.

In humid or rainy regions:

  • Reduce watering frequency to avoid overwatering.
  • Check soil before each watering to ensure it has dried out appropriately.

Best Time of Day to Water Watermelon Plants

The ideal times to water are:

  • Early morning: Allows water to soak deeply before heat evaporates it.
  • Late afternoon (before dusk): If morning watering isn’t possible, but avoid late evening watering to reduce the risk of fungal diseases.

Mulching for Moisture Retention

Mulching is essential for watermelon plants as it:

  • Reduces water evaporation.
  • Keeps soil temperature consistent.
  • Suppresses weed competition.
  • Prevents fruits from resting on bare soil.

Recommended mulch materials:

  • Straw
  • Grass clippings
  • Dried leaves
  • Black plastic (in cooler regions)

Apply a 2–4 inch layer around plants, avoiding direct contact with stems.


Signs of Overwatering and Underwatering

Recognizing the signs of water stress is crucial for timely adjustments.

Signs of Underwatering:

  • Wilting vines, especially during the heat of the day.
  • Dry, crumbly soil.
  • Small, deformed fruits.
  • Premature fruit drop.

Signs of Overwatering:

  • Yellowing leaves starting from the bottom.
  • Waterlogged, soggy soil.
  • Root rot.
  • Blossom end rot on fruits.

Pro Tip: Always check soil moisture at a depth of 4–6 inches before watering.


Common Watering Mistakes

MistakeEffectSolution
Frequent shallow wateringWeak, shallow rootsWater deeply to soak soil 6–8 inches
Overwatering during fruit ripeningReduces sweetness, causes splittingCut back watering once fruits mature
Watering during midday heatRapid evaporation and possible leaf scorchWater early morning or late afternoon
Not adjusting for soil typeInconsistent moisture levelsTailor watering to your soil’s properties

How to Check If Watermelons Are Ready to Harvest (Tied to Watering)

As harvest time approaches:

  • Reduce watering to once a week or stop completely 5–7 days before harvest.
  • This concentrates sugars in the fruit, enhancing flavor and preventing watery, bland melons.

Signs a watermelon is ripe:

  • The tendril nearest the fruit turns brown and dries.
  • The spot where the melon rests on the ground turns yellow.
  • A dull, hollow sound when tapped.

Conclusion

Watering is one of the most important care tasks for watermelon plants. The right balance of deep, infrequent watering promotes strong roots, lush vines, and large, juicy, sweet fruits. Understanding your soil type, adjusting for climate, using mulch, and knowing when to cut back watering at harvest time ensures a healthy and productive watermelon patch.

By following this guide and observing your plants’ needs, you’ll be rewarded with homegrown watermelons bursting with flavor, perfect for refreshing summer treats.

So, next time you grab that watering can or garden hose, remember — your watermelon plants thrive on a thoughtful, well-timed drink.

How Often Should You Water a Custard Apple Tree

How Often Should You Water a Custard Apple Tree

The custard apple tree (Annona squamosa), also known as sugar apple or sweetsop, is a tropical fruit-bearing tree celebrated for its creamy, sweet, and aromatic fruits. Native to the tropical Americas and widely cultivated in parts of India, Southeast Asia, Australia, and Africa, custard apple trees are prized for their rich nutritional content, distinctive flavor, and hardy growing nature.

Like all fruit trees, proper watering is one of the most crucial factors for a healthy custard apple tree and a successful harvest. Both overwatering and underwatering can lead to poor growth, reduced fruiting, and disease problems. So, how often should you water a custard apple tree, and what factors influence its water needs? Let’s explore in detail.


Why Is Watering Important for Custard Apple Trees?

Water plays several vital roles in the life of a custard apple tree:

  • Supports photosynthesis and nutrient transportation.
  • Maintains turgor pressure within plant cells, keeping leaves and fruits firm.
  • Encourages strong root development.
  • Affects fruit quality, size, and taste.
  • Prevents stress-related issues like leaf drop or fruit cracking.

Understanding the right watering frequency and technique helps custard apple trees develop healthy canopies and produce abundant, flavorful fruits.


How Often Should You Water a Custard Apple Tree?

The frequency of watering a custard apple tree depends on several factors:

  • Tree age
  • Season
  • Soil type
  • Climate
  • Growth stage (flowering, fruiting, dormant)

Here’s a general watering schedule based on tree maturity:

Tree AgeWatering Frequency
Newly planted (first year)Every 2–3 days or as needed to keep soil moist
Established (2+ years)Once every 7–10 days during dry conditions
Fruiting seasonIncrease to once every 4–5 days if weather is hot
Dormant season (winter)Water sparingly — once every 2–3 weeks if dry

Note: These are general guidelines and should be adjusted based on rainfall, soil drainage, and local climate.


Seasonal Watering Requirements

Spring (New Growth Season)

  • Begin regular watering as new buds and leaves appear.
  • Keep soil consistently moist, especially in dry climates.
  • Water young trees every 2–3 days.
  • Established trees can be watered once a week.

Summer (Flowering and Fruiting)

  • This is the most critical watering period for custard apples.
  • Fruits require ample moisture for proper development and sweetness.
  • In hot, dry weather, water mature trees every 4–5 days.
  • Container-grown trees may need daily watering.
  • Avoid waterlogging as it can cause root rot and fruit cracking.

Autumn (Post-Fruiting and Dormancy Preparation)

  • Gradually reduce watering frequency after harvest.
  • Continue to water once a week if conditions remain dry.

Winter (Dormant Period)

  • The tree’s water requirement decreases significantly.
  • Water once every 2–3 weeks, especially if there’s little rainfall.
  • Avoid keeping soil soggy to prevent fungal issues.

How Much Water Does a Custard Apple Tree Need?

When watering a custard apple tree, aim for deep, infrequent watering to encourage the development of a deep, strong root system.

General Watering Amount:

  • Young trees (up to 1 year): 5–8 liters per watering session.
  • Mature trees: 20–30 liters per watering session during dry spells.

Ensure water penetrates the soil to a depth of 12–18 inches.


Watering Container-Grown Custard Apple Trees

Container-grown custard apple trees require more frequent watering due to faster soil drying.

Tips for container trees:

  • Water when the top 2–3 inches of soil feels dry.
  • In hot summers, you might need to water daily or every other day.
  • Ensure the container has excellent drainage holes.
  • Use a light, well-draining potting mix with sand and compost.

Soil Type and Watering Frequency

The type of soil greatly affects watering needs:

Soil TypeWatering Frequency
Sandy soilsDrain quickly, water more frequently
Loamy soilsHold moisture well, ideal balance
Clay soilsRetain water longer, water less often

For best results, amend heavy clay soils with organic compost and sand to improve drainage.


Climate and Weather Considerations

In tropical, arid, or semi-arid regions where custard apples are popular:

  • Increase watering during hot, dry spells.
  • Reduce watering frequency during rainy seasons or humid weather.
  • Protect trees from overwatering in areas prone to monsoon rains by improving soil drainage.

Best Time of Day to Water a Custard Apple Tree

The ideal time to water is early morning or late afternoon.

Why?

  • Reduces evaporation loss.
  • Allows water to soak in before the heat of the day.
  • Minimizes the risk of fungal diseases that can occur if foliage remains wet overnight.

Mulching for Moisture Retention

Applying mulch around the base of your custard apple tree can help:

  • Retain soil moisture.
  • Reduce the frequency of watering.
  • Suppress weeds.
  • Regulate soil temperature.

Use organic materials like:

  • Straw
  • Dried leaves
  • Sugarcane mulch
  • Compost

Tip: Keep mulch 4–6 inches away from the trunk to prevent rot.


Signs of Underwatering and Overwatering

Recognizing symptoms of improper watering can help prevent long-term damage.

Signs of Underwatering:

  • Drooping or wilting leaves
  • Yellowing or scorched leaf edges
  • Fruit drop before ripening
  • Small, dry fruits
  • Cracked soil

Signs of Overwatering:

  • Yellowing leaves (starting from the bottom)
  • Wilting despite moist soil
  • Root rot (dark, mushy roots)
  • Fungal diseases
  • Poor growth

Pro Tip: Always check soil moisture at a depth of 3–4 inches before watering.


Common Watering Mistakes

MistakeEffectSolution
Frequent, shallow wateringWeak, surface-level root systemsWater deeply and less frequently
Overwatering during dormancyRoot rot and fungal diseasesReduce watering to once every 2–3 weeks
Watering during peak heatHigh evaporation and water wasteWater early morning or late afternoon
Ignoring soil typeInconsistent moisture levelsAdjust watering based on soil texture

Conclusion

Watering a custard apple tree correctly is key to its health, growth, and fruit quality. Whether grown in tropical backyards or large containers, custard apple trees need consistent, deep watering, especially in the early stages of growth and during fruit development.

By adjusting your watering routine based on the tree’s age, soil type, climate, and seasonal changes, you can foster strong root systems, lush foliage, and abundant harvests of sweet, creamy fruits. Pair this with mulching, good drainage, and regular soil checks, and your custard apple tree will reward you year after year.

So next time you pick up your watering can, remember — your custard apple tree thrives on thoughtful, well-timed care.

How Often Should You Water a Fig Tree

How Often Should You Water a Fig Tree

Fig trees (Ficus carica) are ancient, iconic plants known for their lush foliage, sculptural beauty, and delectable, honey-sweet fruits. Native to the Mediterranean and western Asia, fig trees have long been a favorite of home gardeners thanks to their resilience, low-maintenance nature, and generous fruit production. But like all plants, watering plays a crucial role in keeping fig trees healthy, productive, and thriving.

So, how often should you water a fig tree? The answer isn’t one-size-fits-all. It depends on factors such as climate, soil type, tree maturity, growing method (in-ground or container), and season. In this comprehensive article, we’ll explore how to properly water your fig tree throughout the year, signs of over- or under-watering, and expert tips to ensure a bountiful harvest.


Why Watering Matters for Fig Trees

Water is essential for transporting nutrients, promoting photosynthesis, and supporting healthy growth. In fig trees:

  • Young trees require consistent moisture to establish strong root systems.
  • Mature trees are drought-tolerant but still need supplemental water during dry spells and fruit development.
  • Watering affects fruit size, flavor, and quality — under-watered trees may drop unripe figs or produce small, dry fruits.

Proper watering ensures your fig tree remains vigorous, pest-resistant, and productive.


How Often Should You Water a Fig Tree?

The frequency of watering a fig tree depends on several factors:

Tree AgeWatering Frequency
Newly planted (first year)2–3 times per week (depending on weather)
Established (2+ years)Every 7–10 days in dry conditions
Container-grown fig treesEvery 3–5 days (or when top 2 inches of soil dry out)

Seasonal Watering Guide

Spring

  • Increase watering as the tree exits dormancy.
  • Keep soil consistently moist but not soggy.
  • Critical time for developing new leaves and root activity.

Summer

  • Fig trees require the most water during hot, dry months.
  • Water deeply once or twice a week for in-ground trees.
  • Container-grown figs may need watering daily in extreme heat.
  • Reduce watering frequency slightly after fruit ripens.

Fall

  • Gradually reduce watering as the tree enters dormancy.
  • Allow soil to dry slightly between waterings.

Winter

  • In temperate or Mediterranean climates, fig trees go dormant.
  • Minimal watering required — once every 3–4 weeks if soil is very dry.
  • For indoor container figs, water only when the soil is nearly dry.

How Much Water Does a Fig Tree Need?

When you water a fig tree, focus on deep, infrequent watering that encourages the roots to grow downward.

General Watering Guidelines:

  • Young trees: 5–10 gallons per week
  • Mature trees: 10–20 gallons per week during dry spells

Ensure the water reaches at least 12–18 inches deep into the soil, where most of the roots reside.


Watering Container-Grown Fig Trees

Container figs dry out faster than in-ground trees, especially in hot, sunny locations.

Key points:

  • Check soil moisture daily during summer.
  • Water when the top 2 inches of soil feel dry.
  • Ensure containers have excellent drainage.
  • Use large pots (15–20 gallons) to help retain moisture.
  • Mulch with straw or bark chips to slow evaporation.

How to Tell If Your Fig Tree Needs Water

Use these signs to determine when your fig tree needs a drink:

Needs Water:

  • Wilting or drooping leaves
  • Dry, crumbly soil
  • Leaf edges turning brown or crispy
  • Premature fruit drop
  • Stunted growth or small, hard figs

Too Much Water:

  • Yellowing leaves
  • Root rot (soft, mushy roots)
  • Persistent wet soil
  • Leaf drop despite moist conditions

Pro tip: Use a moisture meter or stick your finger 3–4 inches into the soil — if it’s dry at that depth, it’s time to water.


Soil Type and Its Effect on Watering

The type of soil dramatically influences how often you need to water your fig tree:

Soil TypeWatering Needs
Sandy soilsDrain quickly, require more frequent watering
Loamy soilsIdeal balance, retain moisture but drain well
Clay soilsHold water longer, water less often

Improve poor soils with compost or organic matter to enhance drainage and water retention.


Weather and Climate Considerations

Figs are naturally drought-tolerant once established but will need more frequent watering during:

  • Heatwaves
  • Windy conditions
  • Extended dry periods

In hot, arid regions (like the American Southwest or Mediterranean countries), fig trees may need weekly or twice-weekly watering during peak summer. In humid areas, reduce watering to avoid fungal issues.


Best Time of Day to Water Fig Trees

The optimal time to water is early morning or late afternoon when temperatures are cooler and evaporation rates are lower. Avoid watering during the heat of the day.

Why it matters:

  • Early watering allows moisture to reach roots before sun exposure.
  • Reduces risk of fungal diseases on leaves.
  • Prevents water waste through evaporation.

Mulching for Moisture Retention

Mulching around your fig tree is one of the easiest ways to conserve soil moisture and reduce watering frequency.

Use organic materials like:

  • Straw
  • Wood chips
  • Shredded bark
  • Compost

Apply a 2–4 inch layer around the tree, keeping mulch a few inches away from the trunk to prevent rot.


Common Watering Mistakes

MistakeEffectSolution
Shallow, frequent wateringEncourages weak, surface rootsDeep, infrequent watering
OverwateringCauses root rot, yellow leavesLet soil dry between waterings
Watering during middayRapid evaporation, water wasteWater early morning or evening
Ignoring soil typeInconsistent moisture levelsAdjust watering based on soil type

Conclusion

Watering a fig tree properly is one of the most important aspects of its care — especially in its early years and during hot, dry weather. While established trees are relatively drought-tolerant, deep, infrequent watering is crucial for healthy growth, abundant fruiting, and preventing stress-related problems like fruit drop or leaf scorch.

By considering factors such as tree age, soil type, weather, and whether the tree is planted in-ground or in a container, you can develop a tailored watering routine that keeps your fig tree flourishing. Combine this with mulching, proper drainage, and seasonal adjustments to enjoy a thriving fig tree that rewards you with lush foliage and sweet, juicy fruits for years to come.

So next time you reach for the hose, remember — fig trees prefer a thoughtful drink, not a constant splash.

Which Indoor Plants Are Perfect for Low-Light Rooms

Which Indoor Plants Are Perfect for Low-Light Rooms

Indoor plants have become a popular way to bring life, freshness, and natural beauty into our living and working spaces. But not every room in a home is blessed with bright, abundant sunlight. Many apartments, offices, and homes have corners, hallways, or rooms that receive little natural light — and yet, you can still enjoy a thriving indoor garden in these spaces.

Fortunately, a wide variety of houseplants can adapt beautifully to low-light environments. These plants are naturally tolerant of shaded conditions, making them ideal companions for darker rooms. In this article, we’ll explore which indoor plants are perfect for low-light rooms, their unique qualities, care tips, and how they can enhance your living spaces.


What is Considered a Low-Light Room?

Before selecting plants, it’s essential to understand what qualifies as a low-light environment.

Characteristics of Low-Light Rooms:

  • Rooms with north-facing windows
  • Interior rooms with no direct sunlight
  • Basements or shaded corners
  • Areas where daylight is filtered by curtains, blinds, or outdoor structures

While these areas may seem unsuitable for greenery, many resilient houseplants thrive in precisely these conditions.


Snake Plant (Sansevieria trifasciata)

Also known as Mother-in-Law’s Tongue, the snake plant is one of the toughest and most adaptable houseplants available.

Why It’s Perfect for Low-Light:

  • Tolerates a wide range of light, including dim corners
  • Requires minimal watering
  • Acts as a natural air purifier

Care Tips:
Allow the soil to dry completely between waterings, and avoid overwatering to prevent root rot.


ZZ Plant (Zamioculcas zamiifolia)

The ZZ plant is a hardy, stylish indoor plant known for its waxy, emerald-green leaves and easygoing nature.

Why It’s Perfect for Low-Light:

  • Thrives in low to medium light
  • Highly drought-tolerant
  • Requires little attention

Care Tips:
Water only when the topsoil is dry, and avoid placing it in direct sunlight, which can scorch its leaves.


Pothos (Epipremnum aureum)

A favorite among plant lovers, pothos is an attractive trailing vine with heart-shaped leaves that comes in various shades of green, yellow, and white.

Why It’s Perfect for Low-Light:

  • Tolerates low-light and fluorescent light
  • Grows well in hanging baskets or on shelves
  • Known for its air-purifying abilities

Care Tips:
Water when the top inch of soil feels dry, and trim back leggy vines to encourage bushier growth.


Peace Lily (Spathiphyllum spp.)

Known for its graceful white blooms and dark green leaves, the peace lily adds elegance to any room.

Why It’s Perfect for Low-Light:

  • Thrives in shade and indirect light
  • One of the best air-purifying plants
  • Tolerates neglect well

Care Tips:
Keep the soil consistently moist but not soggy. If the leaves droop, it’s a clear sign the plant needs watering.


Cast Iron Plant (Aspidistra elatior)

True to its name, the cast iron plant is nearly indestructible and can survive in even the darkest corners.

Why It’s Perfect for Low-Light:

  • Tolerates deep shade, poor soil, and irregular watering
  • Low maintenance and resilient
  • Adds lush greenery to gloomy spaces

Care Tips:
Water moderately and avoid letting the plant sit in waterlogged soil.


Chinese Evergreen (Aglaonema spp.)

Chinese evergreen is prized for its patterned foliage and tolerance to poor lighting conditions.

Why It’s Perfect for Low-Light:

  • Grows well in indirect or low light
  • Available in various colors and leaf patterns
  • Resilient and easy to care for

Care Tips:
Water when the top inch of soil is dry and wipe leaves occasionally to keep them dust-free.


Heartleaf Philodendron (Philodendron hederaceum)

A charming trailing plant with heart-shaped leaves, this philodendron is ideal for hanging baskets or shelves in dimly lit rooms.

Why It’s Perfect for Low-Light:

  • Tolerates shaded environments well
  • Requires minimal maintenance
  • Fast-growing in low to moderate light

Care Tips:
Allow the topsoil to dry between waterings, and pinch off leggy growth to encourage fullness.


Dracaena (Dracaena spp.)

Dracaena varieties like ‘Janet Craig’, ‘Lemon Lime’, and ‘Warneckii’ thrive in low-light interiors and add a vertical, architectural element to any room.

Why It’s Perfect for Low-Light:

  • Tolerates shade and filtered light
  • Requires infrequent watering
  • Excellent air purifier

Care Tips:
Avoid overwatering and use a well-draining potting mix.


Parlor Palm (Chamaedorea elegans)

A compact, graceful palm, the parlor palm has been a popular indoor plant for centuries due to its adaptability to low light.

Why It’s Perfect for Low-Light:

  • Prefers shade or indirect light
  • Compact size suitable for small spaces
  • Adds a tropical touch indoors

Care Tips:
Keep soil slightly moist and mist occasionally to increase humidity.


Maidenhair Fern (Adiantum spp.)

With its delicate, lacy fronds, the maidenhair fern thrives in dim, humid environments like bathrooms or shaded kitchens.

Why It’s Perfect for Low-Light:

  • Prefers low, indirect light
  • Enjoys humid, enclosed spaces
  • Adds softness and texture to décor

Care Tips:
Keep soil consistently moist and avoid placing near dry, hot air vents.


Benefits of Low-Light Indoor Plants

Apart from beautifying your home, these low-light plants offer numerous health and environmental benefits:

  • Improve indoor air quality by removing toxins
  • Increase humidity, easing respiratory discomfort
  • Reduce stress and enhance mood
  • Create a calm, inviting atmosphere in dim areas

These plants also require less frequent watering and lower maintenance, making them perfect for busy lifestyles and beginner plant owners.


Conclusion

Low-light conditions don’t mean you have to miss out on the joy of indoor gardening. With so many adaptable, shade-loving plants like snake plants, ZZ plants, pothos, peace lilies, and cast iron plants, you can easily transform your dimly lit rooms into lush, tranquil retreats.

When choosing plants, consider your room’s specific light levels, temperature, and humidity, and select varieties that suit your environment and care preferences. With the right choices and minimal effort, you can enjoy the beauty, air-purifying benefits, and stress-relieving presence of indoor plants in every corner of your home — bright or shaded.

Whether you’re looking to green up a shadowy office, a north-facing living room, or a windowless hallway, these resilient low-light plants are your perfect companions.

Where Is the Ideal Place to Plant Peonies

Where Is the Ideal Place to Plant Peonies

Peonies, with their lush, romantic blooms and intoxicating fragrance, are treasured additions to gardens worldwide. Revered for their longevity, resilience, and sheer beauty, peonies can live and thrive for decades when planted in the right location. However, where you plant your peonies greatly affects their overall health, bloom production, and long-term performance.

Choosing the perfect planting spot is more than just picking a sunny patch. It involves understanding the plant’s soil preferences, drainage needs, spacing requirements, and environmental conditions. In this article, we’ll explore in detail where is the ideal place to plant peonies, along with expert tips to ensure their best possible growth and breathtaking displays year after year.


Understanding Peony Basics

Before identifying the perfect spot, it’s important to grasp a few key facts about peonies:

  • Botanical Name: Paeonia spp.
  • Lifespan: 50+ years in ideal conditions
  • Hardiness: USDA Zones 3–8 (some varieties to Zone 9)
  • Bloom Time: Late spring to early summer
  • Types: Herbaceous peonies, tree peonies, and intersectional (Itoh) peonies

Each type of peony has slightly different requirements, but their ideal planting conditions are largely similar.


Sunlight: Peonies Love the Sun

The most crucial factor when selecting a planting location for peonies is sun exposure.

How Much Sun Do Peonies Need?

  • Full sun: At least 6 to 8 hours of direct sunlight daily
  • Partial sun: Tolerated in warmer regions or afternoon shade in very hot climates (Zones 8–9)

Why It Matters:
Peonies planted in too much shade often produce weak stems, fewer blooms, and are more susceptible to fungal diseases like botrytis.

Ideal Spot:
An open, unobstructed area of the garden, away from overhanging trees and large shrubs that cast significant shade.


Soil Conditions: Well-Drained and Fertile

Peonies are particular about their soil. They thrive in soil that is well-drained, fertile, and rich in organic matter.

Ideal Soil Traits:

  • Texture: Loamy or sandy loam
  • pH level: Neutral to slightly acidic (6.5 to 7.0)
  • Moisture: Consistently moist but never soggy

Why It Matters:
Poorly drained, heavy clay soils can cause root rot, while excessively sandy soils may not retain enough moisture for proper root development.

Ideal Spot:
A slightly elevated area, or a well-amended garden bed, where water drains freely without pooling after rain.

Pro Tip:
If your soil is heavy or clay-based, amend it with compost, aged manure, or well-rotted organic matter before planting.


Air Circulation: Open Space is Essential

Peonies dislike cramped, crowded spaces where air movement is limited. Good air circulation helps prevent fungal diseases and ensures healthier foliage and blooms.

Why It Matters:

  • Reduces the risk of mildew and botrytis blight
  • Keeps foliage dry after rain or watering
  • Encourages sturdy stem growth

Ideal Spot:
Plant peonies at least 3 to 4 feet apart from other shrubs, fences, or walls. Avoid low-lying spots where air tends to stagnate.


Protection from Harsh Winds

While peonies appreciate open, sunny areas, they also benefit from some protection against strong, drying winds that can damage their delicate blooms.

Wind Concerns:

  • Tall, top-heavy blooms are prone to bending or snapping.
  • Constant wind stress weakens stems and flower petals.

Ideal Spot:
A sunny area with light windbreaks nearby, like a garden hedge, trellis, or neighboring sturdy plants, but not so close as to shade the peonies.


Avoiding Competition with Tree Roots

Peonies do not compete well with the dense, fibrous root systems of large trees and shrubs.

Why It Matters:

  • Tree roots quickly absorb available moisture and nutrients.
  • Can crowd out peony roots, limiting their growth and bloom potential.

Ideal Spot:
A location away from mature trees and invasive-rooted shrubs such as willows, maples, or large pines.


Suitable for Cold Winters

One of peonies’ unique characteristics is their need for a cold winter dormancy period to set buds for the following year.

Why It Matters:

  • Peony buds require winter chilling hours to bloom well.
  • In warm climates (Zones 8–9), select varieties like ‘Festiva Maxima’ or tree peonies, and plant in areas with cooler microclimates, such as near north-facing walls or shaded slopes.

Ideal Spot:
In most temperate climates, peonies thrive when planted in open, sunny garden beds that experience cold winters naturally.


Ideal Depth for Planting

While not a “place” in the garden sense, the planting depth is equally critical to peony success.

Planting Depth Guide:

  • Herbaceous and Itoh peonies: Plant eyes (buds) 1 to 2 inches below the soil surface
  • Tree peonies: Plant graft union 4 to 6 inches below the soil surface

Why It Matters:
If planted too deeply, peonies may produce healthy foliage but fail to bloom. If too shallow, roots may dry out or become frost-damaged in winter.

Ideal Spot:
A location where soil depth can be easily controlled and adjusted as needed.


Ideal Use in the Landscape

Peonies are incredibly versatile and can be incorporated into various garden settings:

Garden Uses:

  • Perennial borders
  • Cottage gardens
  • Cutting gardens
  • Mixed shrub beds
  • Foundation plantings (keeping enough distance from walls)

Ideal Spot:
Consider placing peonies in areas where their spectacular blooms will be most visible and appreciated, such as along pathways, near patios, or in front of taller shrubs.


Common Mistakes in Peony Placement

Avoid these frequent errors when deciding where to plant peonies:

  1. Planting in deep shade: Reduces or eliminates blooming.
  2. Crowding them against structures: Limits air circulation and increases disease risk.
  3. Too close to trees or dense shrubs: Competes for moisture and nutrients.
  4. Planting in soggy or poorly drained soil: Causes root rot.
  5. Planting too deeply: Prevents blooming.

Conclusion

The secret to flourishing, long-lived peonies lies in selecting the perfect planting spot. A sunny, open, well-drained location with good air circulation and minimal competition from tree roots is ideal for peonies. Understanding their love for sunshine, dislike for soggy soils, need for cold winters, and preference for gentle wind protection allows you to position them for maximum health and breathtaking floral displays.

By choosing the right location and planting them with care, your peonies can grace your garden with lush blooms for decades — a timeless, living legacy of beauty and fragrance.

Whether you’re establishing a brand-new peony bed or enhancing an existing garden, following these guidelines will reward you with some of the most magnificent flowers nature has to offer.

When Should You Fertilize Your Hydrangea Plants

When Should You Fertilize Your Hydrangea Plants

Hydrangeas are one of the most beloved and visually captivating flowering shrubs found in gardens worldwide. Known for their lush foliage and voluminous, showy blooms in hues of blue, pink, purple, and white, hydrangeas add elegance and charm to any outdoor space. However, to keep these plants healthy and blooming abundantly, proper nutrition is essential — and that means knowing when and how to fertilize them effectively.

Fertilizing hydrangeas isn’t a one-size-fits-all task. The timing, type of fertilizer, and method of application can significantly affect their health, color, and flower production. In this article, we’ll explore in detail when you should fertilize your hydrangea plants, the factors influencing fertilization schedules, and practical tips for achieving those lush, vibrant blooms you desire.


Understanding Hydrangea Nutritional Needs

Hydrangeas require a balanced mix of nutrients for robust growth and flowering. The primary nutrients essential for their well-being include:

  • Nitrogen (N): Promotes lush, green foliage.
  • Phosphorus (P): Encourages healthy root systems and flower development.
  • Potassium (K): Aids in overall plant strength, water regulation, and disease resistance.

Apart from these, hydrangeas benefit from micronutrients such as magnesium, calcium, and iron. Without the right nutrients at the appropriate time, hydrangeas may produce sparse blooms, weak stems, or discolored leaves.


Best Time to Fertilize Hydrangeas

The optimal fertilizing schedule for hydrangeas depends on their type, soil condition, and local climate. However, there are some general guidelines most gardeners can follow to ensure healthy growth and flowering.

Early Spring (Primary Feeding)

When: As new leaf buds begin to appear, typically in March to early April depending on your region.

Why:
Early spring feeding provides the essential nutrients hydrangeas need to support vigorous new growth, establish strong roots, and prepare for bud development.

What to Use:
A balanced, slow-release fertilizer such as 10-10-10 or 14-14-14, or a fertilizer formulated specifically for flowering shrubs.

Application Tip:
Apply the fertilizer evenly around the plant’s drip line (the area under the outermost leaves) and water it in thoroughly.


Mid-Spring (Secondary Feeding)

When: Around 6 to 8 weeks after the first application, usually in late April to May.

Why:
This secondary feeding encourages continued growth and helps the plant sustain itself during the active growing season.

What to Use:
You can use the same slow-release fertilizer or switch to a liquid, water-soluble option like 20-20-20 for quicker nutrient absorption.

Application Tip:
Follow package instructions carefully and avoid over-fertilizing, which can lead to excessive foliage and fewer blooms.


Mid-Summer (Optional for Certain Varieties)

When: In mid to late June, especially for repeat-blooming varieties like Endless Summer® hydrangeas.

Why:
Some modern reblooming hydrangeas benefit from a light mid-season feed to support a second wave of blooms.

What to Use:
A bloom-boosting fertilizer with a higher phosphorus content, such as 10-30-10, to encourage flower bud development.

Application Tip:
Use sparingly and avoid fertilizing too late in the season to prevent new growth that won’t have time to harden off before winter.


Avoid Fertilizing in Late Summer and Fall

It’s crucial to stop fertilizing hydrangeas by late July or early August, depending on your region. Fertilizing too late in the growing season can prompt tender new growth that won’t survive the cold winter months.

Why It Matters:
Late-season fertilizing:

  • Delays the plant’s natural preparation for dormancy.
  • Makes new shoots vulnerable to frost damage.
  • Weakens the plant’s resilience through winter.

Tip:
Instead of fertilizing, focus on maintaining soil moisture and applying mulch to protect the roots during fall and winter.


How Often Should You Fertilize Hydrangeas?

The frequency of fertilizing hydrangeas depends on the fertilizer type:

  • Slow-release granular fertilizers: Typically applied once or twice per growing season (spring and early summer).
  • Liquid or water-soluble fertilizers: Can be applied every 4 to 6 weeks during the active growing season.

Important Note:
Always follow the manufacturer’s directions and avoid over-fertilizing, as it can lead to:

  • Excessive leafy growth with minimal blooms.
  • Nutrient imbalances.
  • Soil and water contamination.

Fertilizing Different Types of Hydrangeas

Different hydrangea varieties have slightly different nutritional needs and preferences. Here’s a quick overview:

Bigleaf Hydrangeas (Hydrangea macrophylla)

  • Prefer balanced or slightly phosphorus-rich fertilizers.
  • Sensitive to soil pH, which affects flower color (blue in acidic soil, pink in alkaline).
  • Benefit from early spring and mid-spring feedings.

Panicle Hydrangeas (Hydrangea paniculata)

  • Thrive with balanced fertilizers.
  • Less fussy about pH levels.
  • Usually require one good spring feeding, with an optional second in early summer.

Smooth Hydrangeas (Hydrangea arborescens)

  • Appreciate higher phosphorus fertilizers to encourage large, showy blooms.
  • Fertilize in early spring, with an optional booster in late spring.

Oakleaf Hydrangeas (Hydrangea quercifolia)

  • Prefer light feeding in early spring.
  • Avoid high-nitrogen fertilizers, which encourage excessive leafy growth.

Soil pH and Fertilizer Selection

For bigleaf and mountain hydrangeas, soil pH affects not only plant health but also flower color.

  • Acidic soil (pH below 6.0): Produces blue flowers.
  • Alkaline soil (pH above 7.0): Produces pink flowers.

If color management is part of your hydrangea care routine:

  • Use aluminum sulfate in early spring to enhance blue hues.
  • Use garden lime to intensify pink shades.

Apply these soil amendments at the same time as your spring fertilizer, ensuring even application and adequate watering.


Common Fertilization Mistakes to Avoid

To get the best out of your hydrangeas, steer clear of these frequent errors:

  1. Over-fertilizing: Can cause lush foliage with few or no blooms.
  2. Fertilizing too late: Encourages tender new growth vulnerable to frost.
  3. Neglecting soil testing: Guessing soil nutrient levels may lead to unnecessary or imbalanced applications.
  4. Applying fertilizer to dry soil: Can burn plant roots. Always water before and after fertilizing.

Conclusion

Fertilizing hydrangeas is both an art and a science, and timing plays a pivotal role in achieving those iconic, full-bodied blooms. As a general rule:

  • Begin feeding hydrangeas in early spring.
  • Follow up in mid-spring.
  • Optionally, fertilize reblooming varieties in mid-summer.
  • Stop by late summer to avoid winter damage.

Choosing the right type of fertilizer, applying it correctly, and understanding your specific hydrangea variety’s needs will lead to healthier plants, prolonged flowering, and those lush, vibrant garden displays hydrangeas are famous for.

By following these guidelines, you’ll ensure your hydrangeas not only survive but thrive — providing breathtaking blooms that transform your garden year after year.

Why Do My Petunias Stop Blooming in Mid-Summer

Why Do My Petunias Stop Blooming in Mid-Summer

Petunias are a favorite among gardeners for their vibrant colors, cascading growth habit, and long blooming season. Whether spilling from hanging baskets, lining garden beds, or brightening up containers, petunias add undeniable charm to any outdoor space. However, many gardeners encounter a frustrating problem: while petunias start the season bursting with blooms in spring and early summer, they often slow down or stop flowering altogether by mid-summer.

If you’ve found yourself wondering why your petunias seem to lose their bloom power just when your garden is in full swing, you’re not alone. Several environmental, cultural, and biological factors contribute to this mid-season bloom decline. In this article, we’ll explore the common reasons petunias stop blooming in mid-summer and offer practical solutions to revive them for a season-long floral show.


The Impact of High Summer Temperatures

Heat Stress on Petunias

Petunias prefer moderate temperatures, typically between 60°F and 75°F (15°C to 24°C). As summer peaks and temperatures soar past 85°F (29°C), petunias experience heat stress. Excessive heat affects their ability to produce and sustain blooms.

How Heat Affects Blooming:

  • Reduces flower bud formation.
  • Causes existing blooms to wilt and drop quickly.
  • Slows overall plant metabolism.

Solution:

  • Provide afternoon shade during the hottest part of the day.
  • Mulch around the base of plants to keep root temperatures down.
  • Water consistently in the morning to help plants face the day’s heat.

Insufficient Deadheading

Deadheading, or removing spent blooms, is crucial for petunias. If old flowers are left on the plant, it will divert energy toward seed production rather than generating new blooms.

Why Deadheading Matters:

  • Stimulates the plant to focus on new flower buds.
  • Keeps the plant looking neat and tidy.
  • Prevents seed formation, which signals the plant to slow bloom production.

Solution:
Pinch or snip off faded flowers regularly, including the seed pod beneath the bloom. Some newer petunia varieties, like Wave or Supertunia®, are self-cleaning, but even these benefit from occasional deadheading in mid-summer.


Nutrient Imbalances

Petunias are heavy feeders, especially when grown in containers or hanging baskets. A lack of proper nutrients — or too much of one type — can lead to poor flowering.

Common Nutrient Issues:

  • Too much nitrogen: Promotes lush green foliage at the expense of flowers.
  • Lack of phosphorus and potassium: These are essential for bud and flower formation.

Solution:
Feed petunias with a balanced, water-soluble fertilizer or one labeled for flowering plants, like 10-20-15 or 15-30-15, every 7-10 days during the growing season. Reduce nitrogen-heavy feedings in mid-summer and increase phosphorus for better blooms.


Leggy Growth and Overcrowding

As petunias grow, they tend to become leggy — long stems with fewer leaves and flowers. This often occurs when:

  • Plants compete for sunlight.
  • Air circulation is poor.
  • Stems grow unchecked without periodic pruning.

Leggy plants produce fewer flowers because their energy is focused on sustaining elongated stems instead of developing blooms.

Solution:

  • Pinch back or cut stems by one-third to one-half in mid-summer to encourage bushier, more compact growth.
  • Thin out overcrowded beds or containers.
  • Maintain proper plant spacing when planting in spring.

Watering Mistakes

Both underwatering and overwatering can negatively impact petunia blooming.

Watering Issues:

  • Underwatering: Causes stress, wilted flowers, and dropped buds.
  • Overwatering: Leads to root rot and discourages blooming.

Solution:

  • Check soil moisture regularly; water when the top 1-2 inches of soil feels dry.
  • Ensure containers have proper drainage.
  • Water deeply in the morning rather than with shallow, frequent sips.

Pest and Disease Pressure

Mid-summer brings an increase in garden pests and fungal diseases, both of which can compromise bloom production.

Common Petunia Pests:

  • Aphids
  • Spider mites
  • Caterpillars
  • Thrips

Common Diseases:

  • Powdery mildew
  • Botrytis (gray mold)
  • Root rot

Solution:

  • Inspect plants regularly for signs of pests and treat early with insecticidal soap or neem oil.
  • Avoid overhead watering to reduce fungal issues.
  • Remove infected or dead plant material promptly.
  • Ensure good air circulation around plants.

Natural Flowering Cycle

Even with perfect care, petunias naturally have a mid-season slump. After several months of continuous blooming, the plants need a rest period to rejuvenate.

Solution:
In late July or early August:

  • Trim back petunias by about one-third to stimulate fresh growth.
  • Feed with a balanced or bloom-boosting fertilizer.
  • Water consistently.

Within 1-2 weeks, new growth and flower buds should appear, reviving your petunia display for the remainder of the season.


Container Limitations

Petunias grown in containers or hanging baskets can deplete soil nutrients and become rootbound by mid-summer.

Effects of Being Rootbound:

  • Reduced nutrient and water absorption.
  • Stunted growth.
  • Fewer or no flowers.

Solution:

  • Replenish the top few inches of soil with fresh potting mix.
  • Repot overly rootbound plants into larger containers.
  • Use slow-release fertilizer granules in addition to liquid feedings.

Conclusion

Petunias are beloved for their lively, colorful displays, but like all plants, they have their seasonal challenges. If your petunias stop blooming in mid-summer, it’s typically due to a combination of heat stress, nutrient imbalances, lack of deadheading, pests, and natural growth cycles. Understanding these factors is the first step toward restoring your plants’ vitality.

By practicing consistent care — regular deadheading, balanced feeding, proper watering, pruning, and timely pest management — you can keep your petunias healthy and blooming beautifully well into fall.

Petunias may need a little extra attention during the hottest months, but with a mid-season refresh and ongoing maintenance, they’ll reward you with vibrant, continuous color that brightens your garden, patio, or balcony until the first frost.


Pro Tip:
Choose heat-tolerant, self-cleaning petunia varieties like Supertunia Vista® or Wave® series for a more resilient, low-maintenance display throughout the entire summer.

What Are the Top Benefits of Growing Basil at Home

What Are the Top Benefits of Growing Basil at Home

Basil, scientifically known as Ocimum basilicum, is one of the world’s most beloved and versatile herbs. Known for its aromatic leaves and vibrant flavor, basil plays a central role in various global cuisines, especially Italian, Thai, Mediterranean, and Indian. But beyond its culinary appeal, growing basil at home offers a treasure trove of benefits — from health perks and environmental advantages to cost savings and mental well-being.

In this article, we’ll delve into the top benefits of growing basil at home and why this simple herb deserves a prime spot in your kitchen garden, balcony, or windowsill.


Easy to Grow and Maintain

One of the foremost reasons people love growing basil at home is its ease of cultivation. Basil thrives in warm, sunny conditions and requires minimal effort to grow.

Key Growing Requirements:

  • Sunlight: At least 6 hours of direct sunlight daily.
  • Soil: Well-drained, nutrient-rich soil.
  • Watering: Consistent moisture without waterlogging.

Even beginners with limited gardening experience can successfully grow basil in pots, window boxes, or garden beds. Its fast growth rate means you’ll have fresh leaves to harvest in just a few weeks after planting.


Enhances the Flavor of Home-Cooked Meals

Basil is a culinary superstar. Its fresh, peppery-sweet flavor with hints of mint and clove can instantly elevate the taste of numerous dishes. When you have fresh basil growing at home, you can enjoy the unmatched flavor and aroma of just-picked leaves in your cooking.

Popular Culinary Uses:

  • Italian cuisine: Pesto, pasta sauces, and bruschetta.
  • Thai dishes: Stir-fries, curries, and soups.
  • Salads: Caprese salad with tomatoes and mozzarella.
  • Beverages: Basil-infused lemonades and teas.

Having basil within arm’s reach encourages healthier, home-cooked meals with rich flavors.


Packed with Nutrients and Antioxidants

Basil isn’t just a flavorful herb; it’s also highly nutritious. Its leaves are loaded with essential vitamins and minerals.

Nutritional Highlights:

  • Vitamin K: Supports bone health and blood clotting.
  • Vitamin A: Promotes good vision and immune health.
  • Vitamin C: Boosts immunity and skin health.
  • Calcium, Magnesium, and Iron: Supports bone strength, heart function, and oxygen transport.

In addition to these, basil is rich in antioxidants like flavonoids and polyphenols, which help combat free radicals and reduce oxidative stress in the body.


Natural Stress Reliever and Mood Booster

The refreshing aroma of basil has calming effects that help reduce stress and anxiety. Studies suggest that basil’s essential oils — particularly linalool and eugenol — have mood-enhancing properties.

Benefits for Mental Health:

  • Acts as a natural anxiolytic (anxiety-reducing agent).
  • Its scent promotes mental clarity and relaxation.
  • Can ease symptoms of depression and mental fatigue.

Simply plucking fresh basil leaves, crushing them between your fingers, and inhaling their fragrance can provide a quick mood lift during stressful moments.


Supports Immune Health

Fresh basil leaves contain powerful antibacterial, antiviral, and anti-inflammatory compounds. Regular consumption of basil can strengthen your body’s defense mechanisms.

Key Immune-Boosting Compounds:

  • Eugenol: Anti-inflammatory and antimicrobial.
  • Cineole: Fights respiratory infections.
  • Linalool: Antibacterial and immune-modulating.

Adding fresh basil to your daily diet may help protect against common colds, flu, and minor infections while also promoting overall wellness.


Acts as a Natural Air Purifier

Having basil plants indoors improves air quality. Like many other houseplants, basil can absorb airborne toxins and release oxygen, creating a healthier home environment.

Air-Purifying Benefits:

  • Removes formaldehyde, benzene, and carbon dioxide.
  • Releases oxygen, enhancing air freshness.
  • Adds humidity, reducing dry indoor air.

Placing basil pots near kitchen windows or living areas not only adds greenery but also improves your home’s indoor air quality naturally.


Cost-Effective and Sustainable

Buying fresh herbs from grocery stores can become expensive, especially for organic varieties. Growing your own basil is a cost-effective alternative.

Economic Benefits:

  • Reduces grocery expenses.
  • Provides a continuous harvest from a single plant.
  • Minimizes food waste since you can harvest only what you need.

It also contributes to a more sustainable lifestyle by reducing the carbon footprint associated with packaging and transporting store-bought herbs.


Natural Insect Repellent

Basil’s strong aroma not only pleases humans but also deters unwanted insects like mosquitoes, flies, and garden pests.

How It Works:

  • The essential oils in basil leaves act as a natural insecticide.
  • Placing basil plants on windowsills, balconies, or patios can keep bugs away.
  • Basil oil can be mixed with water and sprayed around the home for added protection.

This natural repellent feature makes basil a valuable plant for eco-friendly pest control.


Medicinal and Therapeutic Uses

For centuries, basil has been revered in traditional medicine systems such as Ayurveda and Chinese medicine for its healing properties.

Common Traditional Uses:

  • Digestive Aid: Relieves bloating, nausea, and indigestion.
  • Respiratory Relief: Eases coughs and asthma symptoms.
  • Skin Care: Treats acne and skin irritations.
  • Headache Remedy: Basil oil massages can alleviate headaches.

Modern studies continue to explore basil’s potential in reducing blood sugar, lowering cholesterol, and protecting against oxidative stress.


Adds Beauty and Fragrance to Your Home

Beyond its functional benefits, basil is an attractive plant that adds charm to any indoor or outdoor space. Its lush green leaves, delicate flowers, and aromatic scent create a pleasant ambiance.

Decorative Benefits:

  • Complements kitchen counters, balconies, and windowsills.
  • Adds a touch of greenery to apartments and homes.
  • Offers seasonal blooms in white or purple shades.
  • Fills the air with a sweet, peppery fragrance.

It’s a simple yet effective way to enhance your living environment naturally.


Conclusion

Growing basil at home is much more than cultivating a culinary herb. It’s about embracing a lifestyle that prioritizes health, sustainability, and well-being. From enhancing your home-cooked meals and supporting immune health to purifying indoor air and reducing stress, the benefits of growing basil at home are numerous and far-reaching.

Whether you have a sprawling garden, a cozy balcony, or just a sunny kitchen window, a pot of fresh basil can bring life, flavor, and positivity into your home. It’s easy to grow, low-maintenance, and endlessly rewarding — making it one of the most valuable herbs to nurture.

So, if you haven’t already, grab a basil plant or some seeds today and enjoy the countless benefits it brings to your home and life!

How Often Should You Water a Queen Palm

How Often Should You Water a Queen Palm

Graceful, elegant, and a favorite feature of subtropical and tropical landscapes, the Queen Palm (Syagrus romanzoffiana) has become one of the most popular ornamental palms planted along driveways, parks, resort gardens, and residential properties worldwide. Known for its feathery, arching fronds and smooth, slender trunk, the Queen Palm brings a touch of paradise to any outdoor space.

However, while it’s admired for its relatively low maintenance, one of the most crucial aspects of Queen Palm care is proper watering. Both underwatering and overwatering can lead to health issues like frond browning, root rot, and stunted growth.

This article answers an essential question for gardeners, landscapers, and palm enthusiasts:
How often should you water a Queen Palm?

Let’s explore the ideal watering frequency, how environmental factors influence it, the signs of over- and underwatering, and practical care tips for keeping your Queen Palm lush, green, and thriving.


About the Queen Palm

Before we dive into watering guidelines, understanding the natural habits of the Queen Palm can help clarify its needs.

  • Botanical Name: Syagrus romanzoffiana
  • Family: Arecaceae
  • Native Habitat: South America (Brazil, Argentina, Uruguay)
  • Climate Preference: Subtropical to tropical
  • Growth Habit: Fast-growing, evergreen palm, up to 50 feet tall
  • Leaf Type: Arching, pinnate fronds up to 15 feet long
  • Soil Preference: Well-draining, fertile soil

The Queen Palm is valued for its quick growth, aesthetic appeal, and resilience — but like all palms, it thrives best when its water and soil conditions are properly managed.


How Often Should You Water a Queen Palm?

General Watering Guidelines

  • Newly Planted Queen Palms (first 6 months):
    Water 2–3 times per week to establish strong roots.
  • Established Queen Palms (after 6 months):
    Water once every 7–14 days during warm months, and every 14–21 days in cooler weather.

Golden Rule:
Water deeply and infrequently, allowing the top few inches of soil to dry between waterings.


Factors That Influence Queen Palm Watering Frequency

The optimal watering schedule for a Queen Palm depends on several factors:

Age and Establishment

  • Young palms require more frequent watering to develop a strong root system.
  • Mature palms with well-established roots are drought-tolerant and need less frequent watering.

Temperature and Season

  • Summer and hot months: Increase watering frequency due to faster evaporation and active growth.
  • Winter and cooler months: Reduce watering, as palms enter a slower growth phase.

Tip: Always adjust your watering routine to seasonal changes.


Soil Type and Drainage

  • Well-drained sandy or loamy soils prevent waterlogging and root rot.
  • Clay-heavy soils retain moisture longer and need less frequent watering.

Tip: Improve drainage with organic matter or raised planting if necessary.


Rainfall and Natural Moisture

  • Regular rain reduces the need for supplemental watering.
  • In dry spells or drought-prone regions, increase watering frequency.

Tip: Use a rain gauge or soil moisture meter to monitor soil conditions.


How to Check If Your Queen Palm Needs Water

Soil Test

Insert a finger or moisture meter 3–4 inches deep into the soil:

  • Dry soil: Time to water.
  • Moist soil: Wait another day or two.

Visual Cues

  • Drooping or yellowing fronds can indicate dehydration.
  • Dry, brittle leaf tips suggest water stress.

Frond Health

Healthy Queen Palm fronds should remain:

  • Deep green
  • Arching and supple
  • Free from brown, crispy tips

Best Watering Techniques for Queen Palms

Deep Root Watering

Use a slow, deep watering method to soak the soil down to 12–18 inches. This encourages deep root development and drought resilience.

Tip: Water slowly using a soaker hose or drip irrigation around the root zone.


Water Around the Drip Line

Apply water around the outer perimeter of the canopy (drip line), where the active feeder roots are located — not directly against the trunk.


Morning Watering

Water early in the day to reduce evaporation loss and minimize fungal risks.


Seasonal Watering Guide

SeasonNewly Planted PalmsEstablished Palms
Spring/Summer (Active Growth)2–3 times per weekEvery 7–10 days
Autumn/Winter (Dormancy)Once a weekEvery 14–21 days

Signs of Overwatering and Underwatering

Overwatering Symptoms

  • Yellowing or browning fronds, especially lower leaves
  • Mushy, foul-smelling roots (root rot)
  • Algae or mold growth on soil surface
  • Stagnant, puddling water around base

Solution:
Improve soil drainage, reduce watering frequency, and remove any decayed plant material.


Underwatering Symptoms

  • Dry, crispy frond tips
  • Fronds that droop, wilt, or prematurely brown
  • Stunted growth and weak trunk

Solution:
Increase watering frequency, ensuring deep saturation of the root zone.


Special Watering Tips for Queen Palms

Mulch Around the Base
Apply a 2–3 inch layer of organic mulch (pine bark, wood chips) around the root zone to retain moisture, regulate soil temperature, and suppress weeds. Keep mulch 2–3 inches away from the trunk to prevent rot.


Avoid Overhead Watering
Water directly onto the soil, not on the foliage, to minimize fungal issues and wastage.


Adjust During Heatwaves
In extended heat, water every 4–5 days for established palms and check moisture levels more frequently.


Container-Grown Queen Palms
In pots, Queen Palms dry out faster. Water when the top 1–2 inches of soil feels dry, typically once every 5–7 days in summer.


Common Watering Mistakes to Avoid

  • Watering shallowly and frequently, leading to weak, surface roots.
  • Allowing standing water around the base, promoting fungal infections.
  • Neglecting young palms, which require consistent moisture for root establishment.
  • Overwatering during cold months, risking root rot in dormant conditions.
  • Using fast-draining sandy soil without mulching, leading to rapid moisture loss.

Conclusion

Watering a Queen Palm properly is vital for its health, vigor, and appearance. While known for its drought tolerance once established, this elegant palm still requires regular, deep watering — particularly when young or during hot, dry spells.

As a general rule:

  • Water newly planted Queen Palms 2–3 times a week.
  • Water established Queen Palms once every 7–14 days in warm months and every 14–21 days in cool weather.

Adjust based on soil type, rainfall, temperature, and frond health indicators. Prioritize deep, slow watering at the root zone and avoid waterlogging.

By following these guidelines and paying attention to environmental conditions, you’ll keep your Queen Palm thriving, lush, and an eye-catching focal point in your landscape for decades to come.