Where Should You Place a Birdbath in the Garden?

Where Should You Place a Birdbath in the Garden?

A birdbath is one of the simplest yet most effective ways to attract beautiful, beneficial wildlife into your garden. Not only do they provide birds with a crucial source of drinking water and a place to bathe, but they also contribute to the aesthetic appeal and serenity of any outdoor space. However, placing a birdbath in the right location is essential for both the safety of visiting birds and the overall success of your garden’s ecosystem.

In this article, we’ll explore why birdbath placement matters, the ideal spots to position a birdbath, factors to consider before choosing a location, and helpful tips to ensure your garden becomes a safe and attractive haven for birds.


Why Is Birdbath Placement Important?

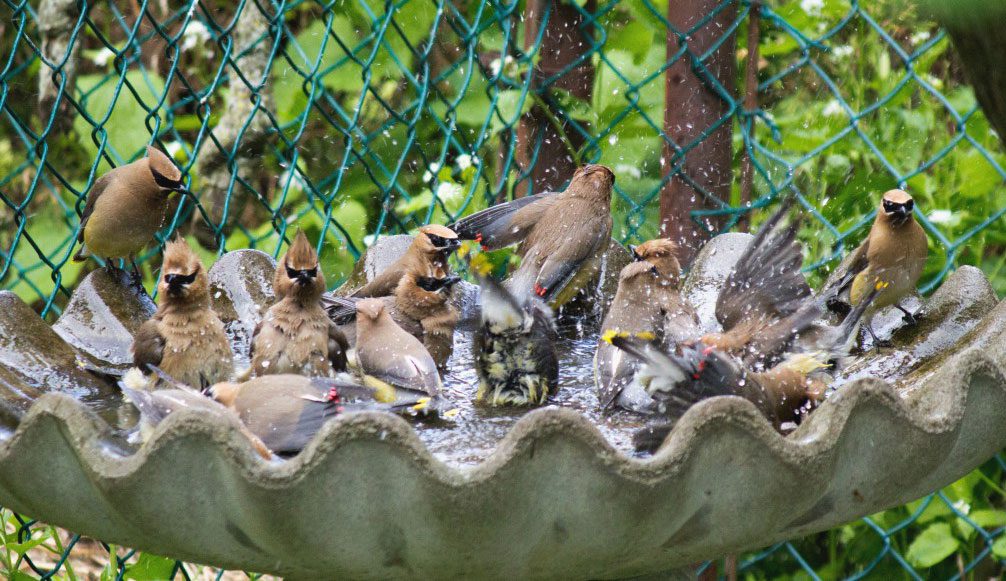
A birdbath isn’t just a decorative feature — it’s a functional resource for wildlife. Birds need water to stay hydrated, especially during dry spells and in urban areas where natural water sources are limited. Bathing helps birds keep their feathers clean and in good condition for insulation and flight.

The placement of your birdbath affects:

  • How frequently birds use it
  • Their safety from predators
  • Water cleanliness and temperature
  • Visibility for birdwatching enjoyment
  • The bath’s maintenance needs

A poorly positioned birdbath can remain unused or even become hazardous for the very creatures it’s meant to help.


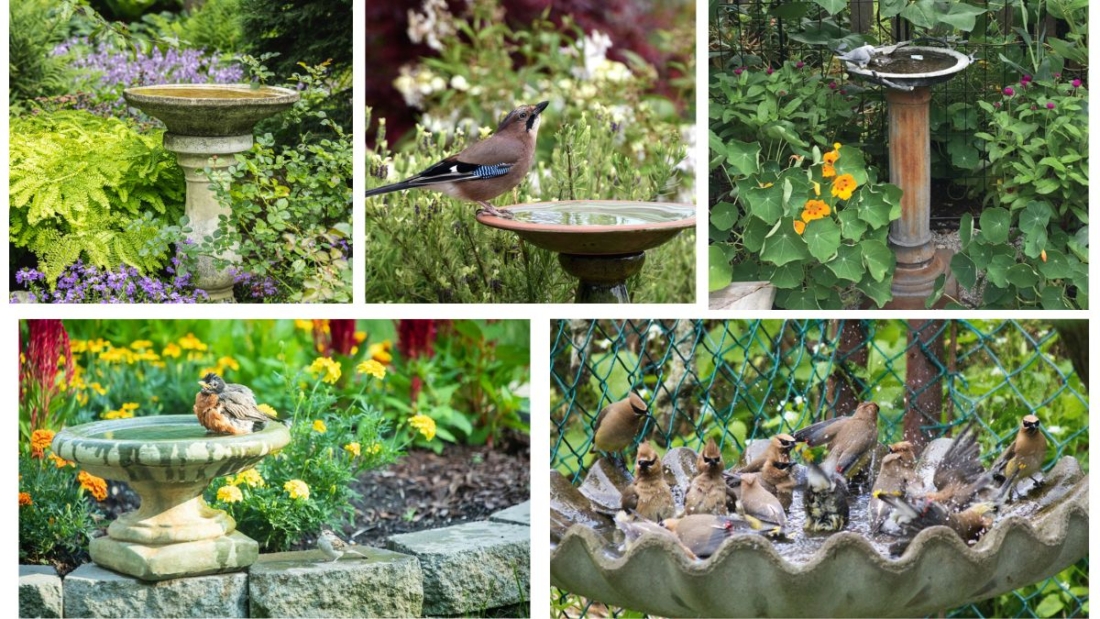
Best Places to Put a Birdbath in Your Garden

Near Trees or Shrubs (But Not Too Close)

Placing a birdbath within 5–10 feet of trees or shrubs is ideal. Birds prefer to have cover nearby to quickly retreat if predators approach. Branches offer perches for preening after bathing and shelter from the elements.

Caution: Avoid placing the birdbath directly beneath branches where leaves and droppings can fall into the water, contaminating it.


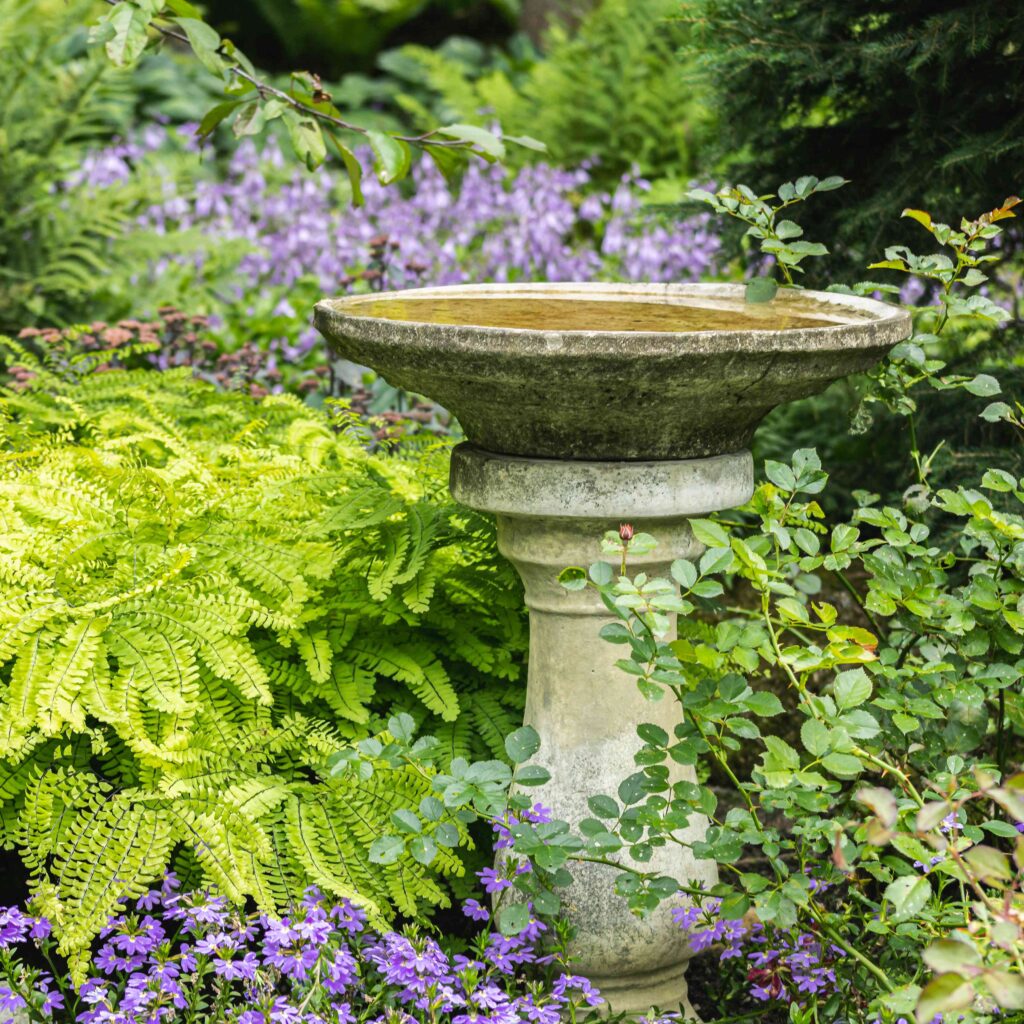
In a Partially Shaded Area

Direct sun heats up water quickly and accelerates algae growth, making the bath less appealing and more difficult to maintain. On the other hand, deep shade might make it too cool, especially in cooler seasons.

Optimal spot:
A location that receives morning sunlight and afternoon shade is ideal, keeping the water fresh, clean, and comfortably temperate throughout the day.


Away from Dense Ground Cover

Ground-level birdbaths should be set away from dense shrubs or tall grass that can conceal lurking predators like cats or snakes. Birds need an open area around the bath to spot danger while drinking or bathing.


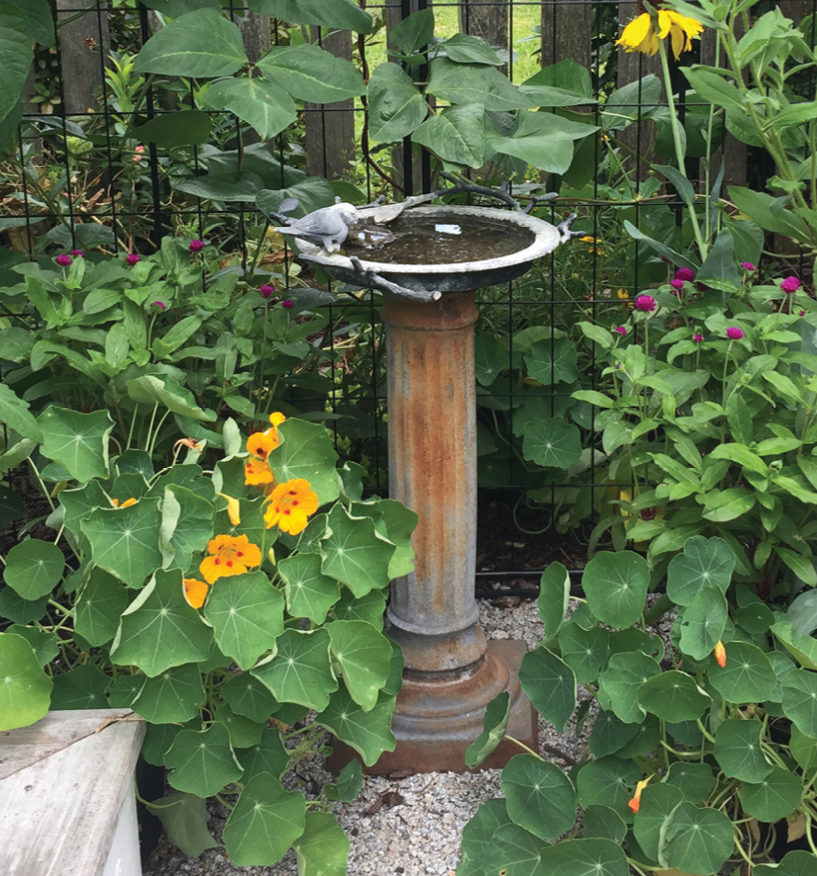
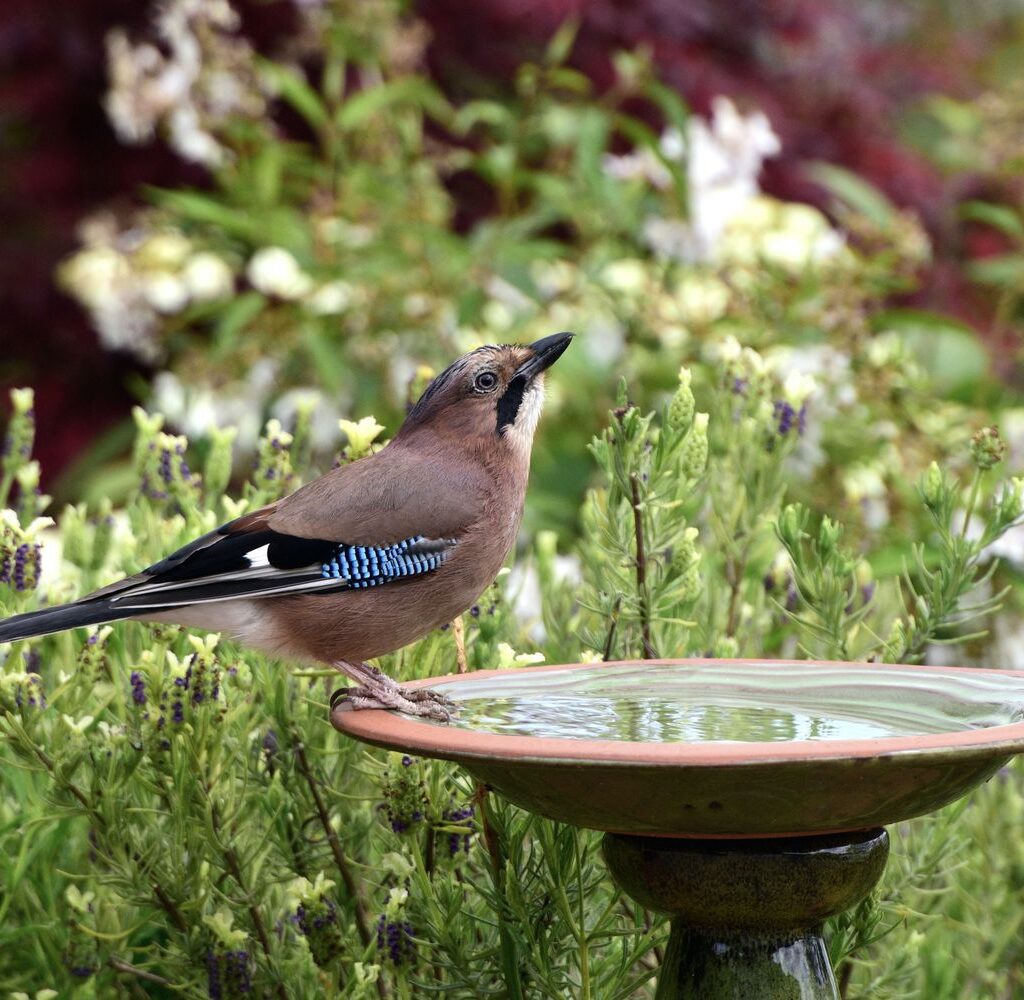
Near Bird-Attracting Plants

Enhance your birdbath’s appeal by placing it near native flowering plants, berry-producing shrubs, or seed-bearing flowers. These not only attract birds but offer natural food sources, increasing the chances of frequent visits.

Good companion plants include:

  • Sunflowers
  • Coneflowers
  • Black-eyed Susans
  • Serviceberry
  • Elderberry

Within Clear Sight from Indoors

If birdwatching is one of your goals, choose a spot that’s visible from a kitchen window, patio, or favorite indoor seating area. This allows you to observe birds without disturbing them.


On a Stable, Level Surface

For safety, position your birdbath on level ground to prevent tipping. A wobbly bath can scare birds away or cause injury.

If your garden is uneven, consider a birdbath with a wide, sturdy base or use flat stones or pavers to stabilize it.


Factors to Consider Before Placing a Birdbath

Safety from Predators

Always prioritize bird safety. Avoid placing birdbaths too close to:

  • Thick bushes or ground covers where cats can hide
  • Open, exposed areas far from any potential cover

A safe distance of 5–10 feet from shelter is recommended.


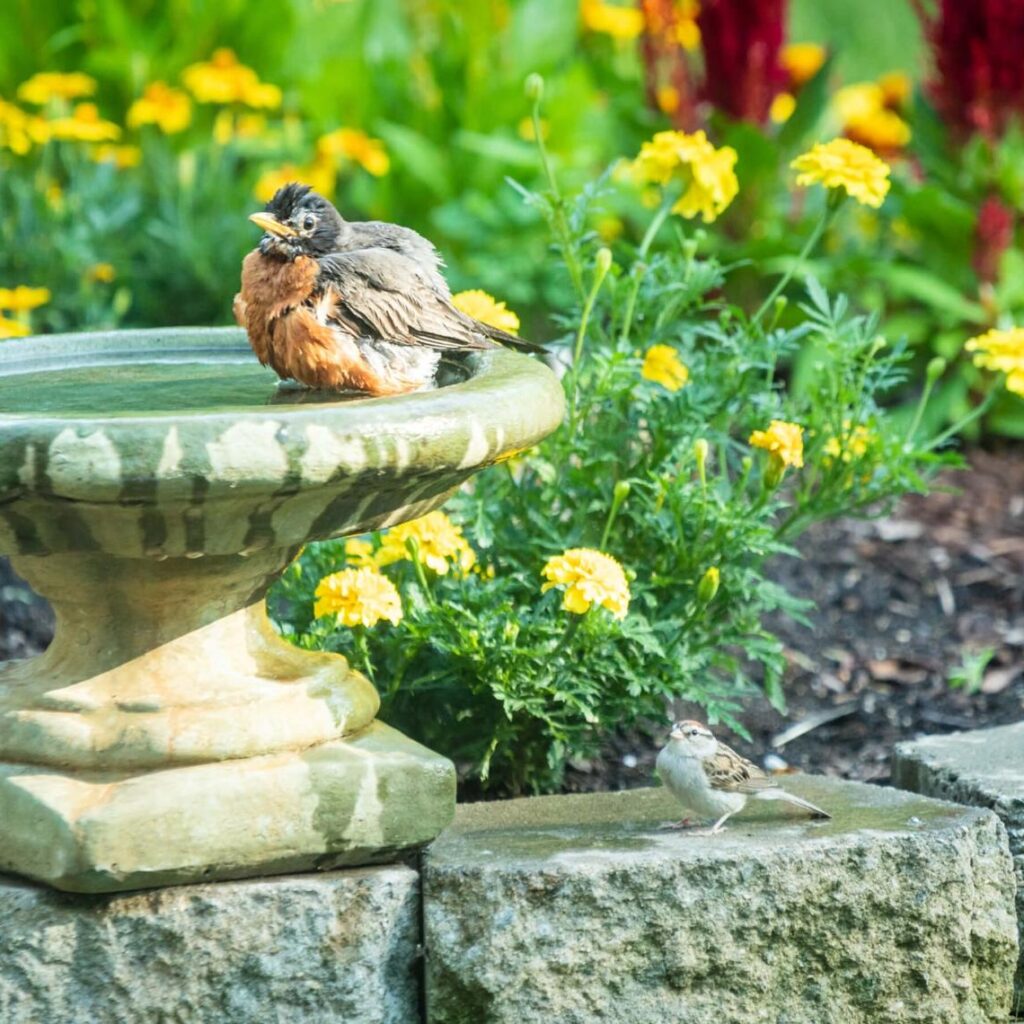
Accessibility for Birds of All Sizes

Ensure birds can easily land, drink, and bathe by:

  • Keeping the water depth shallow (1–2 inches)
  • Adding stones or pebbles in the bath for perching spots
  • Ensuring gradual sloping sides in large baths

Maintenance and Cleaning

Place your birdbath where it’s easy to access for frequent cleaning and refilling. Dirty, stagnant water can spread disease among birds.

Tip: Position it near a garden tap or rain barrel for convenience.


Protection from Strong Winds

Windy spots can cause water to splash out or make birds feel unsafe. Position your birdbath in a sheltered location with moderate air movement.


Seasonal Adjustments

In hot climates, move birdbaths into more shade during peak summer. In cold regions, locate baths in a sunny, sheltered spot during winter to reduce freezing.

Optional: Use heated birdbaths or de-icers in colder climates to offer year-round water.


Comparison of Different Birdbath Placements

LocationAdvantagesDisadvantages
Near trees/shrubsShelter, perching spots, safetyDroppings or debris contamination if too close
Open sunny spotEasy visibility, warmth in winterQuick evaporation, algae growth in summer
Partial shadePrevents overheating, reduces algaeMay cool too much in early morning hours
Near flower bedsAttracts birds with food sources nearbyRequires careful predator monitoring
Under eaves/awningsSheltered from rain, wind, and harsh sunLimited visibility and accessibility

Extra Tips for Attracting More Birds

  • Add multiple birdbaths at varying heights (ground level, pedestal, hanging) to cater to different bird species.
  • Use natural stones in the bath for perching and to help fledglings climb out.
  • Keep water fresh and clean — replace every 2–3 days.
  • Avoid placing baths near reflective surfaces (like windows) to prevent bird collisions.
  • Combine with a bird feeder or nesting box nearby for a complete bird-friendly garden.

Environmental Benefits of a Well-Placed Birdbath

Aside from birdwatching joy, a strategically placed birdbath offers environmental benefits:

  • Supports pollination indirectly by encouraging pollinator-friendly bird species.
  • Reduces insect pests, as many garden birds feed on harmful bugs.
  • Promotes local biodiversity, enhancing the ecological health of your garden.

Conclusion

Where should you place a birdbath in the garden?
The ideal location is:

  • 5–10 feet from trees or shrubs for safety
  • In a partially shaded area to keep water cool and clean
  • Away from dense ground cover to avoid predators
  • Near flowering or fruit-bearing plants to attract more birds
  • On stable, level ground for bird safety and easy maintenance
  • Within clear view from your home if you enjoy birdwatching

A well-placed birdbath transforms your garden into a safe haven for birds, enhances biodiversity, and offers endless opportunities for peaceful observation. By considering both the needs of your feathered visitors and practical garden management, you can create a thriving, bird-friendly environment right outside your door.

When Should You Harvest Basil for Maximum Flavor?

When Should You Harvest Basil for Maximum Flavor?

Basil (Ocimum basilicum) is one of the most beloved herbs in home gardens and kitchens worldwide. Its fresh, aromatic leaves elevate a range of dishes — from classic Italian pesto to Thai curries and refreshing herbal teas. While growing basil is relatively easy, knowing when to harvest basil for maximum flavor is key to enjoying its peak aroma, taste, and culinary value.

In this article, we’ll explore the optimal timing, techniques, and frequency for harvesting basil. You’ll also learn how season, plant age, and flower development affect basil’s flavor, and how proper harvesting can prolong your plant’s productivity.


Why Does Harvest Timing Matter for Basil Flavor?

The flavor of basil comes from its essential oils, which are responsible for its distinctive fragrance and taste. These oils fluctuate throughout the plant’s growth cycle.

Harvesting at the right time ensures:

  • Maximum concentration of aromatic oils
  • Fresher, sweeter, and more complex flavors
  • Prolonged leaf production and plant health

Harvesting too early can reduce the plant’s vigor, while waiting too long—especially after flowering—leads to leaves becoming bitter and less aromatic.


When Should You Start Harvesting Basil?

You can begin harvesting basil once the plant has at least 6–8 leaves (or reaches about 6–8 inches tall). At this stage, the plant is mature enough to handle leaf removal without stunting growth.

General guideline:
Start light harvesting 4–6 weeks after planting or transplanting seedlings.


Best Time of Day to Harvest Basil

For maximum flavor, the ideal time to harvest basil is:

  • In the morning, after the dew has dried but before the sun’s heat evaporates the essential oils.

Avoid harvesting in the afternoon heat, as essential oils diminish with rising temperatures, reducing flavor intensity.


How Growth Stage Affects Basil Flavor

Growth StageLeaf FlavorIdeal for Harvest?
Seedling (0–4 weeks)Mild, undevelopedNo
4–6 weeks, 6–8 leavesSweet, rich, highly aromaticYes
Pre-flowering (8+ weeks)Peak oil concentration, vibrant flavorBest
Flowering or post-floweringLeaves become bitter and tougherNot ideal

Pro Tip: Regular harvesting delays flowering, preserving optimal leaf flavor longer.


How Does Flowering Affect Basil Flavor?

As basil matures, it naturally attempts to flower and produce seeds. While the flowers are edible, allowing a basil plant to bloom drastically affects its leaf quality:

  • Essential oil production drops.
  • Leaves turn bitter.
  • Growth slows as energy shifts to seed production.

To maintain maximum flavor:
Pinch off flower buds as soon as they appear. This redirects energy into leaf growth and prolongs the harvest window.


How to Harvest Basil Properly

Correct harvesting technique improves yield, extends plant life, and ensures flavor-rich leaves.

Step-by-Step Guide:

  1. Use clean, sharp scissors or pinch stems with your fingers.
  2. Cut stems just above a leaf pair or node (where two leaves grow opposite each other).
  3. Leave at least two sets of healthy leaves on the plant to promote regrowth.
  4. Harvest from the top down to encourage bushy growth.

Tip: Avoid stripping leaves from the bottom, as it weakens the plant structure.


How Often Can You Harvest Basil?

Basil is a fast-growing herb. During its active growing season (spring and summer), you can:

  • Lightly harvest every 1–2 weeks
  • Perform a heavy harvest (up to ⅓ of the plant) every 3–4 weeks

Frequent, moderate harvesting actually stimulates new growth and delays flowering, keeping your basil plant productive for months.


Seasonal Basil Harvesting Schedule

SeasonHarvest FrequencyNotes
SpringEvery 7–10 daysStart light harvests once plants have 6–8 leaves
SummerEvery 5–7 days (as needed)Peak growing season — frequent, moderate harvest
FallEvery 7–14 daysReduce frequency; harvest before first frost
WinterOnly if grown indoorsIndoor basil grows slower; harvest sparingly

Signs Your Basil Is Ready for Harvest

Look for these signs to ensure peak flavor:

  • Plants at least 6–8 inches tall
  • 6–8 mature leaves
  • Vibrant green, unblemished leaves
  • No visible flower buds (or pinch them off immediately)

Avoid harvesting pale, yellowing, or wilting leaves, as they lack flavor and nutrients.


Best Practices for Prolonging Basil Harvest

  • Pinch off flowers as soon as they appear
  • Harvest frequently to encourage bushier, fuller growth
  • Remove any yellow or damaged leaves
  • Keep soil consistently moist but not waterlogged
  • Provide 6+ hours of bright, indirect sunlight daily

How to Store Freshly Harvested Basil

Fresh basil is delicate and loses flavor quickly if not stored properly.

Short-term storage (up to 5 days):

  • Place stems in a glass of water at room temperature.
  • Loosely cover leaves with a plastic bag.

Long-term storage:

  • Freeze whole leaves or blended basil with olive oil in ice cube trays.
  • Make and freeze pesto.
  • Dry leaves (note: drying reduces flavor compared to freezing).

Can You Harvest Basil Year-Round?

Yes — if grown indoors in containers with adequate light and warmth.
Use grow lights during winter to supplement reduced daylight hours and maintain regular, light harvesting.


Conclusion

When should you harvest basil for maximum flavor?
The best time is in the morning when the leaves are fresh, just after the plant reaches 6–8 inches tall with at least 6–8 leaves, and ideally before flower buds appear.

Key takeaways:

  • Start light harvesting about 4–6 weeks after planting.
  • Harvest every 7–10 days in spring and 5–7 days in summer.
  • Cut stems above a node to promote bushy growth.
  • Pinch off flower buds immediately to preserve flavor.
  • Store fresh basil properly for prolonged freshness.

With attentive care and well-timed harvesting, your basil plants will reward you with months of aromatic, flavorful leaves — perfect for culinary creations and herbal remedies.

Why Are Bees Important for Your Vegetable Garden?

Why Are Bees Important for Your Vegetable Garden?

In recent years, the conversation about pollinators has gained significant attention — and for good reason. Among the many creatures that contribute to a thriving ecosystem, bees hold a particularly crucial role. While they’re often associated with honey and wildflowers, their presence in vegetable gardens is just as vital.

Bees are not only responsible for sustaining natural ecosystems, but they also directly impact the health, productivity, and success of your homegrown vegetables. This article will delve into why bees are important for your vegetable garden, how they support plant life, the consequences of their decline, and practical ways to attract and protect these tiny, hardworking allies.


The Role of Bees in a Vegetable Garden

The primary role bees play in vegetable gardens is pollination. Pollination occurs when pollen grains are transferred from the male part of a flower (anther) to the female part (stigma). This fertilizes the plant, enabling it to produce fruits, seeds, and vegetables.

While wind, butterflies, birds, and other insects contribute to pollination, bees are by far the most efficient and dependable pollinators, especially for many of our favorite garden crops.


Which Vegetables Rely on Bees for Pollination?

Not all vegetables depend on bees, but many do — particularly those that develop from flowers. Here’s a breakdown of popular vegetables that benefit from or rely heavily on bee pollination:

Fruits of Flowering Vegetables:

  • Tomatoes
  • Cucumbers
  • Zucchini
  • Squash
  • Melons
  • Peppers
  • Eggplants
  • Pumpkins

These plants produce flowers that need pollination for their fruits to develop properly. Without bees, you might see:

  • Poor fruit set
  • Misshapen or small vegetables
  • Lower yields

Example:
A single squash flower requires multiple pollinator visits to transfer enough pollen for a full, healthy fruit.


Why Are Bees So Effective at Pollination?

Bees are uniquely suited for pollination because:

  • Their bodies are covered in fine hairs that trap pollen.
  • They intentionally collect pollen as food for their larvae.
  • They exhibit flower fidelity — meaning a bee tends to visit the same type of flower in one trip, improving pollination efficiency.
  • Certain bees (like bumblebees) use buzz pollination (vibrating flowers) to dislodge pollen, especially beneficial for tomatoes and eggplants.

Fun fact: Honeybees can visit over 2,000 flowers in a single day!


How Bees Improve Vegetable Quality and Quantity

Increased Crop Yields

Crops pollinated by bees produce more fruits and vegetables per plant. Even partial pollination can result in fewer fruits, while well-pollinated plants reach their full potential.

Better-Shaped Produce

Proper pollination affects the shape and size of vegetables. Poorly pollinated fruits often turn out misshapen or underdeveloped.

Enhanced Seed Production

For seed-saving gardeners, bee pollination ensures viable seeds for future planting.


Consequences of a Bee Decline in the Garden

Over the past few decades, bee populations have suffered due to:

  • Pesticide use
  • Habitat loss
  • Diseases and parasites
  • Climate change

A decline in bees means:

  • Fewer vegetables in your garden
  • Lower food security in communities
  • Disruption of broader ecosystems, as countless plants and animals rely on pollinated plants for survival

In short: Without bees, many gardens would struggle to produce reliable, healthy harvests.


Other Pollinators vs. Bees

While other pollinators like butterflies, moths, and flies play supporting roles, bees remain the most efficient vegetable pollinators due to:

  • High activity levels
  • Pollen-gathering behavior
  • Consistency in visiting specific plant types

Some native bees are even more effective than honeybees for certain crops. For example, mason bees are excellent pollinators for tomatoes and peppers.


How to Attract Bees to Your Vegetable Garden

Creating a bee-friendly garden is easier than you might think. By making a few changes, you can turn your outdoor space into a buzzing, productive haven.

Plant Pollinator-Friendly Flowers

Interplant vegetables with nectar-rich flowers to attract bees.

Great companion plants include:

  • Marigolds
  • Borage
  • Lavender
  • Calendula
  • Sunflowers
  • Zinnias
  • Echinacea

Aim for a continuous bloom from early spring to fall.


Provide Clean Water

A shallow dish with water and pebbles offers a safe drinking spot for bees.


Avoid Chemical Pesticides

Synthetic pesticides and herbicides harm bees directly or poison the pollen and nectar they collect.

Safer alternatives: Neem oil, insecticidal soap, or organic practices.


Use Diverse, Native Plants

Plant a variety of native flowering species to provide food and shelter for local bee species.


Leave Wild Areas

Undisturbed patches of grass, logs, and bare soil create nesting sites for ground-nesting and solitary bees.


The Symbiotic Relationship Between Bees and Vegetable Gardens

It’s a mutually beneficial relationship:

  • The garden provides nectar and pollen for bees.
  • Bees enable pollination, which improves garden productivity.

Encouraging bees in your vegetable garden helps support local bee populations while ensuring more abundant, high-quality harvests for yourself.


Conclusion

Why are bees important for your vegetable garden?
Because they are nature’s most effective pollinators, ensuring your garden thrives. Without them, many crops like tomatoes, cucumbers, squash, and melons would struggle to produce healthy, abundant yields.

By increasing crop production, improving vegetable quality, and sustaining the local ecosystem, bees play an indispensable role in garden health. As bee populations face challenges worldwide, home gardeners can take simple, effective steps to protect and attract these essential pollinators.

Key Takeaways:

  • Many popular vegetables depend on bees for fruit and seed production.
  • Bees’ unique biology makes them highly efficient pollinators.
  • Declining bee populations threaten garden productivity.
  • You can support bees by planting flowers, avoiding pesticides, providing water, and creating nesting habitats.

A healthy, bee-friendly garden isn’t just good for your harvest — it’s a vital step toward a greener, more balanced world.

What Is the Ideal Watering Schedule for Pothos?

What Is the Ideal Watering Schedule for Pothos?

Pothos (Epipremnum aureum), also known as Devil’s Ivy, is one of the most popular and forgiving houseplants, loved for its trailing vines and heart-shaped leaves. Whether you’re a seasoned plant parent or a beginner building your indoor jungle, understanding the ideal watering schedule for pothos is essential for keeping this tropical beauty healthy, vibrant, and thriving.

Watering mistakes — either too much or too little — are among the most common reasons pothos plants struggle indoors. In this article, we’ll explore how often to water pothos, the factors that influence its watering needs, how to identify signs of overwatering and underwatering, and practical tips for establishing a foolproof watering routine.


Why Is Proper Watering Important for Pothos?

Although pothos is known for its resilience and adaptability, providing the right amount of water ensures:

  • Steady, healthy vine growth
  • Lush, glossy leaves
  • Prevention of root rot
  • Reduced risk of yellowing or wilting

Since pothos is native to tropical rainforests where it thrives in humid, well-drained environments, mimicking these conditions indoors — especially in terms of watering — is crucial.


How Often Should You Water Pothos?

The ideal watering schedule for pothos isn’t about a strict number of days but depends on environmental factors like light, temperature, humidity, and soil type. Instead of following a rigid schedule, it’s better to water based on soil moisture levels.

General Watering Guidelines:

  • Water every 7–10 days during spring and summer
  • Water every 10–14 days during fall and winter

Key Rule:
Allow the top 1–2 inches of soil to dry out between waterings.

This prevents root rot and mimics the natural dry-wet cycle of its native environment.


Factors That Affect How Often to Water Pothos

Several variables influence how quickly the soil dries out and, consequently, how often your pothos needs water.

Light Exposure

  • Bright, indirect light: Speeds up soil drying, requiring watering every 5–7 days.
  • Low light: Slows down water evaporation; water every 10–14 days.

Note: Avoid placing pothos in direct sunlight as it can scorch the leaves.


Temperature and Season

  • Warm months (spring/summer): Higher evaporation rates — water more frequently.
  • Cool months (fall/winter): Growth slows, and water needs decrease — water less often.

Ideal temperature range: 60°F–85°F (16°C–29°C)


Humidity

Pothos prefers moderate to high humidity (40%–60%). In dry, air-conditioned, or heated homes, soil dries out faster, affecting watering frequency.

Tip: Use a pebble tray or humidifier for added humidity in dry conditions.


Pot Size and Material

  • Small pots dry out faster than large pots.
  • Terracotta pots are porous and lose moisture quickly.
  • Plastic or glazed ceramic pots retain water longer.

Adjust your watering schedule based on pot type and size.


Soil Type

A well-draining potting mix is essential. Heavy, compacted soils retain too much moisture and increase the risk of root rot.

Ideal mix:
60% potting soil + 30% perlite + 10% coco peat or orchid bark.


How to Tell When Pothos Needs Water

Rather than relying solely on a calendar, use these practical methods to check soil moisture:

Finger Test

Insert your finger about 1–2 inches into the soil.

  • Dry? Time to water.
  • Still moist? Wait a few days.

Wooden Stick or Skewer Test

Push a wooden skewer or chopstick into the soil.

  • If it comes out dry and clean, water your pothos.
  • If moist soil sticks to it, wait a bit longer.

Soil Moisture Meter

For accuracy, use a moisture meter and water when the reading drops to 3 or lower on a 1–10 scale.


Signs of Overwatering and Underwatering

Overwatering Symptoms:

  • Yellowing leaves (especially lower leaves)
  • Wilting despite moist soil
  • Soft, mushy stems
  • Root rot (brown, foul-smelling roots)
  • Fungus gnats presence

Solution: Let soil dry out completely, remove rotted roots, and adjust watering frequency.


Underwatering Symptoms:

  • Drooping, curling leaves
  • Dry, crispy brown leaf edges
  • Stunted growth
  • Soil pulling away from the pot sides

Solution: Water thoroughly until excess drains from the bottom.


How to Water Pothos Correctly

Step-by-Step Watering:

  1. Check soil moisture using one of the methods above.
  2. If dry, water evenly around the pot until it drains from the bottom.
  3. Discard any water collected in saucers after 15–20 minutes.
  4. Avoid watering the leaves directly; focus on the soil.

Note: Bottom-watering (placing the pot in a shallow tray of water for 20 minutes) is an occasional alternative to encourage deep root hydration.


Seasonal Watering Schedule Example

SeasonLight ConditionsWatering Frequency
SpringBright, indirect lightEvery 7 days
SummerBright, warm conditionsEvery 5–7 days
FallCooler, indirect lightEvery 10–12 days
WinterLow light, dry airEvery 12–14 days

Adjust for humidity, pot type, and soil drainage.


Bonus Tips for Pothos Watering Success

  • Always use room-temperature water to avoid shocking the roots.
  • If using tap water, let it sit for 24 hours to allow chlorine to dissipate.
  • Water less frequently if your pothos is in low light conditions.
  • Use filtered or distilled water if your tap water is very hard or heavily chlorinated.
  • Always ensure pots have drainage holes to prevent water accumulation.

Conclusion

What is the ideal watering schedule for pothos?
There’s no one-size-fits-all rule — it’s about balance, observation, and adjusting based on your plant’s environment. As a general guideline:

  • Water every 7–10 days in warm seasons
  • Water every 10–14 days in cooler months
  • Let the top 1–2 inches of soil dry out before watering

Pay attention to light, humidity, soil type, and pot material to fine-tune your watering routine. Watch for signs of overwatering or underwatering, and adapt your care as needed.

With the right watering habits, your pothos will reward you with trailing vines, vibrant leaves, and a lush, effortless touch of greenery in your home.

How Old Should a Rose Bush Be Before Pruning?

How Old Should a Rose Bush Be Before Pruning?

Roses are one of the most admired and widely cultivated flowering plants worldwide, valued for their beauty, fragrance, and rich symbolism. Whether grown in formal gardens, cottage landscapes, or small home patios, roses thrive with a care routine that includes proper watering, feeding, and pruning. Among these practices, pruning is particularly important for encouraging vigorous growth, abundant blooms, and plant longevity.

But an often-asked question by novice gardeners is: “How old should a rose bush be before pruning?” Pruning at the correct age and time ensures you don’t damage the young plant and that you promote healthy, productive growth.

This comprehensive guide will explore the recommended age for pruning rose bushes, why pruning matters, different types of pruning, and how to care for roses at every stage of their life.


Why Is Pruning Important for Rose Bushes?

Pruning isn’t just about maintaining a tidy appearance. It plays a vital role in the health and performance of a rose bush:

  • Encourages new, vigorous growth.
  • Improves air circulation, reducing the risk of fungal diseases like black spot and powdery mildew.
  • Shapes the plant, promoting balanced structure and preventing it from becoming leggy or top-heavy.
  • Stimulates more abundant, larger blooms.
  • Removes dead, weak, or diseased wood that could compromise the plant.

By strategically cutting back certain parts of the plant, gardeners can control how their rose bushes grow and bloom year after year.


How Old Should a Rose Bush Be Before Pruning?

General Recommendation: After the First Year

As a rule, you should avoid heavy pruning on a rose bush until it is at least one full growing season old — typically in its second year of life. Newly planted rose bushes, whether bare-root or container-grown, need time to establish strong root systems and acclimate to their growing environment.

Why Wait Until the Second Year?

  • First-year roses focus on root and stem development rather than flowering or structural shaping.
  • Pruning too early can reduce the plant’s overall energy reserves.
  • Early pruning might remove essential growth points needed for the plant’s stability and future form.

Light shaping and removing damaged branches is acceptable in the first year, but major structural or rejuvenating pruning should be reserved for the following seasons.


First-Year Rose Care: What to Do Instead of Pruning

In the rose’s first year:

  • Remove dead, broken, or crossing branches gently.
  • Pinch off spent blooms (deadheading) to encourage new flowers.
  • Avoid cutting back main stems.
  • Focus on watering, mulching, and fertilizing to help the plant establish.

This conservative approach sets the foundation for healthy growth in the years ahead.


Best Time of Year to Prune Roses

Timing your rose pruning correctly is just as important as the plant’s age.

  • In most temperate regions: Prune in late winter to early spring, just as new buds begin to swell and before new growth appears.
  • In frost-prone areas: Wait until the risk of hard frost has passed to avoid damage to new shoots.
  • In warm climates: Prune in late winter or after the last flush of blooms.

Pruning at the right time promotes vigorous regrowth and reduces the risk of weather-related damage.


Types of Rose Pruning

Different types of pruning are performed based on the plant’s maturity and health:

1. Light Pruning

  • Removes dead or weak stems.
  • Can be done in the first year.
  • Helps maintain appearance and remove minor damage.

2. Moderate Pruning

  • Involves cutting back one-third to half of the plant’s height.
  • Typically done in the second or third year.
  • Encourages more blooms and a balanced form.

3. Hard Pruning

  • Reduces plant height drastically (to about 6–12 inches).
  • Suitable for rejuvenating old or neglected roses.
  • Should only be performed on mature, well-established bushes (3 years+).

How to Prune Roses Properly

Follow these steps for a successful pruning session:

Tools Needed

  • Clean, sharp bypass pruners.
  • Gardening gloves (for thorn protection).
  • Disinfectant (to clean tools between cuts to prevent disease spread).

Steps

  1. Remove dead, damaged, or diseased wood.
  2. Cut back weak, thin stems.
  3. Remove inward-growing or crossing branches to open up the plant’s center.
  4. Identify strong, healthy canes and cut them back by one-third to one-half.
  5. Always make cuts about ¼ inch above an outward-facing bud at a 45-degree angle.

Tip: Avoid leaving long stubs, as these can rot and attract pests.


Age-Specific Pruning Guidelines

Age of Rose BushPruning Actions
0–1 YearLightly remove dead or damaged stems, deadhead flowers.
1–2 YearsBegin moderate shaping, remove weak canes, and open plant center.
3+ YearsPerform moderate to hard pruning, removing one-third to half of growth and rejuvenating old canes.

Special Cases: Pruning Different Types of Roses

Not all roses grow the same way, and their pruning requirements differ:

1. Hybrid Tea, Floribunda, and Grandiflora Roses

  • Require moderate to hard pruning in early spring.
  • Encourage robust flowering by removing older canes.

2. Climbing Roses

  • Avoid hard pruning for the first 2–3 years.
  • In early years, tie long canes horizontally to promote side shoots.
  • After establishment, prune dead, weak, or crossed canes and spent blooms.

3. Shrub and Landscape Roses

  • Require minimal shaping in the first two years.
  • Light annual pruning maintains structure and encourages blooms.

Common Pruning Mistakes to Avoid

  • Pruning too soon: Never hard-prune first-year plants.
  • Cutting too close to buds: Leave a small gap to prevent die-back.
  • Neglecting tool hygiene: Dirty tools can spread diseases.
  • Removing too much at once: Over-pruning weakens the plant.

Benefits of Waiting to Prune Young Roses

  • Stronger, more established root systems.
  • Healthier, balanced growth patterns.
  • More resilient plant structure.
  • Increased flowering potential in later seasons.

Patience in those early months pays off in the form of abundant, beautiful blooms later.


Conclusion

To summarize, a rose bush should be at least one year old before it undergoes any significant pruning. The first year should focus on establishment — providing the plant with water, nutrients, and light shaping. Once the rose enters its second growing season, moderate pruning can help encourage healthy, vigorous growth, better air circulation, and plentiful blooms.

Proper pruning techniques, combined with good cultural practices, ensure that your roses remain strong, disease-free, and radiant for years to come. By respecting the plant’s age and growth cycle, gardeners can enjoy the full splendor of their rose gardens season after season.

How Much Water Does a Mint Plant Need Daily?

How Much Water Does a Mint Plant Need Daily?

Mint (Mentha spp.) is one of the most popular, fragrant, and easy-to-grow herbs in both home gardens and indoor spaces. Known for its refreshing aroma, rapid growth, and culinary versatility, mint thrives in a variety of environments. However, one of the keys to growing healthy, lush, and flavorful mint is understanding its watering needs.

While mint is relatively forgiving, watering it properly ensures strong growth, vibrant leaves, and a continuous harvest throughout the season. So, how much water does a mint plant need daily? The answer depends on several factors — including weather, soil type, growing conditions, and plant size.

In this detailed guide, we’ll discuss how often and how much to water mint plants, signs of overwatering and underwatering, tips for growing mint indoors and outdoors, and how to adjust your watering practices based on environmental conditions.


Why Is Proper Watering Important for Mint Plants?

Like all plants, mint relies on water for:

  • Photosynthesis: The process by which plants make food.
  • Nutrient transport: Moving nutrients from the soil to different parts of the plant.
  • Structural support: Water keeps plant cells turgid, maintaining upright stems and leaves.
  • Temperature regulation: Water cools the plant and prevents wilting during hot days.

Since mint is a fast-growing herb with shallow roots and broad leaves, it requires consistent moisture — but not soggy soil. Both overwatering and underwatering can lead to poor growth, disease, and flavor loss.


How Much Water Does a Mint Plant Need Daily?

General Rule: 1 to 2 Inches of Water per Week

Instead of a strict daily requirement, mint’s water needs are better measured weekly, since soil retains moisture and conditions fluctuate. On average:

  • Outdoor mint plants need about 1 to 2 inches of water per week, which can be adjusted based on rainfall and temperature.
  • Indoor mint plants typically require watering every 2 to 3 days, or when the top inch of soil feels dry.

Important: Mint doesn’t necessarily need daily watering unless grown in extremely hot or dry conditions. Watering frequency should be guided by soil moisture, not a rigid schedule.


Factors Affecting Mint’s Watering Needs

Several environmental and plant-specific factors determine how much water your mint needs:

1. Climate and Temperature

  • Hot, dry weather: Increases evaporation, requiring more frequent watering.
  • Cool, humid weather: Reduces water loss, meaning less frequent watering.

2. Soil Type

  • Sandy soil: Drains quickly, requiring more frequent watering.
  • Loamy soil: Retains moisture well, suitable for consistent mint growth.
  • Clay soil: Holds water longer, increasing risk of overwatering.

3. Plant Size and Age

  • Young plants and seedlings: Require moist, consistently damp soil.
  • Mature plants: Can tolerate brief dry spells but prefer evenly moist conditions.

4. Sun Exposure

  • Full sun: Plants dry out faster and need more water.
  • Partial shade: Reduces water loss, requiring less frequent watering.

5. Container vs. Ground Planting

  • Potted mint: Dries out faster and typically needs watering every 1–3 days.
  • In-ground mint: Retains soil moisture longer, requiring less frequent watering.

How to Water Mint Properly

Outdoor Mint

  • Water deeply 1 to 2 times a week.
  • Ensure soil remains consistently moist but not soggy.
  • Water early in the morning or evening to reduce evaporation.

Tip: During peak summer heat, increase watering frequency, especially if leaves begin to wilt.


Indoor Mint

  • Check soil moisture daily by inserting your finger 1 inch deep.
  • Water when the top inch of soil feels dry.
  • Avoid letting the plant sit in standing water, which can cause root rot.

Tip: Use pots with drainage holes and place a saucer beneath to catch excess water.


Signs of Overwatering and Underwatering

Recognizing the signs of improper watering helps correct issues before they harm your mint plants.

Signs of OverwateringSigns of Underwatering
Yellowing leavesDrooping, wilting leaves
Root rot (mushy, foul-smelling roots)Dry, brittle leaves
Mold or mildew on soil surfaceLeaf edges browning or crisping
Stunted growthSlower growth and leaf production

How to Adjust Watering Based on Conditions

During Hot, Dry Weather

  • Water mint plants every 1 to 2 days.
  • Mulch soil to retain moisture.
  • Check containers twice daily for dryness.

During Cool, Rainy Periods

  • Reduce watering to once every 3 to 5 days.
  • Ensure soil has proper drainage to avoid waterlogging.

In Winter or Dormancy

  • Indoor mint plants need less water — every 7 to 10 days.
  • Outdoor mint dies back and doesn’t require watering until spring growth begins.

Best Watering Techniques for Mint

1. Water at Soil Level

Direct water at the base of the plant to minimize moisture on leaves, which can cause fungal diseases.

2. Use a Soaker Hose or Drip Irrigation

For outdoor mint patches, these systems provide slow, even watering directly to the roots.

3. Deep Watering

Ensure water penetrates 6 to 8 inches deep into the soil to promote healthy root growth.


Growing Mint in Different Setups

In Pots

  • Choose a container with drainage holes.
  • Use a light, well-draining potting mix.
  • Water every 1 to 3 days in summer, less in winter.

In the Ground

  • Plant in moist, fertile, well-draining soil.
  • Water deeply once or twice a week.
  • Consider mulching to reduce evaporation.

In Hydroponics

  • Maintain consistent water levels and nutrient-rich solutions.
  • Avoid stagnant water to prevent root rot.

Can You Overwater a Mint Plant?

Yes — overwatering is a common issue, especially in poorly draining soil or containers without drainage. Mint loves moisture but detests soggy conditions. Constant wet soil can suffocate roots, leading to fungal diseases like root rot and leaf blight.

Prevention:

  • Use well-draining soil.
  • Let the top inch of soil dry between waterings.
  • Avoid watering daily unless necessary in extreme heat.

Conclusion

Mint plants typically need about 1 to 2 inches of water per week outdoors or watering every 2 to 3 days indoors. However, watering frequency should always be based on soil moisture, weather conditions, and plant health rather than a rigid schedule.

Understanding the factors that affect your mint plant’s water needs — including climate, soil type, sun exposure, and growth stage — ensures consistent, vigorous growth and a continuous harvest of fresh, fragrant leaves. By learning how to properly water and care for your mint plants, you can enjoy a thriving herb garden in any setting.

How Long Can a Cactus Survive Without Water?

How Long Can a Cactus Survive Without Water?

Cacti are fascinating plants known for their ability to thrive in some of the harshest, driest environments on Earth. From sun-scorched deserts to arid mountain slopes, these hardy succulents have evolved remarkable survival strategies to endure long periods without water. But just how long can a cactus survive without being watered? The answer depends on several factors — species, environment, size, and age — but it’s true that cacti are among the most drought-resistant plants on the planet.

In this article, we’ll explore how long cacti can live without water, what affects their drought tolerance, signs of dehydration, and tips for proper watering to keep your cactus healthy both indoors and outdoors.


Why Are Cacti So Drought-Resistant?

Cacti belong to the Cactaceae family, a group of plants uniquely adapted to survive in arid and semi-arid regions. Their drought tolerance comes from several specialized adaptations:

  • Water-storing tissues (succulence): Cacti have thick, fleshy stems that store water for future use.
  • Reduced leaves: Most cacti have spines instead of leaves, which minimizes water loss through transpiration.
  • Waxy cuticle: Their outer skin is covered with a thick, waxy layer that seals in moisture.
  • Shallow, widespread root systems: These allow cacti to quickly absorb even small amounts of water from rainfall or dew.
  • CAM photosynthesis: A special process where cacti open their stomata (tiny pores) at night to reduce water loss.

These features make cacti exceptionally resilient during long dry spells, whether in their native desert habitat or as houseplants.


How Long Can a Cactus Survive Without Water?

The time a cactus can survive without water varies by species and environment:

  • Small indoor cacti: 4 to 6 weeks without water.
  • Large mature cacti: Several months to a year in the wild.
  • Desert-dwelling cacti (like Saguaro): 1 to 2 years without rainfall under certain conditions.

While these figures are impressive, it’s important to remember that survival isn’t the same as thriving. Even though a cactus can survive without water for long periods, it may stop growing, shrivel, or become stressed if left too dry for too long.


Factors That Affect a Cactus’s Water Needs

Several variables influence how long a cactus can go without water:

1. Cactus Species

Different cactus species have varying water storage capacities:

  • Desert cacti like the Saguaro or Barrel Cactus can survive for a year or more without water.
  • Jungle cacti like the Christmas Cactus prefer more regular watering and won’t tolerate extended dryness.

2. Age and Size

  • Mature, large cacti have larger water reservoirs and survive much longer without water than young or small specimens.
  • Seedlings and young cacti are vulnerable and require more frequent moisture.

3. Season

  • Dormant season (fall and winter): Cacti require minimal water.
  • Growing season (spring and summer): More frequent watering is needed, typically every 10–20 days for outdoor cacti.

4. Environment

  • Hot, dry, and windy climates increase water loss and reduce survival time.
  • Cool, shaded, or indoor settings extend a cactus’s drought endurance.

5. Soil Type

  • Well-draining soil prevents root rot and allows cacti to survive longer droughts.
  • Poorly draining or compacted soil shortens survival time due to root damage.

Signs a Cactus Is Dehydrated

Even though cacti are drought-tolerant, they show signs when they’re too dry for too long:

SymptomCause
Shrinking or shrivelingDehydration and water loss
Wrinkled, sagging skinWater reserves depleting
Yellowing or browningStress from prolonged dryness
Brittle, dry spinesLack of internal moisture
Soft, limp stem tissueSevere dehydration (early wilting)

If these symptoms appear, it’s time to water your cactus carefully — but avoid overwatering, which can lead to root rot.


How to Water a Cactus Properly

Though cacti can survive without water for long periods, appropriate watering ensures healthy growth and longevity.

Indoor Cactus Watering

  • Spring and Summer: Water every 2–4 weeks when soil is fully dry.
  • Fall and Winter: Reduce to once every 6–8 weeks or when soil is bone dry.
  • Always use well-draining soil and pots with drainage holes.

Tip: Check soil moisture by inserting a wooden skewer or your finger 2 inches deep — if it’s dry, it’s time to water.


Outdoor Cactus Watering

  • In most regions, water once every 10–20 days in summer, and every 4–8 weeks in cooler months.
  • Allow soil to dry completely between waterings.
  • Cacti planted in the ground in desert climates may survive solely on rainfall.

Tip: Water deeply at the base of the plant, avoiding overhead watering, which can encourage fungal diseases.


What Happens If a Cactus Gets No Water?

If deprived of water for too long:

  • The cactus draws on stored water in its tissues.
  • The outer skin shrivels as internal reserves deplete.
  • Growth halts to conserve resources.
  • Prolonged dryness can lead to tissue death and plant collapse.

Interestingly, most desert cacti can tolerate periods of complete dryness for months, even up to a year, provided temperatures are cool and there’s minimal evaporation. However, resuming watering before irreversible damage occurs is critical to survival.


Cactus Species Known for Extreme Drought Tolerance

Some cactus species are particularly famous for surviving long without water:

  • Saguaro (Carnegiea gigantea): Can live over a year without rain.
  • Barrel Cactus (Ferocactus spp.): Survives harsh droughts with deep water storage.
  • Golden Ball Cactus (Notocactus leninghausii): Tolerates dry spells of several months.
  • Beavertail Cactus (Opuntia basilaris): Stores water in thick pads for dry seasons.

Can You Underwater a Cactus Indoors?

Yes — even indoor cacti can suffer from underwatering, especially in warm, air-conditioned homes. While it’s better to underwater than overwater, severely dehydrated indoor cacti show:

  • Shriveled, drooping stems
  • Wrinkled or sunken surfaces
  • Brittle spines

The remedy is to water thoroughly when soil is dry, ensuring excess drains out.


Conclusion

Cacti are marvels of nature, capable of surviving weeks to years without water, depending on their species, size, and growing conditions. While their drought endurance is impressive, it’s crucial to balance water deprivation with adequate hydration for healthy, thriving plants.

On average:

  • Indoor cacti need water every 3–6 weeks.
  • Outdoor cacti may go months or a year without rain, especially in cooler or dormant seasons.

Understanding your cactus’s species, environment, and growth stage allows you to fine-tune watering schedules, ensuring these resilient plants stay beautiful, healthy, and long-lived.

How Many Hours of Sunlight Do Tomato Plants Need?

How Many Hours of Sunlight Do Tomato Plants Need?

Tomatoes are among the most popular and rewarding crops for home gardeners. Whether you’re growing plump beefsteaks, tangy cherry tomatoes, or juicy heirlooms, providing the right growing conditions is essential for a bountiful harvest. One of the most crucial factors influencing the health, productivity, and flavor of your tomato plants is sunlight.

In this detailed guide, we’ll explore how many hours of sunlight tomato plants need, why sunlight is vital for their growth, how light affects different growth stages, and tips to optimize light exposure in various gardening setups.


Why Sunlight Matters for Tomato Plants

Tomato plants are warm-season, sun-loving vegetables that thrive on abundant light. Sunlight fuels the process of photosynthesis, where plants convert light energy into sugars and nutrients necessary for growth, flowering, and fruit production.

Without adequate sunlight:

  • Growth becomes spindly and weak.
  • Flowering is reduced or delayed.
  • Fruits may be small, flavorless, or fail to ripen.
  • Plants become more susceptible to pests and diseases.

Understanding your tomato plants’ light requirements ensures healthy, productive plants capable of delivering the rich flavors and vibrant yields every gardener desires.


How Many Hours of Sunlight Do Tomato Plants Need?

Ideal Sunlight Duration: 6–8 Hours Minimum

The general rule for tomato plants is that they require a minimum of 6 hours of direct sunlight daily, but for optimal growth and fruit production, 8 or more hours of full sun is recommended.

The more sun they receive — up to a point — the better they perform. Light exposure affects everything from plant vigor to the quality of the fruits.

Quick Guide:

Sunlight DurationGrowth Impact
Less than 4 hoursPoor growth, weak stems, few or no fruits
4–6 hoursLimited flowering, small fruit yield
6–8 hoursGood growth and steady fruiting
8–10 hoursVigorous growth and maximum yield

How Sunlight Affects Different Growth Stages

Tomato plants have varying needs during different stages of their life cycle. Here’s how sunlight plays a role at each stage:

1. Seedling Stage (0–4 weeks)

  • Light Needs: 12–16 hours of bright light (if starting indoors).
  • Why: Seedlings need extra light to prevent legginess and develop strong stems.
  • Tip: Use grow lights or place seedlings in a bright south-facing window.

2. Vegetative Stage (4–8 weeks)

  • Light Needs: 6–8 hours of full sun outdoors.
  • Why: Promotes sturdy growth and lush foliage.
  • Tip: Gradually harden off indoor plants before moving them outdoors to prevent shock.

3. Flowering and Fruiting Stage (8+ weeks)

  • Light Needs: 8 or more hours of direct sunlight.
  • Why: Supports energy-demanding processes like flowering, pollination, and fruit ripening.
  • Tip: Position plants in unobstructed, sun-rich spots for best results.

Best Sunlight Conditions for Tomatoes

Full Sun

Tomatoes perform best in full sun conditions, where they receive direct sunlight for at least 6–10 hours daily. South or southwest-facing locations are ideal.

Benefits:

  • Strong, bushy plants
  • High fruit yields
  • Rich, flavorful tomatoes
  • Natural protection against fungal diseases via faster drying foliage

Partial Sun or Partial Shade

While it’s possible to grow tomatoes in partial sun (4–6 hours of sunlight), the plants may be less productive, and fruits might take longer to ripen.

Best suited for:

  • Cherry tomatoes and dwarf varieties
  • Hot climates where afternoon shade prevents sunscald

Tip: In very hot, dry climates, a little afternoon shade can actually help reduce heat stress.


Factors Affecting Sunlight Exposure

Several factors influence how much sunlight your tomato plants receive:

1. Geographic Location

  • Northern regions: Maximize exposure by planting in the sunniest spot possible.
  • Southern regions: Monitor for heat stress; consider partial afternoon shade in peak summer.

2. Season

Day length and sun intensity vary with the season, affecting growth and ripening times.

3. Garden Layout

Tall trees, buildings, or other plants can cast shadows. Position tomato plants in open, unobstructed areas for maximum sunlight.

4. Container Gardening

Growing tomatoes in containers allows flexibility. Move pots throughout the day to track the sun, ensuring plants get adequate exposure.


How to Maximize Sunlight for Tomatoes

To ensure your tomato plants receive optimal sunlight:

1. Choose the Right Location

  • Pick a south- or southwest-facing spot.
  • Avoid shaded corners or areas blocked by fences and trees.

2. Use Reflective Surfaces

  • Place white stones, light-colored walls, or aluminum foil nearby to reflect extra light onto plants.

3. Train and Prune Plants

  • Regularly prune suckers (side shoots) to prevent overcrowding.
  • Use cages or trellises to lift plants off the ground and expose foliage to more light.

4. Rotate Containers

If growing in pots, rotate them regularly so all sides receive equal sun exposure.

5. Monitor for Sunscald

In extremely hot climates, too much intense sunlight can cause sunscald (white or yellow patches on fruit). Provide light shade cloth during the hottest part of the day if needed.


Signs Your Tomato Plants Aren’t Getting Enough Sun

Watch for these indicators of insufficient sunlight:

  • Leggy, stretched-out stems
  • Sparse leaves
  • Pale or yellowing foliage
  • Delayed or few flowers
  • Small, underdeveloped, or flavorless fruits

If noticed, consider moving containers, pruning nearby plants, or adjusting plant spacing to improve light access.


Can Tomato Plants Get Too Much Sun?

While tomatoes love the sun, in extreme heat (over 90°F / 32°C), too much intense sunlight can cause:

  • Sunscald on fruits
  • Wilting or leaf scorch
  • Blossom drop

Solution: Use lightweight shade cloth or plant taller companions like sunflowers or corn to provide partial afternoon shade.


Conclusion

Tomatoes are sun-hungry plants that thrive when they receive a minimum of 6 hours of direct sunlight daily, with 8–10 hours being ideal for the healthiest growth, abundant flowering, and the sweetest, most flavorful fruits.

By understanding how light affects each stage of your tomato plant’s development and making thoughtful adjustments to your garden layout, container placement, and plant care, you can maximize sunlight exposure and enjoy a rich, satisfying harvest.

Whether you’re gardening on a sunny balcony, in a backyard plot, or using portable containers, giving your tomato plants the light they crave is one of the simplest and most effective ways to ensure gardening success.

How to Propagate Lavender from Cuttings

How to Propagate Lavender from Cuttings

Lavender is one of the most beloved plants in the garden world — prized for its soothing fragrance, beautiful flowers, and drought-tolerant nature. Native to the Mediterranean region, lavender thrives in sunny, well-drained areas and is widely used in gardens, aromatherapy, and culinary practices. While it’s possible to grow lavender from seeds, propagation by cuttings is a faster, more reliable way to produce healthy, identical plants.

In this comprehensive guide, we’ll walk you through how to propagate lavender from cuttings, when to take them, the tools you’ll need, and care tips to help them thrive.


Why Propagate Lavender from Cuttings?

Propagating lavender from cuttings offers several benefits over growing from seeds:

  • Faster establishment: Cuttings grow faster and bloom earlier than seed-grown plants.
  • Genetic consistency: New plants are exact clones of the parent, preserving desirable traits such as color, size, and fragrance.
  • Cost-effective: One mature lavender plant can yield dozens of cuttings, expanding your garden affordably.
  • Higher success rates: Lavender seeds can be tricky to germinate, while cuttings often root reliably under the right conditions.

When Is the Best Time to Take Lavender Cuttings?

The ideal time to take cuttings depends on the type of cutting and your climate:

  • Softwood cuttings: Taken in late spring to early summer from new, flexible growth.
  • Semi-hardwood cuttings: Taken in mid to late summer when new growth begins to harden.
  • Hardwood cuttings: Taken in late autumn or winter from mature, woody stems.

Softwood cuttings are the easiest and fastest to root, while semi-hardwood and hardwood cuttings may take longer but can be more robust.


Tools and Materials You’ll Need

Before starting, gather these essential tools and materials:

  • Sharp, sterilized pruning shears or scissors
  • Clean pots or seed trays
  • Well-draining potting mix (a mix of compost, sand, and perlite or vermiculite)
  • Rooting hormone (optional but recommended)
  • Clear plastic bag or propagator for humidity control
  • Labels and a pencil
  • Water mister or watering can with a fine rose

Step-by-Step Guide to Propagating Lavender from Cuttings

Follow these detailed steps to successfully propagate lavender from cuttings:


1. Select a Healthy Parent Plant

Choose a vigorous, disease-free lavender plant with strong, healthy stems. Avoid using flowering stems, as they divert energy from root formation. Instead, opt for non-flowering side shoots.


2. Take the Cuttings

  • Using sterilized shears, cut a 3 to 4-inch (7–10 cm) length of stem from the parent plant.
  • Make the cut just below a leaf node (the point where leaves attach to the stem) since this area contains high concentrations of growth hormones.
  • If taking multiple cuttings, keep them moist by placing them in a plastic bag lined with damp paper towel until you’re ready to plant them.

3. Prepare the Cuttings

  • Remove the lower sets of leaves from the bottom half of the cutting, leaving only the top pair of leaves.
  • If the top leaves are large, trim them by half to reduce moisture loss and stress on the cutting.
  • Optionally, dip the cut end into rooting hormone powder or gel to encourage faster root development.

4. Prepare the Potting Medium

  • Use a light, well-draining potting mix. A blend of equal parts compost, coarse sand, and perlite or vermiculite works well.
  • Fill small pots or seed trays with the mix and water lightly to moisten the soil.

5. Plant the Cuttings

  • Make a hole in the soil using a dibber (a pencil or stick works fine).
  • Insert the cut end of each cutting about 1–2 inches deep into the hole.
  • Gently firm the soil around the cutting to hold it upright.
  • Space cuttings about 1 inch apart if planting multiple in a tray.

6. Maintain Moisture and Humidity

  • Mist the cuttings with water and cover the pot or tray with a clear plastic bag or place it inside a propagator to create a humid environment.
  • Keep the plastic from touching the leaves by using stakes or sticks.
  • Place the cuttings in a bright, sheltered location with indirect sunlight. Avoid direct, intense sun, which can cause heat stress.

7. Monitor and Water Regularly

  • Check the soil daily to keep it slightly moist but not soggy.
  • Mist the cuttings as needed to maintain humidity.
  • Remove any cuttings that wilt or develop mold.

8. Check for Root Development

  • After about 3 to 6 weeks, gently tug on a cutting. If you feel resistance, roots have formed.
  • Softwood cuttings typically root faster (around 3 weeks), while semi-hardwood or hardwood cuttings may take up to 6–8 weeks.

9. Potting On the Rooted Cuttings

  • Once a good root system is established, transplant the cuttings into individual pots filled with a well-draining soil mix.
  • Place the young plants in a bright, sheltered spot and water sparingly.
  • Gradually acclimatize them to outdoor conditions if you plan to move them outside permanently.

Caring for New Lavender Plants

To ensure your propagated lavender thrives:

  • Sunlight: Lavender loves full sun. Place plants where they receive at least 6–8 hours of sunlight daily.
  • Soil: Use well-draining, sandy, or rocky soil with a neutral to slightly alkaline pH.
  • Watering: Water sparingly once established. Lavender is drought-tolerant and prefers to dry out between waterings.
  • Pruning: Lightly prune young plants to encourage bushy growth and remove flower buds during the first year to direct energy into root and foliage development.
  • Overwintering: Protect young plants from severe cold in their first winter by moving pots indoors or covering them with garden fleece.

Common Problems and Troubleshooting

ProblemCauseSolution
Wilting cuttingsExcess heat, dry air, or insufficient humidityMist regularly and cover with a plastic bag
Moldy or rotting cuttingsOverwatering or poor drainageImprove airflow, use well-draining soil, reduce watering
Slow rootingLow temperatures or old woody stemsUse younger softwood cuttings, provide gentle warmth

Conclusion

Propagating lavender from cuttings is a rewarding, cost-effective, and eco-friendly way to multiply your favorite lavender plants. By selecting healthy cuttings, providing the right growing conditions, and practicing careful aftercare, you can easily fill your garden, balcony, or patio with these fragrant, hardy plants.

Whether you’re aiming for a lavender hedge, container garden, or gifts for friends and neighbors, learning to propagate lavender ensures a continuous supply of this versatile herb for years to come.

What Are the Most Popular Garden Bulbs?

What Are the Most Popular Garden Bulbs?

Garden bulbs are treasured additions to landscapes and home gardens, prized for their vibrant colors, seasonal reliability, and ease of planting. From the earliest snowdrops of late winter to the towering alliums of early summer, bulbs provide continuous waves of color and interest throughout the year. These underground storage organs house everything a plant needs to grow and bloom, making them both practical and beautiful choices for gardeners of all experience levels.

But with so many varieties available, you might wonder — what are the most popular garden bulbs? In this article, we’ll explore the beloved classics and modern favorites, organized by bloom season and features, while offering planting tips and care advice to help you enjoy a garden that bursts with color year after year.


Understanding Garden Bulbs

Before diving into the plant list, it’s helpful to understand what “bulbs” actually are. In gardening, bulbs refer to underground plant storage structures — though the term is loosely used to include true bulbs, corms, tubers, rhizomes, and tuberous roots. These structures allow plants to survive adverse seasons (winter or drought) and regrow reliably when conditions improve.

True bulbs include tulips, daffodils, and lilies, while plants like crocuses (corms), dahlias (tubers), and irises (rhizomes) are often considered part of the broader bulb category in gardening.


Why Gardeners Love Bulbs

Bulbs are favored for several reasons:

  • Low maintenance: Plant once, enjoy for years.
  • Seasonal beauty: Offer blooms in early spring, summer, or fall.
  • Reliable performers: Return each year in many climates.
  • Easy to propagate: Many multiply naturally underground.

Whether you prefer classic tulips or exotic-looking lilies, bulbs can elevate any garden space with color, form, and texture.


The Most Popular Garden Bulbs

Let’s explore the garden world’s favorite bulbs, celebrated for their beauty, resilience, and adaptability.


1. Tulips (Tulipa spp.)

Why They’re Popular:
Tulips are perhaps the most iconic spring flower, symbolizing renewal and cheer. With thousands of hybrids in nearly every color, tulips range from bold, single blooms to dramatic fringed and parrot varieties.

Bloom Time:
Spring (March to May)

Planting Tips:

  • Plant in fall, 6–8 inches deep.
  • Require well-drained soil and full sun.
  • In warmer climates, pre-chill bulbs before planting.

2. Daffodils (Narcissus spp.)

Why They’re Popular:
Known for their cheerful yellow, white, and orange blooms, daffodils are hardy, pest-resistant, and naturalize easily, forming large colonies over time.

Bloom Time:
Early to mid-spring

Planting Tips:

  • Plant in fall, 4–6 inches deep.
  • Prefer well-drained soil and full to partial sun.
  • Ideal for woodland gardens and borders.

3. Crocuses (Crocus spp.)

Why They’re Popular:
Among the first signs of spring, crocuses offer dainty, goblet-shaped blooms in purples, yellows, and whites, often peeking through late snow.

Bloom Time:
Late winter to early spring

Planting Tips:

  • Plant in fall, 3 inches deep.
  • Ideal for naturalizing in lawns, under trees, or rock gardens.

4. Hyacinths (Hyacinthus orientalis)

Why They’re Popular:
Hyacinths are prized for their intensely fragrant, tightly packed flowers in vivid blues, purples, pinks, and whites.

Bloom Time:
Early to mid-spring

Planting Tips:

  • Plant in fall, 4–6 inches deep.
  • Best in well-drained soil and full sun.
  • Perfect for containers and borders.

5. Snowdrops (Galanthus spp.)

Why They’re Popular:
Delicate, bell-shaped white flowers that herald the end of winter, snowdrops are hardy and naturalize beautifully in woodland settings.

Bloom Time:
Late winter to early spring

Planting Tips:

  • Plant in fall, 2–3 inches deep.
  • Prefer moist, well-drained soil and partial shade.

6. Alliums (Allium spp.)

Why They’re Popular:
Dramatic, spherical clusters of star-shaped flowers atop tall stems add architectural interest to late spring and early summer gardens.

Bloom Time:
Late spring to early summer

Planting Tips:

  • Plant in fall, 4–6 inches deep.
  • Full sun and well-drained soil.
  • Deters pests like rabbits and deer.

7. Lilies (Lilium spp.)

Why They’re Popular:
Lilies offer tall, elegant blooms in a range of colors and fragrances. Varieties like Asiatic, Oriental, and trumpet lilies provide extended summer color.

Bloom Time:
Summer

Planting Tips:

  • Plant in spring or fall, 6–8 inches deep.
  • Require well-drained soil and full to partial sun.
  • Excellent for cutting gardens.

8. Dahlias (Dahlia spp.)

Why They’re Popular:
With extravagant, colorful blooms ranging from tiny pompoms to dinner-plate-sized flowers, dahlias are summer and fall favorites.

Bloom Time:
Midsummer to first frost

Planting Tips:

  • Plant tubers in spring after frost.
  • Full sun and rich, well-drained soil.
  • Regular deadheading promotes continuous blooms.

9. Anemones (Anemone blanda)

Why They’re Popular:
Anemones bring delicate, daisy-like blooms in pastel shades to early spring gardens and naturalize well in woodland areas.

Bloom Time:
Early to mid-spring

Planting Tips:

  • Soak corms before planting.
  • Plant 2–3 inches deep in fall.
  • Thrive in partial shade.

10. Gladiolus (Gladiolus hortulanus)

Why They’re Popular:
Gladiolus spikes produce large, dramatic blooms in a spectrum of colors and are a staple in summer flower arrangements.

Bloom Time:
Midsummer

Planting Tips:

  • Plant corms in spring, staggered every two weeks for continuous blooms.
  • Full sun and well-drained soil.

How to Plant and Care for Garden Bulbs

1. Planting Depth and Spacing:
A general rule is to plant bulbs 2–3 times as deep as the bulb’s height. Space according to variety size.

2. Soil Preparation:

  • Well-drained soil is essential.
  • Amend heavy soils with compost, sand, or grit.

3. Watering:

  • Water bulbs after planting and during dry spells.
  • Avoid water-logged conditions.

4. Fertilizing:

  • Apply balanced, slow-release fertilizer at planting.
  • Supplement lightly in spring for perennials like daffodils and tulips.

5. Post-Bloom Care:

  • Allow foliage to yellow naturally before cutting back.
  • This enables the plant to store energy for next year’s growth.

Conclusion

Garden bulbs remain some of the most cherished and rewarding plants for home gardeners worldwide. From the iconic tulip and cheerful daffodil to the bold dahlia and fragrant lily, bulbs deliver dependable, colorful displays through nearly every season. Their versatility, low maintenance requirements, and wide range of colors, forms, and fragrances make them ideal for gardeners of every skill level.

By understanding their planting requirements, bloom times, and care practices, you can enjoy a vibrant, ever-changing garden filled with the world’s most popular bulbs — ensuring color, beauty, and excitement from late winter to the first frost.