
Growing peanuts in your backyard might sound unusual, especially if you don’t live in a traditional peanut-producing region — but it’s surprisingly simple, fun, and incredibly rewarding. Not only do homegrown peanuts taste fresher than anything you’ll find at the store, but they also make for a unique, conversation-starting addition to your garden.
If you’ve been curious about adding this easygoing legume to your backyard harvest, this complete guide will teach you how to plant peanuts, care for them, and harvest a healthy crop right from your own soil.
Why Grow Peanuts at Home?
Peanuts (Arachis hypogaea) aren’t just for large-scale farms. They’re ideal for home gardens because:
- They enrich the soil by fixing nitrogen.
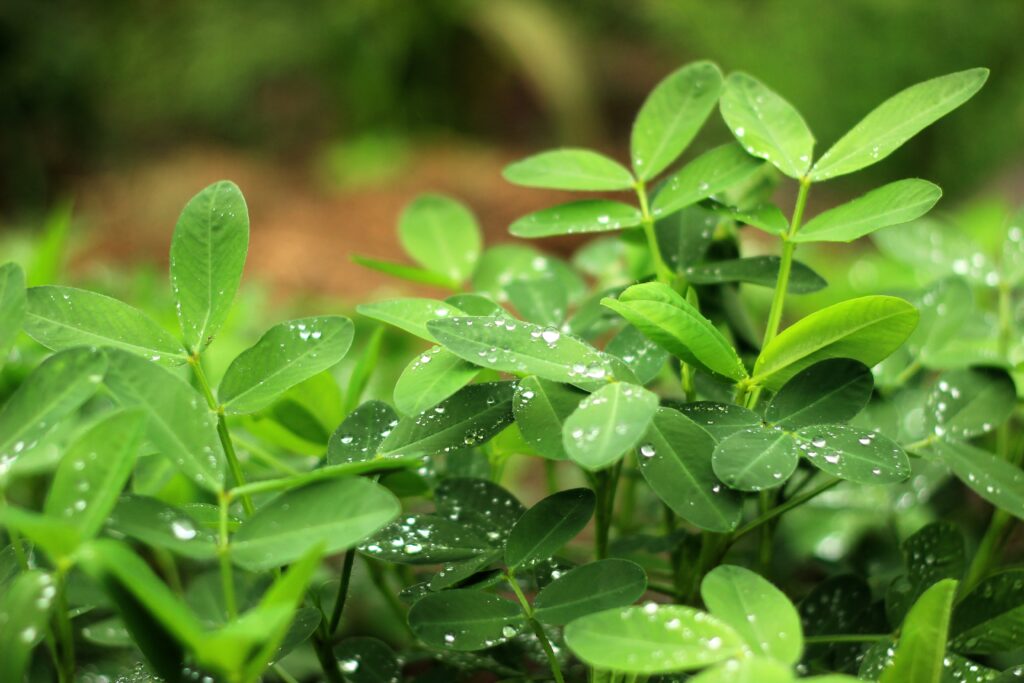
- The plants have attractive, lush green foliage.
- They’re relatively pest-resistant and drought-tolerant.
- It’s a fun, hands-on plant for families, especially when harvesting the nuts underground.
- You can enjoy fresh, chemical-free peanuts roasted, boiled, or made into homemade peanut butter.
Best of all — peanuts require minimal maintenance once established.

Understanding Peanut Plant Basics
Before planting, it’s good to understand how peanuts grow. Peanuts are legumes (like beans and peas) and grow best in warm, sandy, well-draining soil.
Peanuts are unique because they flower above ground, but after pollination, the flower stalks (called pegs) bend down and push into the soil where the peanuts develop underground.
They need a long, frost-free growing season — about 120 to 150 days of warm weather — so they’re best planted in late spring when the soil is warm and the threat of frost has passed.
Choosing the Right Peanut Variety
There are four main types of peanuts you can grow at home:

- Virginia Peanuts: Large, in-shell nuts, perfect for roasting.
- Spanish Peanuts: Small kernels, ideal for snacking and candy.
- Runner Peanuts: Balanced flavor and size, great for peanut butter.
- Valencia Peanuts: Sweet flavor, often used for boiling.
For backyard gardens, Valencia and Runner peanuts are popular because they mature relatively quickly and are easy to grow.
When and Where to Plant Peanuts
Best Planting Time:
- Late spring, when soil temperatures consistently reach 65°F (18°C) or warmer.
- Avoid planting too early — peanuts are sensitive to cold.
Ideal Location:
- Full sun with at least 6–8 hours of direct sunlight daily.
- Loose, sandy, well-draining soil with a pH of 5.8 to 6.2.
- Avoid heavy clay or waterlogged areas.
What You’ll Need
- Raw, unroasted peanuts in the shell (available online or from garden suppliers)
- Garden spade or hoe
- Compost or organic matter
- Mulch (straw, grass clippings, or wood chips)
- Water source
How to Plant Peanuts in Your Backyard
Step 1: Prepare the Soil
Peanuts grow best in loose, friable soil to allow pegs to penetrate easily.
To prepare:
- Till the soil to a depth of 8–12 inches.
- Remove rocks, debris, and old plant material.
- Mix in compost or aged manure for nutrients and drainage.
- Ensure the soil is slightly acidic to neutral (pH 5.8–6.2).
Step 2: Source and Prepare Your Seed Peanuts
You’ll need raw, untreated peanuts. Roasted peanuts won’t germinate.
- Crack open the shells carefully to reveal the seeds (the peanut kernels).
- Leave the thin, papery skin intact — it protects the seed during germination.
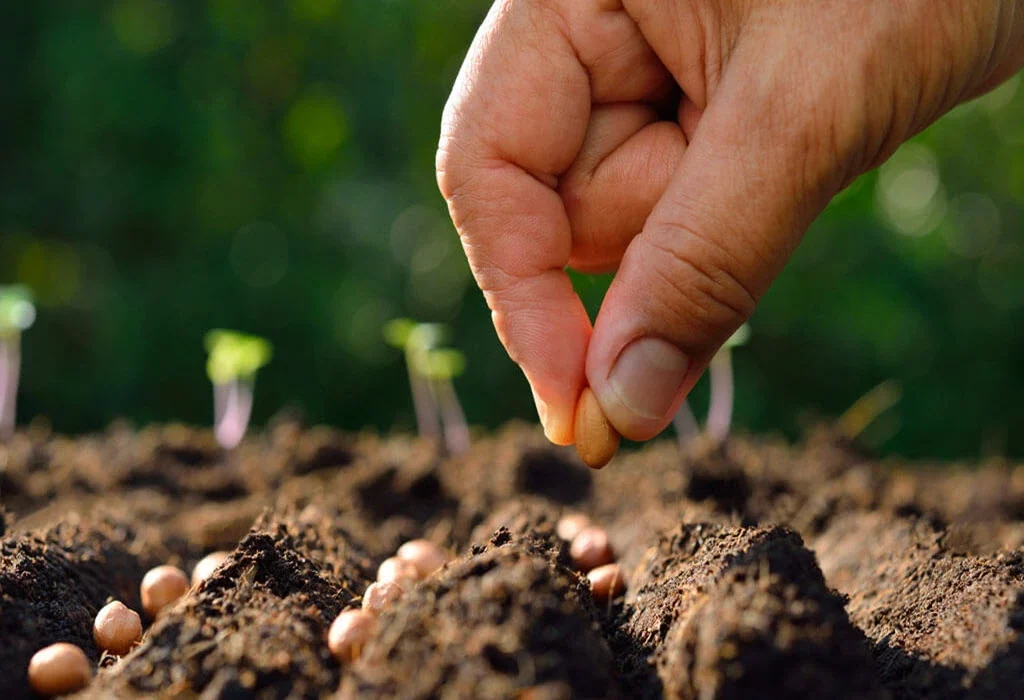
Step 3: Plant the Peanuts
- Dig shallow furrows about 1–2 inches deep and 3 inches wide.
- Place peanuts 2 inches apart, with 18–24 inches between rows.
- Cover lightly with soil, just enough to conceal them.
Tip: Soak the peanuts in water for a few hours before planting to speed up germination.
Caring for Your Peanut Plants
Once planted, peanuts are relatively low-maintenance but appreciate consistent care.
Watering:
- Keep the soil evenly moist but not soggy.
- Water deeply once or twice a week, more during dry spells.
- Peanuts need more water during flowering and pod development (mid to late summer).
Mulching:
- Apply a 2–3 inch layer of straw, grass clippings, or organic mulch to retain soil moisture, suppress weeds, and keep soil warm.
Weeding:
- Hand-pull weeds early and often.
- Avoid deep cultivation to protect developing peanuts underground.
Fertilizing Peanuts
Peanuts fix their own nitrogen, so they don’t require heavy fertilizing.
Before planting:
- Mix in compost or a balanced, low-nitrogen fertilizer if your soil is poor.
During the season:
- A light dose of potassium-rich fertilizer at mid-growth can promote healthy pod formation.
Avoid high-nitrogen fertilizers, which produce excessive foliage at the expense of peanuts.
Watch for Pegging
About 40 days after planting, small yellow flowers appear. After pollination:
- Flower stalks bend toward the soil.
- The pegs burrow into the ground where peanuts begin to form.
Ensure the soil remains loose and free of debris during this time.
Common Pests and Problems
Peanuts are hardy but occasionally face:
| Problem | Solution |
|---|---|
| Aphids | Spray with insecticidal soap or neem oil. |
| Fungal diseases | Avoid overhead watering and use well-draining soil |
| Birds/squirrels | Use row covers or netting if necessary. |
| Root rot | Ensure soil doesn’t stay soggy. |
Proper spacing, sunlight, and drainage will prevent most issues.
When and How to Harvest Peanuts
Peanuts are typically ready 120–150 days after planting, once the foliage turns yellow.
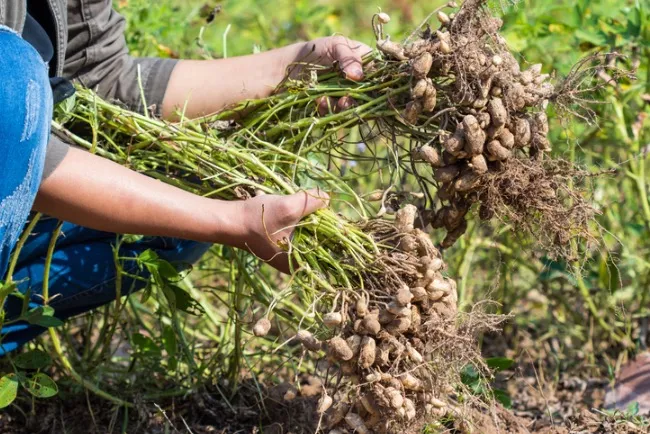
To harvest:
- Loosen the soil around the plant with a garden fork.
- Gently pull up the entire plant.
- Shake off excess soil.
- Let the plant dry in the sun for 2–3 days.
- Strip the peanuts from the plant.
- Cure them in a warm, dry, well-ventilated space for 2–4 weeks.
Once cured, your peanuts are ready for roasting, boiling, or storage!
Storing and Using Homegrown Peanuts
Storage Tips:
- Store dried, unshelled peanuts in a cool, dry place for up to 12 months.
- Keep shelled peanuts in airtight containers.
Uses:
- Roast for snacks.
- Boil for traditional Southern-style boiled peanuts.
- Grind into fresh peanut butter.
- Incorporate into baked goods and savory dishes.
Final Thoughts
Growing peanuts in your backyard is a fun, simple, and productive project for gardeners of all skill levels. With a little preparation and care, you’ll enjoy a bountiful harvest of homegrown peanuts to snack on, share, or turn into homemade treats.
Remember:
- Plant in loose, sunny, well-draining soil.
- Use raw, untreated peanuts.
- Keep soil consistently moist but not soggy.
- Harvest after 120–150 days when foliage yellows.
Whether you’re looking to experiment with new crops, teach kids about gardening, or enjoy fresh, chemical-free nuts, planting peanuts is a rewarding backyard adventure.
Leave A Comment