How to Cut Basil Leaves from a Plant Properly

How to Cut Basil Leaves from a Plant Properly

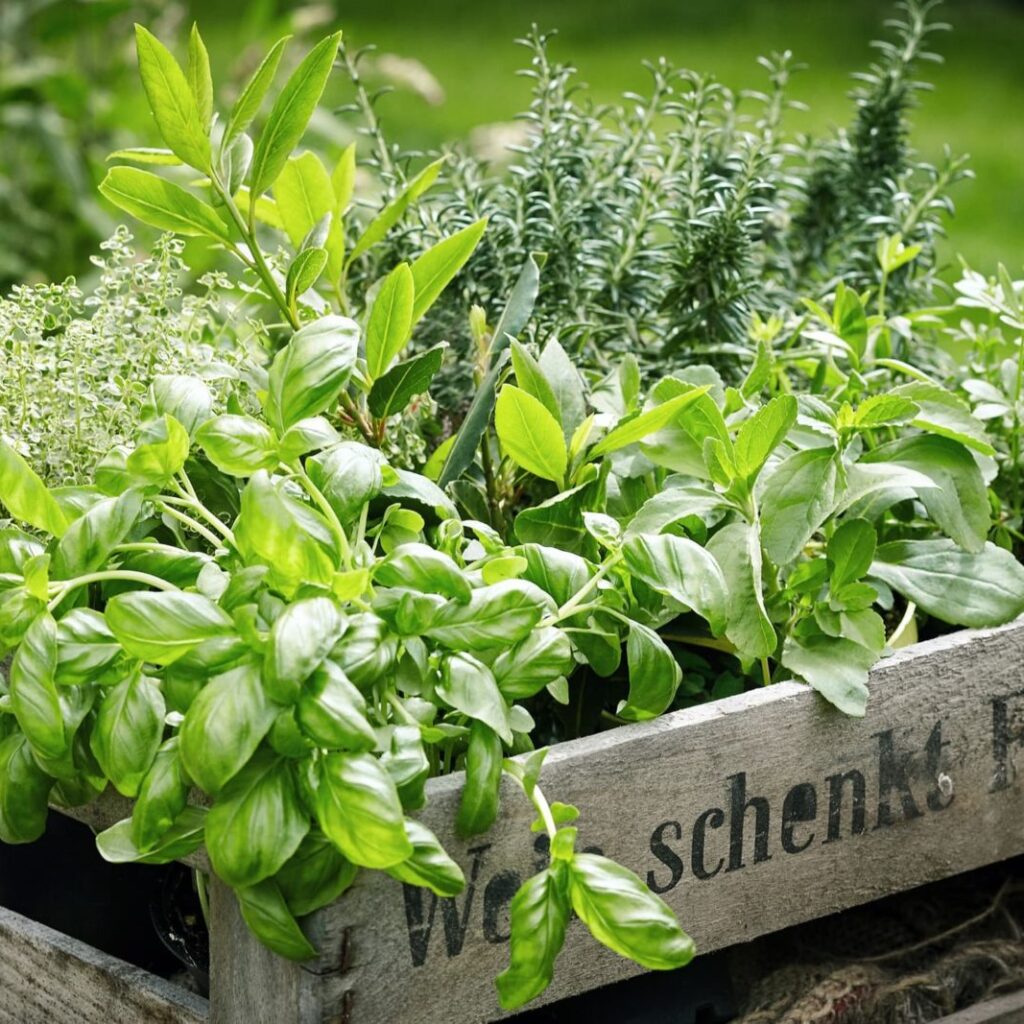
Basil (Ocimum basilicum) is one of the most popular and versatile herbs grown in gardens and containers worldwide. Its rich aroma and distinct flavor make it a staple in kitchens, especially in Italian, Thai, and Mediterranean cuisines. However, to keep your basil plant healthy, productive, and long-lasting, it’s important to harvest it correctly. Cutting basil leaves improperly can stunt growth, encourage early flowering, or even damage the plant permanently.

In this article, we’ll cover why proper cutting matters, when to cut basil, tools you’ll need, the correct technique for cutting basil leaves, and essential post-harvest care tips. By following these steps, you’ll not only enjoy a continuous harvest but also promote a lush, bushy, and thriving basil plant throughout the growing season.


Why Properly Cutting Basil Matters

Harvesting basil isn’t just about plucking a few leaves for your next meal. The way you cut basil leaves can directly affect the plant’s growth pattern, lifespan, and overall health. Proper cutting helps:

  • Encourage bushier growth by preventing the plant from becoming tall and leggy.
  • Delay flowering (bolting), which causes the plant to produce seeds and lose its flavor.
  • Stimulate continuous leaf production, ensuring a steady supply of fresh basil throughout the season.
  • Avoid stress and plant shock, keeping your basil healthy and resilient against pests and diseases.

Incorrect harvesting methods, such as randomly picking leaves or cutting too much at once, can lead to uneven growth and weaken the plant.


When is the Best Time to Cut Basil Leaves?

Timing plays a crucial role in basil harvesting. Picking leaves at the right stage ensures optimal flavor and promotes vigorous regrowth. Here’s what you need to know:

  • Start harvesting when the plant reaches about 6-8 inches in height, usually around 4-6 weeks after planting.
  • The best time of day to harvest basil is early morning, just after the dew has dried but before the sun’s heat intensifies. This is when the essential oils responsible for basil’s flavor and aroma are at their peak.
  • Avoid harvesting immediately after watering or rainfall, as wet leaves are prone to bruising and fungal infections.

If you’re cutting basil for drying or preserving, it’s best to do so before the plant begins to flower. After flowering, the leaves tend to become bitter and less aromatic.


What Tools Will You Need?

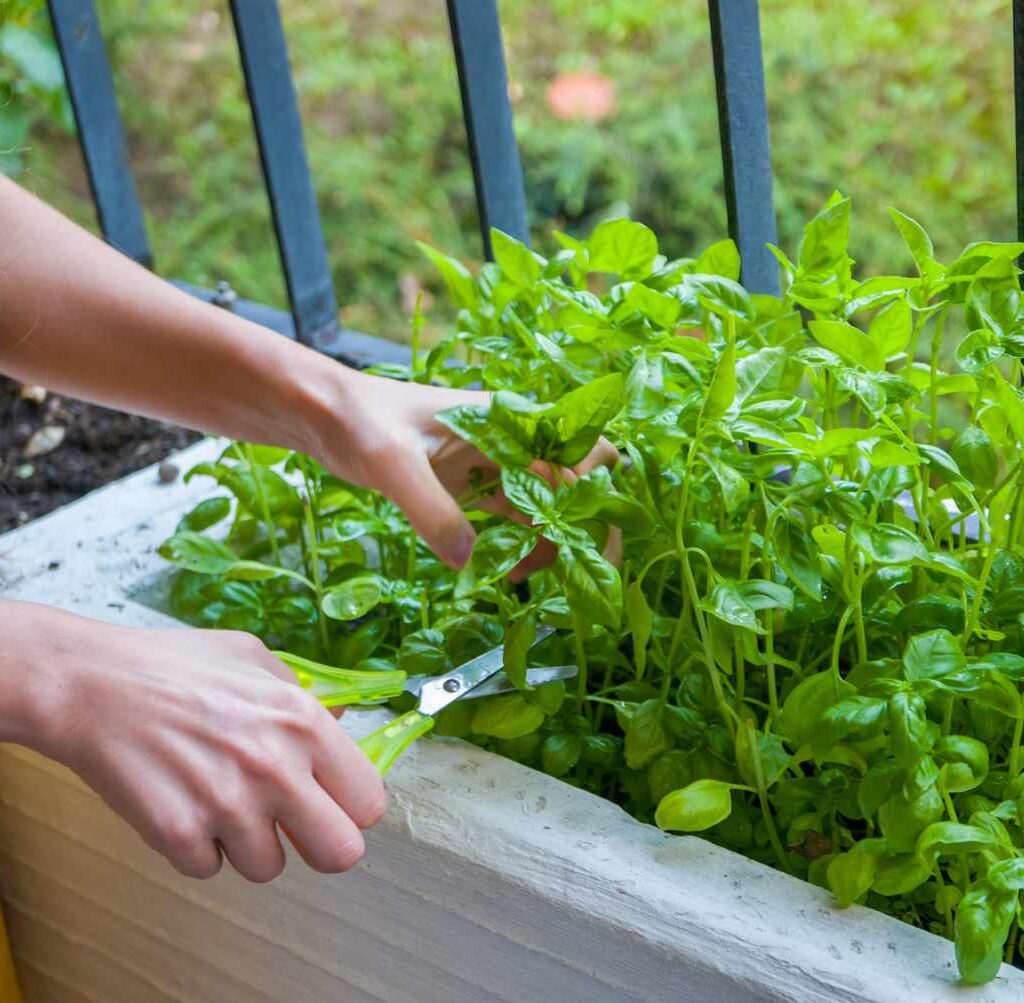
Though you can harvest basil leaves with your fingers, using the right tools ensures clean cuts and minimizes damage to the plant. Here’s what you should have:

  • Sharp garden shears, scissors, or pruning snips
  • Clean hands or gloves (to prevent the spread of diseases)
  • A clean container or basket to collect your harvested leaves

Ensure that your cutting tools are sterilized with rubbing alcohol or soapy water before use to avoid transferring any harmful bacteria or fungal spores to the plant.


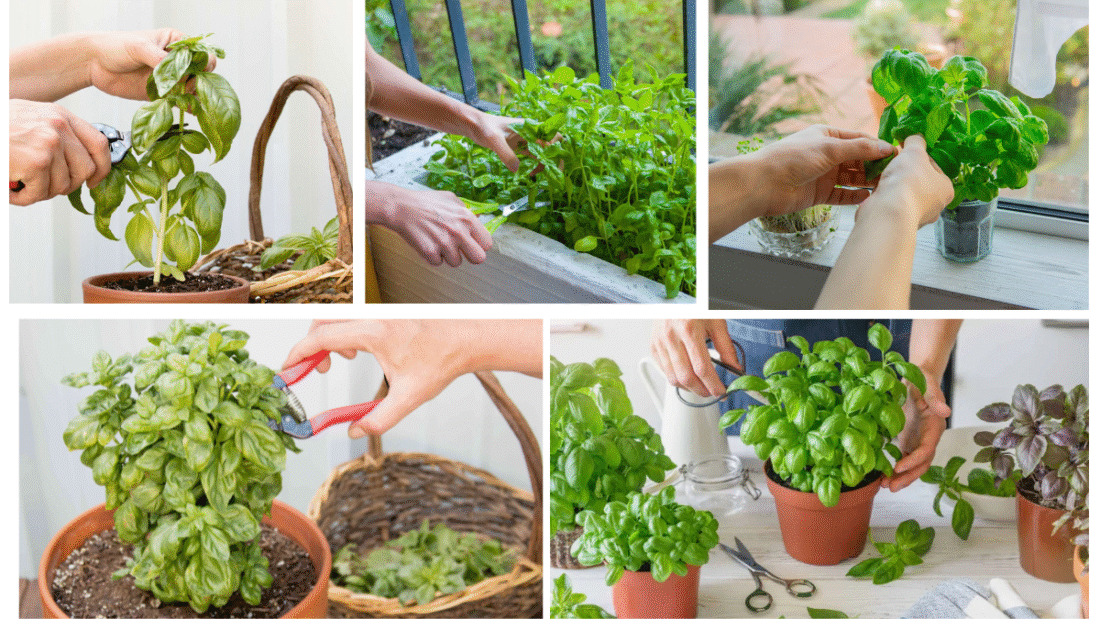
How to Cut Basil Leaves from a Plant Properly: Step-by-Step

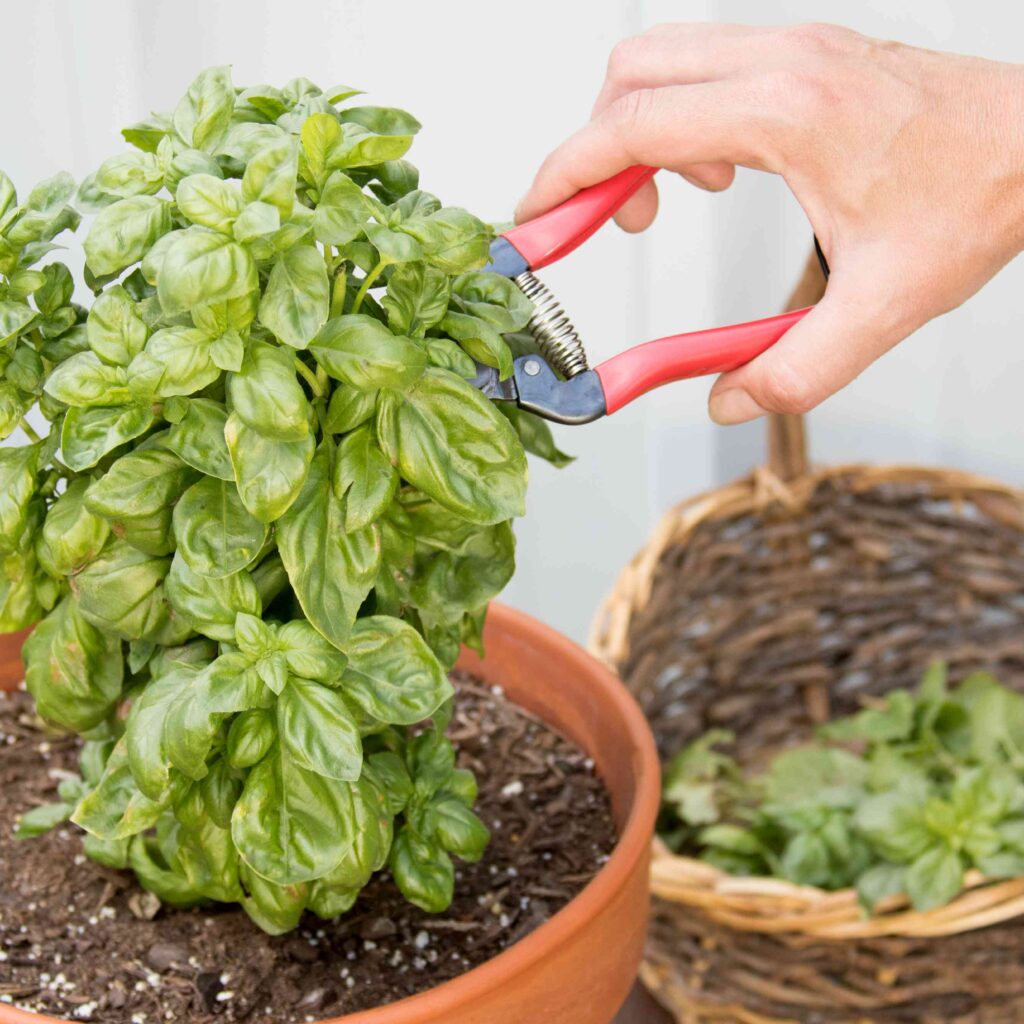
1. Identify the Right Spot to Cut

When harvesting basil, always look for leaf nodes — the small points where two leaves meet the stem. Cutting just above these nodes encourages new shoots to develop from both sides, resulting in a bushier plant.

Never cut from the base of the plant or remove entire stems unless you’re pruning for shape or rejuvenation.


2. Make Clean, Diagonal Cuts

Using your sharp scissors or shears, make a diagonal cut about ¼ inch above a leaf node. This clean cut promotes quick healing and reduces the risk of fungal infections. Diagonal cuts also prevent water from pooling on the cut surface, which can attract pests or lead to rot.

Avoid tearing or pinching stems, as jagged edges heal poorly and can invite disease.


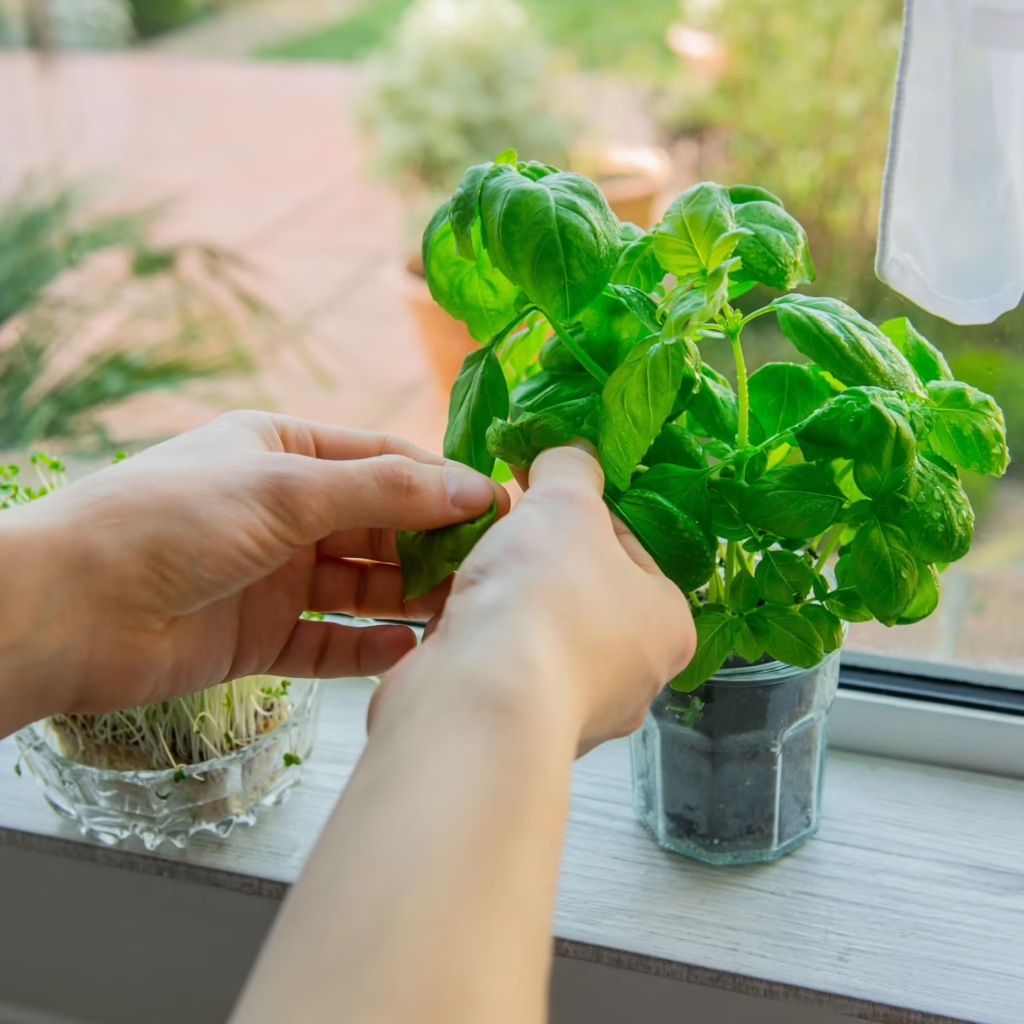
3. Remove the Topmost Leaves First

Start by harvesting the top two to four leaves of each stem. This removes the plant’s growing tip, redirecting energy to the side shoots and preventing vertical, leggy growth.

If your basil plant has already branched out, you can harvest from multiple stems during the same session.


4. Avoid Over-Harvesting

A good rule of thumb is to never harvest more than one-third of the plant at a time. Over-harvesting stresses the plant, reducing its ability to photosynthesize and recover.

After cutting, allow the plant a week or two to regrow before harvesting again.


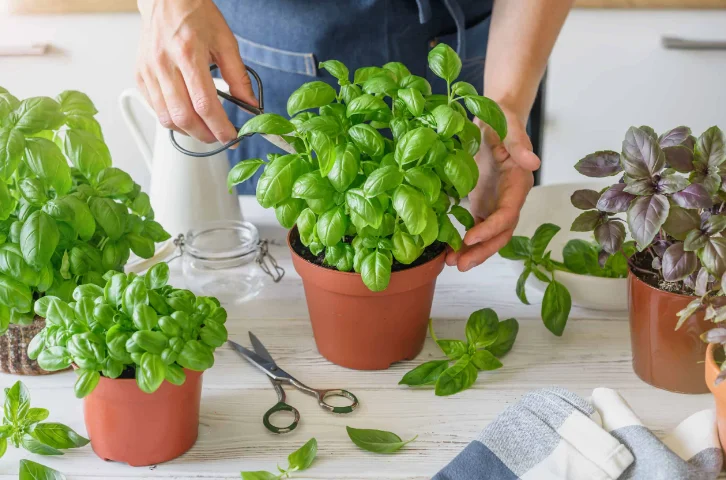
Post-Harvest Care for Basil

After harvesting, give your basil plant some extra care to help it recover and continue thriving:

  • Water the plant thoroughly to reduce stress and support new growth.
  • Remove any dead or yellowing leaves to improve air circulation.
  • Pinch off flower buds as soon as they appear to delay bolting and extend the harvesting period.
  • Optionally, apply a diluted organic liquid fertilizer to support healthy regrowth.

Position the plant in a spot with 6-8 hours of indirect sunlight daily, and ensure well-draining soil to avoid root rot.


Preserving Harvested Basil Leaves

Freshly harvested basil leaves can be used immediately in cooking, but if you’ve picked more than you need, here are a few preservation methods:

1. Refrigeration:

Wrap basil leaves in a damp paper towel and place them in a resealable bag in the vegetable crisper. Use within 3-5 days.

2. Freezing:

Blanch basil leaves in boiling water for 2-3 seconds, then immediately transfer them to an ice bath. Pat dry and store in airtight freezer bags.

3. Drying:

Tie basil stems in small bunches and hang them in a warm, well-ventilated area away from direct sunlight. Once dry, crumble the leaves and store them in an airtight container.

4. Infusing in Oil:

Blend fresh basil leaves with olive oil and freeze in ice cube trays for convenient use in sauces and dressings.


Common Mistakes to Avoid

To keep your basil plant healthy and productive, avoid these common harvesting errors:

  • Harvesting from the lower leaves first: This weakens the plant’s support structure and reduces growth potential.
  • Over-harvesting during early growth stages: Wait until the plant is established before removing large amounts of foliage.
  • Ignoring flower buds: Once a basil plant flowers, the leaves lose flavor. Pinch off buds promptly.
  • Using dull tools or pinching stems by hand: This causes jagged wounds and increases the risk of disease.

Conclusion

Learning how to cut basil leaves from a plant properly is essential for maintaining a lush, healthy, and productive herb garden. By harvesting the right way — targeting leaf nodes, making clean diagonal cuts, and avoiding over-harvesting — you’ll encourage bushy, vigorous growth and extend the life of your basil plant.

With the added benefit of fresher, more aromatic leaves for your kitchen, this simple skill ensures you get the most out of your basil plant season after season. Whether you’re growing basil in a container on your balcony or in a backyard herb patch, applying these harvesting techniques will keep your basil thriving and your dishes full of flavor.

9 Unique Around-Tree Flower Bed Ideas to Transform Your Garden Design

9 Unique Around-Tree Flower Bed Ideas to Transform Your Garden Design

When it comes to enhancing your outdoor space, the area around your trees is often an overlooked opportunity. With a bit of creativity, you can turn these spots into beautiful focal points that elevate your entire garden’s charm. From simple designs to eye-catching arrangements, here are 9 unique around-tree flower bed ideas that will effortlessly transform your garden design.


1. Classic Circular Flower Bed

A timeless favorite, a circular flower bed around a tree adds clean, elegant definition to your landscape. Use bricks, stones, or wooden edging to create a tidy border and fill it with colorful seasonal flowers or lush green groundcovers. Choose shade-tolerant varieties like hostas, impatiens, or begonias for a vibrant, healthy look. This design works especially well for front yard trees and helps create a cohesive, polished garden space.


2. Layered Ring Planting

For a more dynamic look, opt for a layered ring planting design. Start by planting low-growing flowers close to the tree trunk, followed by medium-height plants in a surrounding ring, and taller flowers or shrubs at the outermost edge. This tiered effect creates visual interest and depth while maximizing the use of vertical space. Consider combinations like ferns, astilbes, and foxgloves for a beautiful, shade-friendly display.


3. Rustic Rock Border Bed

Add a touch of rustic charm to your garden by encircling your tree with a rock-bordered flower bed. Use natural stones or river rocks to form a casual, irregular border and fill the inside with hardy, low-maintenance plants. Sedums, creeping thyme, and ajuga work beautifully in this setting. The rocks not only add texture and structure but also help with soil retention and drainage, ensuring your plants stay healthy.


4. Wildflower Woodland Ring

Transform the base of your trees into a natural woodland haven by planting a mix of native wildflowers. This style embraces an informal, free-flowing look, perfect for country or cottage-style gardens. Include plants like columbines, bleeding hearts, and ferns for a soft, organic feel. Allow leaves and moss to gather naturally to enhance the woodland atmosphere and provide a welcoming space for pollinators and wildlife.


5. Mulch and Flower Combo

A practical yet beautiful option is combining rich mulch with a ring of colorful flowers. Mulching around the tree helps retain moisture and protect roots, while a surrounding border of annuals or perennials adds a bright accent. Choose blooms like pansies, violets, or impatiens that thrive in partial to full shade. This simple method is budget-friendly and easy to maintain, perfect for beginner gardeners.


6. Decorative Brick Raised Bed

For a more formal and structured look, build a small raised flower bed around your tree using decorative bricks or pavers. This design elevates your flowers for better visibility and easier maintenance while protecting your tree’s roots. Plant shade-tolerant varieties and cascading ground covers like vinca minor or sweet alyssum to soften the edges. The raised bed also makes seasonal replanting and soil improvement effortless.


7. Succulent and Pebble Arrangement

If you’re aiming for a low-water, contemporary look, create a succulent bed around your tree paired with decorative pebbles or gravel. Hardy varieties like sedum, echeveria, and hens-and-chicks add texture and color while requiring minimal maintenance. Use contrasting colored stones or pebbles to define pathways or patterns within the bed. This modern design is perfect for drought-prone areas and adds stylish curb appeal.


8. Edible Herb Circle

Turn the space around your tree into a functional and fragrant herb garden. Plant culinary herbs like mint, oregano, parsley, and chives in a neat circular bed, choosing varieties that can tolerate partial shade. Not only does this design look charming, but it also offers fresh ingredients for your kitchen. The scent of the herbs will deter some garden pests and attract beneficial pollinators, making it both practical and attractive.


9. Flower and Vine Combo

Combine flowering plants with shade-loving vines for a lush, layered effect around your tree. Plant ground-level flowers like begonias or hostas and intersperse them with vines such as English ivy or creeping Jenny that will spread naturally. This mix creates a soft, cascading look that complements the tree’s natural form. Regular pruning keeps the area tidy while allowing the plants to thrive together in harmony.


Conclusion:
Around-tree flower beds are a fantastic way to turn overlooked garden spaces into stunning visual highlights. Whether you prefer classic designs, rustic charm, or modern minimalism, these ideas offer endless inspiration to upgrade your outdoor sanctuary. Pick a style that matches your garden’s character and enjoy the added beauty and vibrancy it brings to your landscape.

Which Country Is the Leading Ackee Producer in the World?

Which Country Is the Leading Ackee Producer in the World?

Ackee, a tropical fruit with a distinctive pear-like shape and bright red color, holds a unique place in culinary and cultural traditions, especially in the Caribbean. While its use has spread to different parts of the world, there’s one country that stands out as the undisputed leader in its cultivation and export. So, which country is the leading ackee producer in the world?
The answer is Jamaica.

In this article, we’ll explore ackee’s history, its cultural significance, global production patterns, and the reasons why Jamaica leads the world in its production and export.


What Is Ackee?

Ackee (scientific name: Blighia sapida) is an evergreen tree native to West Africa, known for its bright red fruits that split open when ripe to reveal three large black seeds surrounded by creamy, yellowish flesh called arils. The arils are the only edible part of the fruit and are considered a delicacy in several countries.

Ackee is unique for several reasons:

  • It must be fully ripe and naturally opened before it’s safe to eat.
  • Unripe ackee contains hypoglycin A and B, toxins that can cause severe illness or even death.
  • Once properly prepared, ackee has a soft, scrambled egg-like texture and a mild, buttery flavor.

A Brief History of Ackee

Although ackee is native to West Africa, it was introduced to the Caribbean in the 18th century, likely brought by enslaved Africans. It quickly found a new home in Jamaica’s tropical climate, where it flourished and integrated into local diets and traditions.

Over the years, ackee became a staple ingredient in Jamaican cuisine, most famously paired with saltfish in ackee and saltfish — the island’s national dish.

Today, Jamaica remains the primary country cultivating ackee commercially and has built an international reputation for producing and exporting the fruit.


Why Is Jamaica the World’s Leading Ackee Producer?

Several factors have contributed to Jamaica becoming the top global producer of ackee:

1. Favorable Climate and Soil Conditions

Ackee thrives in tropical and subtropical climates with well-drained soils, abundant sunlight, and consistent rainfall. Jamaica’s warm temperatures, fertile soils, and balanced dry and wet seasons create the ideal environment for ackee cultivation.

2. Deep Cultural and Culinary Roots

Ackee is deeply ingrained in Jamaican culture and cuisine. Its role in traditional dishes like ackee and saltfish has ensured sustained local demand and motivated large-scale cultivation.

3. Established Processing and Export Infrastructure

Since raw ackee can be toxic if not properly prepared, export markets require the fruit to be canned or frozen. Jamaica developed specialized food processing facilities to safely handle, blanch, and can ackee for international trade, primarily to the United States, Canada, and the United Kingdom.

4. Government Support and Quality Control

The Jamaican government has actively supported the ackee industry through agricultural programs, export regulations, and food safety standards to meet international import requirements, particularly those set by the U.S. Food and Drug Administration (FDA).


Ackee Production and Export Statistics

Jamaica produces the vast majority of the world’s commercial ackee supply. While exact global production figures are limited, it’s estimated that Jamaica produces over 90% of all ackee sold internationally.

Key export markets include:

  • United States
  • United Kingdom
  • Canada
  • Caribbean diaspora communities worldwide

In 2020 alone, Jamaica exported over 800 metric tons of canned ackee, generating millions of dollars in revenue and contributing to rural employment.


Other Countries That Grow Ackee

Although Jamaica is the dominant producer, ackee also grows in other tropical regions:

1. Haiti

Ackee trees grow in Haiti’s fertile lowlands, though the fruit is consumed locally and not typically exported due to processing challenges.

2. Trinidad and Tobago

Ackee is grown in home gardens and used in traditional dishes, though not on a commercial scale like in Jamaica.

3. West Africa

Countries such as Ghana, Nigeria, and Senegal still grow ackee in its native environment. However, in these countries, ackee is primarily consumed domestically or in local markets.

4. Other Caribbean Islands

Islands like St. Lucia, Dominica, and Barbados cultivate ackee on a small scale for local use.

Despite these regional cultivations, none approach the scale, export volume, or international recognition of Jamaica’s ackee industry.


Ackee in Jamaican Cuisine and Culture

Ackee holds symbolic significance in Jamaica beyond its role in cuisine:

  • National Dish: Ackee and saltfish, often served with fried dumplings, festival (sweet fried dough), or roasted breadfruit, is a traditional breakfast staple and a source of national pride.
  • Cultural Festivals: Jamaica hosts annual events and festivals celebrating ackee, highlighting traditional recipes and modern culinary innovations.
  • Representation in Art and Music: Ackee frequently appears in Jamaican folklore, music, and artwork, symbolizing resilience, culture, and homegrown pride.

Health Benefits of Ackee

When properly prepared, ackee is not only delicious but also offers several health benefits:

  • Rich in essential fatty acids like oleic acid and stearic acid.
  • Contains vitamin A, promoting eye health and immune function.
  • Provides dietary fiber, aiding digestion.
  • Offers protein and potassium, supporting heart and muscle function.

Its unique nutrient profile, combined with its versatility, makes it a sought-after ingredient in Caribbean and fusion cuisines.


Safety Considerations

One of the distinctive aspects of ackee is that it must be fully ripe before consumption. Unripe ackee contains hypoglycin A and B, toxins that cause Jamaican Vomiting Sickness, characterized by:

  • Severe vomiting
  • Hypoglycemia
  • Potentially fatal complications if untreated

To ensure safety:

  • Only consume ackee that has naturally opened on the tree.
  • Avoid eating the pinkish membrane and seeds, which remain toxic.
  • When purchasing canned ackee, choose products from certified, FDA-approved Jamaican processors.

Conclusion

Jamaica is the world’s leading producer and exporter of ackee, a fruit that has become both a culinary delicacy and a cultural symbol for the island nation. Thanks to its ideal tropical climate, rich agricultural history, and government-backed food safety programs, Jamaica dominates the global ackee trade, supplying international markets with high-quality, safely prepared canned ackee.

While other Caribbean and West African countries also grow ackee, none match Jamaica’s scale, infrastructure, or international recognition. Beyond its export value, ackee holds a cherished place in Jamaican homes, celebrations, and cultural identity.

Whether enjoyed in a traditional ackee and saltfish breakfast or used in modern gourmet recipes, ackee remains a shining example of how a humble tropical fruit can become a national icon and an international export success.

Why Is Mulching Important in Summer?

Why Is Mulching Important in Summer?

As summer arrives, bringing with it intense heat and prolonged dry spells, gardeners must take extra care to protect their plants and soil. One of the most effective and eco-friendly strategies for maintaining a healthy garden during the hot months is mulching. More than just a decorative ground cover, mulch serves as a vital shield against the stress of summer weather.

This article explores why mulching is important in summer, its many benefits, the best materials to use, proper mulching techniques, and common mistakes to avoid. Whether you’re a home gardener or a landscape professional, understanding the power of mulch can transform your summer gardening experience.


What Is Mulching?

Mulching is the process of covering the soil surface with a protective layer of organic or inorganic material. This layer helps regulate soil temperature, retain moisture, suppress weeds, and improve soil health.

Mulch can be:

  • Organic: Bark chips, straw, grass clippings, compost, shredded leaves.
  • Inorganic: Gravel, landscape fabric, plastic sheeting, rubber mulch.

Each type of mulch has specific uses and benefits, especially during hot summer months when plant stress is at its peak.


Why Mulching Is Crucial in Summer

Summer brings challenges such as high temperatures, dry soil, and increased competition from weeds. Mulching directly addresses these problems by providing a natural buffer between the sun and your soil.

Here’s how mulching benefits your garden during summer:


1. Retains Soil Moisture

Summer heat leads to rapid evaporation of water from the soil. A layer of mulch helps conserve moisture by slowing down evaporation. This means:

  • Less frequent watering.
  • Better water efficiency.
  • More consistent moisture for plant roots.

Mulching is especially important in drought-prone areas or for gardeners practicing water-wise landscaping.


2. Regulates Soil Temperature

In the peak of summer, soil temperatures can become extremely high, often damaging plant roots. Mulch acts as an insulating blanket, keeping the soil cooler during hot days and warmer during cool nights.

Consistent soil temperature:

  • Protects root systems.
  • Encourages steady plant growth.
  • Reduces stress on young or shallow-rooted plants.

3. Suppresses Weeds

Weeds compete with garden plants for sunlight, water, and nutrients. By creating a physical barrier, mulch:

  • Blocks sunlight from reaching weed seeds.
  • Prevents weed germination and growth.
  • Reduces the need for chemical herbicides or frequent weeding.

A well-mulched bed can reduce weed growth by up to 90%, saving time and labor.


4. Prevents Soil Erosion and Compaction

Summer storms can wash away topsoil and compact the ground with heavy rains. Mulch protects the soil from direct rainfall impact, helping to:

  • Prevent erosion on slopes or bare areas.
  • Maintain soil structure and porosity.
  • Keep nutrients from leaching away.

This is especially important in raised beds and sloped gardens.


5. Improves Soil Fertility and Structure (Organic Mulch)

As organic mulch breaks down, it enriches the soil by:

  • Adding organic matter and nutrients.
  • Improving soil texture and drainage.
  • Feeding beneficial soil organisms like earthworms and microbes.

Over time, mulching leads to a healthier soil ecosystem, ideal for productive gardening.


6. Protects Plant Roots from Damage

Exposed roots are vulnerable to heat stress and physical damage from tools or foot traffic. Mulch acts as a buffer, shielding roots and promoting a more stable environment for growth.


7. Enhances Aesthetic Appeal

Beyond functionality, mulch provides a clean, finished look to garden beds, pathways, and borders. It can unify a landscape design and highlight plant groupings while creating contrast with foliage and flowers.


Best Mulching Materials for Summer

Here are some top choices for summer mulching, along with their benefits:

Organic Mulches:

  1. Shredded Bark or Wood Chips
    • Long-lasting
    • Attractive appearance
    • Ideal for trees, shrubs, and perennial beds
  2. Straw or Hay (seed-free)
    • Light and easy to spread
    • Great for vegetable gardens
    • Breaks down quickly, improving soil
  3. Compost
    • Nutrient-rich
    • Best for flower beds and vegetables
    • Needs more frequent replenishment
  4. Grass Clippings
    • Readily available
    • Excellent for nitrogen
    • Apply in thin layers to avoid matting
  5. Shredded Leaves
    • Free and abundant in autumn
    • Breaks down into rich humus

Inorganic Mulches:

  1. Gravel or Pebbles
    • Ideal for xeriscapes or succulents
    • Does not decompose
    • Reflects heat — may increase soil temps in extreme heat
  2. Landscape Fabric
    • Long-lasting weed barrier
    • Use beneath decorative mulch
  3. Plastic Sheeting
    • Used in commercial agriculture
    • Retains heat and moisture
    • Not breathable — can cause overheating in some areas

How to Apply Mulch in Summer

Applying mulch correctly is key to maximizing its benefits:

Step-by-Step Guide:

  1. Clear the area: Remove weeds and grass before mulching.
  2. Water the soil: Mulch retains moisture best when soil is already damp.
  3. Spread evenly: Apply mulch 2–4 inches deep. Too little won’t suppress weeds; too much may suffocate roots.
  4. Keep mulch away from stems/trunks: Leave a 1–2 inch gap around plant bases to prevent rot or pest infestation.
  5. Replenish as needed: Organic mulches decompose over time and may need refreshing once or twice per year.

Common Mistakes to Avoid

  1. Over-mulching: More than 4 inches can suffocate roots and cause fungal issues.
  2. Volcano mulching: Piling mulch against tree trunks encourages decay and pest problems.
  3. Using fresh manure or un-composted materials: May burn plants or introduce weeds.
  4. Not replenishing mulch: Degraded mulch won’t retain its effectiveness.
  5. Using dyed mulch near edibles: Some colored mulches may contain chemicals — avoid in vegetable gardens.

Mulching Around Specific Plants

Different plants benefit from mulch in unique ways:

  • Vegetables: Straw or compost encourages growth and reduces splash-back from soil-borne diseases.
  • Trees & Shrubs: Wood chips retain moisture and prevent weed competition.
  • Perennials & Flowers: Shredded bark or leaf mulch enriches soil and adds beauty.
  • Succulents & Cacti: Gravel or sand-based mulches aid drainage and prevent stem rot.

Tailoring mulch to your plant’s needs ensures long-term success.


Environmental Benefits of Mulching

Mulching isn’t just good for plants — it also helps the planet:

  • Reduces water usage: Essential for sustainable gardening during drought.
  • Minimizes chemical inputs: Less need for fertilizers and herbicides.
  • Supports biodiversity: Encourages soil life, insects, and pollinators.
  • Recycles garden waste: Turning leaves or grass clippings into mulch reduces landfill use.

Conclusion

Mulching in summer is one of the most effective ways to protect and nourish your garden. From conserving moisture and regulating soil temperatures to suppressing weeds and improving soil quality, mulch is a gardener’s best friend during the hot, dry months.

By choosing the right materials, applying them correctly, and avoiding common mistakes, you can ensure your garden not only survives summer but thrives in it. Whether you’re cultivating vegetables, flowers, or trees, a well-mulched garden is healthier, more sustainable, and far more beautiful.

So, as the summer sun intensifies, don’t forget this simple yet powerful tool — mulch your way to a better garden.

What Are the Best Low-Growing Perennials?

What Are the Best Low-Growing Perennials?

In garden landscapes, not every plant needs to command attention through towering heights or dramatic displays. Sometimes, the most impactful additions are those that hug the ground, filling gaps, softening borders, or creating seamless green carpets punctuated with delicate blooms. Low-growing perennials are the unsung heroes of gardens, offering year-after-year color, texture, and coverage without requiring constant replanting.

In this article, we’ll explore what low-growing perennials are, their benefits in landscaping, how to select them for your space, and introduce some of the very best options for a variety of garden styles and climates.


What Are Low-Growing Perennials?

Low-growing perennials are plants that stay relatively close to the ground, typically growing no more than 6 to 18 inches tall. Unlike annuals, which live for a single growing season, perennials return year after year, often expanding in size and vigor.

These plants are commonly used for:

  • Ground covers
  • Border edging
  • Rock gardens
  • Pathway plantings
  • Filling gaps between larger shrubs or perennials

They often feature attractive foliage, seasonal flowers, and sometimes fragrant or evergreen characteristics, making them valuable for adding diversity to garden beds.


Benefits of Low-Growing Perennials in Landscaping

Incorporating low-growing perennials offers several advantages:

  • Year-round structure: Many retain foliage in colder months.
  • Weed suppression: Dense foliage crowds out invasive weeds.
  • Erosion control: Ground covers help stabilize soil on slopes or around tree bases.
  • Low maintenance: Once established, perennials need minimal care.
  • Pollinator support: Many species offer nectar for bees and butterflies.
  • Aesthetic cohesion: They soften hard edges and connect taller plantings.

Their versatility makes them essential elements in well-designed landscapes.


How to Choose the Best Low-Growing Perennials

When selecting low-growing perennials, consider:

  • Sun exposure: Full sun, partial shade, or full shade.
  • Soil type: Well-drained, moist, clay, or sandy.
  • Moisture needs: Drought-tolerant or moisture-loving.
  • Bloom period: Early spring, summer, or fall.
  • Hardiness zone: Choose plants suited to your region’s climate.
  • Evergreen vs. deciduous: Some retain leaves year-round.

Matching the plant’s growing requirements to your garden conditions ensures long-term success.


15 Best Low-Growing Perennials for Gardens

Here’s a curated list of some of the most attractive, reliable, and easy-to-grow low-growing perennials:


1. Creeping Thyme (Thymus serpyllum)

Height: 2–3 inches
Sun: Full sun
Bloom Time: Summer

A fragrant, mat-forming ground cover with tiny purple blooms that attract pollinators. It’s drought-tolerant and perfect for pathways and borders.


2. Sedum (Stonecrop)

Height: 3–6 inches
Sun: Full sun
Bloom Time: Late summer to fall

Succulent leaves and starry flowers make sedums excellent for dry, poor soils and rock gardens.


3. Ajuga (Bugleweed)

Height: 4–8 inches
Sun: Part shade to full sun
Bloom Time: Spring

Features attractive, glossy foliage in green, bronze, or variegated hues, with spikes of blue or purple flowers.


4. Hosta (Miniature Varieties)

Height: 6–12 inches
Sun: Partial to full shade
Bloom Time: Summer

Beloved for their wide leaves in various shades of green, blue, and gold, hostas add texture to shaded spots.


5. Lamb’s Ear (Stachys byzantina)

Height: 6–12 inches
Sun: Full sun to partial shade
Bloom Time: Late spring to early summer

Silvery, velvety foliage creates a soft, tactile ground cover in borders or under roses.


6. Heuchera (Coral Bells)

Height: 8–12 inches
Sun: Part shade to sun
Bloom Time: Spring to summer

Known for colorful foliage in burgundy, lime, and silver hues, with delicate flower spikes.


7. Phlox subulata (Creeping Phlox)

Height: 4–6 inches
Sun: Full sun
Bloom Time: Spring

Forms a dense carpet of flowers in pink, purple, or white, ideal for slopes and sunny borders.


8. Campanula (Bellflower)

Height: 6–12 inches
Sun: Full sun to part shade
Bloom Time: Summer

Charming bell-shaped flowers in shades of blue, purple, or white, loved by pollinators.


9. Epimedium (Barrenwort)

Height: 6–12 inches
Sun: Partial to full shade
Bloom Time: Spring

A shade-loving perennial with heart-shaped leaves and delicate, spidery flowers.


10. Mazus reptans

Height: 2–4 inches
Sun: Full sun to part shade
Bloom Time: Spring to summer

A fast-spreading ground cover producing tiny purple-blue flowers and green mats ideal for between stepping stones.


11. Sweet Woodruff (Galium odoratum)

Height: 6–12 inches
Sun: Partial to full shade
Bloom Time: Spring

A fragrant, shade-loving ground cover with star-shaped white flowers and whorled leaves.


12. Creeping Jenny (Lysimachia nummularia)

Height: 2–4 inches
Sun: Full sun to partial shade
Bloom Time: Summer

Fast-growing, golden-leaved ground cover that spreads quickly, great for moist areas and around ponds.


13. Tiarella (Foamflower)

Height: 6–12 inches
Sun: Part to full shade
Bloom Time: Spring

Produces frothy spikes of tiny white or pink flowers above attractive foliage.


14. Pulmonaria (Lungwort)

Height: 8–12 inches
Sun: Partial to full shade
Bloom Time: Early spring

Features spotted leaves and clusters of pink, blue, or violet flowers.


15. Dianthus (Pinks)

Height: 6–12 inches
Sun: Full sun
Bloom Time: Spring to summer

Low-growing forms offer fragrant, fringed flowers in pink, red, and white shades.


Maintenance Tips for Low-Growing Perennials

To keep these perennials thriving:

  • Mulch around plants to retain moisture and suppress weeds.
  • Divide clumps every 3–5 years to maintain vigor.
  • Deadhead spent flowers to prolong blooming.
  • Remove debris in fall to prevent disease.
  • Avoid overwatering; many low-growers prefer slightly dry conditions.

Conclusion

Low-growing perennials provide invaluable structure, color, and coverage in both formal and informal gardens. From shade-loving ground covers like Sweet Woodruff and Hostas to sun-loving favorites like Creeping Phlox and Sedum, these plants reduce maintenance while enhancing beauty.

By choosing perennials suited to your site’s sun, soil, and moisture conditions, you can build a flourishing, long-lasting, and visually cohesive landscape. Incorporating a variety of textures, bloom times, and foliage colors ensures year-round interest and ecological support for pollinators.

Whether edging a flower border, filling gaps between pavers, or stabilizing a sloped garden bed, low-growing perennials are versatile, beautiful, and essential additions to any garden.

How Can You Improve Clay Soil for Gardening?

How Can You Improve Clay Soil for Gardening?

Soil is the foundation of every successful garden, and its texture, structure, and nutrient content directly affect plant health and productivity. Among the various soil types, clay soil is both a blessing and a challenge for gardeners. While rich in nutrients, clay soil’s dense, compacted nature often leads to poor drainage, root suffocation, and difficulty in cultivation. The good news is that with the right techniques, clay soil can be transformed into a fertile, well-draining, and productive growing medium.

In this article, we’ll explore how you can improve clay soil for gardening, what makes clay soil unique, its advantages and disadvantages, and step-by-step methods to enhance its structure, drainage, and fertility.


What Is Clay Soil?

Clay soil consists of very fine mineral particles with minimal organic matter. These particles are so small that they pack tightly together, leaving little space for air and water movement. While it holds nutrients exceptionally well, its poor drainage and tendency to compact can make it difficult for plant roots to thrive.

Characteristics of clay soil:

  • Feels sticky when wet and hard when dry.
  • Forms clumps or rolls into a ball when squeezed.
  • Drains slowly, retaining water for long periods.
  • Cracks and hardens during dry spells.
  • Tends to be alkaline in pH.

Advantages of Clay Soil

Despite its challenges, clay soil offers some benefits:

  • Nutrient-rich: Holds essential minerals like potassium, calcium, and magnesium.
  • Moisture-retentive: Retains water longer than sandy soils.
  • Good foundation for organic amendments: Responds well to soil improvement techniques.

If managed correctly, clay soil can support healthy plant growth and productive gardens.


Challenges of Gardening in Clay Soil

Clay soil presents several obstacles for gardeners:

  • Poor drainage: Causes waterlogged roots and root rot.
  • Compaction: Makes it hard for roots to penetrate.
  • Slow warming in spring: Delays planting schedules.
  • Tendency to become hard and cracked when dry.
  • Difficult cultivation: Can stick to tools and become heavy and unworkable.

The key to overcoming these challenges lies in modifying the soil’s texture and improving aeration and drainage.


How to Improve Clay Soil for Gardening

Improving clay soil requires both short-term fixes and long-term amendments. Here’s a comprehensive step-by-step guide:


1. Add Organic Matter

The single most effective way to improve clay soil is by adding generous amounts of organic material.

Why it works:
Organic matter loosens compacted soil, increases pore space for air and water, encourages beneficial soil organisms, and improves overall fertility.

Materials to use:

  • Compost
  • Well-rotted manure
  • Leaf mold
  • Grass clippings (in moderation)
  • Shredded bark or wood chips

How to apply:

  • Spread a 2–4 inch (5–10 cm) layer of organic matter over the soil surface.
  • Work it into the top 8–12 inches (20–30 cm) of soil with a garden fork or tiller.
  • Repeat annually or every growing season for best results.

2. Incorporate Soil Conditioners

Soil conditioners are mineral or organic substances that improve soil structure and aeration.

Effective options include:

  • Gypsum (calcium sulfate): Helps break up clay particles without altering soil pH.
  • Coarse sand (in small amounts): When mixed thoroughly with organic matter.
  • Perlite or vermiculite: Enhances drainage and reduces compaction.

Caution: Never add sand alone to clay soil, as it can create a cement-like consistency.


3. Use Raised Beds

If working with dense clay is too difficult, consider building raised garden beds.

Advantages:

  • Improves drainage by elevating the growing area.
  • Allows you to control soil composition by adding quality topsoil and compost.
  • Warms up faster in spring.

Ensure raised beds are at least 12 inches (30 cm) deep for most plants.


4. Mulch Regularly

Applying mulch protects soil from compaction due to rainfall and suppresses weed growth.

Use organic mulches such as:

  • Straw
  • Shredded leaves
  • Bark chips
  • Grass clippings

Benefits:

  • Regulates soil temperature.
  • Retains moisture.
  • Gradually adds organic matter as it decomposes.

Apply a 2–3 inch (5–7.5 cm) layer around plants and replenish as needed.


5. Avoid Working Wet Soil

Working clay soil when it’s wet can lead to severe compaction and soil structure damage.

Best practice:
Wait until the soil is moist but not sticky. Test by squeezing a handful of soil — if it crumbles easily, it’s ready to work. If it forms a sticky ball, let it dry further.


6. Plant Clay-Tolerant Species

While improving soil, consider growing plants that naturally tolerate clay conditions.

Examples:

  • Coneflowers
  • Daylilies
  • Hostas
  • Bee balm
  • Black-eyed Susans
  • Asters

Native plants adapted to your region’s soil type often perform well in clay-heavy areas.


7. Encourage Earthworms and Beneficial Soil Life

Earthworms and soil microbes help aerate clay soil and break down organic material.

To attract them:

  • Add compost and mulch.
  • Avoid chemical fertilizers and pesticides.
  • Keep soil moist but not waterlogged.

8. Implement Cover Cropping

Cover crops improve soil structure and add organic matter.

Good choices for clay soil:

  • Ryegrass
  • Clover
  • Buckwheat
  • Vetch

Grow cover crops during the off-season, then till them into the soil before planting in spring.


Long-Term Benefits of Improving Clay Soil

Over time, consistent soil improvement efforts will:

  • Increase drainage and reduce standing water.
  • Create a loose, crumbly texture for easier planting.
  • Boost plant root health and development.
  • Enhance soil microbial activity and earthworm populations.
  • Support stronger, more productive plants.

Clay soil doesn’t improve overnight — but within a couple of growing seasons, noticeable changes in texture and plant performance will appear.


Mistakes to Avoid When Amending Clay Soil

  • Adding sand alone: Leads to a concrete-like mix.
  • Overworking wet soil: Causes severe compaction.
  • Neglecting regular organic matter additions: Slows improvement progress.
  • Using chemical fertilizers excessively: Disrupts soil organisms and structure.

Patience, observation, and consistent care are key to success.


Conclusion

Clay soil presents unique challenges, but it also offers remarkable gardening potential when properly managed. By incorporating organic matter, using soil conditioners like gypsum, applying mulch, and avoiding working the soil while wet, gardeners can significantly enhance clay soil’s structure, drainage, and fertility.

Raised beds, cover cropping, and choosing clay-tolerant plants offer practical solutions during the improvement process. Over time, these strategies will transform dense, stubborn clay into rich, productive soil capable of supporting a thriving, beautiful garden.

With careful attention and sustainable soil practices, even the heaviest clay can be turned into a gardener’s ally — fertile, nourishing, and full of life.

Which Houseplants Are Toxic to Cats?

Which Houseplants Are Toxic to Cats?

Houseplants bring life, color, and natural beauty to indoor spaces — they purify air, boost mood, and add aesthetic charm. However, for households with feline companions, some popular houseplants can pose serious health risks. Cats are naturally curious creatures, often nibbling on leaves, flowers, or stems, which makes knowing which houseplants are toxic to them crucial for their safety.

In this article, we’ll provide a comprehensive guide to which houseplants are toxic to cats, symptoms of plant poisoning, how to create a cat-safe indoor garden, and alternatives to common toxic plants.


Why Are Some Houseplants Toxic to Cats?

Many plants produce natural chemicals to defend themselves from herbivores, insects, and diseases. These substances, while harmless or even beneficial to humans, can be toxic to pets like cats when ingested, inhaled, or when sap comes into contact with skin.

Some toxic compounds include:

  • Calcium oxalate crystals (irritating to mouth and digestive tract)
  • Cardiac glycosides (affecting heart function)
  • Alkaloids and saponins (disrupting digestion and nervous system)
  • Essential oils (toxic to cats when concentrated)

Understanding which plants carry these risks can help pet owners make safer choices for their home environment.


Common Houseplants Toxic to Cats

Here’s a list of popular houseplants known to be toxic to cats, along with their potential effects:

1. Lilies (Lilium spp. and Hemerocallis spp.)

Toxicity: Extremely toxic. Even small amounts can cause severe kidney failure in cats.
Symptoms: Vomiting, drooling, lethargy, loss of appetite, kidney damage.

Note: All parts — leaves, stems, flowers, pollen, and even water from a vase — are dangerous.


2. Peace Lily (Spathiphyllum spp.)

Toxicity: Mild to moderate.
Symptoms: Mouth irritation, drooling, vomiting, difficulty swallowing.

Contains calcium oxalate crystals that can cause intense irritation if chewed.


3. Aloe Vera (Aloe barbadensis miller)

Toxicity: Mild to moderate.
Symptoms: Vomiting, diarrhea, lethargy, tremors.

While its gel is soothing for humans, the latex just beneath the leaf skin is toxic to cats.


4. Snake Plant (Sansevieria trifasciata)

Toxicity: Mild to moderate.
Symptoms: Nausea, vomiting, diarrhea.

Contains saponins, which can disrupt a cat’s digestive system.


5. Pothos (Epipremnum aureum)

Also known as Devil’s Ivy.
Toxicity: Mild to moderate.
Symptoms: Oral irritation, vomiting, drooling, difficulty swallowing.

Another plant with calcium oxalates, making it harmful if ingested.


6. Dieffenbachia (Dumb Cane)

Toxicity: Moderate.
Symptoms: Intense oral irritation, drooling, swelling, difficulty breathing, vomiting.

Its sap contains oxalates and enzymes that cause burning and swelling.


7. Philodendron (Philodendron spp.)

Toxicity: Mild to moderate.
Symptoms: Oral pain, drooling, vomiting, difficulty swallowing.

Shares similar toxins with Pothos and Peace Lily.


8. Sago Palm (Cycas revoluta)

Toxicity: Highly toxic and potentially fatal.
Symptoms: Vomiting, diarrhea, seizures, liver failure.

All parts are toxic, with seeds being the most poisonous.


9. ZZ Plant (Zamioculcas zamiifolia)

Toxicity: Mild to moderate.
Symptoms: Vomiting, diarrhea, skin irritation.

Contains calcium oxalate crystals that cause discomfort when chewed.


10. Dracaena (Dracaena spp.)

Toxicity: Mild to moderate.
Symptoms: Vomiting, appetite loss, drooling, depression.

Found in various varieties like Corn Plant, Marginata, and Lucky Bamboo.


Signs of Plant Poisoning in Cats

Recognizing the symptoms of plant toxicity can save your cat’s life. Common signs include:

  • Vomiting and diarrhea
  • Excessive drooling
  • Difficulty swallowing
  • Pawing at the mouth
  • Lethargy and weakness
  • Loss of appetite
  • Tremors or seizures
  • Difficulty breathing
  • Uncoordinated movements
  • Abdominal pain
  • Swollen mouth, tongue, or throat

If you suspect your cat has ingested a toxic plant, contact a veterinarian immediately. Bring a sample of the plant or its name for identification.


Safe Alternatives to Toxic Houseplants

You don’t have to give up indoor greenery entirely. Many beautiful, cat-safe plants are available for pet-friendly homes.

Popular Non-Toxic Houseplants for Cats:

  • Spider Plant (Chlorophytum comosum)
  • Areca Palm (Dypsis lutescens)
  • Parlor Palm (Chamaedorea elegans)
  • Calathea species
  • Prayer Plant (Maranta leuconeura)
  • Boston Fern (Nephrolepis exaltata)
  • African Violet (Saintpaulia)
  • Baby’s Tears (Soleirolia soleirolii)

These plants offer lush foliage and decorative appeal without posing a risk to curious cats.


How to Cat-Proof Your Indoor Garden

If you own houseplants and cats, follow these guidelines to minimize the risk of toxicity:

  1. Know what you’re growing.
    Research every plant’s safety before bringing it indoors.
  2. Place toxic plants out of reach.
    Use hanging baskets or high shelves, although agile cats may still access them.
  3. Create a cat garden.
    Plant cat-safe grasses like cat grass (Dactylis glomerata) or catnip (Nepeta cataria) as a distraction.
  4. Use deterrents.
    Citrus peels, vinegar sprays, or motion-activated devices can discourage plant-chewing.
  5. Prune and clean regularly.
    Remove fallen leaves or flowers to prevent accidental ingestion.
  6. Educate family members.
    Ensure everyone knows which plants are hazardous.

Can Cats Die from Eating Toxic Houseplants?

While many houseplant toxicities result in mild to moderate symptoms like vomiting and oral irritation, some plants — particularly lilies, sago palms, and certain bulbs — can be fatal without prompt treatment.

Even small amounts of certain plants can cause irreversible kidney or liver damage in cats, so taking plant toxicity seriously is vital for responsible pet ownership.


What to Do If Your Cat Eats a Toxic Plant

  • Remove plant material from the cat’s mouth if visible.
  • Rinse the mouth gently with water.
  • Call your veterinarian or an animal poison control hotline immediately:
    • ASPCA Animal Poison Control Center (USA): +1-888-426-4435
  • Provide the plant’s name and details on the amount ingested.
  • Follow veterinary instructions carefully.

Conclusion

Indoor houseplants can coexist safely with cats — as long as you know which species are harmful and take preventive measures. Popular plants like lilies, pothos, snake plants, and sago palms are toxic to cats, while others such as spider plants, parlor palms, and calatheas offer a safer alternative.

Knowing which houseplants are toxic to cats is essential for creating a safe, pet-friendly environment at home. By making informed choices, you can enjoy the benefits of indoor greenery while protecting your feline friend’s health and wellbeing.

Regularly inspecting your plant collection and replacing harmful species with safe alternatives ensures peace of mind and a happier, healthier home for everyone — both two-legged and four-legged.

How Long Does It Take for a Money Plant Cutting to Root in Water?

How Long Does It Take for a Money Plant Cutting to Root in Water?

The Money Plant (Epipremnum aureum, also known as Pothos, Devil’s Ivy, or Golden Pothos) is one of the most popular and beginner-friendly houseplants around the world. Known for its glossy, heart-shaped leaves and cascading vines, it’s loved not only for its aesthetic appeal but also for its reputation as a symbol of prosperity and good fortune.

One of the reasons for the plant’s enduring popularity is how easily it can be propagated from cuttings, particularly in water. For new plant owners and propagation enthusiasts alike, a common question arises: How long does it take for a Money Plant cutting to root in water?

This article explores the rooting process in detail — covering the timeline, influencing factors, care tips during propagation, and how to successfully transplant rooted cuttings into soil.


Understanding Money Plant Propagation

Money Plants are fast-growing vines native to Southeast Asia and thrive in a variety of conditions, making them a favorite for indoor environments. They can be propagated by:

  • Stem cuttings in water
  • Stem cuttings in soil

Rooting cuttings in water is particularly popular because it allows plant lovers to visually monitor root development and enjoy an attractive display at the same time.


How Long Does It Take for a Money Plant Cutting to Root in Water?

On average, it takes 7 to 14 days for a Money Plant cutting to begin developing visible roots in water. The time frame can vary based on several factors such as:

  • Temperature
  • Light availability
  • Water quality
  • Cutting health and maturity
  • Season

In ideal conditions, some cuttings may show root growth within a week, while others might take up to 3 weeks or more to establish strong roots suitable for transplanting.


Factors That Affect Rooting Time

Let’s explore the key factors influencing how quickly your Money Plant cuttings will root:


Temperature

Money Plants root faster in warm temperatures ranging from 20°C to 30°C (68°F to 86°F). Cooler temperatures slow down the metabolic processes within the cutting, delaying root development.


Light Conditions

Bright, indirect light encourages faster root growth. Insufficient light slows the process, while direct sunlight can cause cuttings to wilt or damage exposed parts.

Tip: Place your propagation jar near a bright window shielded with a sheer curtain.


Water Quality

Use clean, room-temperature, chlorine-free water. Tap water with high chlorine content can impede rooting. Filtered or rainwater is ideal.

Change the water every 3–5 days to prevent stagnation, bacterial growth, and nutrient depletion.


Cutting Health and Size

Healthy, disease-free cuttings root more reliably. Choose a stem section with 2–4 leaves and at least one visible node (a small bump along the stem where roots will grow).

Avoid taking cuttings with yellowing or damaged leaves.


Season

Rooting is typically faster in the spring and summer months when growth activity is naturally higher. In cooler seasons, root development may take longer.


How to Propagate Money Plant Cuttings in Water

Here’s a step-by-step guide to successfully rooting your cuttings:


Step 1: Select a Healthy Stem

Choose a robust, mature vine with at least one healthy node and a couple of leaves.

Tip: The node is where roots will emerge, so it’s crucial for successful propagation.


Step 2: Cut Below the Node

Using sterilized scissors or pruning shears, make a clean cut just below a node.

Recommended cutting length: 4 to 6 inches (10–15 cm)


Step 3: Remove Lower Leaves

Strip away any leaves near the bottom 1–2 inches of the cutting to avoid submerging them in water, which can lead to rot.


Step 4: Place in a Water-Filled Jar

Fill a clear glass jar with clean water and insert the cuttings so the nodes are submerged but the leaves remain above water.


Step 5: Position in Indirect Light

Place the jar in a spot with bright, indirect sunlight — like a windowsill with filtered light.


Step 6: Change Water Regularly

Change the water every 3–5 days to maintain oxygen levels and prevent algae or bacteria buildup.


Step 7: Wait for Roots to Appear

Within 7 to 14 days, you should see tiny white roots emerging from the nodes. Wait until roots are at least 2–3 inches long (5–7 cm) before transplanting.


How to Transplant Water-Rooted Cuttings into Soil

Once the roots reach a desirable length, typically within 2–4 weeks, you can move the cuttings to a soil-based pot.

Steps:

  1. Select a well-draining potting mix (houseplant mix or a blend of peat, coco coir, and perlite).
  2. Gently plant the rooted cuttings in soil, covering the roots but not the leaves.
  3. Water thoroughly and place in bright, indirect light.
  4. Avoid direct sun and overwatering for the first week after transplanting.

Common Rooting Problems and Solutions

ProblemCauseSolution
No roots after 3 weeksPoor lighting, low temperatureMove to brighter, warmer area
Cuttings turning yellowWater stagnation, dirty jarChange water regularly, clean container
Rotting stem endsSubmerged leaves, poor water hygieneRemove submerged leaves, trim damaged parts

Benefits of Propagating Money Plants in Water

  • Cost-effective way to multiply your plants
  • Visually appealing as decorative water displays
  • Great for gifts or plant swaps
  • Allows for easy monitoring of root growth
  • Quick, low-maintenance process perfect for beginners

Conclusion

How long does it take for a Money Plant cutting to root in water? Typically, under optimal conditions, it takes 7 to 14 days for roots to emerge, though it can take up to 3 weeks or more in cooler or less ideal environments.

Understanding the key factors — light, temperature, water quality, and cutting health — can help speed up the rooting process and improve your success rate. Regularly changing the water and placing your cuttings in a bright, warm spot will reward you with new roots in no time.

Once established, these propagated cuttings can either remain in water for decorative purposes or be potted into soil for long-term growth. Either way, propagating Money Plant cuttings is an easy, satisfying, and rewarding way to expand your indoor plant collection.

How many Times Should You Fertilize a Rose Plant?

How Many Times Should You Fertilize a Rose Plant?

Roses are among the most cherished garden plants in the world — celebrated for their elegance, fragrance, and diversity of colors and forms. While their blooms appear effortlessly beautiful, achieving consistently healthy, vibrant, and abundant flowers requires attentive care, particularly when it comes to fertilization.

One of the most common and important questions gardeners ask is: how many times should you fertilize a rose plant? Fertilizing roses isn’t a one-size-fits-all task. It involves understanding the plant’s needs at different growth stages and providing nutrients at appropriate intervals for optimum growth and blooming.

In this article, we’ll explore the proper fertilization schedule for rose plants, the types of fertilizers to use, factors that influence feeding frequency, and tips for keeping your roses nourished and thriving.


Why Fertilizing Roses Matters

Roses are considered heavy feeders, meaning they consume significant nutrients from the soil throughout their active growing season. Fertilizing replenishes essential nutrients that promote:

  • Strong, healthy foliage
  • Vigorous growth and new shoot development
  • Robust, colorful, and fragrant blooms
  • Disease resistance and stress tolerance

Without adequate nutrients, roses may develop weak stems, sparse blooms, yellowing leaves, and reduced vigor.


Nutrient Needs of Rose Plants

Roses require a balanced supply of primary and secondary nutrients:

Primary nutrients:

  • Nitrogen (N): Supports lush leaf and stem growth
  • Phosphorus (P): Promotes root development and flower formation
  • Potassium (K): Enhances disease resistance and overall plant health

Secondary nutrients and trace elements:
Magnesium, calcium, sulfur, and micronutrients like iron and manganese are also crucial for balanced growth.


How Many Times Should You Fertilize a Rose Plant?

On average, rose plants should be fertilized 3 to 4 times during the growing season. The exact frequency depends on factors such as rose variety, soil fertility, climate, and fertilizer type.

Let’s break it down by season and growth phase:


First Application — Early Spring (When New Growth Appears)

When: As soon as buds swell and leaves begin to unfurl in early spring.

Why: This feeding jumpstarts new growth after winter dormancy, supplying essential nutrients for shoot and leaf development.

What to use:
A balanced, slow-release granular fertilizer (e.g., 10-10-10 or 12-6-10) or an organic option like well-aged compost, fish emulsion, or seaweed extract.


Second Application — After First Bloom Cycle

When: Once the first flush of flowers begins to fade, usually 4–6 weeks after the initial feeding.

Why: Roses expend a lot of energy producing blooms. A post-bloom fertilizer application supports recovery, new bud formation, and continued flowering.

What to use:
A fertilizer higher in phosphorus (e.g., 5-10-5 or 10-20-10) encourages repeated blooming.


Third Application — Mid-Summer (Optional)

When: 6–8 weeks after the second feeding if the plant is still actively growing and blooming.

Why: This optional feeding sustains growth through the peak of summer, especially in regions with long growing seasons.

What to use:
A balanced fertilizer or organic compost tea to gently nourish without overstimulating in the heat.


Final Application — Late Summer (Stop Feeding 6–8 Weeks Before First Frost)

When: No later than mid to late summer (depending on your region’s frost dates).

Why: Fertilizing too late encourages tender new growth that won’t harden off before winter, increasing the risk of frost damage.

What to use:
A fertilizer lower in nitrogen but rich in potassium (e.g., 4-8-12) to promote sturdy stems and winter readiness.


Adjusting Frequency Based on Fertilizer Type

The type of fertilizer you use will influence how often you should apply it:

Slow-Release Granular Fertilizers

  • Typically applied every 6–8 weeks
  • Break down gradually, providing consistent nutrients
  • Good for busy gardeners or large rose gardens

Liquid and Water-Soluble Fertilizers

  • Applied more frequently, typically every 2–4 weeks during active growth
  • Ideal for rapid uptake and correcting deficiencies
  • Best combined with deep watering

Organic Fertilizers

  • Examples: compost, compost tea, fish emulsion, alfalfa meal
  • Applied monthly or as a soil amendment in spring and summer
  • Improve soil structure and microbial activity along with feeding

Factors That Influence Fertilizer Frequency

Not every rose plant has the same feeding needs. Consider these variables when determining how often to fertilize:

  • Soil fertility: Rich, well-amended soil needs less frequent feeding. Sandy or poor soils require more.
  • Climate: Roses in warm, long-growing regions need more frequent fertilizing than those in short seasons.
  • Rose type: Hybrid teas and floribundas, which produce continuous blooms, need more feeding than once-blooming shrub roses or climbers.
  • Growth stage: Young, newly planted roses should be fertilized lightly after settling in, while mature roses can handle a full feeding schedule.

Best Practices for Fertilizing Roses

To maximize the effectiveness of fertilizing and keep your roses thriving:

  • Always water the plant before and after applying granular fertilizers to prevent root burn.
  • Apply fertilizers at the drip line (the outer edge of the foliage canopy) rather than at the base to nourish the root tips.
  • Avoid over-fertilizing, which can lead to soft, weak growth, increased pest issues, and reduced bloom quality.
  • Mulch around rose bushes with organic matter to retain soil moisture and gradually enrich the soil as it decomposes.

Signs of Nutrient Deficiency in Roses

Knowing the symptoms of underfed roses can help you adjust your fertilizing routine:

DeficiencySymptoms
Nitrogen (N)Pale green leaves, stunted growth
Phosphorus (P)Poor flowering, purplish leaf edges
Potassium (K)Weak stems, dull flowers, scorched leaf margins
IronYellow leaves with green veins
MagnesiumInterveinal yellowing, particularly on older leaves

Timely fertilization with a balanced nutrient supply addresses and prevents these issues.


Conclusion

So, how many times should you fertilize a rose plant? The ideal schedule involves 3 to 4 feedings during the growing season, starting in early spring and concluding by late summer. The exact number depends on fertilizer type, climate, rose variety, and soil condition.

Properly timed fertilization, combined with good watering practices, sunlight, and regular pruning, will reward you with strong, healthy rose plants and breathtaking blooms from spring to fall.

By tailoring your fertilizing routine to your specific garden environment and observing your roses’ needs, you’ll ensure a garden filled with vibrant color, intoxicating fragrance, and continuous floral beauty.

How to Make Your Orchid Bloom Again

How to Make Your Orchid Bloom Again

Orchids are among the most elegant and captivating flowering plants, often gracing homes with their delicate, exotic blooms. While they’re prized for their beauty, many orchid owners find themselves perplexed when their plant’s vibrant flowers fade, leaving behind green leaves and bare stems. The good news is — with the right care and attention, your orchid can bloom again.

This article will guide you through the essential techniques and conditions needed to encourage repeat blooming in orchids, helping you understand their natural cycles and how to optimize your home environment to keep these stunning plants thriving year after year.


Understanding the Orchid’s Bloom Cycle

Before diving into how to make your orchid bloom again, it’s important to understand the plant’s natural life cycle.

Most orchids, particularly the popular Phalaenopsis (moth orchid), bloom once a year. Blooms typically last between 6 to 10 weeks, after which the flowers drop, and the plant enters a rest period (dormancy). During this phase, the orchid conserves energy and prepares for its next bloom.

Many first-time orchid owners mistakenly believe their plant has died once the blooms fade. In reality, with proper post-bloom care, your orchid can reward you with fresh blossoms season after season.


Steps to Make Your Orchid Bloom Again

Here’s a detailed, step-by-step guide to help your orchid rebloom successfully:


Assess the Health of Your Orchid

A healthy plant is essential for repeat flowering. Before focusing on reblooming, check for:

  • Firm, green leaves without yellowing or dark spots
  • Plump, healthy roots that are green or silvery-white
  • No signs of pests like mealybugs, spider mites, or aphids

If your orchid is healthy, it’s ready for the next stage of care.


Trim the Flower Spike

After the last bloom drops:

  • Inspect the flower spike (stem) for green nodes — small bumps along the stem.
  • If the spike remains green:
    • Cut just above a healthy node (typically the third or fourth node from the base). This can trigger a side shoot with new buds.
  • If the spike has turned brown and dry:
    • Cut it back to the base, near the leaves.

This pruning encourages the plant to direct energy into root and leaf growth, preparing it for a future bloom.


Provide the Right Lighting

Orchids need bright, indirect light to bloom again. Too little light is one of the most common reasons for poor flowering.

Ideal light sources:

  • East-facing windows (gentle morning sun)
  • South or west-facing windows with filtered light

If natural light is limited, consider using a full-spectrum grow light placed about 12 inches above the plant for 12–14 hours a day.

Tip: Leaves should be bright green. Dark green leaves may indicate insufficient light, while yellowish-green can mean too much.


Maintain Optimal Temperatures

Orchids, especially Phalaenopsis varieties, often need a temperature drop to trigger reblooming.

Ideal temperature range:

  • Daytime: 70–80°F (21–27°C)
  • Nighttime: 60–65°F (16–18°C)

A drop of about 10°F (5°C) at night for several weeks can signal the orchid that it’s time to produce a new flower spike.


Water Properly

Incorrect watering is a major cause of orchid stress, affecting their ability to rebloom.

Watering guidelines:

  • Water when the top 1 inch of the potting medium feels dry.
  • Use room-temperature, distilled, or rainwater when possible.
  • Water thoroughly, allowing excess water to drain out of the pot.
  • Avoid letting the plant sit in standing water.

Frequency: Typically once a week in summer and every 10–14 days in winter.


Feed Your Orchid Correctly

Fertilizing encourages healthy growth and flower production.

Use a balanced orchid fertilizer (20-20-20) or a bloom booster high in phosphorus (like 10-30-20).

Feeding schedule:

  • During active growth (spring and summer): Fertilize every two weeks.
  • During dormancy (fall and winter): Fertilize once a month or suspend feeding.

Always dilute fertilizer to half the recommended strength to avoid root burn.


Encourage Humidity

Orchids thrive in humid environments, mimicking their native tropical habitat.

Ideal humidity: 40–60%

Ways to increase humidity:

  • Place the pot on a pebble tray filled with water.
  • Use a humidifier nearby.
  • Group plants together to create a mini-humid microclimate.

Tip: Avoid misting leaves frequently, as excess moisture can lead to fungal problems.


Repot When Needed

Over time, the potting medium can break down, affecting drainage and air circulation around the roots.

When to repot:

  • Every 1–2 years
  • When roots are tightly crowded or growing over the pot’s edge
  • If the medium has become compacted or decomposed

Use a special orchid bark mix, not regular potting soil, to ensure proper aeration.


Watch for a New Spike

After providing ideal care, a healthy orchid will often produce a new spike during late fall or winter. You’ll notice a slender, green shoot emerging from the base of the plant, distinct from a root (which is typically rounded and silvery-green).

Support the new spike gently with a stake as it grows, and continue your care routine.


How Long Before an Orchid Blooms Again?

With proper conditions, most orchids will rebloom once a year, typically 8–12 months after their last flowering. Phalaenopsis orchids, for example, often bloom in late winter or early spring.

The precise timing depends on:

  • Plant health
  • Seasonal light and temperature changes
  • Quality of care during the rest period

Patience is key — orchids grow slowly, but the reward is worth the wait.


Common Reblooming Problems

If your orchid isn’t blooming, consider these troubleshooting tips:

ProblemLikely CauseSolution
No new spike formingInsufficient lightMove to a brighter spot
Stunted growthOverwatering or poor drainageAdjust watering and repot if needed
Yellowing leavesToo much direct sun or overfeedingMove to filtered light and reduce fertilizer
No blooms after new spikeInconsistent temperature or lightProvide a night temperature drop

Conclusion

Bringing your orchid back into bloom requires understanding its natural cycles and providing the right environment — bright, indirect light, appropriate temperatures, proper watering, regular feeding, and occasional repotting.

With patience and consistent care, your orchid can reward you with stunning, long-lasting blooms year after year. Many orchid enthusiasts proudly keep the same plants blooming for decades indoors, transforming their homes with grace and beauty.

So, don’t discard that post-bloom orchid. Follow these steps, nurture it through its resting phase, and you’ll soon be rewarded with a fresh display of exquisite flowers.